Loading ...
Loading ...
Loading ...
10_ Installing your washer
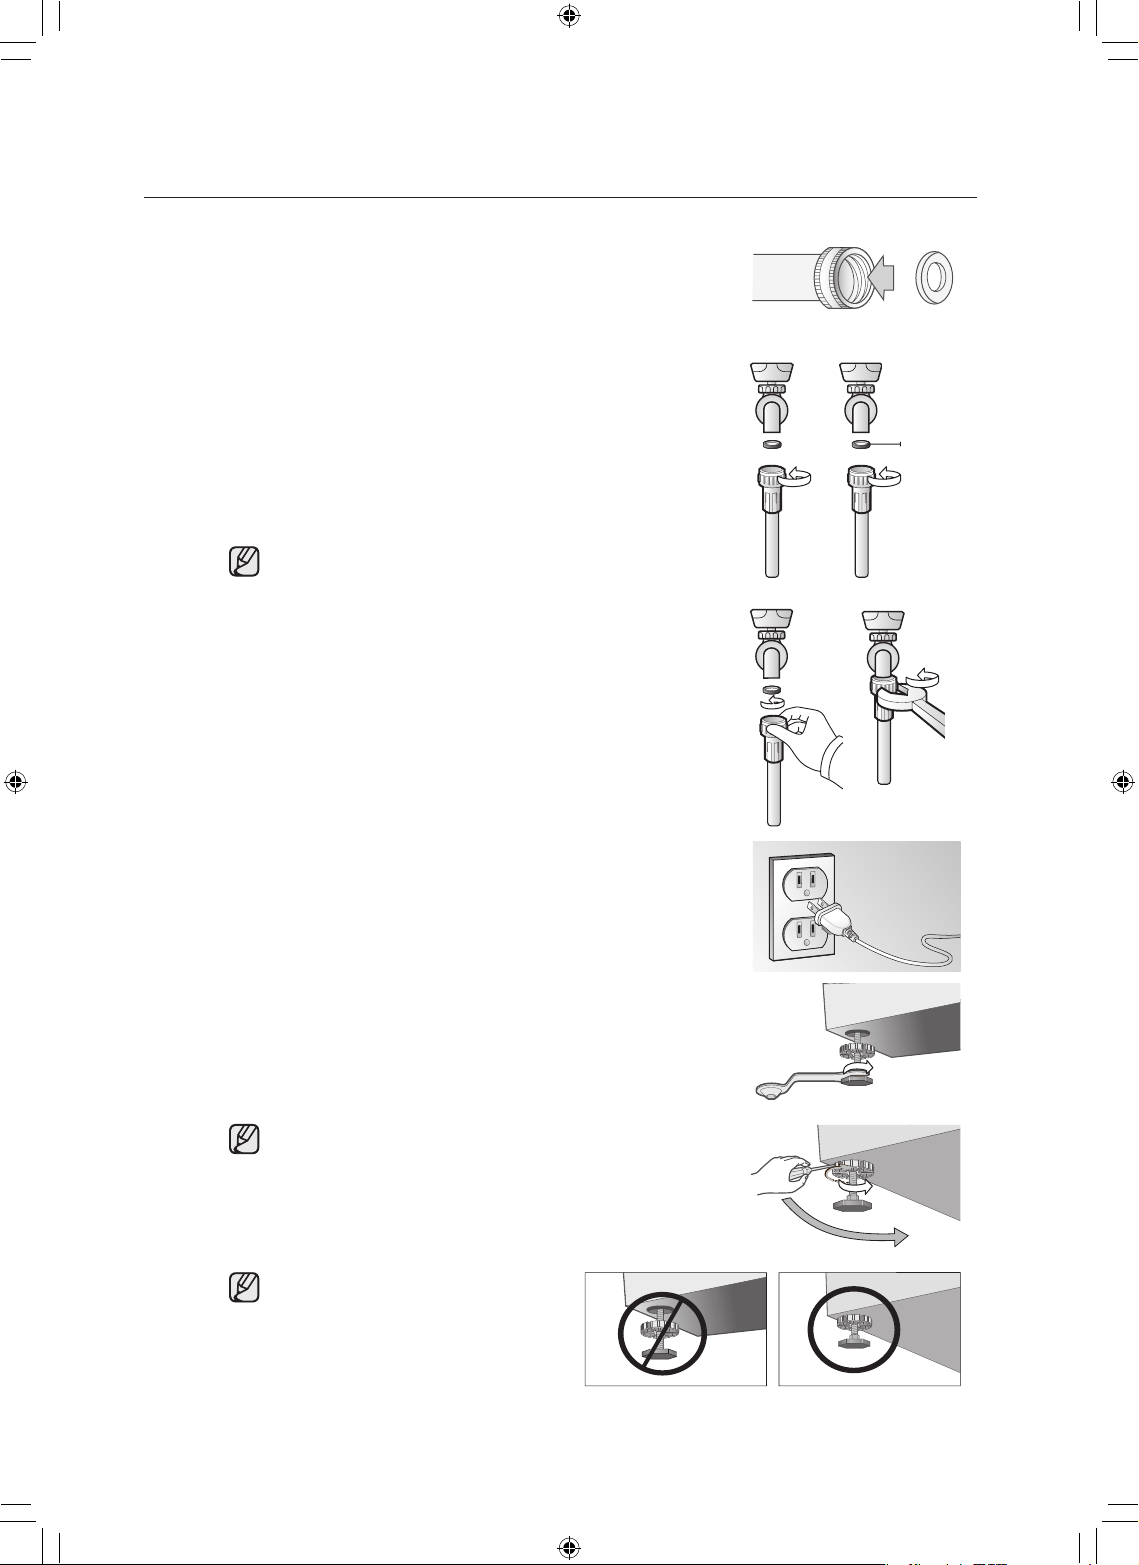
2. Insert new rubber washer (supplied) into each end of the
inlet hoses. Firmly seat the washers in the couplings.
3. Check the inlet hose to ensure a washer is inside each fill
hose.
Thread the inlet hoses to the HOT and COLD faucet
connections.
On the other end of the hose, check for one rubber washer
per hose and install each fill hose to the water valve. Make
sure the hose with the Hot printed line is attached to the
HOT faucet. Tighten by hand until snug, then two-thirds of a
turn with pliers.
For correct water use, connect both HOT and COLD water
valves. If one is not connected, an “nF” (no fill) error can
occur.
4. Turn on the “HOT” and “COLD “water supply and check all
connections at the water valve and the faucet for leaks.
5. Plug the power cord into a 3-Prong, well grounded 120 volt
60 Hz approved electrical outlet protected by a 15-amp fuse
or comparable circuit breaker.
Your washer is grounded through the third prong of the
power cord when plugged into a three-prong grounded
receptacle.
6. Slide your washer into position.
7. Level your washer by turning the leveling legs in or out as
necessary by hand or wrench included with your washer.
When your washer is level, tighten the nuts using the wrench
or (-) driver.
Your Washer must be leveled on all four sides. A carpenter’s
level should be used on all four corners of your Washer. It’s
a good idea after the first dozen washes to recheck your
washer’s levelness.
Avoid the damage of legs, Do not
move the Washer unless the Locking-
nuts are fastened to the bottom of the
Washer.
installing your washer
Cold Hot
Cold printed Hot printed
Rubber washer
WF338AA-02562A-01_EN.indd 10 2008-03-10 ¿ÀÈÄ 3:35:41
Loading ...
Loading ...
Loading ...