Loading ...
Loading ...
Loading ...
9
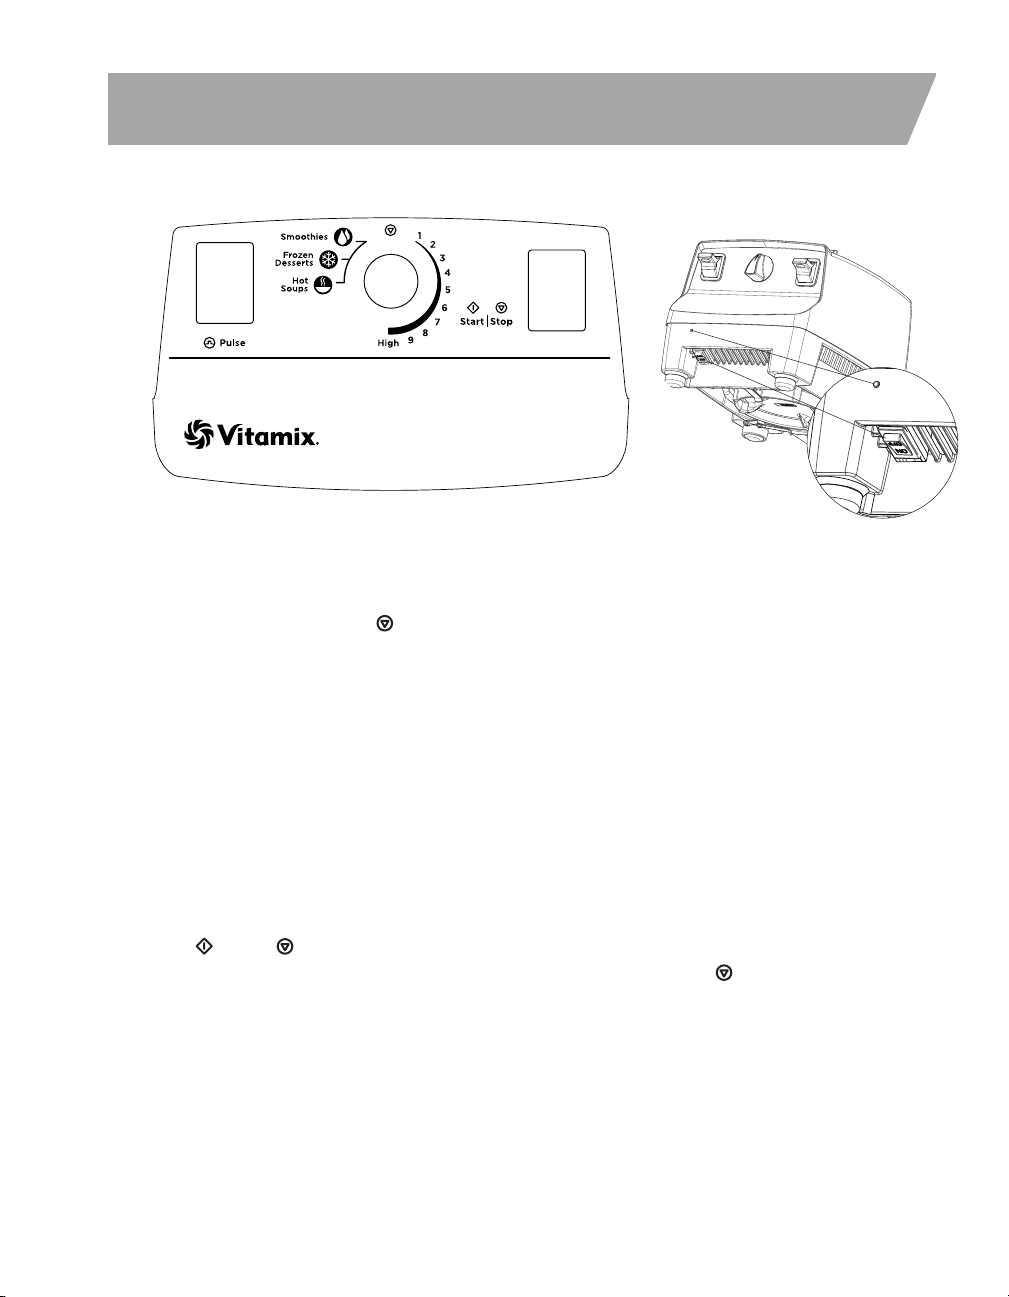
CONTROL PANEL
1. On/Off Switch (l)/(
O
): The switch is located on the front left side of the machine below the control
panel and below the On/Off light.
The On/Off Switch controls the power to the machine.
BEFORE moving the On/Off Switch to the On
(I)
position, make sure the marker on the Variable Speed Dial
is pointed at the Stop Symbol ( ) at the top of the dial.
After plugging in the unit, move the On/Off Switch to the On position to ready the machine for blending.
Move the On/Off Switch to the Off position at night and whenever the machine will be left unattended.
If the On/Off switch is moved to the Off position to stop a program mid-cycle, wait 30 seconds for power to
recycle and the timer to reset before moving the On/Off switch to the On position.
When the Pulse, Start/Stop, and Program Symbols brighten, the On/Off Switch is in the On position and
power is flowing.
.
2. On/Off Light: The light is located on the front left side of the machine below the control panel and
above the On/Off switch. (See illustration above.) When lit, the machine is plugged in and the On/Off
switch is powered On. The power light will flash when a pre-programmed setting is used to indicate that
the program is near completion. Push down the Start/Stop switch to activate a program or initiate
continuous Variable speed operation.
3. Start ( )/Stop ( ) Switch:
After the marker on the Variable Speed Dial is rotated off of the Stop Symbol ( ) to either Variable
Speed 1 or a Program setting, press the Start/Stop Switch to start the machine and initiate the blending
process. Pressing the Start/Stop Switch again will stop the blending process.
Programs can be interrupted by pushing down the Start/Stop switch at any time. If reactivated by pushing down
the Start/Stop switch, the program will start at the beginning.
Loading ...
Loading ...
Loading ...