Loading ...
Loading ...
Loading ...
18
INSTALLATION
Do not use an adapter plug. Disconnecting of the
power cord places undue strain on the adapter and
leads to eventual failure of the adapter ground terminal.
Installation must conform with local codes or, in the
absence of local codes, with the National Fuel Gas
Code, ANSI Z223.1/NFPA 54.
The installation of appliances designed for mobile
home installation must conform with the Manufactured
Home Construction and Safety Standard, Title 24
CFR, Part 3280 (formerly the Federal Standard
for Mobile Home Construction and Safety, Title
24, HUD, Part 280) or, when such standard is not
applicable, the Standard for Manufactured Home
Installations, latest edition (Manufactured Home Sites,
Communities and Set-Ups), ANSI A225.1, latest
edition, or with local codes. In Canada, mobile home
installation must be in accordance with the current
CAN/CSA Z240/MH Mobile Home Installation Code.
Sealing the Openings
Seal any openings in the wall and floor after electrical
and gas supplies are completed.
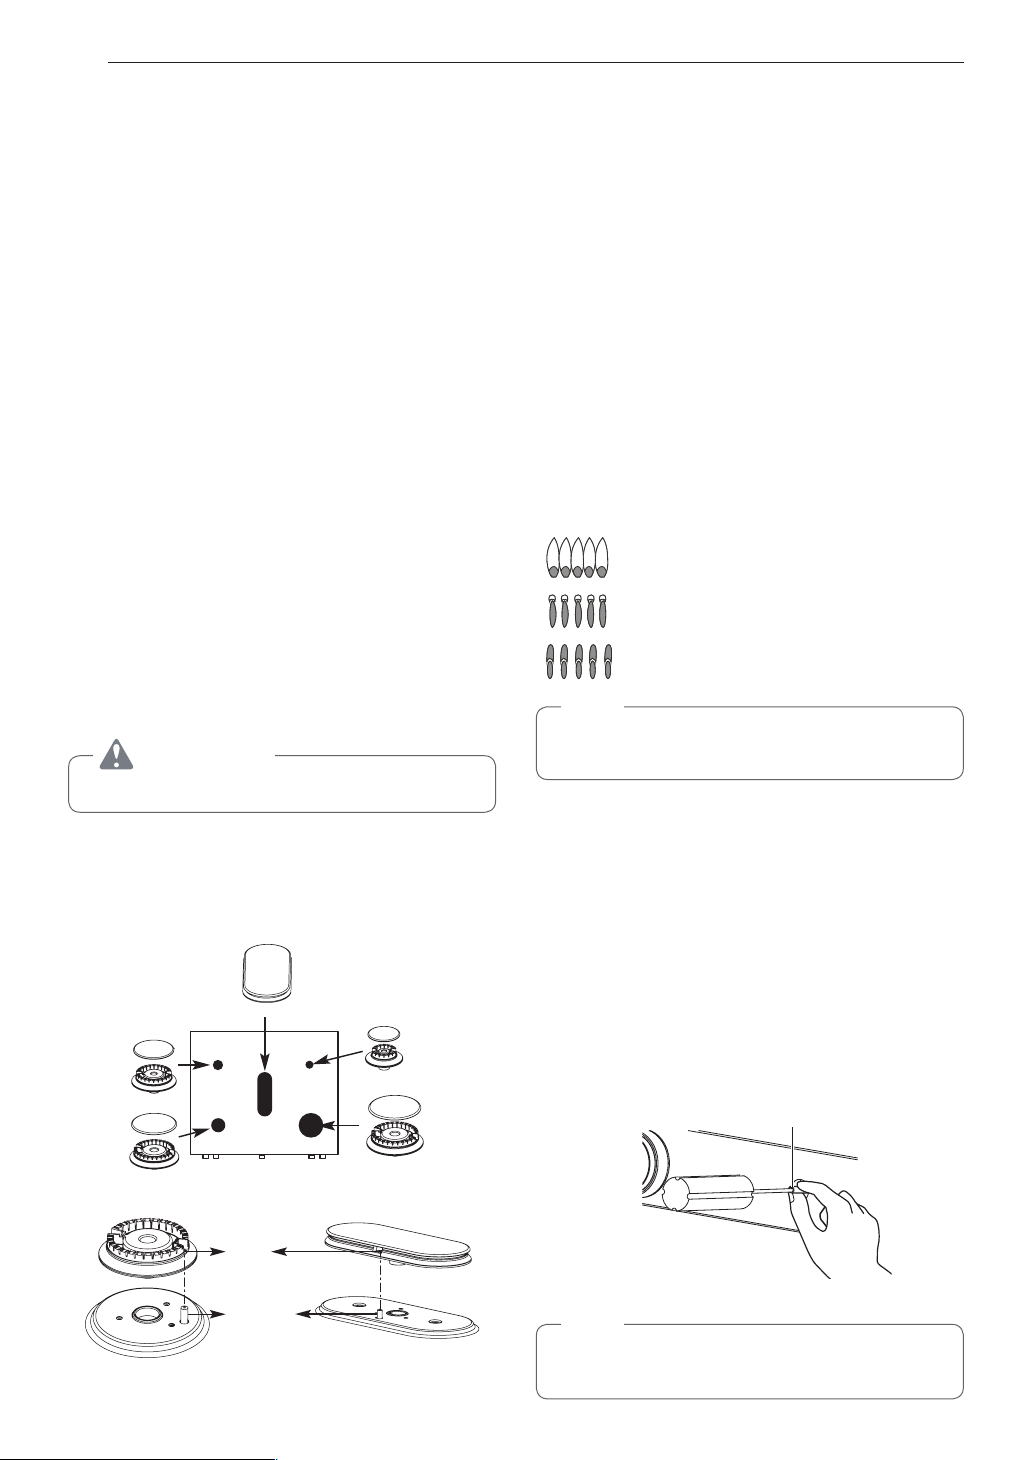
Assembling the Surface
Burners
CAUTION
Do not operate the burners without all parts in place.
Place the burner caps and heads on the cooktop.
Make sure that the caps and heads are placed in the
correct locations. There is one small, one medium,
one large, and one extra large burner head and cap.
Center Burner
Oval (Center) burner
head/cap assembly
Small burner
head and
cap
Medium
burner
head
and cap
Large burner
head and cap
Front of range
Extra large burner
head and cap
Hole
Electrode
Make sure the hole in the burner head is positioned
over the electrode.
Checking Ignition of the
Surface Burners
Electric Ignition
Select a surface burner knob and simultaneously
push in and turn to the Lite position. You will hear
a clicking sound indicating proper operation of the
spark module.
Once the air has been purged from the supply lines
the burner should ignite within 4 seconds. After the
burner ignites, rotate the knob out of the Lite position.
Try each burner in succession until all burners have
been checked.
Quality of Flames
The combustion quality of the burner flames needs to
be confirmed visually.
A Yellow flames - Call for service.
B Yellow tips on outer cones - This
is normal for LP gas.
C Soft blue flames - This is normal
for natural gas.
NOTE
•
With LP gas, some yellow tipping on outer
cones is normal.
Adjusting the Surface Burner to the
Low Flame (Simmer) Setting
1
Light all surface burners.
2
Turn the knob on the burner being adjusted to
Lo.
3
Remove the knob.
4
Insert a small, flat-blade screwdriver with a
minimum length of 3" (76.2 mm) and a diameter
of
3
/
32
" (2.4 mm) into the valve shaft.
Valve shaft
Center adjustment screw
NOTE
Hold the valve shaft with one hand while turning
the screw to adjust with the other.
Loading ...
Loading ...
Loading ...