Operating Instructions Canister Vacuum Cleaner
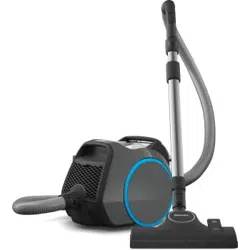
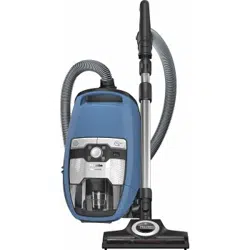
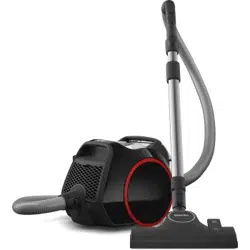
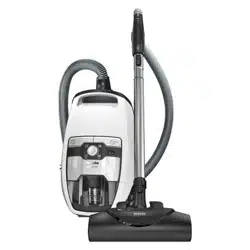
Appliance description
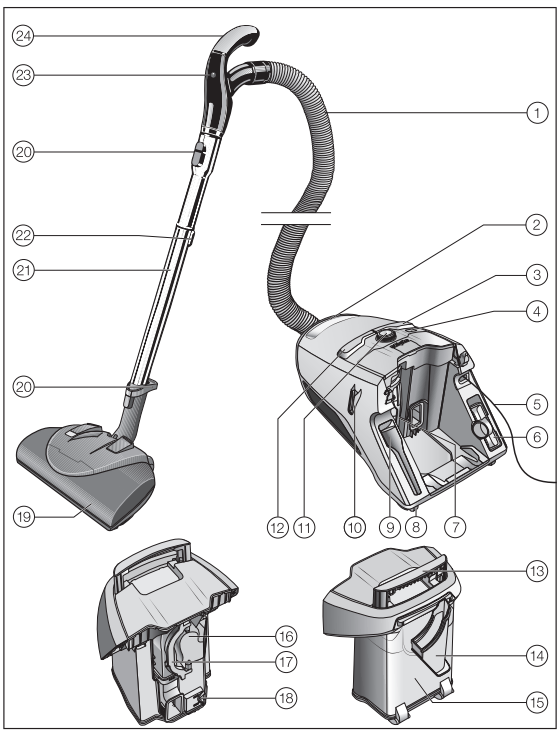
- SES 121 Suction hose
- Vacuum cleaner carrying handle
- Foot switch for cable rewind
- ComfortClean button
- Power cord
- Upholstery nozzle
- Fine dust container with fine dust filter
- Wheels
- Crevice nozzle
- Park system for pauses during vacuuming
- Suction power selector
- On/off
 foot switch
- Dust container carrying handle
- Filter frame
- Dust container
- Pre-filter
- Pre-filter handle
- Dust container release mechanism
- Electrobrush (either SEB 217 / EB02, SEB 228 / EB03 or SEB 236 / EB01, depending on model)
- Release buttons
- SET 220 telescopic wand
- Telescopic suction wand release button
- Electrobrush On/Off button
- Comfort handle
Underneath - Park system for storage (not shown)
Caring for the environment
Disposal of the packing material
The cardboard box and packing materials protect the appliance during shipping. They have been designed to be biodegradable and recyclable.
Ensure that any plastic wrappings, bags, etc. are disposed of safely and kept out of the reach of children. Danger of suffocation!
Disposal of your old appliance
Before disposing of your old appliance, remove the fine dust filter and dispose of it with your household waste.
Electrical and electronic appliances contain valuable materials. They also contain certain substances, compounds and components which are essential for the proper functioning and safe use of the equipment. Handling these materials improperly by disposing of them in your household waste can be harmful to your health and the environment. Therefore, please do not dispose of your old appliance with your regular household waste.
Instead, use the official collection and disposal points provided by local authorities, dealers or Miele, in order to dispose of and recycle electrical and electronic appliances. You are legally responsible for deleting any personal data on the old appliance you wish to dispose of. Please ensure that your old appliance is kept away from children until removal.
References to illustrations
- The illustrations referred to in the text are shown on the fold-out pages at the end of these Operating Instructions.
Electrobrush operating instructions
Your vacuum cleaner is equipped with an Electrobrush as standard. Please read the separate operating instructions supplied with the Electrobrush before using it for the first time.
Preparing for use
Attaching the suction hose (Fig. 01)
- Insert the hose connector into the suction socket on the vacuum cleaner until it clicks into position.
Disconnecting the suction hose (Fig. 02)
- Press the release buttons at the side of the hose connector, and lift the hose from the socket.
Connect the Comfort handle to the telescopic wand (Fig. 03)
Adjusting the telescopic wand (Fig. 04)
-
One part of the telescopic wand is fitted inside the other so that the tube can be adjusted to suit your preferred height for comfortable vacuuming, the maximum height, however, is until the end stop.
-
Press the release button and adjust the telescopic wand to the desired height.
Connecting the telescopic wand to the Electrobrush (Fig. 05)
Using the Electrobrush
-
Depending on the model, your vacuum cleaner will be fitted as standard with one of the following Electrobrushes.
-
The Electrobrush is particularly suitable for the intensive vacuuming of carpets which are subject to hard wear.
Connecting the telescopic wand to the floorhead/floorbrush (Fig. 06) (included as standard depending on model)
-
Push the telescopic wand into the suction nozzle and turn it clockwise or counter-clockwise until it clicks into position.
-
To detach these parts from each other, press the release button and pull the telescopic wand out of the suction nozzle, twisting it slightly as you do so.
Using the reversible floorhead (Fig. 07) (included as standard depending on model)
Adjusting the floor head (Fig. 07): Vacuum carpets and rugs with the brush retracted:
Using the accessories supplied (Fig. 08)
- Crevice nozzle - For cleaning in folds, crevices or corners.
- Upholstery nozzle - For cleaning upholstery, mattresses, cushions, curtains, covers, etc.
- Dusting brush with natural bristles, included in loose form - For cleaning base boards as well as ornate, carved and particularly sensitive objects. The head can be swiveled to adjust to the best angle.
The crevice nozzle and the upholstery nozzle are located in holders at the rear of the vacuum cleaner.
Reversible floorhead (Fig. 09) (included as standard depending on model)
- For general use and also for vacuuming the stairs.
Floorbrush Parquet Twister with swiveling head (SBB 300-3) (included as standard depending on model)
- This brush is suitable for a variety of hard floor surfaces and has a swivel joint enabling it to get into awkward corners.
Floorbrush Parquet Twister XL with swiveling head (SBB 400-3) (included as standard depending on model)
- With natural bristles for quickly vacuuming smooth hard floors and small gaps.
Use
Power cord
- Unwind the cord completely to aid the vacuum in dissipating heat. Do not pull or carry by the cord, use the cord as a handle, close a door on the cord, or pull the cord around sharp edges or corners. Do not run the appliance over the cord. Keep the cord away from heated surfaces. Do not unplug by pulling the cord. To unplug grasp the plug, not the cord. This appliance is equipped with a power cord reel. Hold the plug when rewinding onto cord reel. Do not allow plug to whip when rewinding.
Unwind the power cord (Fig. 10)
- Pull the power cord out to the required length (max. cord length approx. 21 ft / 6.5 m).
- Insert the plug into the electrical socket.
Rewinding the power cord (Fig. 11)
- Unplug the power cord from the socket.
- Step on the cord rewind foot switch.
The power cord will then retract itself into the vacuum cleaner.
If you do not want the cord to retract completely into the vacuum cleaner you can deactivate this function. To do this, take hold of the end of the cord while rewinding it and give it a short pull when you want the rewinding to end.
Turning the vacuum cleaner on and off (Fig. 12)
- Press the On/Off foot control .
Selecting the suction power
The suction power can be adjusted to suit the type of flooring being cleaned. Reducing the power lowers the amount of effort required to maneuver the floor brush.
The vacuum cleaner has symbols on the controls which indicate the type of use the settings are suitable for.
 Curtains, lightweight fabric
 Deep pile carpets, rugs and runners
 Low pile carpet and rugs
 Hard flooring and heavily soiled carpets and rugs (also for cleaning upholstery and mattresses with the upholstery nozzle)
Rotary dial (Fig. 13)
- Turn the rotary selector to the suction power setting you require.
During vacuuming
- When vacuuming, pull the vacuum cleaner behind you on its wheels. You can stand it upright for vacuuming stairs and curtains, etc.
When vacuuming, in particular fine dust, e.g. dust, sand, plaster, flour, etc., electrostatic charges build up naturally. Under certain conditions these charges will be released. To avoid the unpleasant effects of these discharges, a metal inlay has been incorporated into the underside of the handle. Please make sure that you keep your hand in constant contact with this metal strip during vacuuming (Fig. 14).
If you are vacuuming a large amount of dust at once, the ComfortClean selfcleaning function should be started manually either during a vacuuming pause or immediately afterward. This enables the vacuum cleaner to achieve the very best cleaning performance again right away (see “Maintenance – Starting the ComfortClean self-cleaning function manually”).
Switching the Powerbrush on and off (Fig. 15)
To use the Electrobrush, it has to be switched on additionally to the vacuum cleaner.
- To do this, press the On/Off button
 on the Comfort handle.
This means that you can switch the Electrobrush off during vacuuming and the vacuum cleaner will continue to operate using suction only, e.g. when moving from vacuuming a fitted carpet to a high quality rug, for example.
Parking, transport and storage
Park system for pauses during vacuuming (Fig. 16) (cannot be used with the Electrobrush SEB 236)
The park system allows you to conveniently park the suction wand and floorhead during pauses.
- Slot the floorhead into the parking attachment on the vacuum cleaner.
If your vacuum cleaner is on a sloping surface, e.g., a ramp, retract the telescopic suction wand fully.
Park system for storage (Fig. 17)
Always disconnect the vacuum cleaner from the power supply when you have finished using it. Remove the plug from the socket.
- Stand the vacuum cleaner upright.
It is a good idea to retract the telescopic suction wand fully.
- Slot the floorhead downwards into one of the parking attachments on either side of the vacuum cleaner (the parking attachments cannot be used with Electrobrushes SEB 228 and SEB 236).
This makes the vacuum cleaner easier to carry or store.
For safety reasons, do not lift the vacuum cleaner using the dust container carrying handle.
Maintenance
Emptying the dust container (Figs. 18 - 23)
- Empty the dust container before the dust has reached the max marking on the dust container.
- Pull the dust container handle upward.
- Remove the dust container upward.
- Hold the dust container close to the trash can so that as little dust billows out as possible.
- Press the yellow release button on the bottom of the dust container.
The flap will open and the dust will fall out.
- Close the flap firmly. It should click into place.
- Insert the dust container down into the vacuum cleaner so that it audibly clicks into place.
- Push the handle down.
Cleaning the dust container
Clean the dust container as required.
- Clean the dust container using water and liquid dish soap.
- Dry the dust container carefully
Cleaning the filter frame (Figs. 24 + 25)
A removable filter frame is located in the dust container. This should be cleaned if it is obviously dirty.
- Place the emptied and open dust container on its front.
- Release the filter frame and remove it.
- Empty the filter frame and rinse it under cold running water.
- Place the dry filter frame in the dust container so that it audibly clicks into place.
Cleaning the fine dust filter
The fine dust filter is equipped with a self-cleaning function. When a specified degree of soiling is reached, the vacuum cleaner switches off automatically for approx. 20 seconds and carries out a cleaning process. You will hear this process running.
The ComfortClean button on the vacuum cleaner lights up yellow.
Starting the ComfortClean self-cleaning function manually (Fig. 26)
If you are vacuuming a large amount of dust at once, the ComfortClean selfcleaning function should be started manually either during a vacuuming pause or immediately afterward. This enables the vacuum cleaner to achieve the very best cleaning performance again right away.
- With the vacuum cleaner switched on, press the ComfortClean button for at least two seconds.
The vacuum cleaner is switched off automatically for approx. 20 seconds and a cleaning process is carried out which results in operational noise. The ComfortClean button on the vacuum cleaner lights up yellow. The vacuum cleaner will then switch back on automatically and will operate with the previously selected setting.
We also recommend emptying and cleaning the fine dust container once or twice a year (see “Frequently asked questions – Cleaning the fine dust filter manually”).
When to change the thread catchers? (only possible for models with a reversible floorhead included as standard)
- The thread catchers on the suction inlet of the reversible floorhead can be replaced. Check them from time to time and replace them if the pile has worn down.
How to replace the thread lifters (Fig. 27)
- Use a suitable screwdriver to remove the thread lifters from the slots.
- Install new thread lifters.
Cleaning the roller on the AllTeQ floorhead (Fig. 28) (depending on model)
Clean the roller on the floorhead if required.
- Release the bearing (with bayonet fitting) using a coin.
- Press the bearing out, and remove.
- Remove the roller. Remove any threads and hair, replace the roller and refit the bearing, locking it back into position.
Cleaning and care
Always switch off the vacuum cleaner before cleaning it and unplug the power cord from the outlet
Vacuum cleaner and accessories
The vacuum cleaner and all plastic accessories can be cleaned with a commercially available cleaner suitable for plastic.
Follow the special cleaning instructions for the dust container and filter frame in “Maintenance” and for the fine dust filter, the pre-filter, and the fine dust container in “Frequently asked questions”.
Do not use abrasive cleaning agents, glass cleaning agents, allpurpose cleaners, or oil-based conditioning agents.
Do not let the vacuum cleaner get wet. If moisture gets into the vacuum cleaner, there is a risk of electric shock.
Cleaning the pre-filter (Figs. 29 + 30)
The pre-filter is located at the rear of the vacuum cleaner. This should be cleaned if it is obviously dirty.
- Remove the dust container.
- Release the handle of the pre-filter and remove the pre-filter.
- Rinse the pre-filter under cold running water
Do not use detergent! Do not use any sharp or pointed objects! Dry the pre-filter carefully!
- Replace the dry filter in the dust container and lock the handle.
- Reinsert the dust container in the vacuum cleaner.
Cleaning the fine dust filter manually (Figs. 31 - 36)
Allow a drying time of 24 hours.
- Remove the dust container.
- Release the fine dust container in the direction of the arrow and remove it.
- Run a little water into the opening at the top of the fine dust container.
- Gently shake the fine dust container back and forth.
This will rinse out the dust.
- Shake the water out of the opening.
- Release the top so that the marking is pointing to the
 symbol.
- Carefully lift the fine dust filter up and out of the fine dust container.
- Clean the outside of the fine dust filter under cold running water.
Do not clean the inside of the fine dust filter. Do not use detergent. Do not use any sharp or pointed objects and do not brush the fine dust filter. After cleaning, allow the fine dust filter to dry for a minimum of 24 hours.
- Clean the fine dust container with water and mild detergent.
- Dry the fine dust container carefully.
- Insert the dry fine dust filter into the dry fine dust container so that the marking is pointing to the symbol.
- Lock the top into place so that the marking is pointing to the
 symbol.
- Reinsert the fine dust container in the vacuum cleaner and lock it into place.
- Reinsert the dust container in the vacuum cleaner.
Frequently Asked Questions - Troubleshooting
The vacuum cleaner turns off automatically.
- A temperature limiter switches the vacuum cleaner off automatically if it gets too hot. This can occur when the airways are blocked by bulky objects.
- Switch the vacuum cleaner off immediately using the On/Off foot switch . Switch off at the outlet and unplug it.
- After removing the cause of the fault, wait for approximately 20–30 minutes to allow the vacuum cleaner to cool down. It can then be turned on again.
The ComfortClean button lights up in yellow.
- The vacuum cleaner carries out an automatic cleaning process which you can hear running.
- Wait for approx. 20 seconds until this cleaning process has finished.
The ComfortClean button lights up in red. The vacuum cleaner switches itself to the lowest power setting.
- The dust container is full.
- Empty the dust container.
- The pre-filter is dirty.
- Clean the pre-filter (see “Frequently asked questions - Cleaning the pre-filter”).
- The fine dust filter is dirty.
- Clean the fine dust filter at the next available opportunity (see “Frequently asked questions - Cleaning the fine dust filter manually”).
Cleaning power is reduced.
- The pre-filter is dirty.
- Clean the pre-filter (see “Frequently asked questions - Cleaning the pre-filter”).
- The fine dust container is full.
- Empty and clean the fine dust container at the next available opportunity (see “Frequently asked questions - Cleaning the fine dust filter manually”).
Technical Service
Contact in case of fault
In the event of a fault which you cannot remedy yourself, please contact your Miele dealer or Miele Technical Service.
Warranty
For more information about warranty conditions, please contact Miele Technical Service.
Optional accessories
Please be sure to observe your flooring manufacturer's cleaning and care instructions.
Only use genuine accessories with the “ORIGINAL Miele” logo on them. This will ensure that the suction power of the vacuum cleaner is optimally maintained, and the best possible cleaning result can be achieved. Please note that faults and damage caused by use of accessories which do not bear the “ORIGINAL Miele” logo are not covered by the vacuum cleaner guarantee.
Purchasing accessories
Original Miele accessories are available from the Miele Web store, Miele and your Miele dealer.
Ordering the correct accessories
Original Miele accessories are identified by the “ORIGINAL Miele” logo on the packaging
Floor tools / Brushes
AllergoTeQ floorhead (SBDH 285-3) - This floor brush is suitable for daily hygienic cleaning of all floor surfaces. The level of cleanliness of the floor shows in a color “traffic light” display when vacuuming.
TurboTeQ Turbobrush (STB 305-3) - This brush is ideal for cleaning shortpile carpet.
Floor brush Parquet Twister with swiveling head (SBB 300-3) - This brush is suitable for a variety of hard floor surfaces and has a swivel joint enabling it to get into awkward corners.
Parquet Twister floorbrush with swiveling head (SBB 300-3) - With natural bristle for vacuuming smooth hard floors and small gaps.
Floorbrush Parquet Twister XL with swiveling head (SBB 400-3) - With natural bristles for quickly vacuuming smooth hard floors and small gaps.
Other accessories
MicroSet accessory case (SMC 20) - This set is specially designed for cleaning small objects and difficult to reach areas (such as PC keyboards, stereo equipment, intricately carved furniture and ornaments, models, etc).
Turbo XS hand turbo brush (STB 20) - For vacuuming upholstery, mattresses or car seats, etc.
Universal brush (SUB 20) - For dusting books, shelves, etc.
Radiator brush (SHB 30) - For dusting radiators, narrow shelves and crevices.
Mattress tool (SMD 10) - For vacuuming upholstery, mattresses, cushions, curtains, covers, etc.
Crevice nozzle, 12" (300 mm) (SFD 10) - Extra long crevice nozzle for cleaning in folds, crevices and corners.
Crevice nozzle, 22" (560 mm) (SFD 20) - Flexible crevice nozzle for vacuuming hard to reach places.
Upholstery nozzle, 7 1/2" (190 mm) (SPD 10) - Extra wide upholstery nozzle for cleaning upholstered furniture, mattresses and pillows.
 . Clean hard flooring which is not susceptible to scratching, and flooring with gaps or deep crevices in it with the brush protruding:
 .
.