Loading ...
Loading ...
Loading ...
5
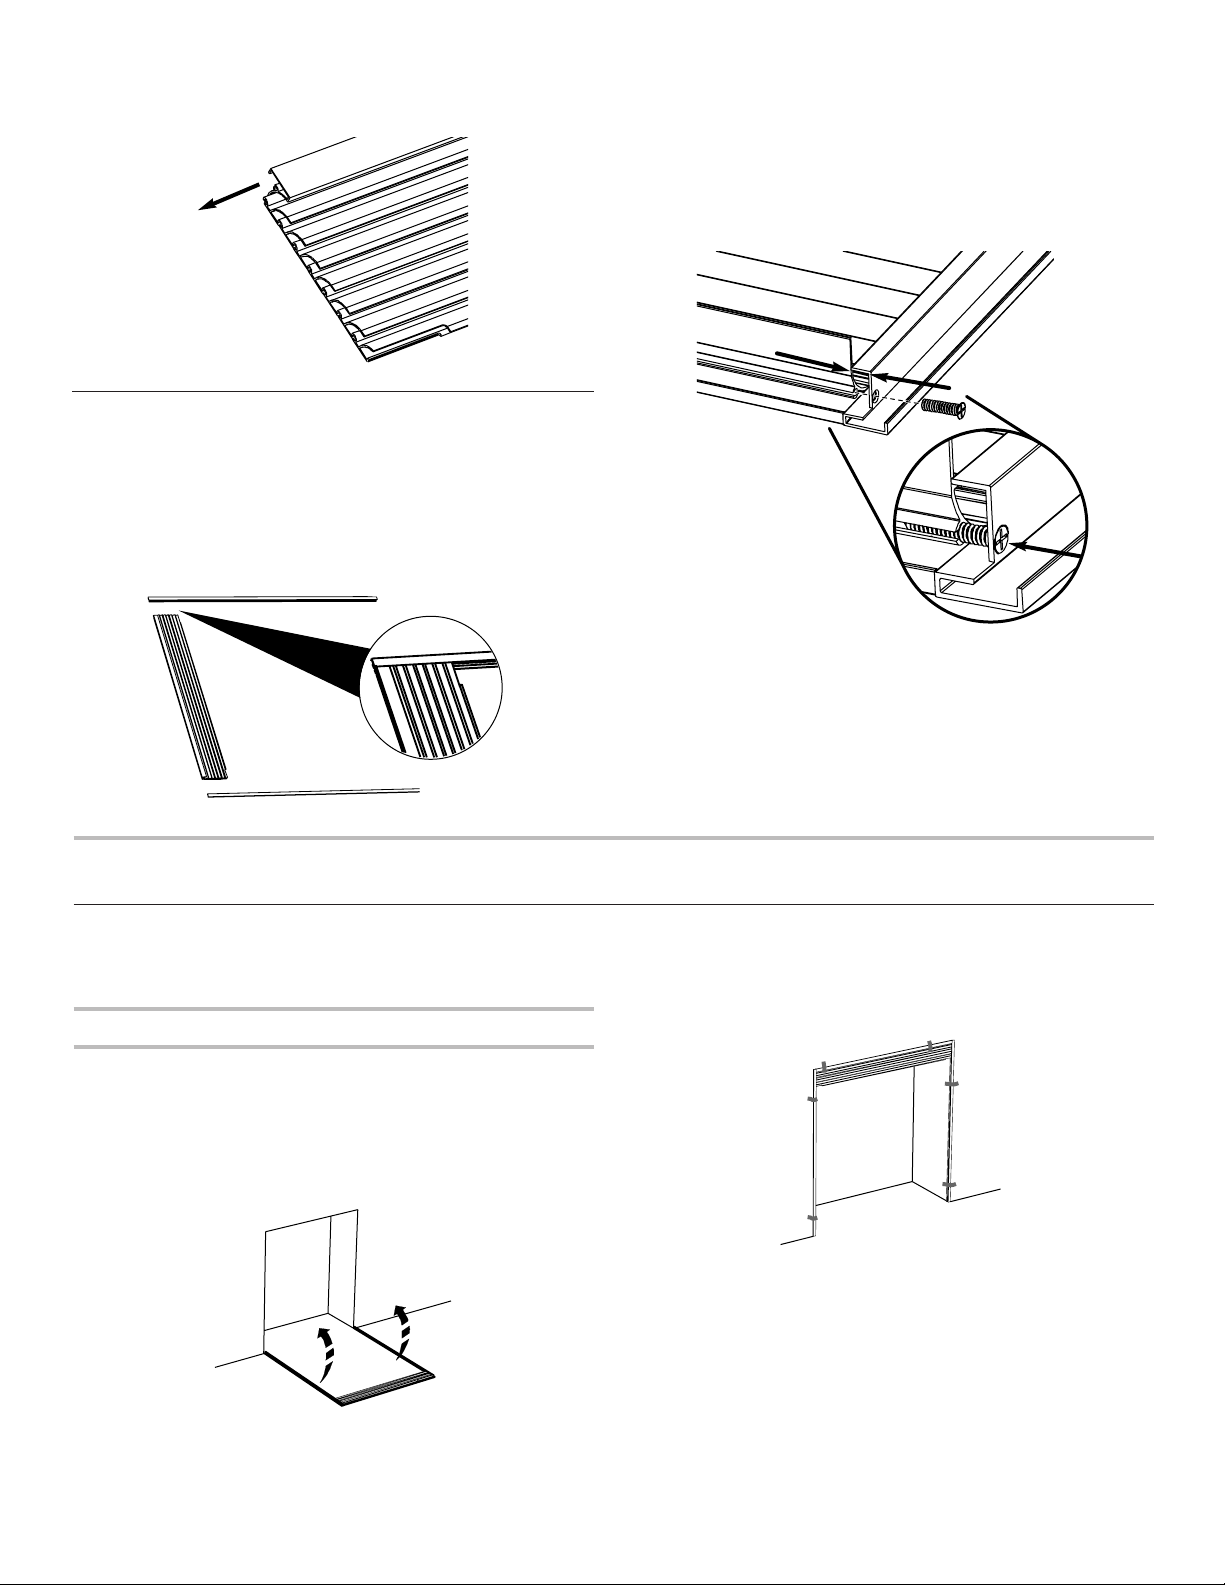
3. Install the top trim mount (A) onto the top grille assembly (B)
by sliding it onto the grille section at the top.
Attach the Side Rails
1. Align the side trim pieces (E, G) with the sides of the top
grille assembly (B).
NOTE: Make sure all the grille pieces are contained within
the channel of the side trim pieces (E and G) and the top
surface of the top grille (B) is flush with the top surface
of the sides.
2. Align the hole in the side trim piece (E and G) with the groove
on the top grille (B) on each side of the grille assembly. There
will be a ³⁄8" (9.5 mm) gap between side trim piece (E and G)
and top grille (B).
3. Using the two countersunk Phillips screws (K) (provided),
fasten the side trim piece (E and G) to the top grille assembly
(B). Insert the screw through the predrilled hole and into the
groove on each side of the top grille assembly (B) as shown.
³⁄₈"
(9.5 mm)
INSTALLATION INSTRUCTIONS
Install the Top Grille and Trim Assembly
IMPORTANT: The top grille and trim assembly, and your floor
can be damaged if the assembly is dropped.
Prepare the Opening
1. Place cardboard or hardboard over the floor at each side of
the rough opening where the side trim will meet the floor.
2. Place the top grille and trim assembly face down on the floor
centered in front of the rough opening.
3. Using two people, one on each side, lift the trim assembly
and position it into place above and on each side of the
opening.
4. Use several pieces of tape to temporarily hold the assembly
in place as shown.
5. Mark the trim assembly hole locations around the opening.
Remove the tape and lower the trim assembly back to the
floor.
6. Using a cordless drill and ¹⁄8" diameter drill bit, drill holes
where marked.
NOTE: Some cabinetry or wall materials may require
predrilled holes using a
7
⁄8" diameter drill bit.
7. Repeat steps 3 and 4.
Loading ...
Loading ...
Loading ...