Loading ...
Loading ...
Loading ...
11
Installation instructions
Leak-testing and flame-testing the cooktop
Important!
The operation of the cooktop, including the ignition system, must be tested before installation is complete.
If, after following the instructions below, satisfactory performance cannot be obtained, contact the local
gas authority or your local Authorised Repairer for advice and assistance.
Checking the connections for leaks
After installation and making all connections, check thoroughly for possible leaks and make sure
all connections are gas-tight.
1
Turn all control dials to O (OFF).
2
Open the valve on the gas supply.
3
Check each connection one at a time by brushing a soap and water solution or a suitable leak
detection fluid over it.
Important!
Do not use any naked flames to check for leaks.
The presence of bubbles indicates a leak. Tighten or replace connections as appropriate, then
leak-test all connections again. For CG604 and CG905DWFC models, ensure the fibre washer
(supplied) is located between the elbow and the cooktop’s gas inlet.
Checking the burner flames
1
Light each burner.
2
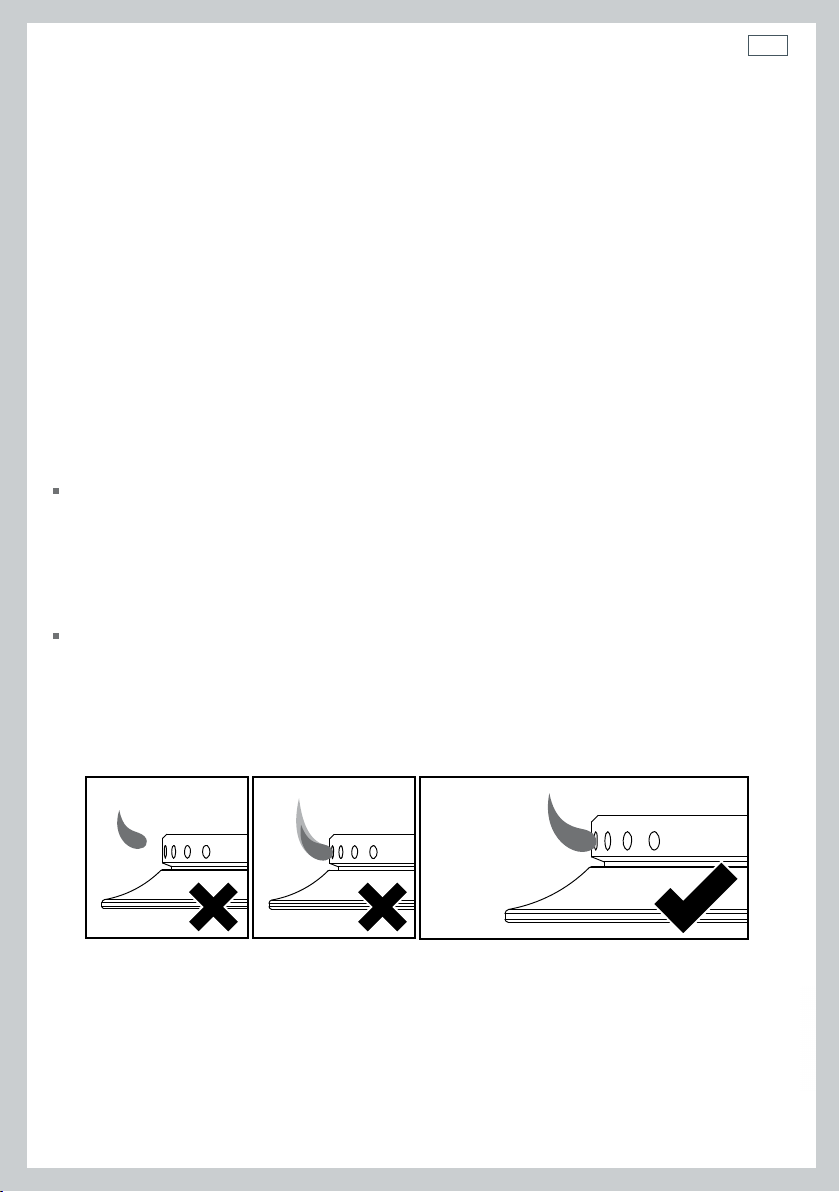
Check for a well-defined blue flame without any yellow tipping. See Fig.4.
If any abnormality is evident, check that:
- the burner cap is located properly
- the injector nipple is correctly aligned
- the correct size injectors are installed.
Incorrect: flame
‘lifting off’ the burner
Incorrect:
yellow tipping
Good flame: well-defined blue flame
without yellow tipping
Fig.4 Incorrect and good flame patterns
Loading ...
Loading ...
Loading ...