OFF
ON
x3
x2
Hold for 6 seconds
until LEDs start
blinking
quick-start guide
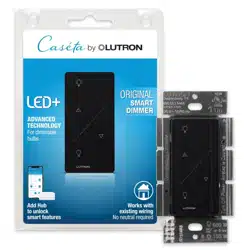
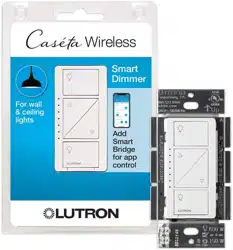
In-wall dimmer
Welcome—and thank you for purchasing a CasétaTM
Wireless in-wall dimmer. In order to control your lights
from an app or remote, you’ll need to replace an existing
switch with a CasétaT Wireless in-wall dimmer.
Before you install the dimmer, please watch the
installation video at
www.casetawireless.com/support
We hope you enjoy the convenience of Caséta
TM Wireless!
NOTE: You can mix and match dimmable LED and
CFLs, as well as halogen and incandescent light
bulbs, with Caséta
TM Wireless dimmers.
Dimmable LED and CFL light bulbs vary in their
dimming performance. If you’re using these
bulbs and they flicker or turn off, please visit
www.casetawireless.com/lowend for information
on adjusting the dimmer for best bulb performance.
For a complete list of compatible dimmable LEDs
and CFLs, please visit
www.casetawireless.com/bulblist
Compatible light bulbs include:
Cree
®
BA19-08027OMF-12DE26-1U100
CR6-575L
EcoSmart
®
ECS BR30 W27 FL 120
ECS 20 WW FL 50WE 120
Feit
®
A19/OM/LED
Philips
®
9290002295
Sylvania
®
LED12A19/DIM/O/827
LED21PAR38/DIM/P/930/FL30
LED
—up to 150 W
CFL—up to 150 W
Contents supplied
Double your warranty
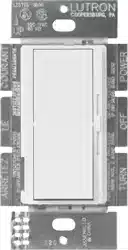
In-wall dimmer
(PD-6WCL)
Tools you’ll need
Works with energy efficient
dimmable light bulbs:
Flat-head screwdriver
Wire connectors (3)
Phillips-head screwdriver
Pliers
Screws (2)
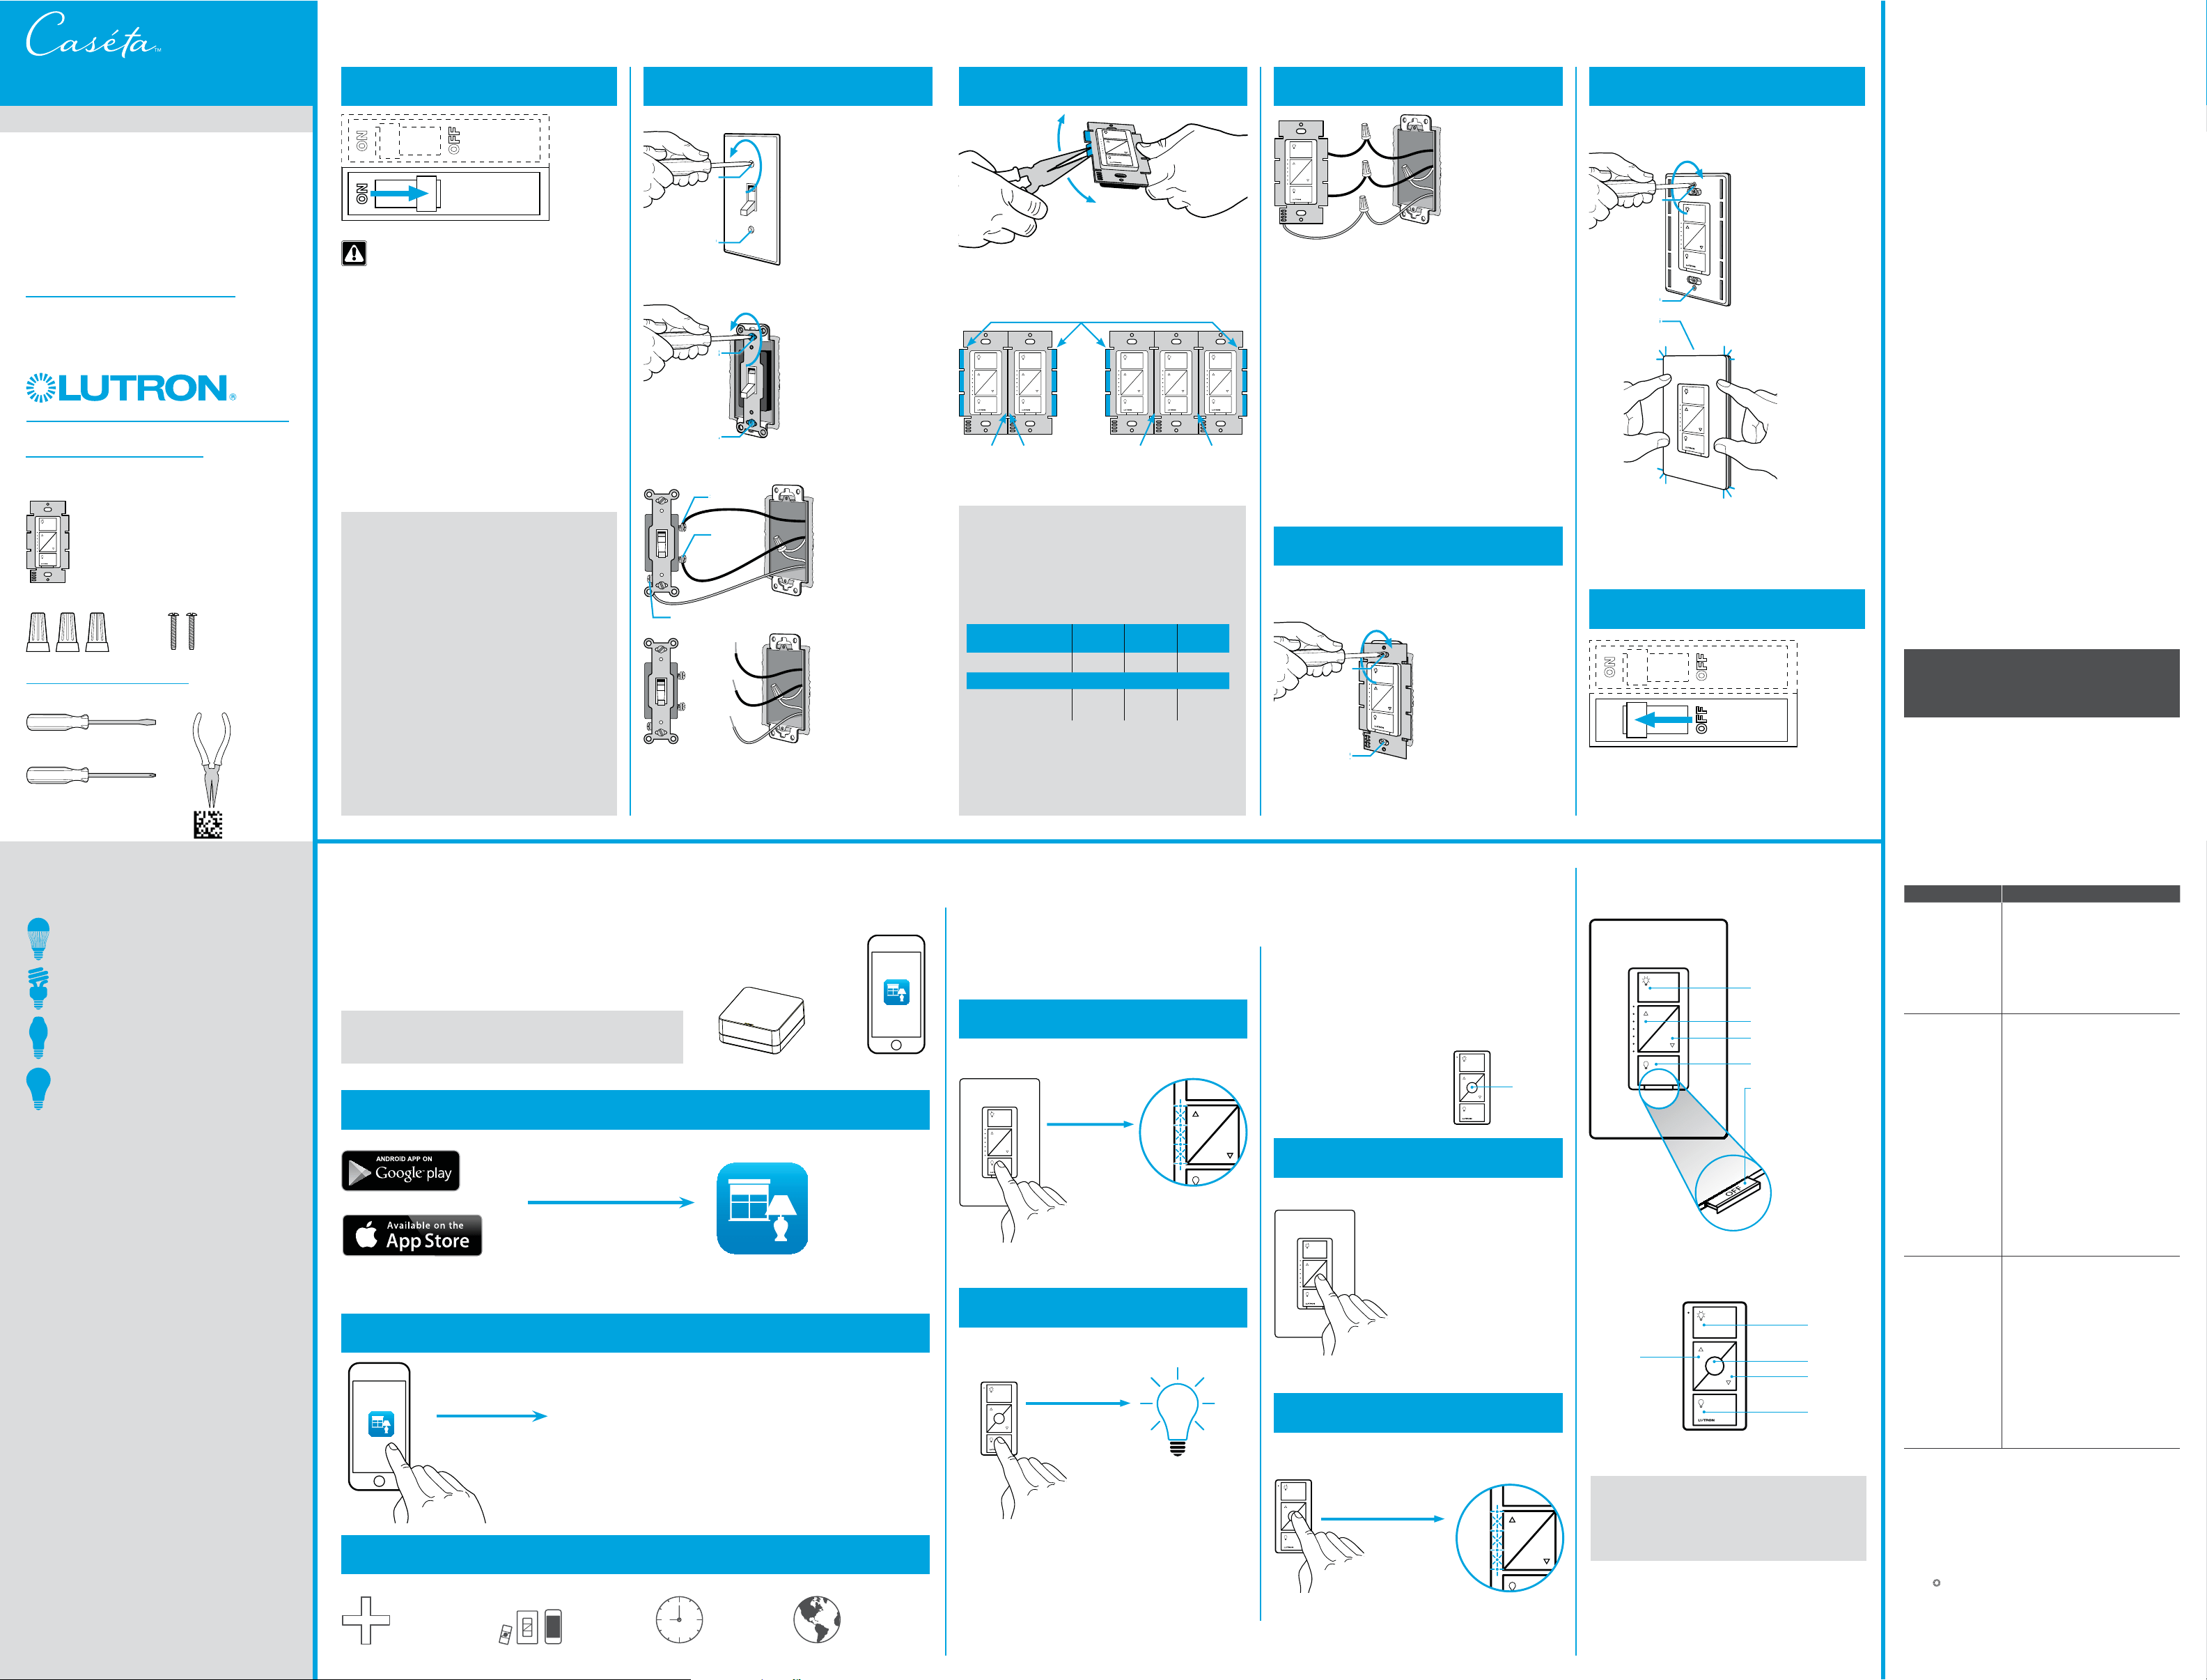
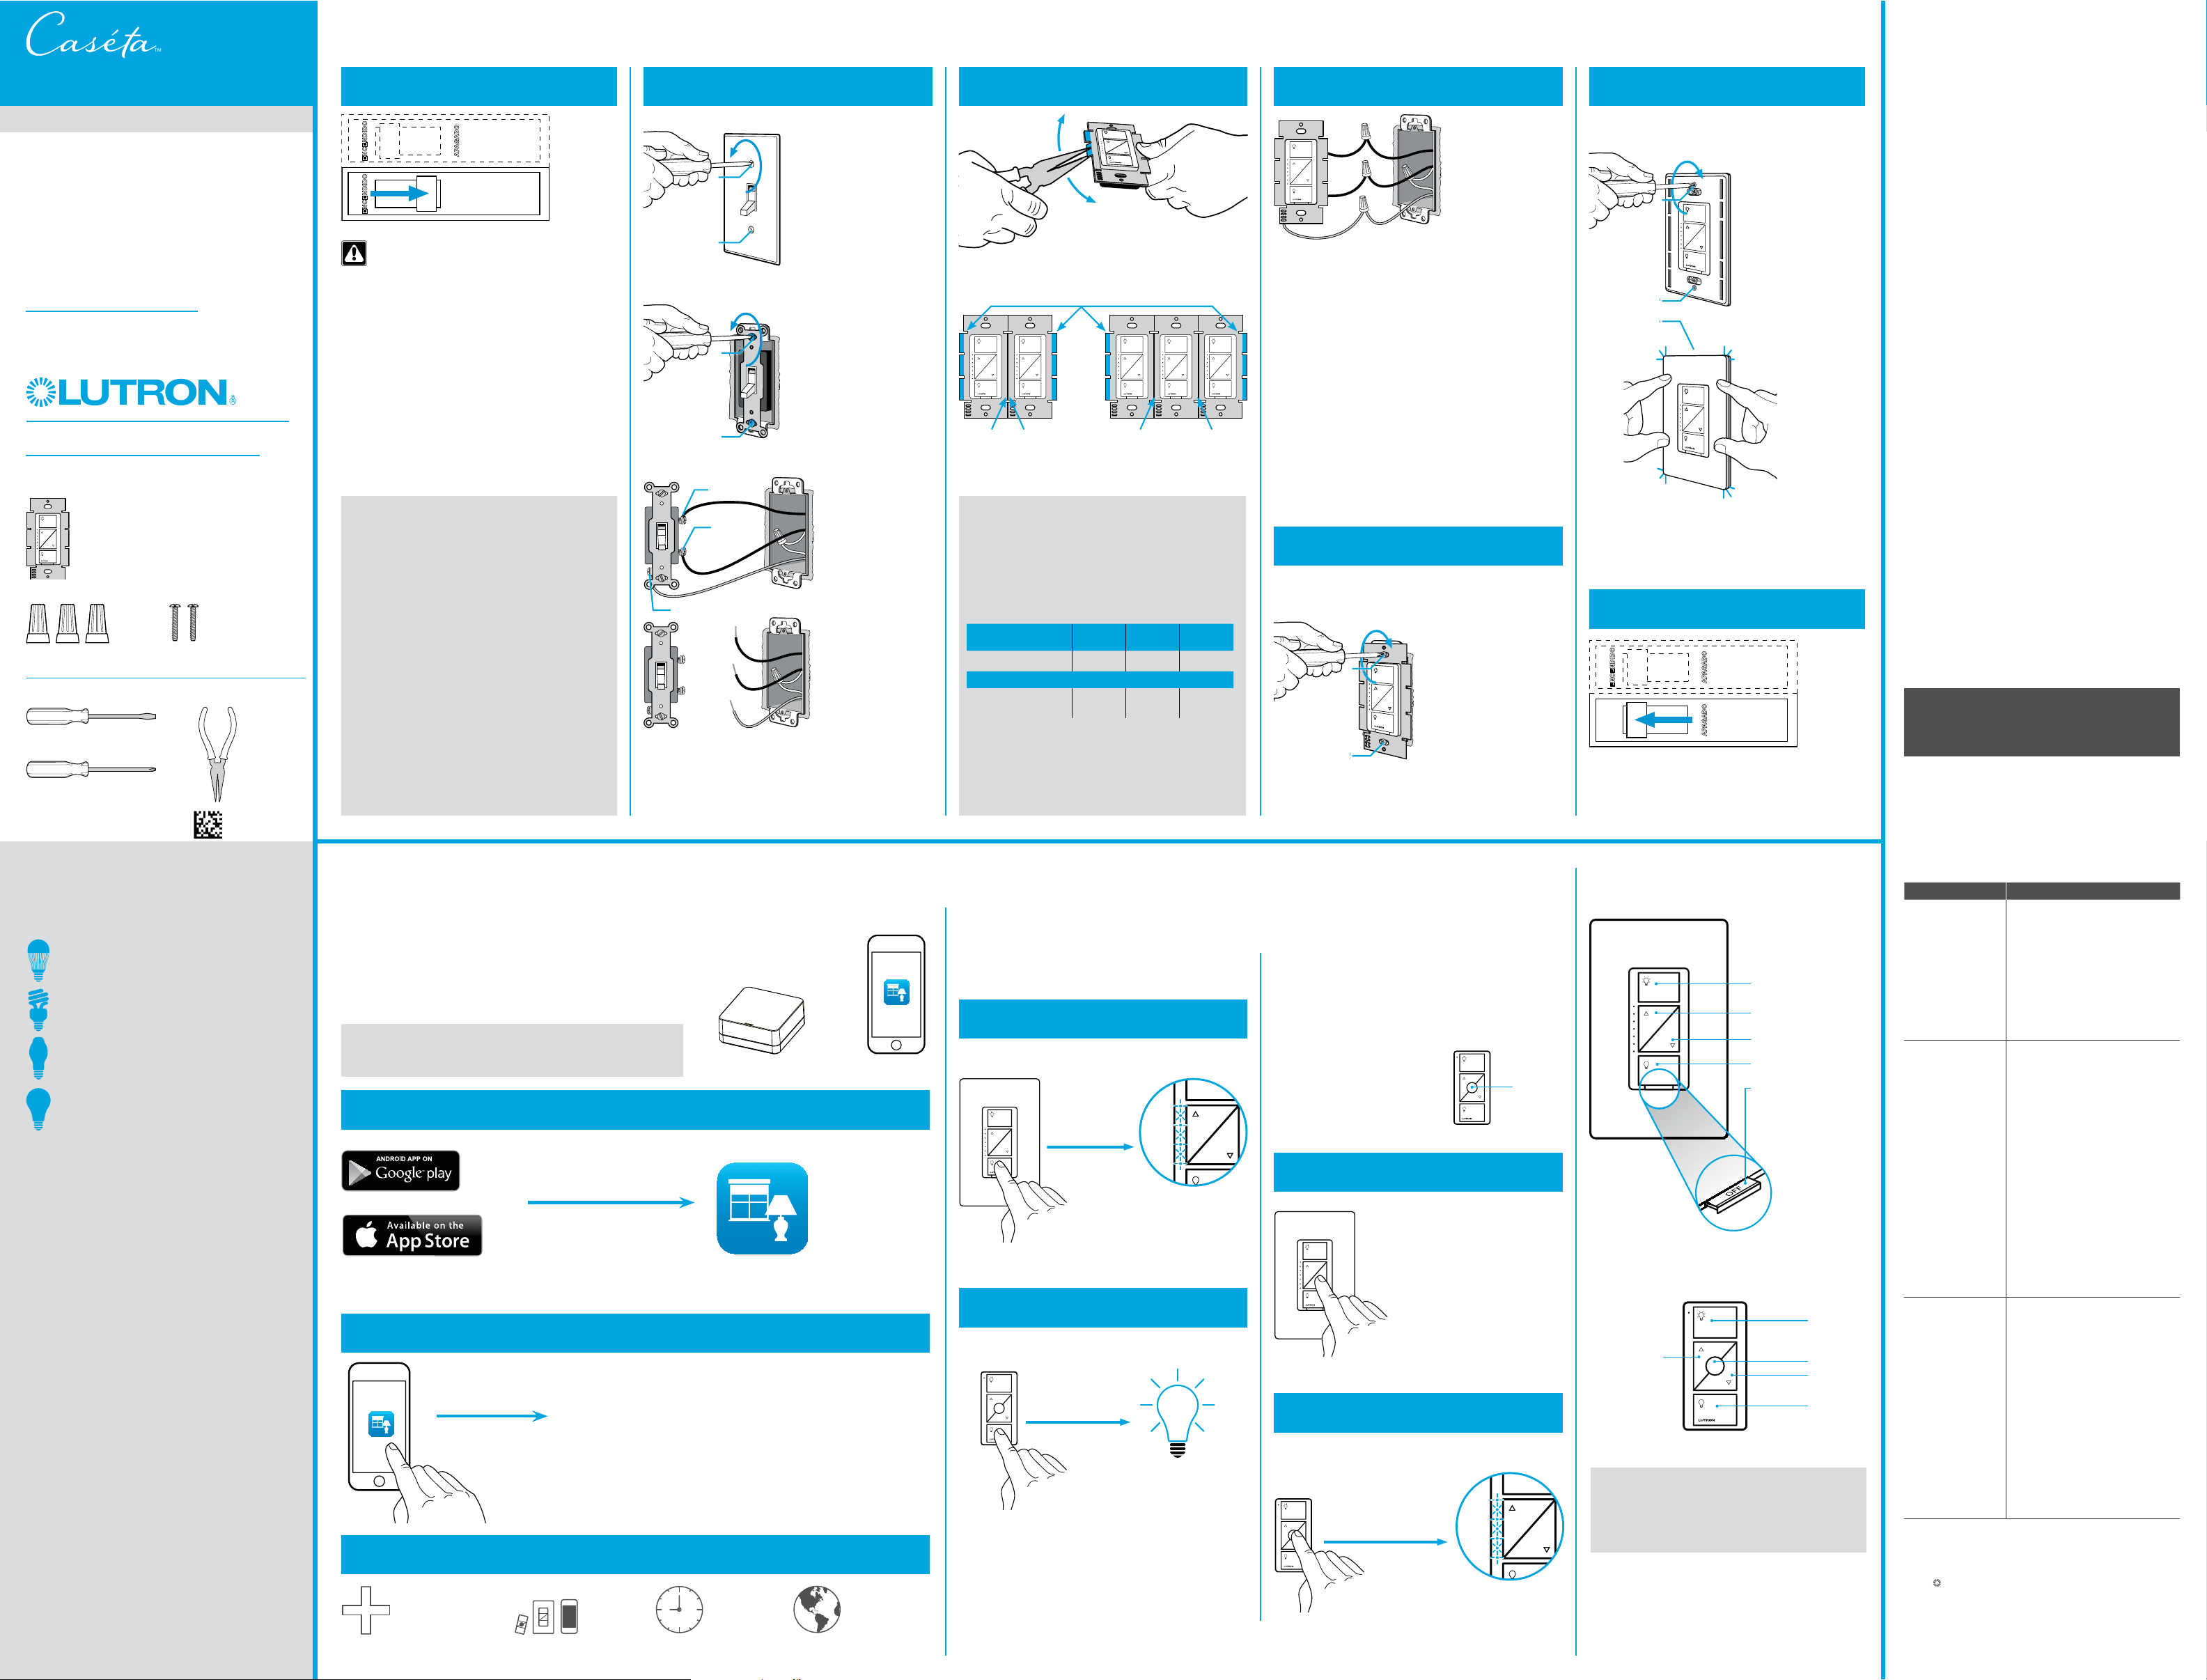
Installation for lights with one wall switch (single pole)
Installing your dimmer
Using your CasétaT Wireless kit
(sold separately)
Some lights have one wall switch, while others
have two or more wall switches (such as stair lights,
which have a switch at both the top and bottom of
the stairs). We’ve included instructions for lights with
one wall switch (called a single pole). If your light has
more than one switch (called a 3-way), please visit
www.casetawireless.com/3way for complete
installation instructions and how-to videos.
WARNING: SHOCK HAZARD
May result in serious injury or death. Turn off
power at circuit breaker or fuse before installing.
1
Turn power off at circuit breaker!
1
Press and hold “off” button on dimmer
2
Press and hold “off” button on remote
4
Connect the dimmer
5
Mount the dimmer
6
Attach the wallplate
7
Turn power on at circuit breaker
2
Remove existing switch from wall
Remove the wallplate from switch.
3
Remove side sections (if necessary)
Remove the switch and pull it away from the wall.
* If your switch has more than 3 wires attached, see
“Installing Caséta Wireless in a 3-way switch application”
video at www.casetawireless.com/3way
Bend back
and forth.
3
5
1
2
3
1
4
6
Ground
Ground
Ground
7
2
Disconnect all three wires* from the switch.
1 Connect the bare copper (or green) “ground” wire
from the wallbox to the green wire on the dimmer
using a wire connector.
2 Connect either of the remaining wires from the
wallbox to either of the remaining wires on the
dimmer using a second wire connector.
3 Connect the remaining wire from the wall to
the remaining wire on the dimmer using a third
wire connector.
Do not remove outside side sections
on dimmers at the end of gang.
Each dimmer
has inside side
sections removed.
Dimmer at middle has all
side sections removed.
Attach the adapter to the dimmer using the
screws provided and snap on the wallplate.
‘snap’
(If you installed the dimmer next to other dimmers
or switches, you’ll need to install a wallplate with the
correct size/number of openings to accommodate all
the devices.)
Use the screws provided.
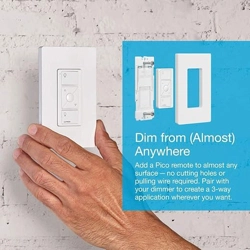
Pairing the dimmer and
Pico
® remote control
Go to www.casetawirless.com/support for
additional troubleshooting suggestions.
Symptoms Probable cause and action
Light does not
turn on or in-wall
dimmer LEDs do
not light up.
• Light bulb(s) burned out.
• Breaker is OFF or tripped.
• Light not properly installed.
• Wiring error.
• FASS
TM switch on the dimmer is
in the Off position.
Light does not
respond to Pico
®
remote control.
• The dimmer failed to pair with
Pico® remote control; see
Pairing the dimmer and Pico
®
remote control.
• The dimmer is already at the
light level the Pico
® remote
control is sending.
• The Pico
® remote control
is outside the 30 ft (9 m)
operating range.
• The Pico
® remote control
battery is low.
• The Pico
® remote control
battery is installed incorrectly.
• Bulbs turn off
while being
dimmed.
• Bulbs turn on
at high light
level but do not
turn on at a low
light level.
• Bulbs flicker
or flash when
dimmed to a
low light level.
Verify bulbs are marked
dimmable and visit
www.casetawireless.com/
lowend for information on
adjusting the dimmer for best
bulb performance.
Love Caséta
TM Wireless dimmers? Have ideas
for making them better? Tell us what you think
and we’ll extend your warranty by 1 year.
www.casetawireless.com/register
For advanced features, tips for using Caséta
TM Wireless dimmers with CFLs and LEDs, the complete CasétaTM Wireless
product line, and more, please visit www.casetawireless.com/features
Changing the favorite light level
on the Pico
® remote control
(sold separately)
You can use the round “favorite”
button on the Pico
® remote
control to recall a favorite light
level. We’ve set it to 50%, but you
can change it to any level you like.
Favorite
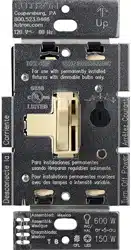
Replacing light bulbs using FASSTM
Pull the FASSTM switch out on the in-wall dimmer to
remove power at the light socket.
CAUTION
Use only with permanently installed fixtures with
dimmable LED, dimmable CFL, halogen, or
incandescent,lamps. To avoid overheating and
possible damage to other equipment, do not use
to control receptacles, motor-driven appliances,
or transformer-supplied appliances.
Codes
Install in accordance with all national and local
electrical codes.
Grounding
When no “grounding means” exist in wallbox, the
National Electrical Code (NEC
®) allows a control to
be installed as a replacement if 1) a nonmetallic,
noncombustible faceplate is used with nonmetallic
attachment screws or 2) the circuit is protected by a
ground fault circuit interrupter (GFCI). When installing
a control according to these methods, cap or remove
green wire before screwing control into wallbox.
FCC/IC Information
This device complies with part 15 of the FCC Rules and Industry Canada
license-exempt RSS standard(s). Operation is subject to the following two
conditions: (1) This device may not cause interference, and (2) this device
must accept any interference, including interference that may cause undesired
operation. Modifications not expressly approved by Lutron Electronics Co.,
Inc. could void the user’s authority to operate this equipment.
Note: This equipment has been tested and found to comply with the limits for
a Class B digital device, pursuant to part 15 of the FCC Rules. These limits
are designed to provide reasonable protection against harmful interference
in a residential installation. This equipment generates, uses and can radiate
radio frequency energy and, if not installed and used in accordance with
the instructions, may cause harmful interference to radio communications.
However, there is no guarantee that interference will not occur in a particular
installation. If this equipment does cause harmful interference to radio or
television reception, which can be determined by turning the equipment off
and on, the user is encouraged to try to correct the interference by one or
more of the following measures:
—Reorient or relocate the receiving antenna.
—Increase the separation between the equipment and receiver.
— Connect the equipment into an outlet on a circuit different from that to which
the receiver is connected.
—Consult the dealer or an experienced radio/TV technician for help.
Lutron, , and Pico are registered trademarks and FASS, Caséta, and
Smart Bridge are trademarks of Lutron Electronics Co., Inc. NEC is a
registered trademark of the National Fire Protection Association, Quincy,
Massachusetts. Google and the Google logo are registered trademarks of
Google Inc., used with permission.
© 2014 Lutron Electronics Co., Inc
P/N 0301729 REV B
Lutron Electronics Co., Inc.
7200 Suter Road
Coopersburg, PA 18036-1299, U.S.A.
3
3
4
4
2
2
1
2
2
2
1
2
2
2
Hold for 6 seconds until LEDs
blink twice on in-wall dimmer.
New favorite level is now saved.
3
Set desired light level on dimmer
4
Press and hold “favorite” button on remote
Important note:
Troubleshooting
Hold for 6 seconds
until lights flash 3 times.
5
5
5
Device Ratings
In-wall dimmer
PD-6WCL
120 V~ 50/60 Hz
Important notes:
1. For indoor use only.
2. Operate between 32 ˚F (0 ˚C) and 104 ˚F (40 ˚C).
Repeat steps to pair other
Pico
® remote controls.
Wireless
Pico® remote control (sold separately)
On
Off
Darker
Brighter (with raised icon)
FASS
™
Front Accessible
Service Switch
In-wall dimmer
On
Off
Darker
Favorite
Brighter
With a smartphone or tablet (Bridge required, sold separately)
1 Press and hold “off” button on dimmer
2
Press and hold “off” button on remote
The Lutron® app will walk you through
setting up your devices.
Download the Lutron® app
www.casetawireless.com/LutronApp
Launch the Lutron® app
Lutron
The CasétaT Wireless dimmer can be controlled from a smartphone
when used with the LutronR Smart BridgeT.
If you are using the dimmer and remote control with the LutronR
Smart BridgeT follow the instructions below.
Search for “Lutron Caseta”
3
Press and hold “off” button on remote
Use the Lutron® app to complete ALL remaining steps
Lutron
LutronR Smart BridgeT
Note: If you are using the dimmer and remote control with
another manufacturer’s bridge, please refer to that manufacturer’s
instructions for set-up.
Lutron
LutronR app
Apple is a trademark of Apple Inc., registered in the U.S. and other countries. App Store is a service mark of Apple Inc.
Without a smartphone or tablet (Bridge not required)
Warranty
For warranty information, please visit
www.casetawireless.com/warranty
P/N 0301729 REV B
Incandescent—up to 600 W
Control
three ways
Add devices
• PicoR remotes
• Dimmers
• Shades
Schedule
your lights
Connect
while away
Important note:
Removing side sections reduces the dimmer’s
maximum wattage rating. See the chart below
for maximum wattage information.
* For maximum wattage information when
mixing light bulb types see
www.casetawireless.com/ganging
Maximum* wattage derating chart
(120 V~ 50/60 Hz)
Side sections
removed
None 1 side 2 sides
LED & CFL 150 W 150 W 150 W
or
*
Incandescent &
Halogen
600 W 500 W 400 W
3
3
3
Halogen—up to 600 W
Using your controls
1
2
3
1
2
2
2
1
2
2
2
APAGADO
ENCENDIDO
Atenuador empotrable
Uso del kit CasétaT Wireless (se vende por separado)
1
Corte la corriente del cortacircuitos
3
5
1
4
6
Tierra
Tierra
7
2
5
5
5
Clasificación del dispositivo
Atenuador empotrable
PD-6WCL
120V~ 50/60Hz
Control remoto Pico
® (se vende por separado)
guía de inicio rápido
Contenido suministrado
Doble su garantía
Atenuador empotrable
(PD-6WCL)
Herramientas que necesitará
Destornillador de cabeza plana
Conectores de cables (3)
Destornillador Phillips
Alicates
Tornillos (2)
¿Le encantan los atenuadores Caséta
TM Wireless?
¿Tiene alguna idea para mejorarlos? Cuéntenos su
opinión y extenderemos la garantía por 1 año.
www.casetawireless.com/register
ADVERTENCIA: RIESGO DE
DESCARGA ELÉCTRICA.
Puede resultar en lesiones graves o la muerte.
Corte la corriente del cortacircuitos o fusible
antes de instalar.
Algunas luces tienen un interruptor de
pared, mientras que otras tienen dos o
más interruptores de pared (como luces de
escaleras, que tienen un interruptor tanto al
inicio como al final de las escaleras). Hemos
incluido instrucciones para luces con un
interruptor de pared (llamado unipolar). Si su luz
tiene más de un interruptor (llamado de 3vías),
visite
www.casetawireless.com/3way
para obtener las instrucciones completas de
instalación y los videos instructivos.
Nota importante:
Instalación de luces con un interruptor de pared (unipolar)
Cómo instalar el atenuador
2
Retire el interruptor actual de la pared
Retire la placa de pared del interruptor.
Retire el interruptor y aléjelo de la pared.
* Si su interruptor tiene más de 3 cables, consulte
el video “Installing Caséta
TM Wireless in a 3-way
switch application” (Cómo instalar Caséta
TM Wireless
en una aplicación de interruptor de 3vías)
a www.casetawireless.com/3way
Desconecte los tres cables* del interruptor.
3
Retire las secciones laterales
(en caso de ser necesario)
Doble hacia atrás
y hacia delante.
No quite las secciones laterales externas
de los atenuadores al final de la conexión.
Cada atenuador tiene
las secciones laterales
internas quitadas.
El atenuador del medio
tiene todas las secciones
laterales quitadas.
4
Conecte el atenuador
5
Coloque el atenuador
1 Conecte el cable a tierra de cobre sin protección
(o verde) desde la caja de pared al cable verde del
atenuador utilizando un conector de cable.
2 Conecte uno de los cables restantes de la caja de
pared a uno de los cables restantes del atenuador
utilizando un segundo conector de cable.
3 Conecte el otro cable de la caja de pared al cable
restante del atenuador utilizando un tercer conector
de cable.
Use los tornillos proporcionados.
Tierra
6
Coloque la placa de pared
7
Encienda la corriente
del cortacircuitos
Conecte el adaptador al atenuador con los tornillos
suministrados y encájelo en la placa de pared.
(Si instaló el atenuador al lado de otros atenuadores
ointerruptores, debe instalar una placa de pared que
tenga la cantidad correcta de orificios y del tamaño
correcto para instalar todos los dispositivos.)
Encendido
Apagado
Más oscuro
Más brillante
(con icono en relieve)
Interruptor
de servicio
accesible desde
el frente FASS
™
Atenuador
empotrable
Encendido
Apagado
Más oscuro
Favorito
Más brillante
Cómo reemplazar los focos de luz usando FASSTM
Deslice el interruptor FASSTM hacia fuera en el
atenuador empotrable para desconectar la energía en
el zócalo de la luz.
Notas importantes:
1. Solo para uso en interiores.
2. Opere entre 0°C (32°F) y 40°C (104°F).
x3
Presione durante
6segundos hasta
que las luces LED
comiencen
a parpadear.
1
Mantenga presionado el botón
“apagado”del atenuador
2
Mantenga presionado el botón
“apagado”del control remoto
Cómo emparejar el atenuador
con el control remoto PicoR
Para ver características avanzadas, consejos para usar los atenuadores CasétaTM Wireless con luces LFCA y LED, la
línea completa de productos Caséta
TM Wireless y más, visite www.casetawireless.com/features
Mantenga presionado
durante 6segundos
hasta que la luz
parpadee 3 veces.
Repita los pasos para emparejar
otros controles remotos Pico
R.
x2
Cómo cambiar el nivel de luz
favorito en el control remoto
PicoR (se vende por separado)
Puede usar el botón redondo
“favorito” en el control remoto
Pico para recuperar un nivel de
luz favorito. Lohemos establecido
en 50%, pero puede cambiarlo al
nivel que desee.
Favorito
Presione durante 6segundos
hasta que las luces LED
parpadeen dos veces en el
atenuador. El nuevo nivel
favorito ha sido guardado.
3
Configure el nivel de luz deseado
enelatenuador
4
Mantenga presionado el botón
“favorito”del control remoto
Ingrese a www.casetawireless.com/support para
obtener sugerencias adicionales para la resolución
de problemas.
Resolución de problemas
PRECAUCIÓN
Use solo con luminarias permanentes con lámparas
LED atenuables, LFCA atenuables, halógenas, o
incandescentes. Para evitar el sobrecalentamiento
y posibles daños a otros equipos, no lo use para
controlar receptáculos, electrodomésticos con motor
o electrodomésticos con transformador.
Códigos
Instale de acuerdo con todos los códigos eléctricos
nacionales y locales.
Conexión a tierra
Cuando no exista ningún medio de conexión a
tierra en la caja de pared, el NEC
® (Código Eléctrico
Nacional) permite la instalación de un control como
reemplazo si 1) se usa una placa frontal incombustible
que no sea metálica con tornillos de sujeción no
metálicos o 2) el circuito está protegido por un GFCI
(interruptor de circuito por falla a tierra). Al instalar un
control de acuerdo con estos métodos, tape o retire
el cable verde antes de atornillar el control a la caja de
pared.
Información de la FCC/IC
Este dispositivo cumple con la parte 15 de las reglas de la FFC (Comisión
Federal deComunicaciones) y con las normas RSS de IC (Industry Canada)
para dispositivos exentos de licencia. La operación está sujeta a las dos
condiciones siguientes: (1)Estedispositivo no debe causar interferencia
perjudicial y (2) este dispositivo debe aceptar cualquier interferencia recibida,
incluyendo las que pueden causar una operación indeseada. Cualquier cambio
o modificación sin la aprobación explícita deLutron Electronics Co., Inc. puede
anular la autorización del usuario para operar elequipo.
Nota: Este equipo ha sido probado y se comprobó que cumple con los límites
para dispositivos digitales de ClaseB, de acuerdo con la Parte15 de las
Reglas de la FCC. Estos límites se han diseñado para proveer una protección
razonable contra interferencias dañinas en una instalación residencial. Este
equipo genera, usa ypuede emitir energía de radiofrecuencia y si no se instala
yutiliza de acuerdo con las instrucciones, puede causar interferencia dañina en
las comunicaciones de radio. Sin embargo, no hay garantía de que no ocurrirá
interferencia en una instalación determinada. Si este equipo causa interferencia
dañina en la recepción de la radio ola televisión, que se puede determinar
encendiendo y apagando el equipo, elusuario puede tratar de corregir la
interferencia mediante uno o más de los siguientes procedimientos:
—Cambiar la orientación o ubicación de la antena receptora.
—Aumentar la separación entre el equipo y el receptor.
— Conectar el equipo a un receptáculo que esté en un circuito diferente al del
receptor.
— Consultar al distribuidor o a un técnico experimentado en radio/TV para
obtener ayuda.
Garantía
Para obtener información sobre la garantía, visite
www.casetawireless.com/warranty
Lea antes de instalar.
Bienvenido
, y gracias por comprar el atenuador
empotrable Caséta
TM Wireless. Para controlar sus luces
desde una aplicación o un control remoto, deberá reemplazar
un interruptor existente por un atenuador empotrado Caséta
Wireless.
Antes de instalar el atenuador, vea el video de
instalación en www.casetawireless.com/support
¡Esperamos que disfrute la comodidad de
Caséta
TM Wireless!
Síntomas Causa probable y acción
La luz no se
enciende o no
se encienden los
LED del atenuador
empotrable.
• Los foco(s) están quemados.
• El cortacircuitos está apagado
osedisparó.
• La luz no está instalada
correctamente.
• Error de cableado.
• El interruptor FASS
TM del
atenuador está apagado.
La luz no
responde al
control remoto
Pico
®.
• Falló el emparejamiento del
atenuador con el control
remoto Pico
®; consulte Cómo
emparejar elatenuador con el
control remotoPico
®.
• El atenuador ya se encuentra
en el nivel de luz solicitado por
el control remoto Pico
®.
• El control remoto Pico
®
está fuera del rango de
funcionamiento de 9m
(30pies).
• La batería del control remoto
Pico
® está baja.
• La batería del control remoto
Pico
® está mal instalada.
• Los focos se
apagan mientras
seatenúan.
• Los focos se
encienden en
un nivel de luz
alto pero no se
encienden en un
nivel de luz bajo.
• Los focos
parpadean
cuando se
atenúan a un
nivel de luz bajo.
Verifique que los focos tengan la
marca de atenuable y visite
www.casetawireless.
com/lowend para obtener
información sobre cómo ajustar
el atenuador para un mejor
rendimiento del foco.
NOTA: Puede combinar focos LFCA y LED
atenuables, así como focos de luz halógenos
e incandescentes, con los atenuadores
Caséta
TM Wireless.
Los focos de luz atenuables LFCA y LED
varían en su rendimiento de atenuación. Si está
utilizando estos focos y parpadean o se apagan,
visite www.casetawireless.com/lowend
para obtener información sobre cómo ajustar el
atenuador para un mejor rendimiento del foco.
Para obtener una lista completa de los
LFCA y LED atenuables compatibles, visite
www.casetawireless.com/bulblist
Los focos de luz compatibles incluyen:
Cree
®
BA19-08027OMF-12DE26-1U100
CR6-575L
EcoSmart
®
ECS BR30 W27 FL 120
ECS 20 WW FL 50WE 120
Feit
®
A19/OM/LED
Philips
®
9290002295
Sylvania
®
LED12A19/DIM/O/827
LED21PAR38/DIM/P/930/FL30
LED
—hasta 150W
LFCA—hasta 150W
Incandescente—hasta 600W
Funciona con focos de luz
atenuable de bajo consumo
energético:
Lutron Electronics Co., Inc.
7200 Suter Road
Coopersburg, PA 18036-1299, E.U.A.
Wireless
Lutron, , y Pico son marcas registradas y FASS, Caséta, y Smart
Bridge son marcas comerciales de Lutron Electronics Co., Inc. NEC
es una marca registrada de National Fire Protection Association,
Quincy,Massachusetts. Google y el logotipo de Google son marcas
registradas de Google, Inc., utilizadas con autorización.
© 2014 Lutron Electronics Co., Inc
P/N 0301729 REV B
Con un teléfono inteligente o una tableta
(se requiere un Smart BridgeT que se vende por separado)
1 Press and hold “off” button on dimmer
2
Press and hold “off” button on remote
La aplicación LutronR lo guiará por la
configuración de sus dispositivos.
Descargue la aplicación Lutron®
www.casetawireless.com/LutronApp
Inicie la aplicación Lutron®
Lutron
El atenuador CasétaT Wireless se puede controlar con un teléfono
inteligente cuando se utiliza con el dispositivo de conexión inteligente
Lutron
®.
Si utiliza el atenuador y el control remoto con el Lutron
R Smart BridgeT
siga las instrucciones a continuación.
Busque “Lutron Caseta”
3
Press and hold “off” button on remote
Utilice la aplicación de Lutron® para completar TODOS los pasos restantes
Lutron
LutronR Smart Bridge
Nota: Si utiliza el atenuador y el control remoto con el
dispositivo de conexión de otro fabricante, consulte las
instrucciones del fabricante para configurarlo
Lutron
Aplicación
Lutron
®
Apple es una marca registrada de Apple Inc. en E.U.A. y en otros países. App Store es una marca de servicio de Apple Inc.
Sin un teléfono inteligente o una tableta
(no se requiere un Smart BridgeT)
P/N 0301729 REV B
Controle
de tres
maneras
Añada dispositivos
• Controles
remotos Pico
®
• Atenuadores
• Persianas
Programe
sus luces
Conecte
a larga
distancia
Nota importante:
Cuando retira las secciones laterales, se reduce
el vataje derégimen máximo. Consulte el cuadro
a continuación para obtener la información de
vataje máximo.
* Para obtener información del vataje máximo al
combinar tipos de focos de luz, consulte
www.casetawireless.com/ganging
Cuadro de reducción de vataje máximo*
(120 V~ 50/60 Hz)
Secciones
laterales quitadas
Ninguna 1 lateral
2
laterales
LED y LFCA 150W 150W 150W
o
*
Incandescente
yhalógena
600W 500W 400W
3
3
3
Halógeno—hasta 600W
Cómo usar sus controles