Loading ...
Loading ...
Loading ...
13
A
B
D
C
HORIZONTAL EXHAUST INSTALLATION ONLY
A
B
Install the hood (EZ1 brackets)
NOTE: The following procedure applies to both
framed or frameless cabinet installations.
1. Run house power cable between service panel and
hood location.
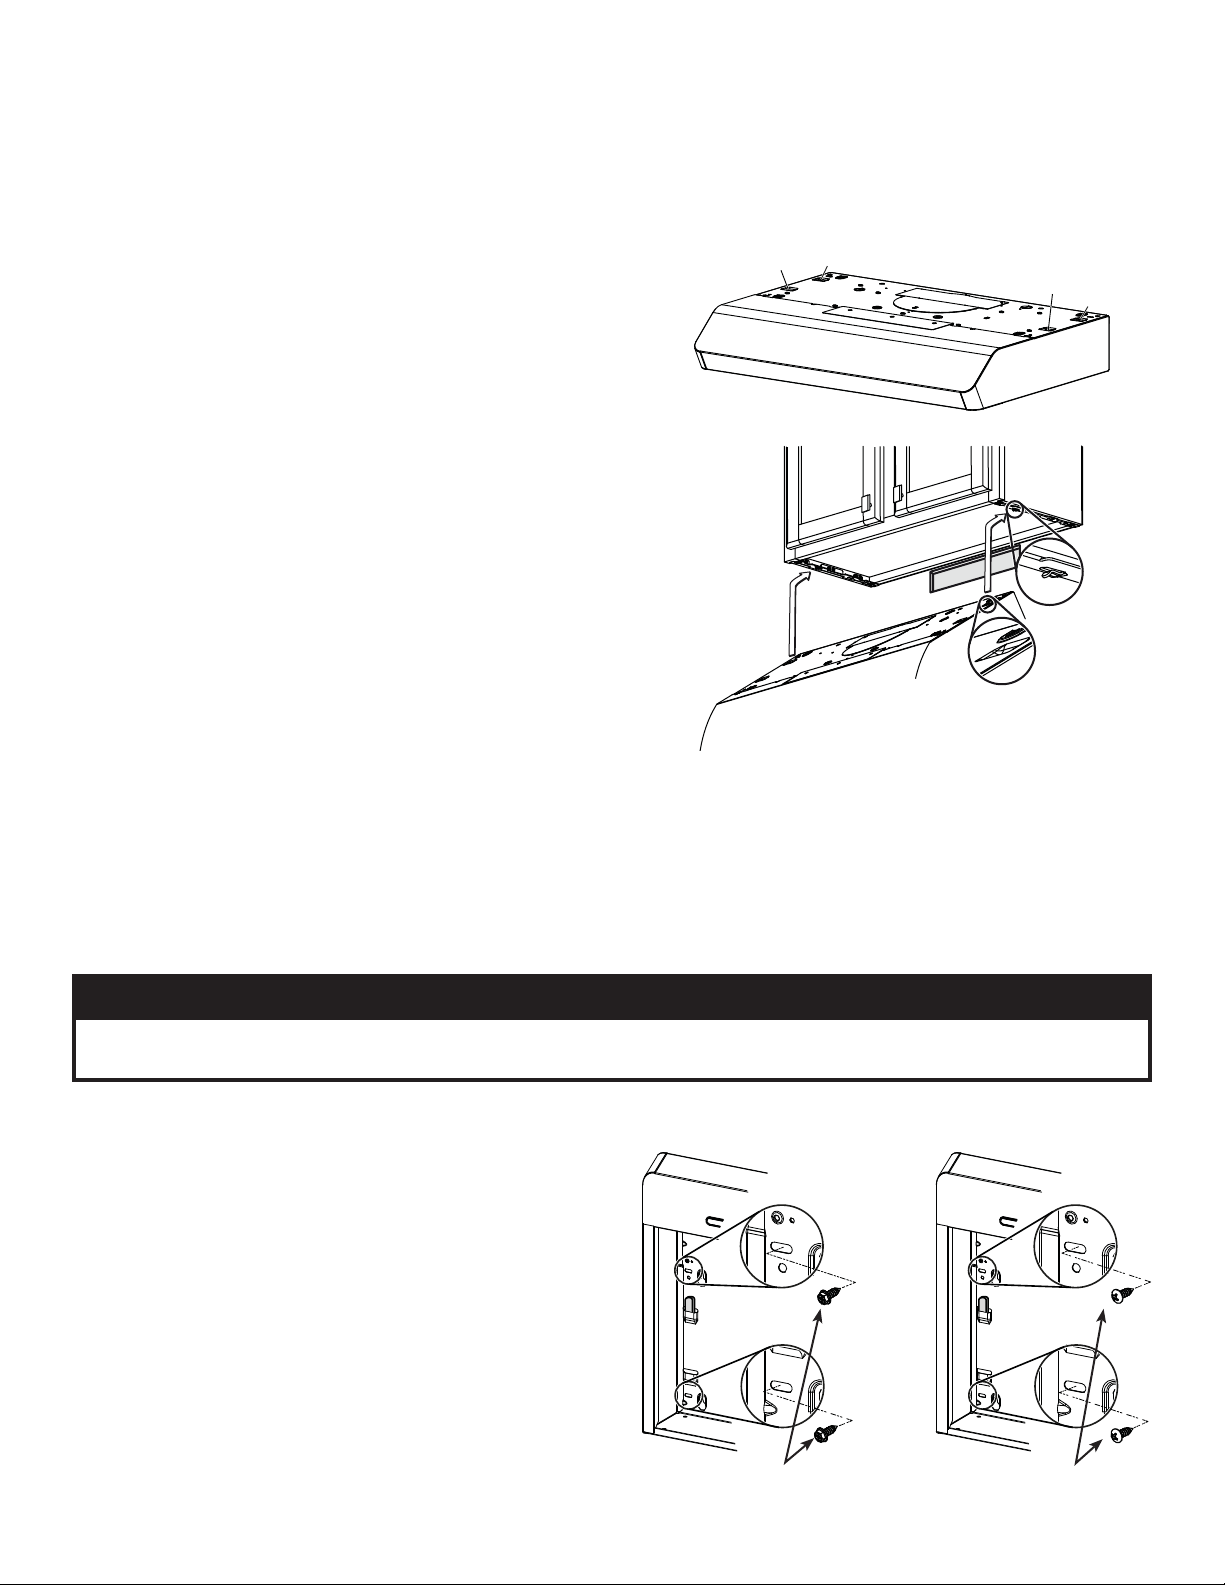
2. There are 2 pairs of recessed holes on each side of the
top of the hood (on rear: A and B, on front C and D on
illustration below); these holes allow the range hood to
hang on the brackets (previously installed).
3. Temporarily hang the hood on the brackets using its
2 recessed REAR HOLES (A and B). While holding the
hood, run the house power cable into the hood through
the strain relief previously installed i
n step 5 on page 8.
4. Unhook the rear holes from the brackets and hang the
hood using its 2 recessed FRONT HOLES (C and D).
While holding the hood, attach the power cable to the
hood using the strain relief.
VERTICAL EXHAUST INSTALLATION ONLY
5. Hang the hood on the brackets using the 2 recessed
FRONT HOLES (C and D). While holding the hood, run
the house power cable into the hood through the strain
relief previously installed in step 5 on page 8. Attach
power cable to the hood.
DUCTED INSTALLATIONS ONLY
6. Connect the ductwork to the hood and use metal foil duct tape to make joints secure and air-tight. Make sure the
damper assembly (or round duct plate) enters the ductwork and that the damper opens and closes freely.
FRAMED CABINET FRAMELESS CABINET
W
OOD
SCREWS
METAL
SCREWS
7. For framed cabinet, secure the hood to the EZ1 brackets
using 4 no. 8-18 x 1/2” metal screws (screws included
in parts bag). Insert 2 screws per side, in the slots (as
shown in inset on illustration beside).
8. For frameless cabinet, secure the hood to the cabinet
using 4 no. 8 x 5/8” round head wood screws (screws
included in parts bag). Insert 2 screws per side, in the
slots (as shown in inset on illustration beside).
Loading ...
Loading ...
Loading ...