Loading ...
Loading ...
Loading ...
9
1
7
6
5
4
3
2
1
9
HT-SL72 / HT-SL77
E-9
2012 January 31
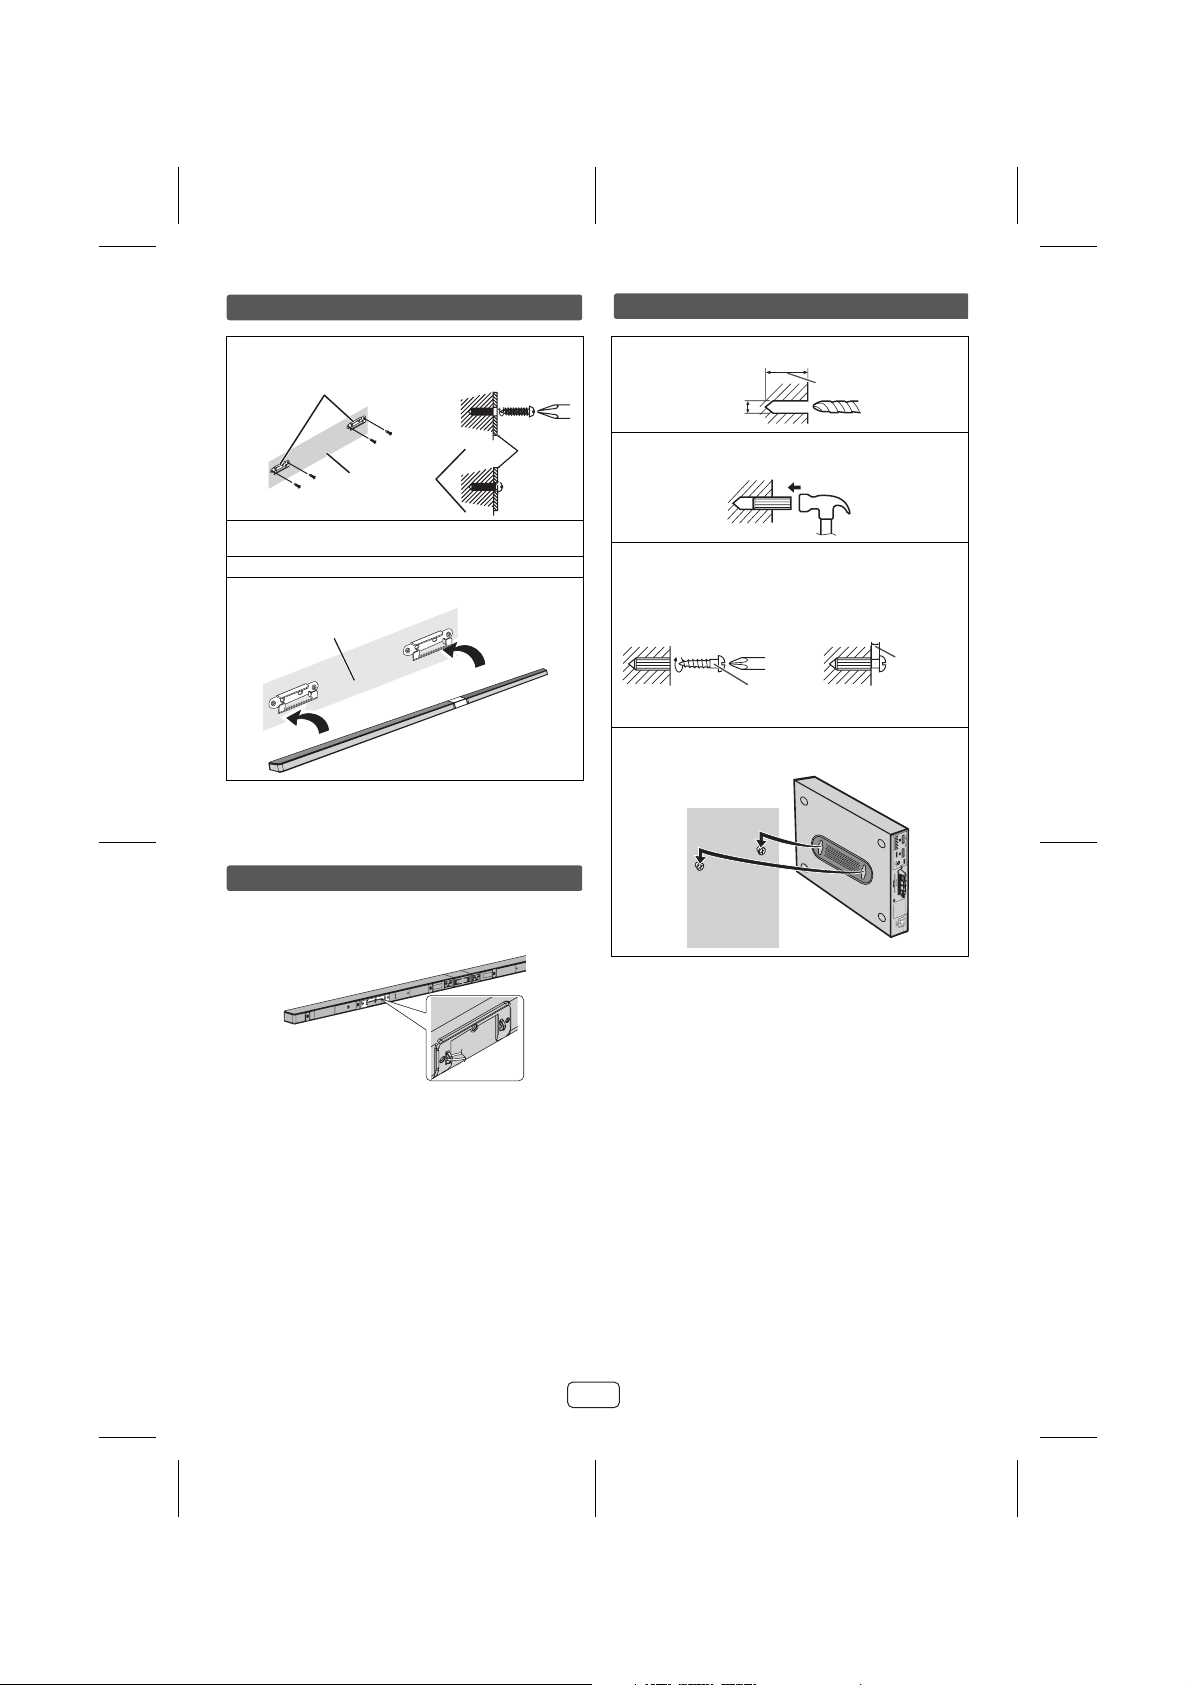
Note:
Make sure all screws are fully tightened. (screws are not
supplied)
Safety wires (not supplied) are useful to prevent the sound
bar from falling off the table.
Loop the safety wires (not supplied) into each hole as
shown and tie the safety wires to the LCD TV stand.
4 Screw the wall mount angle to the wall as shown in
the illustration. (Total screw is 4 pieces)
5 Align the wall mount slot at the sound bar to the
wall mount angle.
6 Slot the sound bar into the wall mount angle.
7 Fix them securely.
Installing the sound bar (continued)
Wall surface
Wall mount angle
Wall
mount
angle
(screws x 2)
(screws x 2)
Wall surface
Falling prevention
1 Make a hole in the wall using a drill.
2 Fix a wall mount plug into the hole using a
hammer, until it is flush with the wall surface.
3 Fix screws into the wall for the speaker, as
shown in the illustration.
● Make sure that the screw and the wall can support
a load of 45 lbs (20 kg).
● Fix the screws, so the screw head extends about
7/32" (5.5 mm) from the wall.
4 Tighten the screws. Hook the TX-BOX on the
screw heads and make sure it is properly secured.
Installing the TX-BOX
1-1/4" (32 mm)
3/8" (8 - 9 mm)
Wall surface
Wall mounting
screw
7/32"
(5.5 mm)
Wall surface
Wall surface
Loading ...
Loading ...
Loading ...