User manual Refrigerator
Operating Instructions
About the control on the refrigerator.

The control will look like the one above.
The arrow indicates the setting selected.
Control Settings
The temperature control maintains the temperature in the refrigerator. 1 is the warmest setting; higher numbers are colder settings with 7 being the coldest setting. The typical setting is 3.
Allow 24 hours for the refrigerator to reach the desired temperature.
If you want a colder or warmer temperature, move the dial one setting at a time. Moving the control to O stops cooling but does not turn off the power to the refrigerator. Setting the control too high may cause freezing in the refrigerator depending on the room temperature.
How To Test Temperatures
Use the milk test. Place a container of milk on a shelf and check it a day later. If the milk is too warm or too cold, adjust the temperature control.
After changing the control, allow 24 hours for the refrigerator to reach the temperature you have set.
Shelves
To remove a shelf, lift up the back slightly and pull forward.
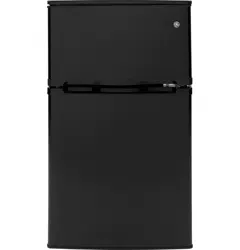
Freezer Compartment
This compartment is designed for production of ice cubes and short-term storage of some commercially frozen foods.
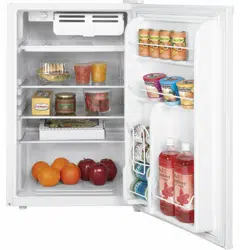
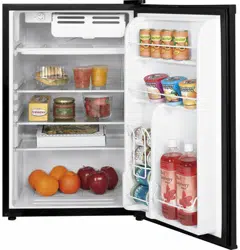
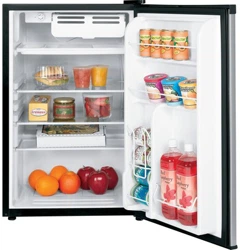
Door Shelves
Shelves on the door provide convenient storage for frequently used items. The fresh food doors are capable of storing large bottles for your convenience.
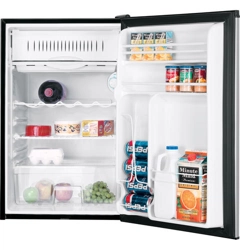
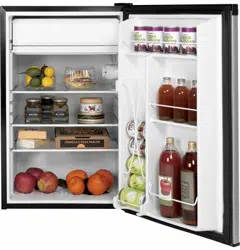
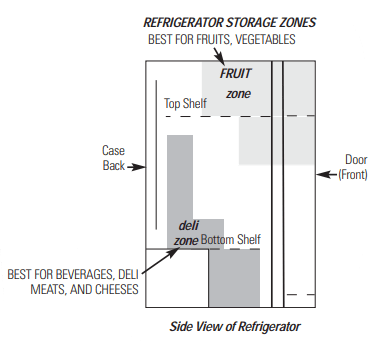
Fresh Food Storage Zones
For best results follow the recommended storage zones:
- The top shelf is best for storing fruits and vegetables.
- The bottom shelf is best for storing beverages, deli meats and cheeses.
Care and cleaning of the refrigerator.
Cleaning the Outside
Keep the outside clean. Wipe with a clean cloth lightly dampened with kitchen appliance wax or mild liquid dish detergent. Dry and polish with a clean, soft cloth.
Do not wipe the refrigerator with a soiled dish cloth or wet towel. These may leave a residue that can erode the paint. Do not use scouring pads, powdered cleaners, bleach or cleaners containing bleach because these products can scratch and weaken the paint finish.
Protect the paint finish. The finish on the outside of the refrigerator is a high quality, baked-on paint finish. With proper care, it will stay new-looking and rust-free for years. Apply a coat of kitchen/ appliance wax when the refrigerator is new, and then at least twice a year.
Cleaning the Inside
To help prevent odors, leave an open box of baking soda in the refrigerator.
Unplug the refrigerator before cleaning. If this is not practical, wring excess moisture out of sponge or cloth when cleaning around the control.
Use warm water and baking soda solution –about a tablespoon (15 ml) of baking soda to a quart (1 liter) of water. This both cleans and neutralizes odors. Rinse and wipe dry.
Other parts of the refrigerator–including door gaskets, fruit and vegetable drawers, and all plastic parts–can be cleaned the same way.
Do not wash any plastic refrigerator parts in the dishwasher
Replacing the Light Bulb

Unplug the refrigerator before replacing a burned-out bulb. Setting the controls to 0 does not remove power to the light circuit.
The light bulb is located behind the temperature control housing and is visible through the clear lens.
Using a Philips screwdriver, unscrew the lens and pull horizontally until the lens is removed. Gently unscrew the light bulb and replace with a bulb of 15 watts or less.
Defrosting
Defrost whenever frost on the wall of the Freezer compartment becomes 1/4” thick. Never use a sharp or metallic instrument to remove frost as it may damage the cooling coils. (A punctured cooling coil will cause serious problems and void the warranty.) We recommend using a plastic scraper. Do not use any electrical device in defrosting your refrigerator.
To defrost:
- Remove foods from the Freezer and Fresh Food compartments.
- Set the temperature control dial to 0.
- Place a towel in the Freezer Compartment to soak up water.
Defrosting usually takes a few hours. To defrost faster, keep the door open. Also using a hair dryer on the low setting may speed defrosting.
Warning: using excessive heat may damage the plastic liner !
Do not pour water into the Freezer or Fresh Food compartments.
After defrosting:
- Empty water from the drip tray. Wash the tray with warm water.
- Wipe the Freezer and Fresh Food compartments with a damp cloth.
- Turn the temperature control to the desired setting and return food to the refrigerator.
NOTE: If ice buildup is very thick, it may keep the ice tray compartment door from opening or closing completely. Don’t try to force it open; after defrosting, the door will open and close easily
Preparing for Vacation
For long vacations or absences, remove food and unplug the refrigerator. Move the control to the 0 position, and clean the interior with a baking soda solution of one tablespoon (15 ml) of baking soda to one quart (1 liter) of water. Leave the door open.
Preparing to Move
Secure all loose items such as shelves and ice trays by taping them securely in place to prevent damage.
Be sure the refrigerator stays in an upright position during moving.
Installation Instructions
Refrigerator Location
- Do not install the refrigerator where the temperature will go below 50°F (10°C) because it will not run often enough to maintain proper temperatures.
- Install it on a floor strong enough to support it fully loaded.
- Do not install it closer than 5”(13 cm) next to a range.
The following applies only to the 2, 3 and 4 Cubic Foot Models:
- Do not install it in a recessed area.
- Do not build in the refrigerator.
Clearances
Allow the following clearances for ease of installation and proper air circulation.
Sides 1/2” (13 mm)
Top 2” (51 mm)
Back 2” (51 mm)*
*From the rear cabinet surface to the wall
Leveling Legs (on some models)
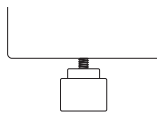
Adjustable legs at the front corners of the refrigerator should be set so the refrigerator is firmly positioned on the floor and the front is raised just enough that the door closes easily when opened about halfway.
To adjust the leveling legs, turn the legs counterclockwise to lower the refrigerator, clockwise to raise it.
Door Reversal
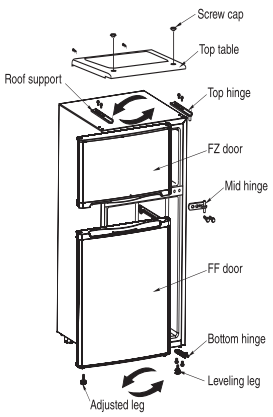
- Remove the two screws from under the screw caps located on the top cover.
- Remove the two screws from the back of the top cover and remove top cover.
- Remove the top hinge by removing the two screws, as shown.
- Remove the freezer door by lifting off of the middle hinge.
- Remove the J-shaped hinge support on the bottom of the freezer door.
- Install new J-shaped hinge support on the opposite side of the freezer door bottom. The new J-shaped hinge support and mounting screw are located in a zip lock bag that is shipped with the refrigerator.
- Remove the fresh food door by lifting off the bottom hinge.
- Remove both adjustable legs.
- Remove the bottom hinge and re-install on the opposite side of the refrigerator.
- Re-install the adjustable legs. Insure that the smaller leg is on the same side as the bottom hinge.
- Place the fresh food door on the bottom hinge.
- Place the bottom peg of the middle hinge in the fresh food door. Re-install middle hinge. Make sure the fresh food door is aligned with the refrigerator cabinet before tightening screws.
- Place the freezer door on the top peg of the middle hinge. Place the top hinge peg into the freezer door. Re-install top hinge. Make sure the freezer door is aligned with the refrigerator cabinet before tightening screws..
- Re-install the top cover with four screws..
- Replace the screw caps.
Troubleshooting Tips
| Problem |
Possible Causes |
What To Do |
| Refrigerator does not operate |
Control in 0 position. |
Move the control to a temperature setting. |
| Refrigerator is unplugged. |
Push the plug completely into the outlet. |
| The fuse is blown/circuit breaker is tripped. |
Replace fuse or reset the breaker. |
| Vibration or rattling (slight vibration is normal) |
Front leveling legs (on some models) need adjusting. |
See Leveling Legs. |
| Refrigerator is on an uneven surface. |
Use shims to level the refrigerator. |
| Motor operates for long periods or cycles |
Normal when refrigerator is first plugged in. |
Wait 24 hours for the refrigerator to completely cool down. |
| |
Often occurs when large amounts of food are placed in refrigerator |
This is normal. |
| |
Door left open. |
Check to see if package is holding door open. |
| |
Hot weather or frequent door openings. |
This is normal. |
| |
Temperature control set at the coldest setting |
See About the control. |
| |
Not enough clearance from the wall. |
See Clearances in Preparing to install the refrigerator |
| Fresh Food/Freezer too warm |
Temperature control not set cold enough. |
See About the control.
Note: Changing the temperature control will change the temperatures of both the Fresh food and Freezer compartments.
|
| Warm weather or frequent door openings. |
Set the temperature control one step colder. See About the control. |
| Door left open. |
Check to see if package is holding door open. |
| Cabinet sides are warm |
This is normal for a hot wall type condenser. |
| |
Ice/Frost build up |
See Care and Cleaning |
| Refrigerator has odor |
Foods transmitting odor to refrigerator. |
Foods with strong odors should be tightly wrapped.
Keep an open box of baking soda in the refrigerator; replace every three months.
|
| Interior needs cleaning |
See Care and cleaning |
| Moisture forms on outside of refrigerator |
Not unusual during periods of high humidity. |
Wipe surface dry |
| Moisture collects inside (in humid weather, air carries moisture into refrigerator when door is opened) |
Too frequent or too long door openings. |
|
| Fresh Food/Freezer too cold |
Temperature control set too cold. |
See About the control.
Note: Changing the temperature control will change the temperatures of both the Fresh food and Freezer compartments.
|