
Change for life
Thank you for choosing our product.
Please read this Owner’s Manual carefully before operation and
retain it for future reference.
If you have lost the Owner's Manual, please contact the local agent
or visit www.gree.com or send an email to global@gree.com.cn for
the electronic version.
Owner's Manual
Original Instructions
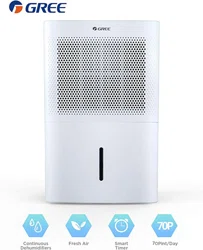
Dehumidifier
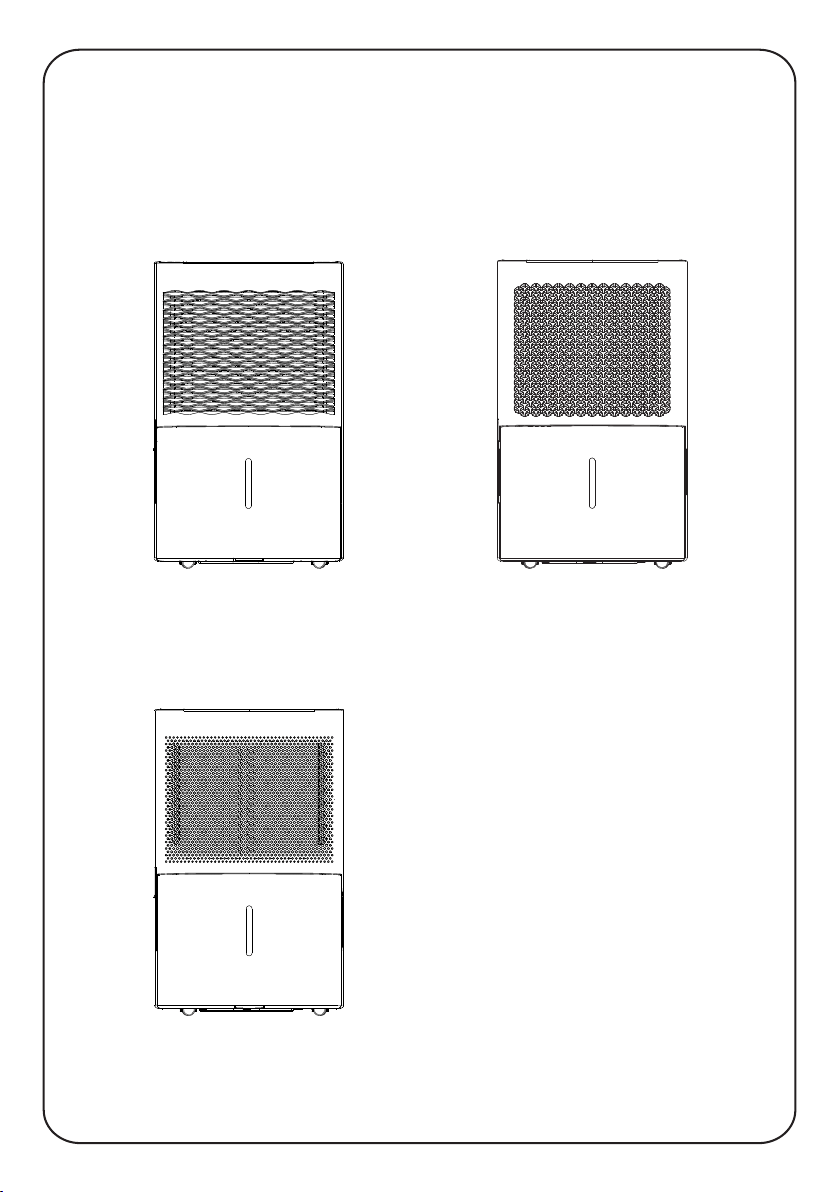
Actual product may be different from above graphics, please refer to actual product.
GDN20AZ-A3EBA3A
GDN30BB-A3EBA3A
GDN45BA-A3EBA3A
GDN20AZ-A3EBA4A
GDN30BB-A3EBA4A
GDN45BA-A3EBA4A
GDN20AZ-A3EBA2A
GDN30BB-A3EBA2B
GDN45BA-A3EBA2A
NOTICE:
Graphics in this manual are only for reference. Please refer to actual
products for specific details.
This appliance is not intended for use by persons (including children) with reduced physical, sensory
or mental capabilities, or lack of experience and knowledge, unless they have been given supervision
or instruction concerning use of the appliance by a person responsible for their safety.
Children should be supervised to ensure that they do not play with the appliance.
Malfunction Codes................................................................................15
Electric Schematic Diagram..................................................................17
Troubleshooting....................................................................................13
Malfunction
Maintenance
● Clean and Maintenance........................................................................10
Operation Instructions
● Operation Method...................................................................................5
● Drainage Option......................................................................................8
Operation Notices
● Operation Area........................................................................................1
● Safety Precautions..................................................................................2
● Parts Name.............................................................................................3
● Check Before Operation.........................................................................4
Content
Explanation of Symbols
Exception Clauses
Indicates a hazardous situation that, if not avoided, will
Manufacturer will bear no responsibilities when personal injury or
1.Damage the product due to improper use or misuse of the product;
2.Alter, change, maintain or use the product with other equipment without abiding
by the instruction manual of manufacturer;
product;
4.After verification, defects are due to improper operation during transportation of
regulations;
5.Operate, repair, maintain the unit without abiding by instruction manual or related
performance of parts and components that produced by other manufacturers;
6.After verification, the problem or dispute is caused by the quality specification or
majeure.
7.The damage is caused by natural calamities, bad using environment or force
3.After verification, the defect of product is directly caused by corrosive gas;
property loss is caused by the following reasons.
result in death or serious injury.
Indicates a hazardous situation that, if not avoided, could
result in death or serious injury.
Indicates a hazardous situation that, if not avoided, may
result in minor or moderate injury.
Indicates important but not hazard-related information,
used to indicate risk of property damage.
Indicates a hazard that would be assigned a signal word
WARNING or CAUTION.
DANGER
WARNING
CAUTION
N OT IC E
1
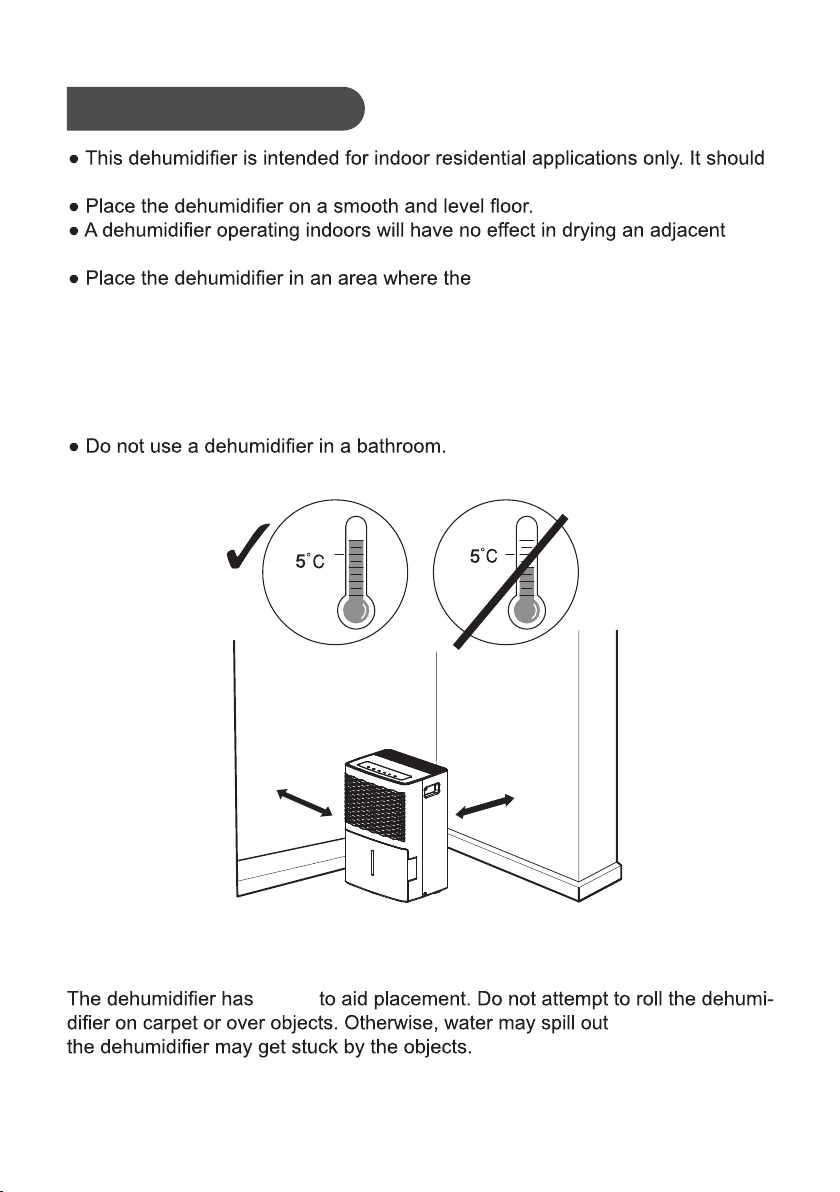
Operation Area
Note:
from the bucket or
NOTICE:
castors
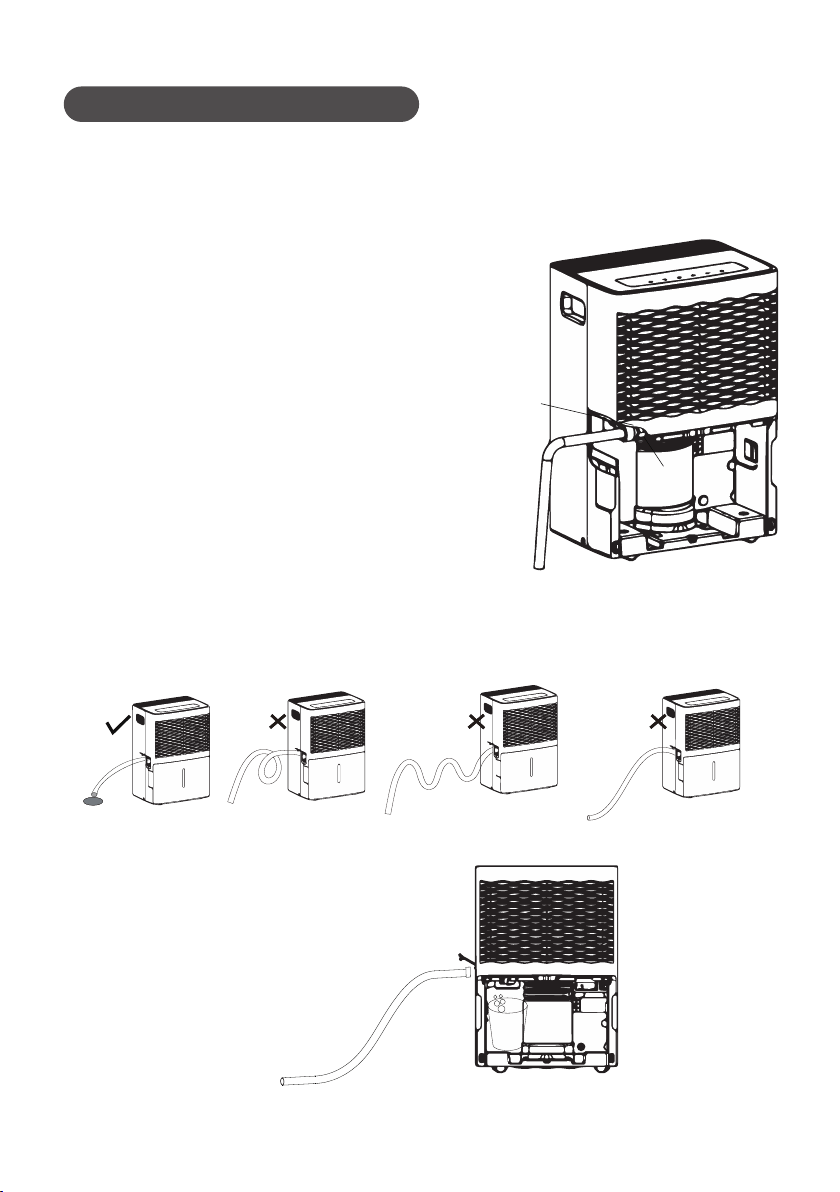
Correct
Above
(41°F)
Wrong
Below
(41°F)
not be used for commercial or industrial applications.
temperature will not below 5°C(41°F)
● Avoid direct sunlight.
.tesolc a sa hcus ,aera desolcne
or above 32°C(90°F). The suggested range of relative humidity is between 30%
and 90%.
Allow at least
18inches
of air space on all sides of the unit.
Close all doors, windows and other outside openings of the room to improve
the working effect.
Please keep the air inlet/outlet clean and not blocked.
●
●
●
at least 18inches
at least 18inches

2
●
●
●
Before operation, please check the po
wer cord if it complies with the require-
Safety Precautions
Warning
This appliance can be used by children aged from 8 years and above and pe-
rsons with reduced physical, sensory or mental capabilities or lack of experie-
nce and knowledge if they have been given supervision or instruction concer-
ning use of the appliance in a safe way and understand the hazards involved.
Children and disabled people are not allowed to use the dehumidifier without
supervision.
Children shall not play with the appliance.
Cleaning and user maintenance s
hall not be made by children without
supervision.
●
●
ment indicated on the nameplate.
Before cleaning, please turn it off and unplug the dehumidifier.
●
ton dna detcennoc llew s'ti erus ekam dna droc rewop dednuorg esu esaelP
Make sure the power cord is not pressed by any hard object.
●
Do not remove the power plug or move unit by pulling the power cord.
Do not use any heating application near the dehumidifier.
Do not remove the power plug in wet hands.
damaged.
Keep children from playing or climbing on the dehumidifier.
Do not place the dehumidifier under dripping objects.
●
Memory function is included in this deh umidifier. When nobody is taking care
of the unit, please turn it off and remove the power plug o
r disconnect power.
Do not repair or disassemble the unit by yourself.
ta rewop tcennocsid esaelp ,)llems denrub .g.e( srucco noitidnoc lamronba fI
once and then contact local dealer.
●
siht fo dir teg ot tnaw uoy fI .erehwyreve fo desopsid eb ton nac reifidimuheD
dehumidifier, please check with l
ecivres noitamrofni ro lasopsid gnildnah laco
● Prohibit operating the unit in the bathroom or laundry room.
center about what to do.
●
Instructions for cord-connected room air conditioners shall i
nclude manufacture’s
recommendations regarding the
na fo esu fI .)sdroc noisnetxe(stes droc fo esu
.siht etats llahs snoitcurtsni eht ,dednemmocer ton si droc noisnetxe
a fo esu eht tsael ta yficeps llahs droc noisnetxe na rof snoitadnemmoceR
tnemhcatta epyt-gnidnuorg rotcudnoc gnidnuorg tnempiuqe na htiw tes droc
plug, and grounding-type connect or(load fitting) ;and the amp city and voltage
rating of the cord set.
The appliance shall be installed in accordance with national
wiring regulations.
If the SUPPLY CORD is damaged, it must be replaced by the man
ufacturer, its
service agent or similarly qualified person in order to avo
id a hazard.
●
●
●
●
●
●
●
●
●
●

Rear Case
Power Plug
Cover Plate
(continuous
drainage)
3
Back Side
Air Outlet
Air-in Grille
Castors
Control
Bucket
Panel
Water
Parts Name
Front Side
Note:Actual product may be different from above graphics, please refer to actual product.
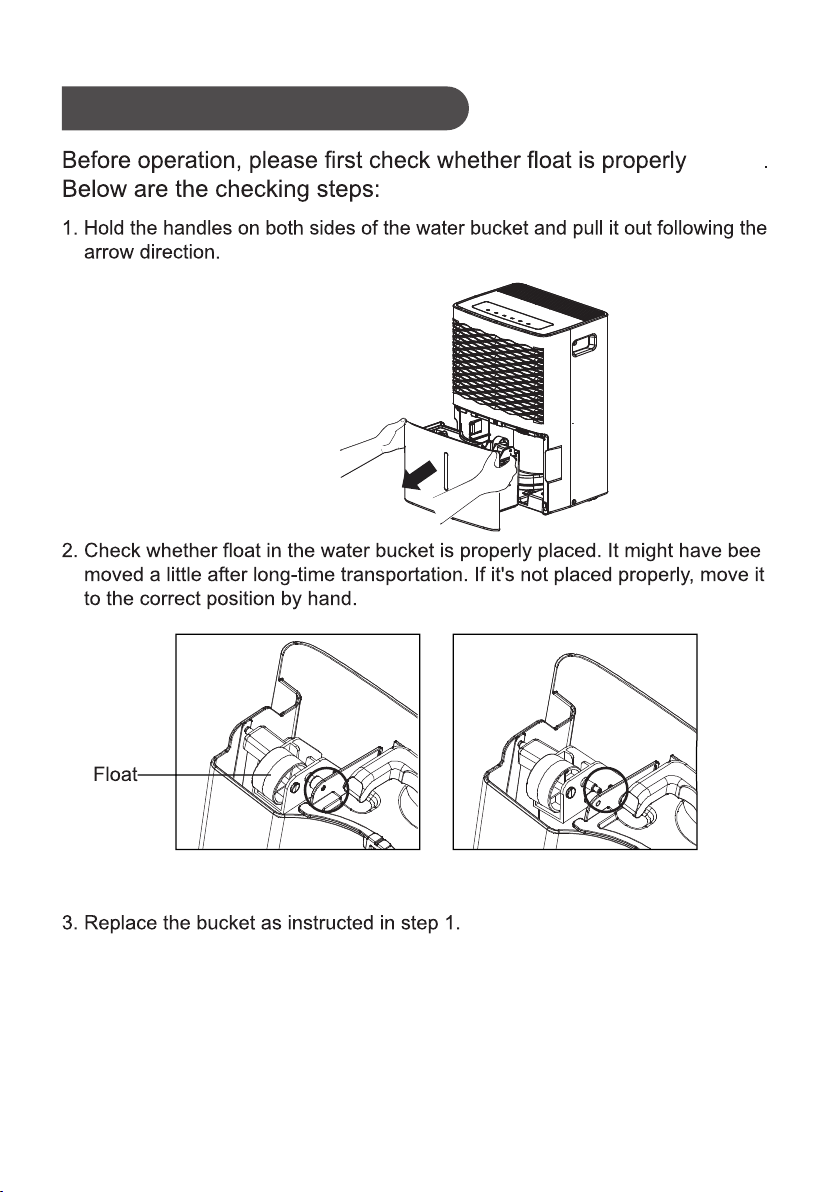
Check Before Operation
placed
n
Correct Position Wrong Position
4
Note:Actual product may be different from above graphics, please refer to actual product.

5
NOTICE:
2
FILTER
After 250 hours of operation, the Filter indicator light will glow to remind
you to clean the filter. Remove the filter and clean it.
Press to rest to turn off the Filter light.See the Clean and Maintenance.
1
Basic Functions of the Buttons
POWER
Press to turn the dehumidifier on and off.
Water bucket must be correctly installed for the dehumidifier to operate.
Do not remove the bucket while unit is in operation.
If you want to use drain hose to drain water away, please install the hose
according to section "Drainage option".
Each time pressing the effective button on the control panel will give out a
"beep" sound.
When power is connected, power indicator on the control panel will be on and
dehumidifier gives out a “beep” sound simultaneously.
Operation Method
Full light indicates
bucket needs to be emptied
or is not in place in the unit
4 hour or 2 hour
Full
delay on/off indicator
lights
Nonstop operation
on indicator light
High, Medium
and Low fan
indicator lights
Filter
indicator light
Low
Medium
High
Nonstop
FILTER
Filter
4
hour
TIMER
Power On
indicator light
2
hour
On
P
POWER
*Actual product may be different from above graphics, please refer to actual product.

6
3
-/+
The humidity level can be set within a range of 80% RH (Relative Humidity)
to. 35% RH (Relative Humidity) in 5% reduce or at continuous operation.To
set the unit for continuous operation, press the - pad until the screen reads
NS.
6
TIMER
While the dehumidifier is in operation, press this pad to set it to automatically
turn off in 2 hours or 4 hours. While the dehumidifier is off, press this pad to
set it to automatically turn on in 2 hours or 4 hours.
4
NOTE: If Nonstop is selected, the dehumidifier will operate continuously at its
maximum dehumidification settings if attached to a hose to drain or until the
bucket is full.For drier air, press the - pad and set to a lower percent value (%).
For damper air, press the + pad and set to a higher percent value (%).
When you first use the dehumidifier, set the humidity control to 45% or 50%.
Allow at least 24 hours for the dehumidifier to achieve the humidity level. If you
still have damper air than desired, set the humidity level to a lower setting or
select Continuous for maximum dehumidification.
Display
Shows the set % humidity level while setting, then shows the actual (± 5%
accuracy) room % humidity level.
5
FAN SPEED
Controls the fan speed.
Press to select either High, Medium or Low fan speed.
Set the fan control to High for maximum moisture removal. When the humidity
has been reduced and quiet operation is preferred, set the fan control to Medium
or Low.

1.
2. Alarm
3. Auto Shut Off
4. Auto Defrost
When frost builds up on the evaporator coils,the compressor will cycle off and
the fan will continue to run until the frost disappears.
5. Power Outage
In the case of a power outage or interruption,the unit will automatically restart,
in the settings last used, after the power is restored.
Other Instructions
Full Light
Glows when the bucket is ready to be emptied,or when the bucket is removed or
not replaced in the proper position.
If the bucket is full or missing for more than three minutes, an alarm will sound for
about 10 seconds to remind you to empty and replace the bucket.
The Water Level Control Switch shuts off the dehumidifier when the bucket is full,
or when the bucket is removed or not replaced in the proper position.
7
8
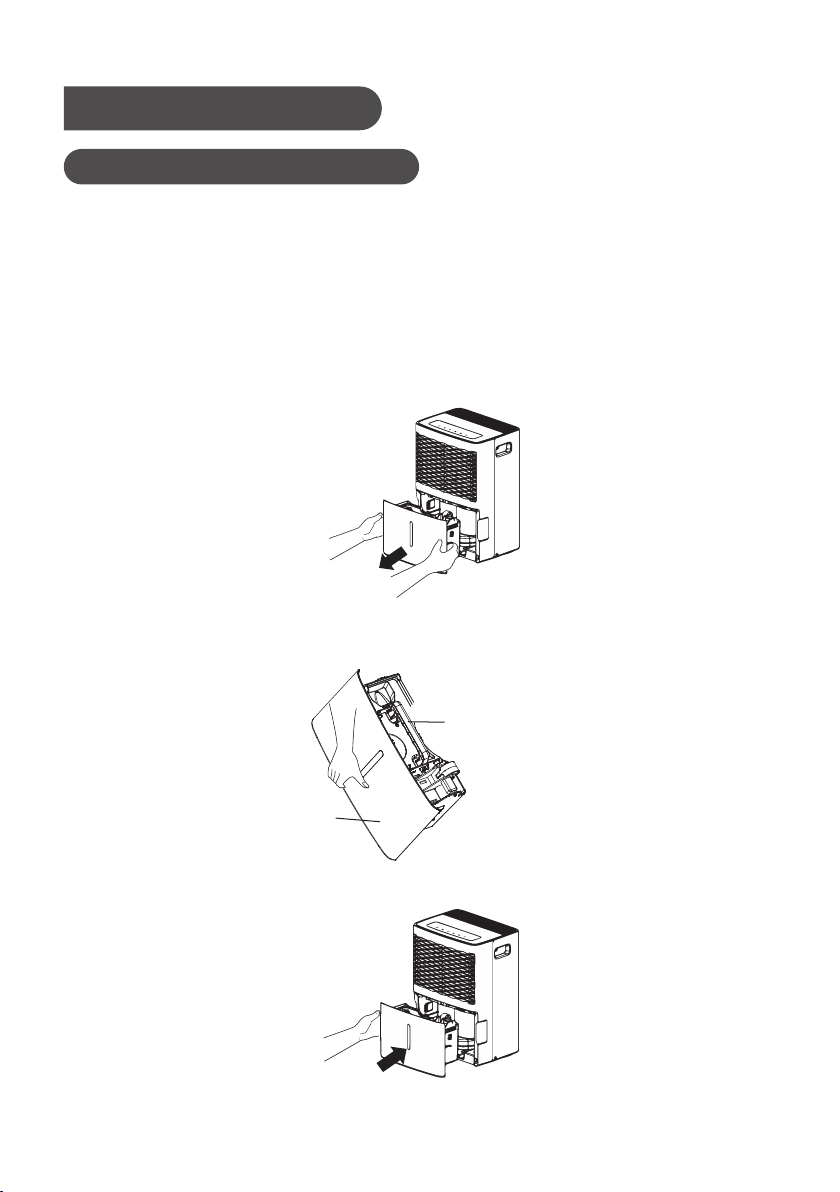
Drainage Option
Option 1 Emptying Manually
● Do not remove the bucket when unit is in operation or has just stopped.
Otherwise it may cause some water to drip on the floor .
● Do not use the hose if using water bucket to collect water. When the hose is
connected, water will be drained out through it instead of into the bucket.
1. Hold the handles on both sides of the water bucket and pull it out following the
arrow direction. (Attention: Pull out the bucket carefully in case the water may
spill out from the bucket and onto the floor.)
2. Empty the bucket by grasping the handle on the top of bucket with one hand
and grasping the bottom of bucket with the other hand.
3. Replace bucket in the dehumidifier according to the arrow direction
Handle
Bucket
NOTICE:
Note:Actual product may be different from above graphics, please refer to actual product.
9
drain hose
nozzle
Option 2 Gravity Drain Hose
1. Hose is not provided, so user shall prepare it in advance.
[Size: The hose thread should have an outer diameter of 11/16 inches (1.0625
inches or 27.0mm), and a pitch of 11.5 TPI.]
4.
When you want to take off the drain hose, prepare a receptacle to
collect water from the nozzle.
2. Remove bucket from the unit as instructed.
3. Thread the drain hose onto the nozzle and make
sure it's securely locked.
NOTICE:
Replace the bucket. Make sure the drain hose goes through the bucket's drain
hole and is placed downward. Lead the hose to the floor drain and then cove
the hole with a lid. Note that drain hose should not be pressed, otherwise
water can not be drained out.
Note:Actual product may be different from above graphics, please refer to actual product.
2.
●
1.
●
●
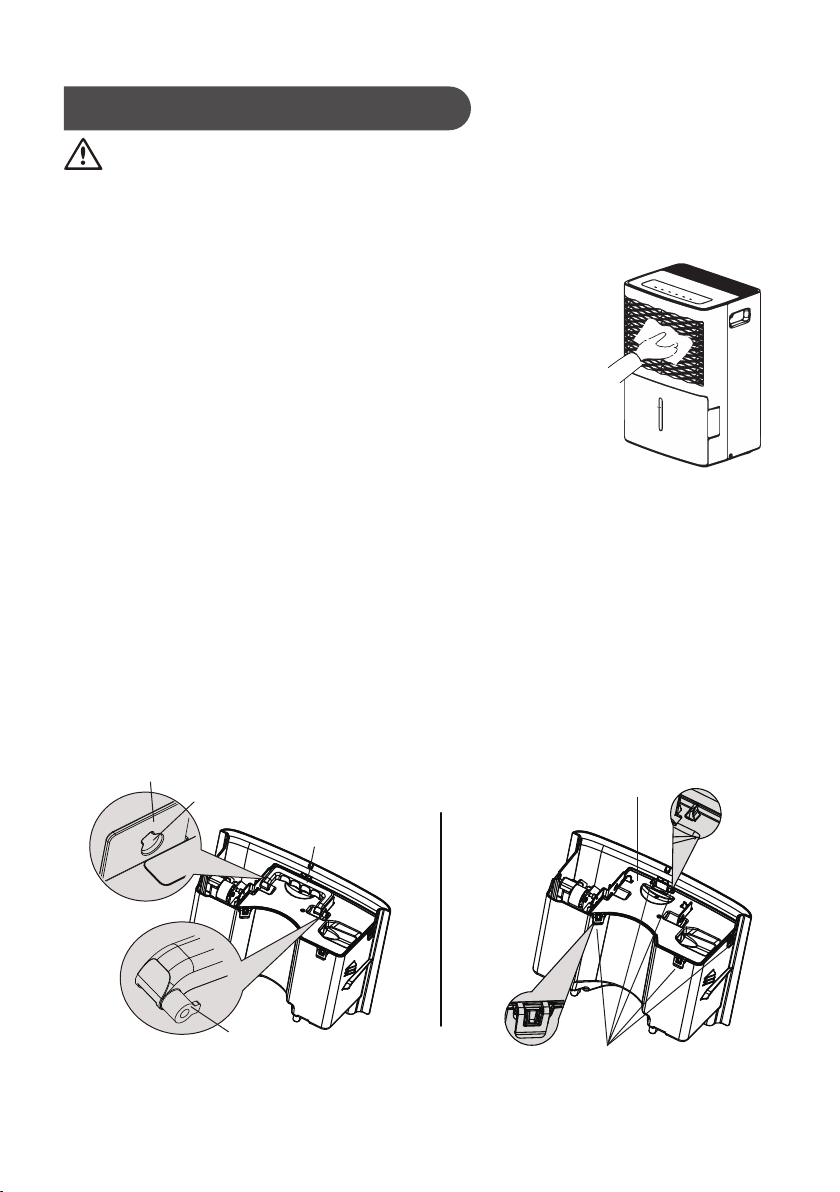
Clean and Maintenance
10
GDN45BA-A3EBA2A、GDN45BA-A3EBA3A、GDN45BA-A3EBA4A
Water Bucket
Every few weeks, clean the bucket to prevent growth of mold, mildew and
bacteria. Use soft brush to clean the bucket and then rinse it.
To remove:
(1) Direct the rotor shaft of handle to the hole of buckle plate.Pull the bucket
plate at the handle side by following the arrow direction. Remove the handle.
(shown in Fig.1a,Fig.1b,Fig.1c)
(2) Press down all buckles around the water bucket. Lift up the drain lid.
(shown in Fig.2a,Fig.2b,Fig.2c)
Note:5 clasps marked with line on the right figure.
Warning
Before cleaning, turn off the dehumidifier and disconnect power. Otherwise it
may lead to electric shock.
Do not wash the dehumidifier with water, or it may lead to electric shock.
Do not use volatile liquid(such as thinner or gasoline) to clean
dehumidifier.Otherwise it will damage unit's appearance.
Grille and Case
To clean the case:
When there is dust on the case, use soft towel
to dust it off; When the case is very dirty(greasy),
use mild detergent to clean it.
To clean the grille:Use a dust catcher or brush.
Buckle Plate
Hole of Buckle Plate
Handle
Drain Lid
Rotor Shaft
Fig. 1a
of Handle
Buckle
Fig. 2a
Note:Actual product may be different from above graphics, please refer to actual product.
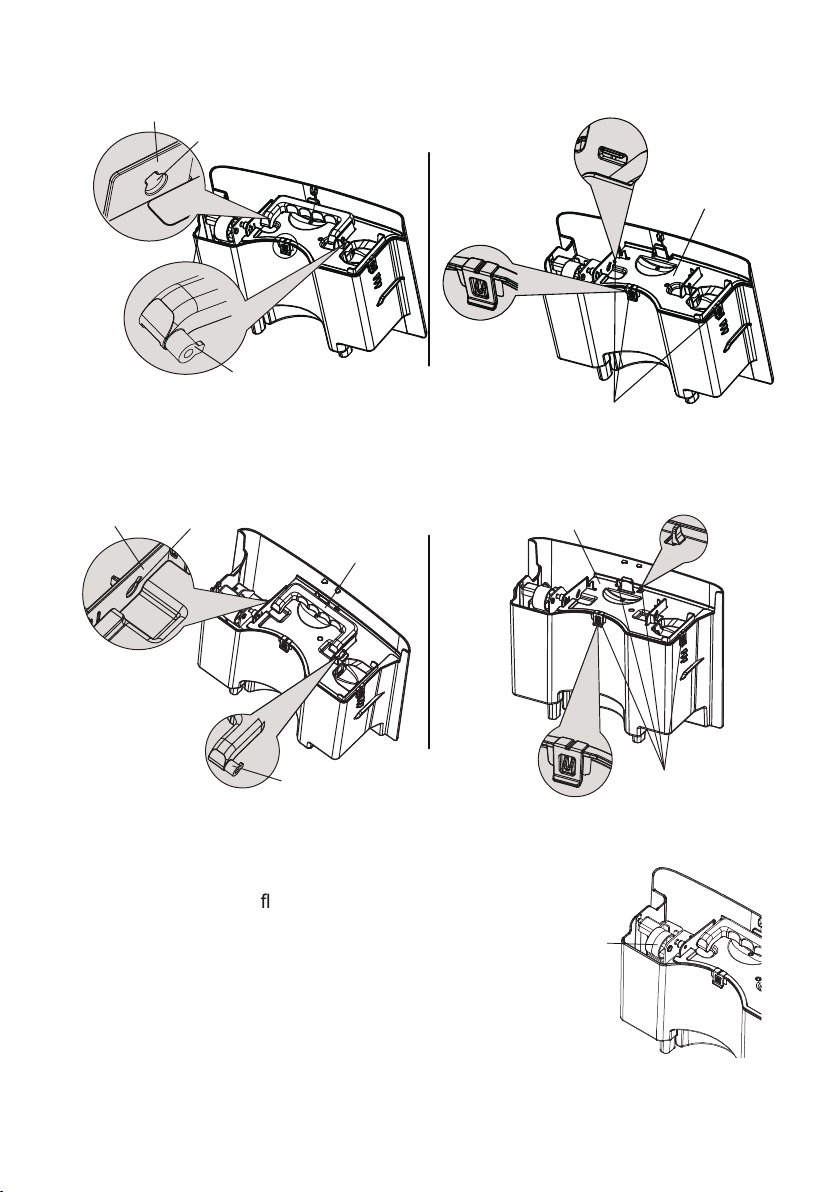
Drain Lid
Fig. 1b Fig. 2b
Fig. 1c Fig. 2c
Buckle
of Handle
Rotor Shaft
Buckle Plate
Hole of Buckle Plate
GDN20AZ-A3EBA2A、GDN20AZ-A3EBA3A、GDN20AZ-A3EBA4A
Handle
of Handle
Rotor Shaft
Handle
GDN30BB-A3EBA2B、GDN30BB-A3EBA3A、GDN30BB-A3EBA4A
Buckle Plate Hole of Buckle Plate
Drain Lid
Buckle
Float
11
(3) After cleaning, replace the drain lid and handle
and make sure the oat of water bucket is placed
properly. The side with foam plastic should be
beneath the drain lid. Do not remove the foam
plastic on the float
Note:Actual product may be different from above graphics, please refer to actual product.
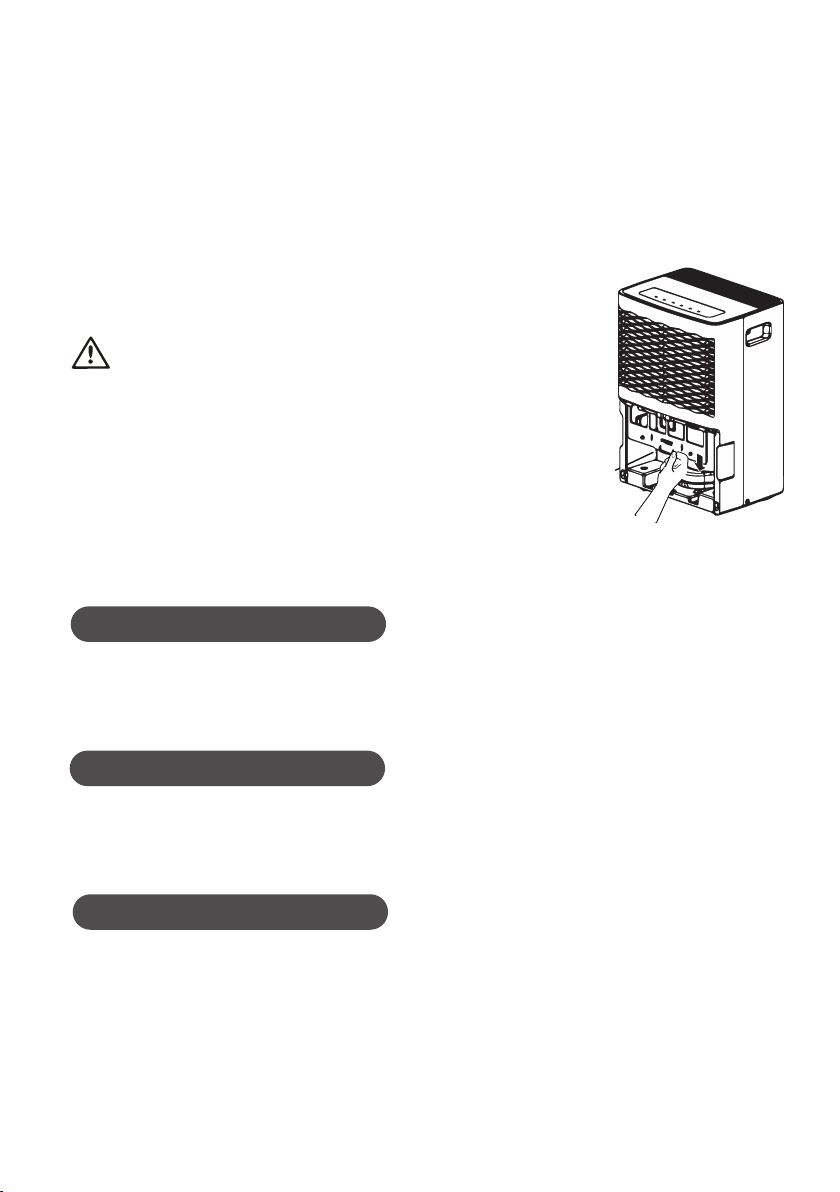
3. Air Filter
Dehumidifier will remind you to clean the air filter
when it has been operating for 250 hours. If it is
used in dusty places, clean the air filter more
often.
To remove: Remove the bucket. Grasp the filter
●
●
Air Filter
●
*
Actual product may be different from
above graphics, please refer to actual
product.
Check Before Use-season
● Check whether air outlet is blocked.
Check whether power plug and power socket are in good condition.
Check whether air filter is clean.
Check whether drain hose is damaged.●
12
Warning
Do not operate the dehumidifier without a filter.
Otherwise the evaporator will catch dust and
affect unit's performance.
Do not dry the air filter with fire or electric hair
dryer. Otherwise the air filter may be unshaped
or caught on fire.
Don' t use dust catcher or brush to clean
the air filter. Otherwise the air filter may be
destroyed.
Care After Use-season
Disconnect power.
Clean air filter and case.
Clean dust and obstacle of the dehumidifier.
Empty the water bucket.
Long-time Storage
●
●
If you won't use the dehumidifier for a long time, we suggest that you follow the
steps below in order to maintain the unit in good condition.
●
●
●
Make sure the bucket is clear of water and drain hose is removed.
Unplug the dehumidifier and pack the power cord.
Clean the unit and wrap it well to prevent the gathering of dust.
edge, and pull it straight down and out.
To clean: Clean the filter in warm, soapy water.
Rinse it and let the filterdry before rep-
lacing it.
●
●
●
●

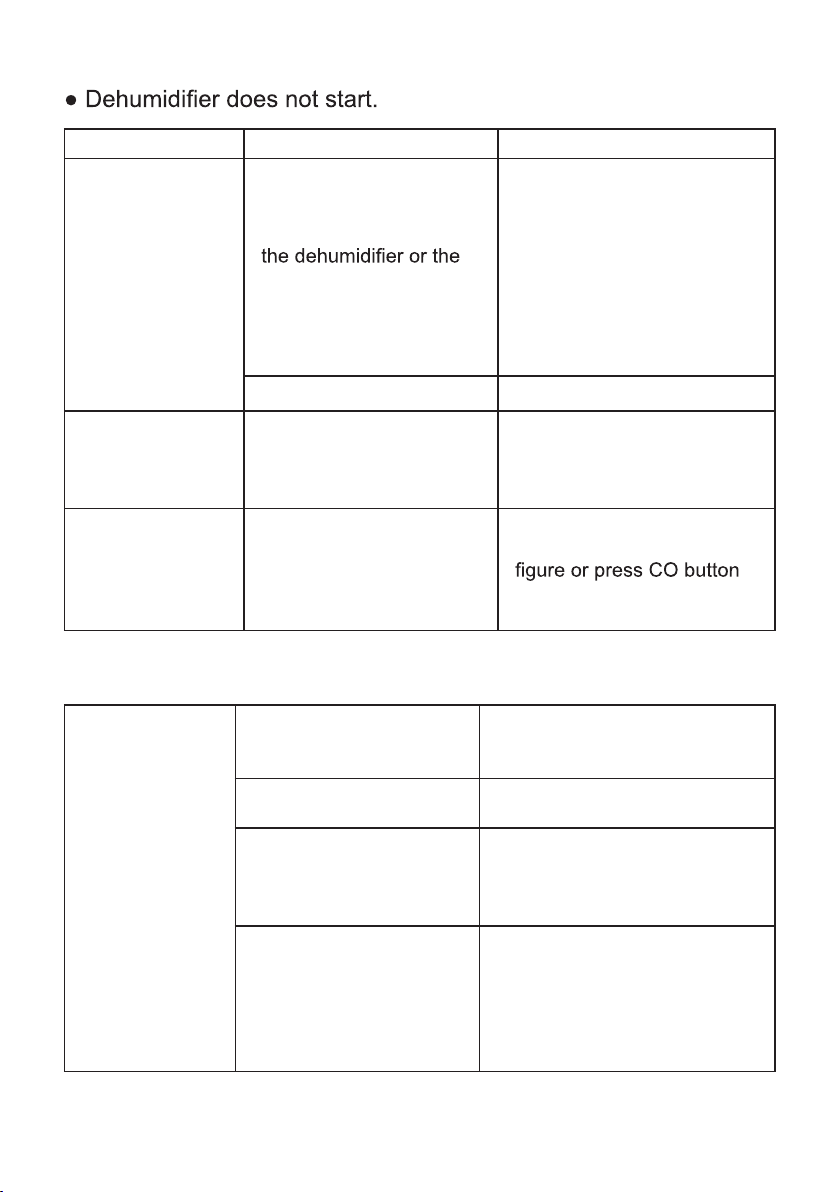
Troubleshooting
Not all the following problems are malfunctions.
Problem Possible Causes
Noise suddenly rises during
operation.
Dehumidifier is not operating.
Controls can not be set.
Unit is operating in an area where temperature
is higher than 32°C
(9 °F)
or lower than 5°C
(41°F)
.
Bucket is full.
Humidity does not drop.
Little or no effect in
dehumidifying
When first operated, the ai
emitted has musty-odor.
Unit has noises.
There might be some noise if unit is operating on
wooden floor.
Swooshing sound is heard.
Problem of Water Leakage.
Due to temperature rising of heat exchanger, the
air may have some strange smell at the beginning.
Problem SolutionPossible Causes
Examine the drainage joint.
When using drain
hose, there is water
in the bucket.
Normal. This is the sound of the ow of refrigerant.
Drain hose is not correctly
installed.
Drain hose is not correctly
installed.
13
Remove the drain hose and
replace it. Be sure that the
hose is correctly installed.
Noise will rise if compressor has just started.
Power supply problem.
Unit is placed on uneven floor.
Connect the drainage joint
well.
Clear the obstacle from the
drain hose.
Room temperature is too low.
Humidity level may be improperly set.
If unit is operating in a room where temperature
is from 5 to 15 °C
(41°F to 59°F)
, it will start to
defrost automatically. Compressor will stop for a
brief period of time(fan will operate in high fan
speed).When unit finishes defrosting, it will be
back normal operation.
Area to be dehumidified is too large. The capacity
of your dehumidifier may not be adequate
Doors are open.
There might be some device producing vapor in
the room.
14
Problem Possible Causes Solution
● Power is not supplied for
power plug is not well
inserted.
Power indicator is
not lit when power
is connected.
● Check whether power plug is
● Check whether power cord is
● Fuse is blown. ● Replace the fuse.
●
Bucket full indicator
is lit up.
●
Empty the bucket and replace
it.● Water is full in the bucket.
●
●
● Humidity is set too high.
● Dehumidifier does not dry air as intended.
● Check whether there is
any obstacle around the
unit.
● Make sure there is no curtain,
shutter or furniture that blocks
the dehumidifier.
● Air filter is dusty and
blocked.
● Clean the filter.
● Make sure all doors and
windows and other opening to
the outside have been
closed.
Bad dehumidifying
performance
● Doors and windows are
left open.
● Warm temperature is good for
dehumidification. Low temper-
ature will reduce unit's working
effect. This unit should be wor-
● Room temperature is too
low.
king in a place where temper-
ature is above 5°C
(41°F)
.
●
●
Check if power is lost. If yes,
wait for the power to restore.
If not, check whether the
power circuit or power socket
has been damaged.
loosen.
damaged.
If you want the air drier,
press “-” button to lower the
for unit to dehumidify
continuously.
Bucket is not properly
placed.
Bucket has been removed.
Unit can function
normally but it can
not start up.
15
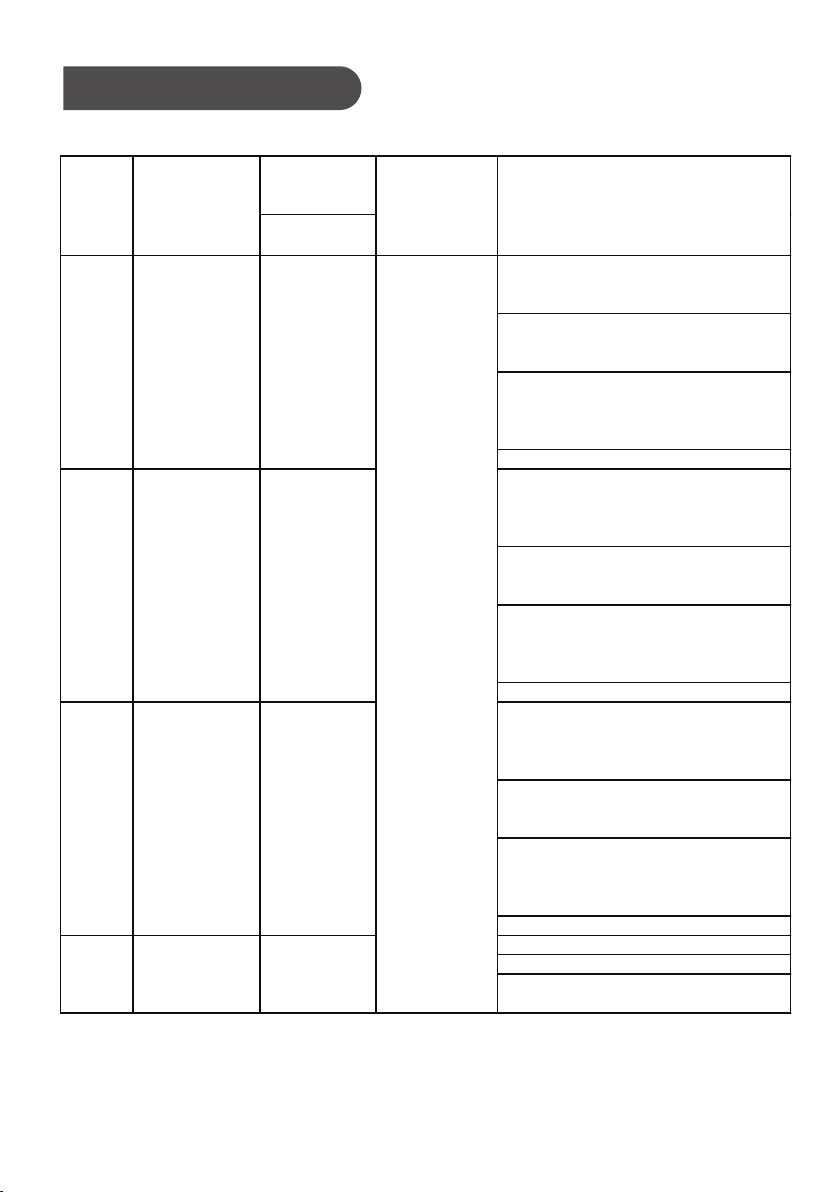
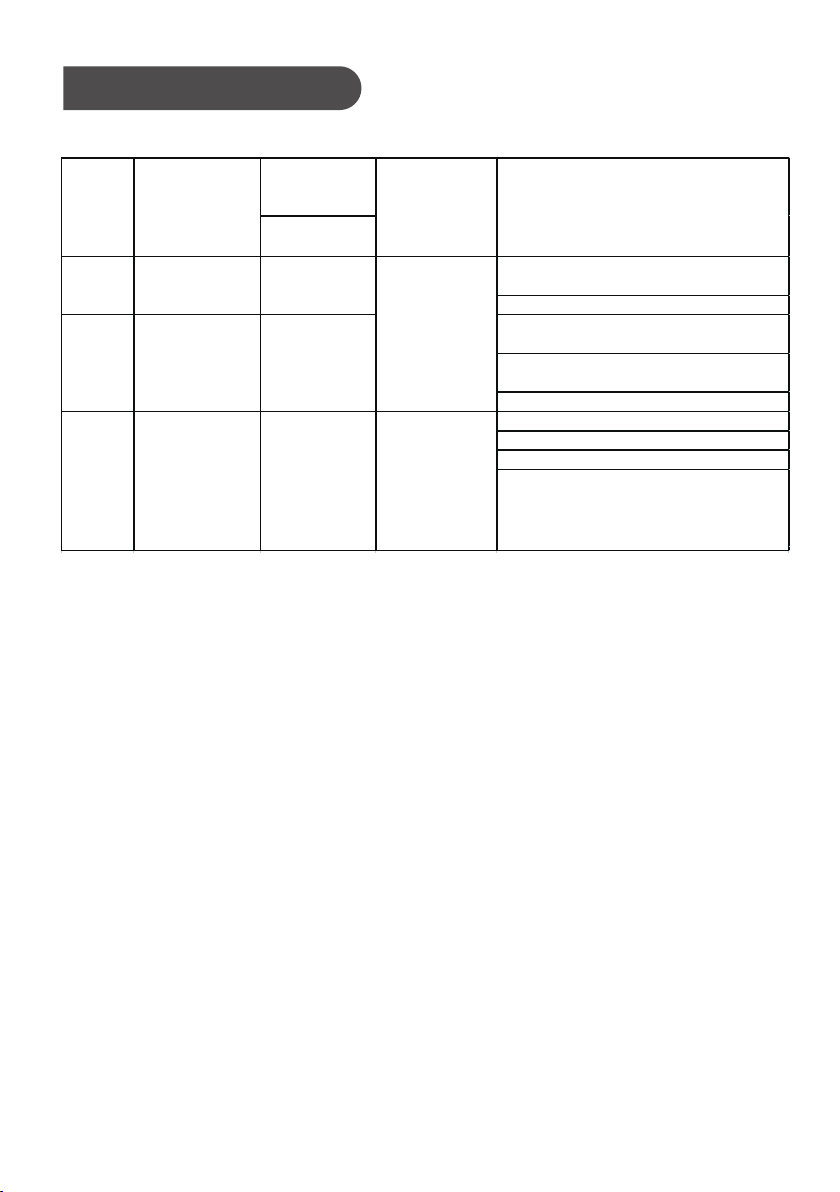
Malfunction Codes
● Unit's Malfunction Codes
Display
Code
Display
Window
● Ambient temperature sensor is
loosen or is poorly connected
with the terminal of display board.
● Some element of display board
may have been put upside down
and cause short circuit.
●
Ambient temperature sensor is
damaged(Please refer to Checking
Table for Temperature Sensor
Resistance).
● Display board is damaged.
● Temperature sensor on the
evaporator is loosen or is poorly
connected with the terminal of
display board.
● Some element of display board
may have been put upside down
and cause short circuit.
● Temperature sensor on the evaporator
is damaged(Please refer
to Checking Table for Temperature
Sensor Resistance).
● Display board is damaged.
●
Temperature sensor on the
evaporator is loosen or is poorly
connected with the terminal of
display board.
●
Some element of display board
may have been put upside down
and cause short circuit.
●
Discharge temperature sensor is
damaged (Please refer
to Checking Table for Temperature
Sensor Resistance).
● Display board is damaged.
● Humidity sensor is short-circuited.
● Humidity sensor is damaged.
● Display board is damaged.
2
3
4
Compressor
and fan
motor stop.
The buttons
are invalid.
F2
Tube
Temperature
Sensor
Malfunction
L1
Humidity
Sensor
Malfunction
Discharge
Temperature
Sensor
Malfunction
F5
No.
Malfunction
Name
Unit's
Condition
Possible Causes
F1
Ambient
Temperature
Sensor
Malfunction
1
16
Malfunction Codes
● Unit's Malfunction Codes
Display
Code
Display
Window
● Refrigerant is leaking.
●
System is blocked
● Ambient operation condition is
bad.
● The evaporator and condenser
are blocked with filth.
●
The system is abnormal.
●
Abnormal system (e.g.: blockage, etc).
●
Abnormal rotation speed of the motor.
●
Abnormal air intake.
● System is normal, but the compressor
discharge
temperature sensor is abnormal or poorly
contacted.
H3
High-temperature
overload
protection
5
6
E4
High discharge
temperature
protection of
compressor
7
Freon-lacking
protection
F0
No.
Malfunction
Name
Unit's
Condition
Possible Causes
The compressor
stops;
the fan motor
stops after
30 seconds.
The compressor
stops;
the fan motor
stops after
30 seconds.
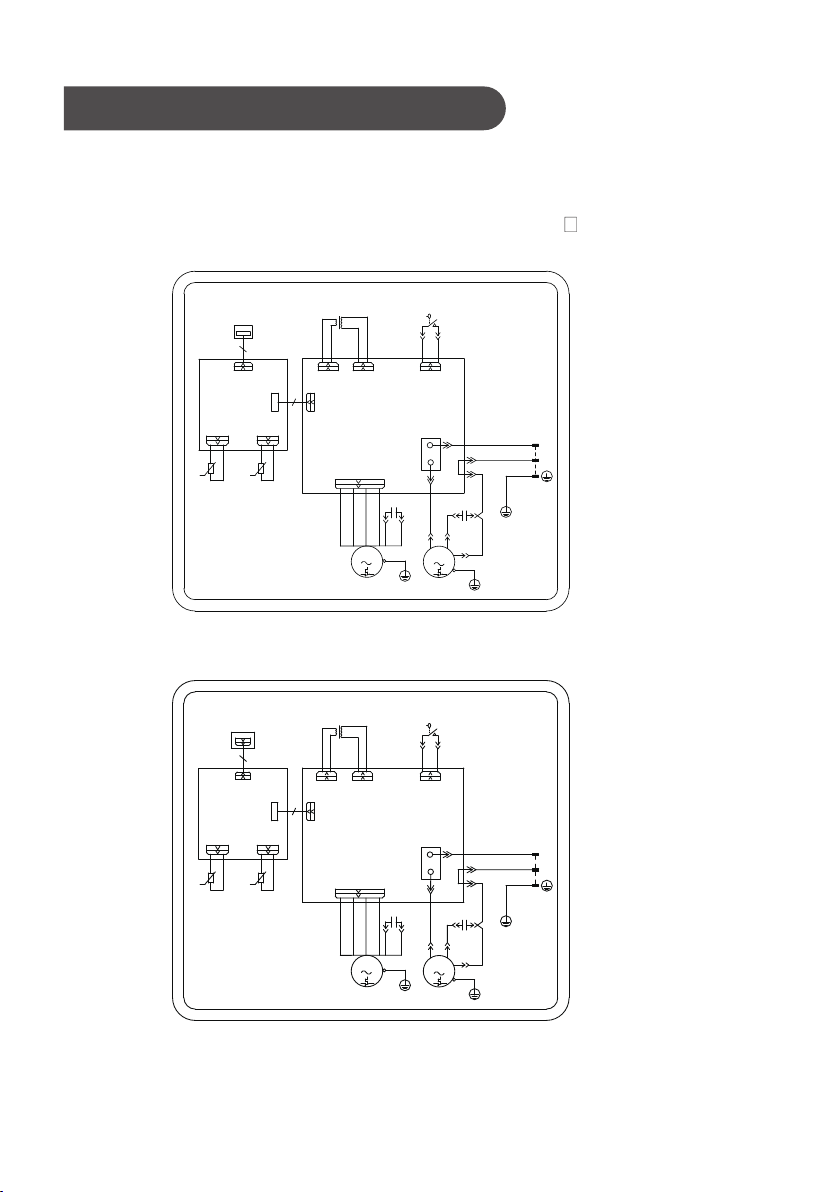
17
Electric Schematic Diagram
MAIN BOARD
The Electric schematic diagram are subject to change without notice.
Please refer to which one on the unit.
GDN20AZ-A3EBA2A、GDN20AZ-A3EBA3A、GDN20AZ-A3EBA4A
GDN45BA-A3EBA2A、GDN45BA-A3EBA3A、GDN45BA-A3EBA4A
CN4
AP2
HUMIDITY
CN2
SENSOR
G
GN(YEGN)
L
N
AP1
CN6
N1
BK(BN)
WH(BU)
FAN
COMP
L
POWER
BOARD
DISPLAY
YEGN
C1
FAN MOTOR
RD
BN
M1
G
CAP.
C
RD
COMP.
YEGN
G
C2
YE
BU
BU
R
S
COMP.
CAP.
LIQUID LEVEL SWITCH
SA1
COM
NO
WH
BK
CN7
YE
BU
BK
WH
TRANSFORMER
TR-OUT
TR-IN
RT2
T-PIPE
TEMP.SENSOR
DISCHARGE
θ
RT1
TUBE
TEMP.SENSOR
TUBE
θ
MAIN BOARD
GDN30BB-A3EBA2B、GDN30BB-A3EBA3A、GDN30BB-A3EBA4A
CN4
AP2
HUMIDITY
CN2
SENSOR
G
GN(YEGN)
L
N
AP1
CN6
N1
BK(BN)
WH(BU)
FAN
COMP
L
POWER
BOARD
DISPLAY
YEGN
C1
FAN MOTOR
RD
BN
M1
G
CAP.
C
RD
COMP.
YEGN
G
C2
YE
BU
BU
R
S
COMP.
CAP.
LIQUID LEVEL SWITCH
SA1
COM
NO
WH
BK
CN7
YE
BU
BK
WH
TRANSFORMER
TR-OUT
TR-IN
RT2
T-PIPE
TEMP.SENSOR
DISCHARGE
θ
RT1
TUBE
TEMP.SENSOR
TUBE
θ

GREE ELECTRIC APPLIANCES, INC. OF ZHUHAI
Add: West Jinji Rd, Qianshan, Zhuhai,Guangdong, China, 519070
Tel: (+86-756) 8522218
Fax: (+86-756) 8669426
E-mail: [email protected]
Web: www.gree.com
600005061728