2
!1BOTVQQPSUT
"$POUSPMLOPCT
#"VYJMJBSZCVSOFSVQUP L8
$4FNJSBQJECVSOFSVQUP L8
%3BQJECVSOFSVQUP L8
&%PVCMFGMBNFXPLCVSOFS#VQUP L8
' %VBMEPVCMFGMBNFXPLCVSOFS%VQUP L8
(&MFDUSJDIPC 8
).BJO4XJUDI
!5PQ
"
#Ο
$Ο
%Ο
&ΧΟ
' ΧΟ%
(
)Ϯ
353%
2
1
3530
2
1
2
1
35<%
2
1
355%
2
1

3
Ú7DEOHRIFRQWHQWV
[en]Instruction manual
6DIHW\SUHFDXWLRQV
<RXUQHZDSSOLDQFH
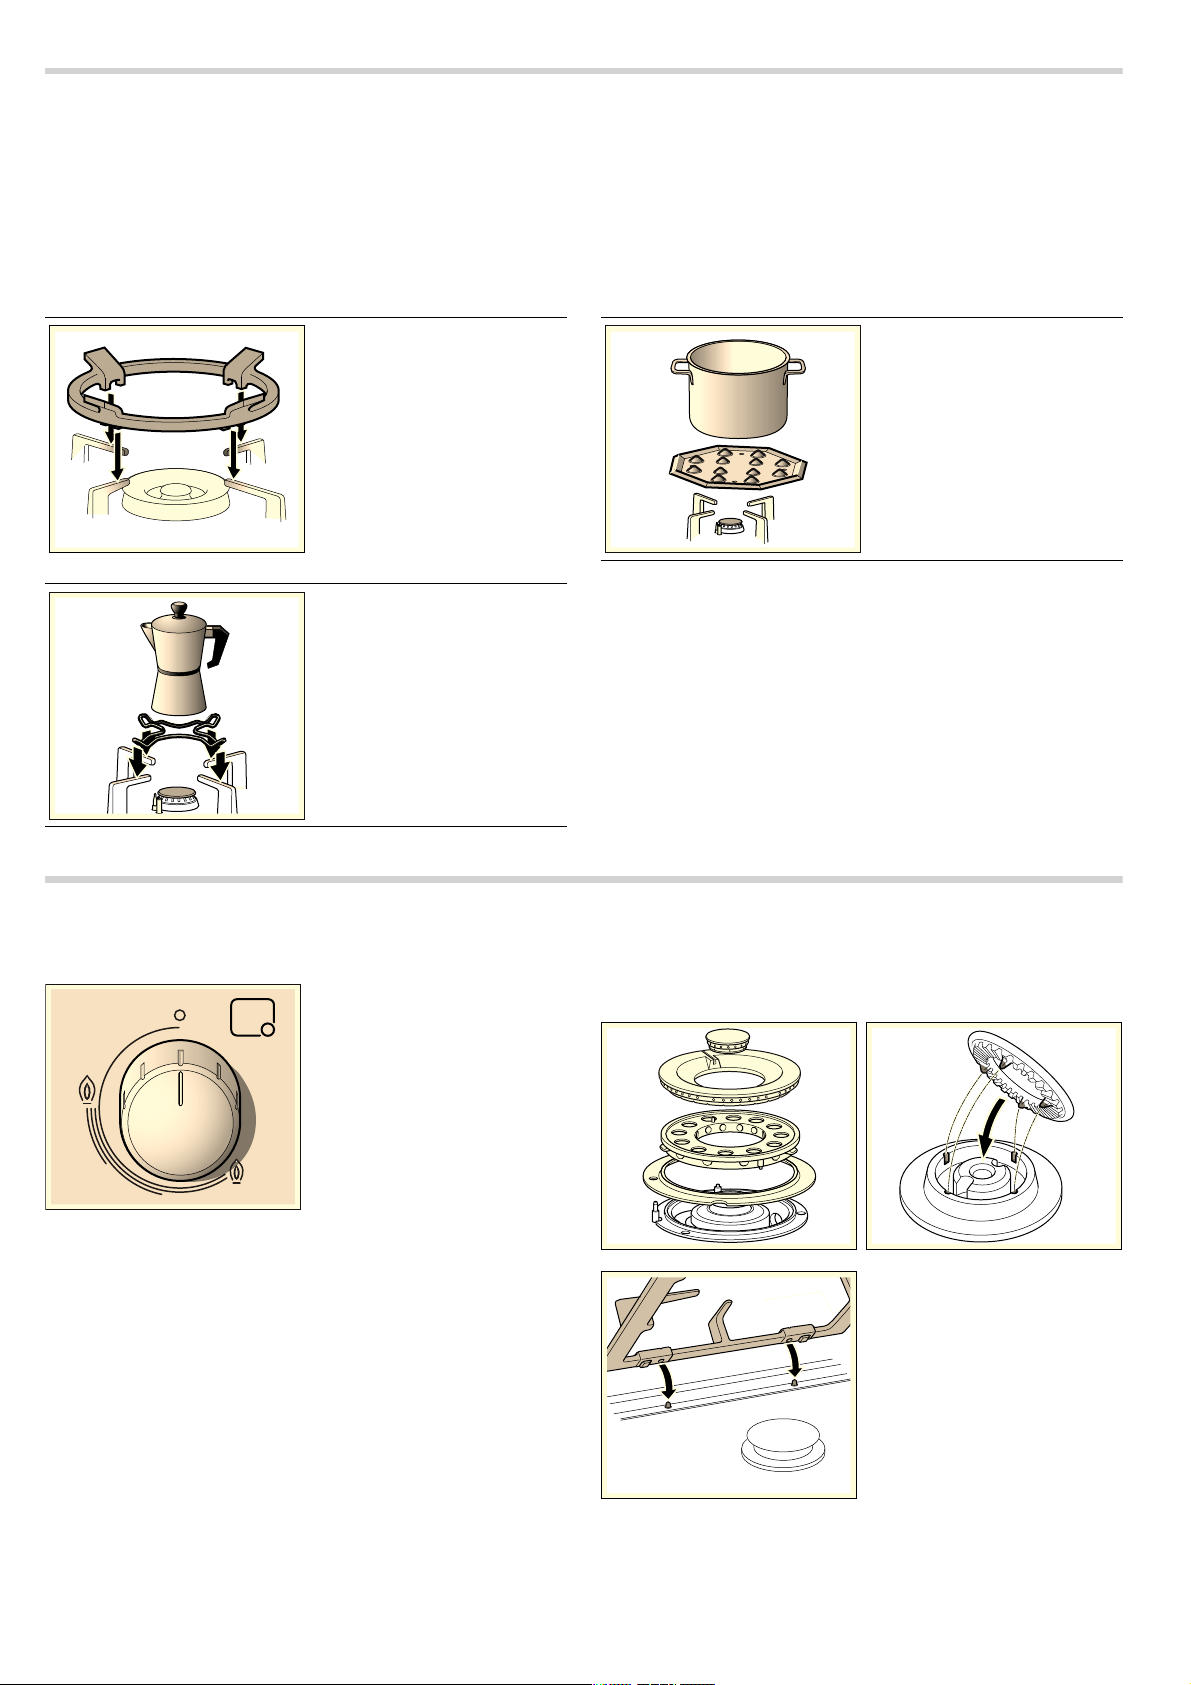
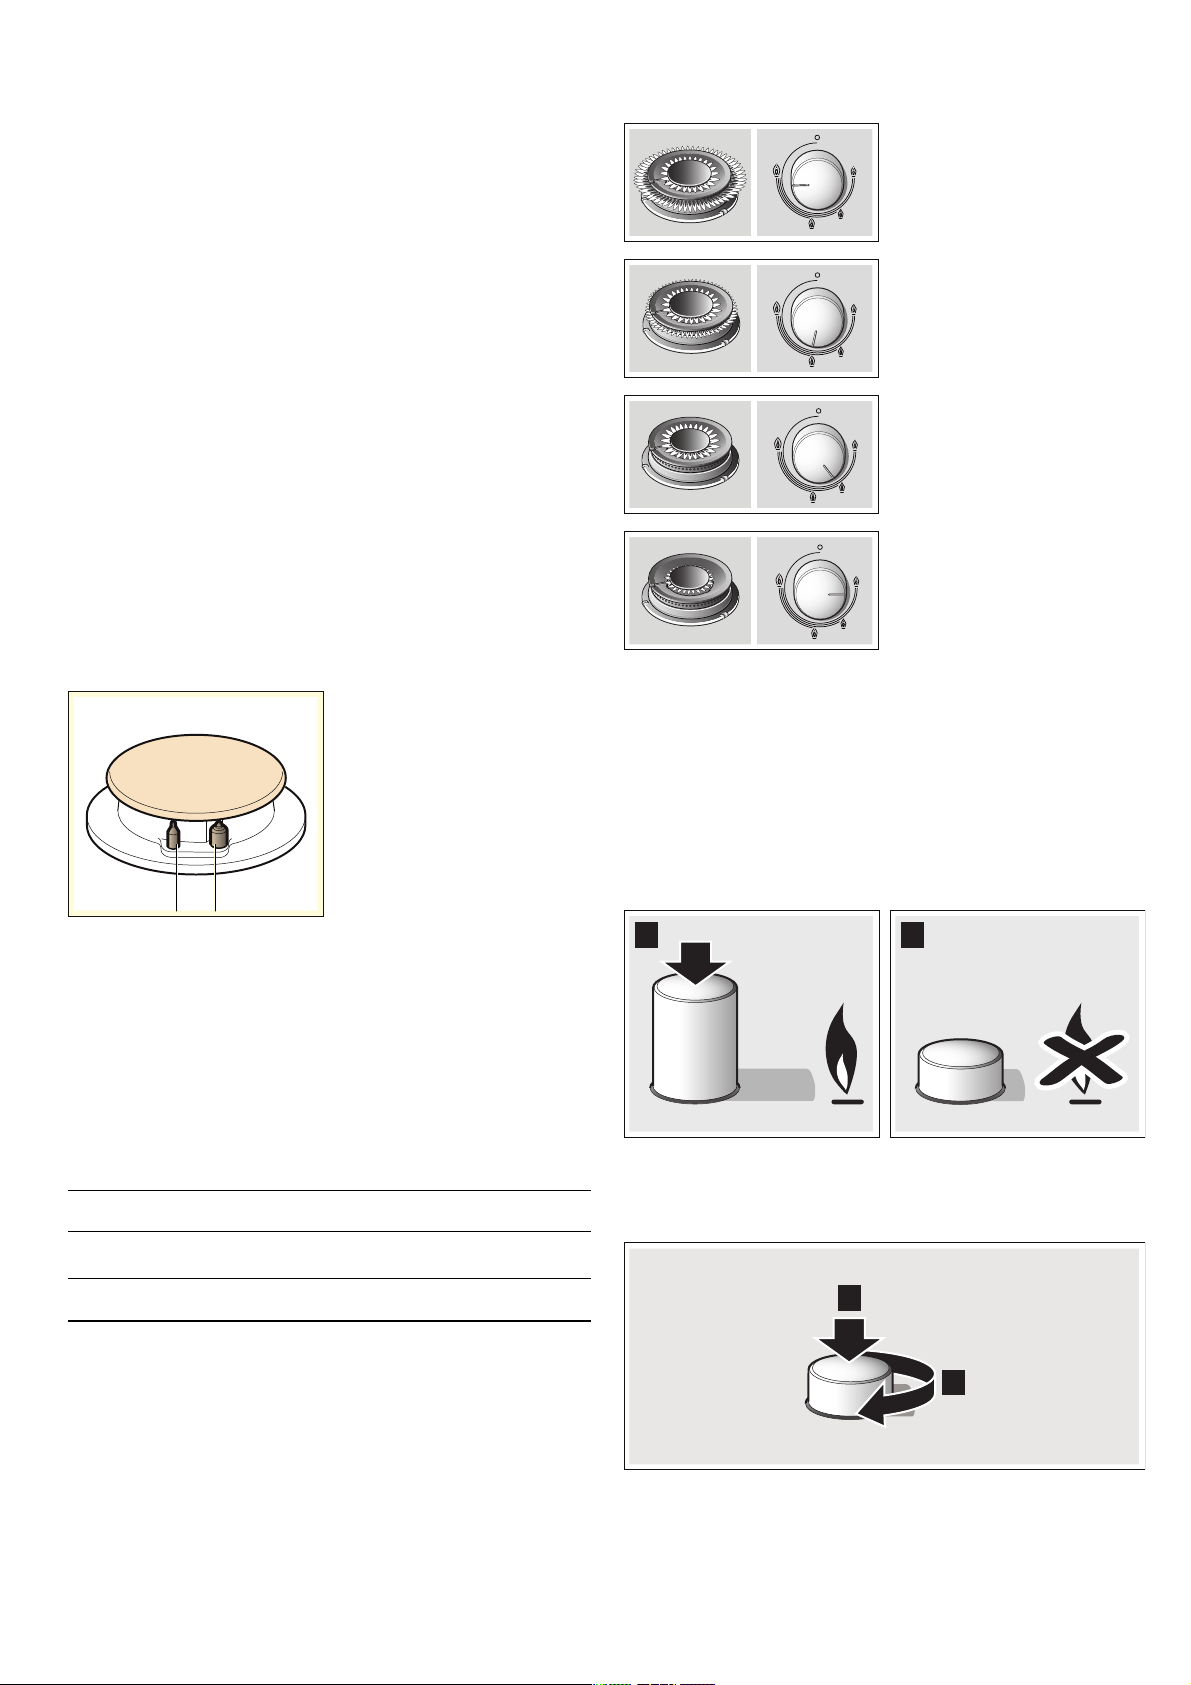
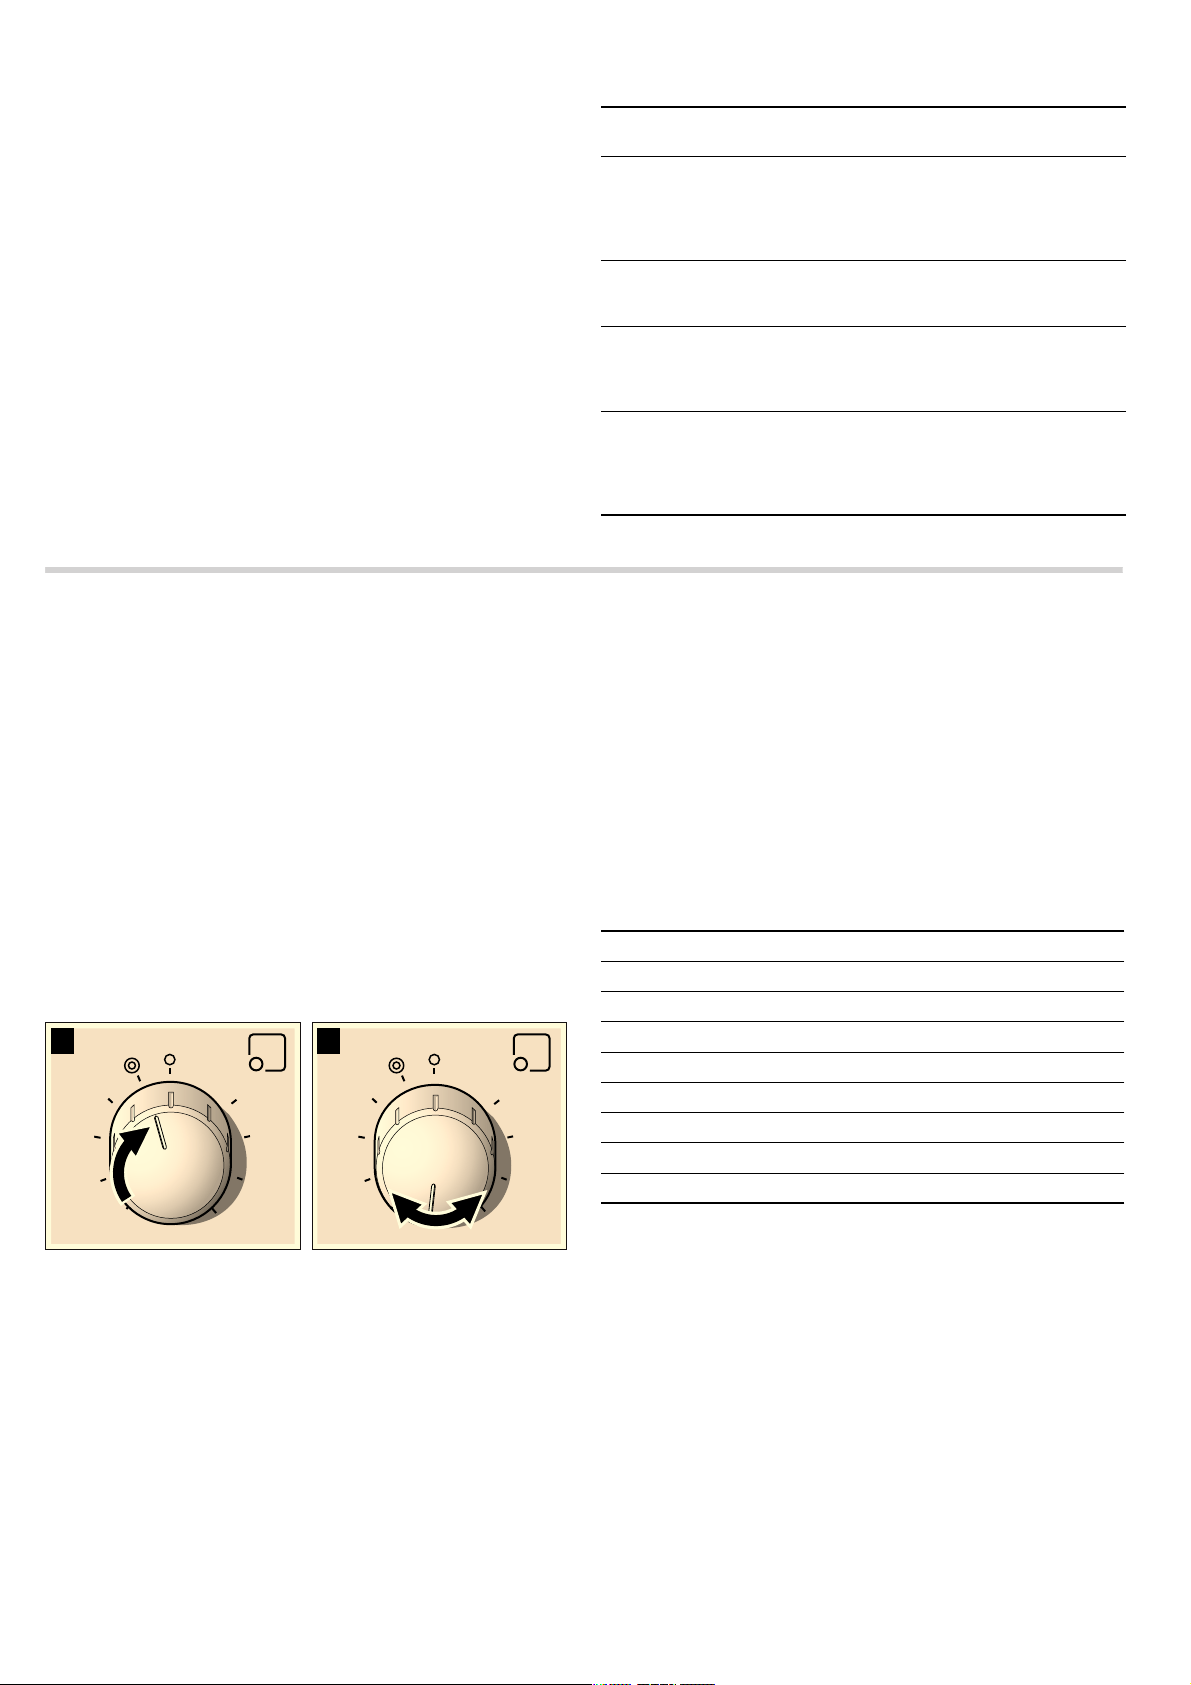
"DDFTTPSJFT
*DVEXUQHUV
4XJUDIJOHPONBOVBMMZ
4XJUDIJOHPOBVUPNBUJDBMMZ
4BGFUZTZTUFN
4XJUDIJOHPGGBCVSOFS
1PXFSMFWFMT
.BJOTXJUDI)PCMPDL.BJO4XJUDI
8BSOJOHT
$PPLJOHHVJEFMJOFT
(OHFWULFKRE
0QFSBUJPO
$PPLJOHHVJEFMJOFT
&RRNLQJSDQV
4VJUBCMFQBOT
1SFDBVUJPOTGPSVTF
&OHDQLQJDQGPDLQWHQDQFH
$MFBOJOH
.BJOUFOBODF
7URXEOHVKRRWLQJ
7HFKQLFDO$VVLVWDQFH6HUYLFH
8BSSBOUZDPOEJUJPOT
8VHGDSSOLDQFHVDQGSDFNDJLQJ
&OWJSPONFOUBMMZGSJFOEMZEJTQPTBM
Produktinfo
"EEJUJPOBMJOGPSNBUJPOPOQSPEVDUTBDDFTTPSJFTSFQMBDFNFOU
QBSUTBOETFSWJDFTDBOCFGPVOEBU ZZZERVFKKRPHFRPBOE
JOUIFPOMJOFTIPQ ZZZERVFKHVKRSFRP
: 6DIHW\SUHFDXWLRQV
3FBEUIFTFJOTUSVDUJPOTDBSFGVMMZ:PVXJMM
POMZ CF BCMF UP VTF ZPVS BQQMJBODF TBGFMZ BOE
FGGFDUJWFMZXIFOZPVIBWFSFBEUIFN5IFTF
PQFSBUJOHBOEJOTUBMMBUJPOJOTUSVDUJPOTTIPVME
CF SFUBJOFE BOE QBTTFE POUP UIF CVZFS JG UIF
BQQMJBODFJTTPME
7KHPDQXIDFWXUHULVH[HPSWIURPDOO
UHVSRQVLELOLW\LIWKHUHTXLUHPHQWVRIWKLV
PDQXDODUHQRWFRPSOLHGZLWK
5IFJNBHFTTIPXOJOUIFTFJOTUSVDUJPOTBSF
GPSHVJEBODFPOMZ
%POPUSFNPWFUIFBQQMJBODFGSPNJUT
QSPUFDUJWFQBDLBHJOHVOUJMJUJTJOTUBMMFEJOUIF
VOJU%POPUTXJUDIPOUIFBQQMJBODFJGJUJT
EBNBHFEJOBOZXBZ$POUBDUPVS5FDIOJDBM
"TTJTUBODF4FSWJDF
5IJTBQQMJBODFJTDMBTTUZQFBDDPSEJOHUP
UIF&/SFHVMBUJPOGPSHBTBQQMJBODFT
CVJMUJOBQQMJBODF
#FGPSFJOTUBMMJOHZPVSOFXIPCFOTVSFUIBUJU
JTCFJOHJOTUBMMFEBDDPSEJOHUPUIFBTTFNCMZ
JOTUSVDUJPOT
5IJTBQQMJBODFDBOOPUCFJOTUBMMFEPOZBDIUT
PSJODBSBWBOT
5IJTBQQMJBODFNVTUPOMZCFVTFEJOXFMM
WFOUJMBUFEQMBDFT
5IJTBQQMJBODFJTOPUJOUFOEFEGPSPQFSBUJPO
XJUIBOFYUFSOBMDMPDLUJNFSPSBSFNPUF
DPOUSPM
$OORSHUDWLRQVUHODWLQJWRLQVWDOODWLRQ
FRQQHFWLRQUHJXODWLRQDQGFRQYHUVLRQWR
RWKHUJDVW\SHVPXVWEHSHUIRUPHGE\DQ
DXWKRULVHGWHFKQLFLDQUHVSHFWLQJDOO
DSSOLFDEOHUHJXODWLRQVVWDQGDUGVDQGWKH
VSHFLILFDWLRQVRIWKHORFDOJDVDQG
HOHFWULFLW\VXSSOLHUV6SHFLDODWWHQWLRQ
VKDOOEHSDLGWRYHQWLODWLRQUHJXODWLRQV
5IJTBQQMJBODFMFBWFTUIFGBDUPSZTFUUPUIF
HBTUZQFUIBUJTJOEJDBUFEPOUIF
TQFDJGJDBUJPOTQMBUF*GUIJTOFFETUPCF
DIBOHFEQMFBTFDPOTVMUUIFBTTFNCMZ
JOTUSVDUJPOT*UJTSFDPNNFOEFEZPVDPOUBDU
UIF5FDIOJDBM"TTJTUBODF4FSWJDFUPDIBOHF
UPBOPUIFSHBTUZQF
5IJTBQQMJBODFIBTCFFOEFTJHOFEGPSIPNF
VTFPOMZOPUGPSDPNNFSDJBMPSQSPGFTTJPOBM
VTF5IJTBQQMJBODFJTPOMZJOUFOEFEGPS
DPPLJOHQVSQPTFTOPUBTBIFBUJOHTZTUFN
5IFXBSSBOUZXJMMPOMZCFWBMJEJGUIF
BQQMJBODF JT VTFE GPS UIF QVSQPTF GPS XIJDI JU
XBTEFTJHOFE
/FWFS MFBWF UIF BQQMJBODF VOBUUFOEFE EVSJOH
PQFSBUJPO
%POPUVTFMJETPSQSPUFDUJWFCBSSJFSTGPS
DIJMESFOXIJDIBSFOPUSFDPNNFOEFECZUIF
IPCNBOVGBDUVSFS5IFZNBZDBVTF
BDDJEFOUTTVDIBTUIPTFEVFUPUIF
PWFSIFBUJOHJHOJUJPOPSEFUBDINFOUPG
GSBHNFOUTPGNBUFSJBMT
5IJTBQQMJBODFNBZCFVTFECZDIJMESFO
ZFBSTPMEBOEPMEFSBOECZQFSTPOTXJUI
SFEVDFE QIZTJDBM TFOTPSZ PS NFOUBM DBQBDJUZ
PSBMBDLPGFYQFSJFODFPSLOPXMFEHFJGUIFZ
BSFTVQFSWJTFEPSUIFZIBWFCFFOJOTUSVDUFE

4
BCPVU UIF TBGF VTF PG UIF BQQMJBODF BOE IBWF
VOEFSTUPPEUIFBTTPDJBUFEEBOHFST
/FWFSMFUDIJMESFOQMBZXJUIUIFBQQMJBODF
$MFBOJOHBOEVTFSNBJOUFOBODFNVTUOPUCF
DBSSJFEPVUCZVOTVQFSWJTFEDIJMESFO
5LVNRIGHIODJUDWLRQ
"DDVNVMBUJPO PG VOCVSOFE HBT JO BO FODMPTFE
BSFBDBSSJFTBSJTLPGEFGMBHSBUJPO%POPU
TVCKFDUUIFBQQMJBODFUPESBVHIUT5IFTF
NJHIU CMPX PVU UIF CVSOFST $BSFGVMMZ SFBE UIF
JOTUSVDUJPOT BOE XBSOJOHT PO UIF PQFSBUJPO PG
HBTCVSOFST
5LVNRISRLVRQLQJ
5IFLJUDIFOXJMMCFDPNFIPUBOEIVNJEBOE
DPNCVTUJPO QSPEVDUT QSPEVDFE XIFO UIJT HBT
BQQMJBODFJTVTFE.BLFTVSFUIFLJUDIFOJT
XFMM WFOUJMBUFE QBSUJDVMBSMZ XIFO UIF IPC JT JO
PQFSBUJPOFJUIFSLFFQUIFOBUVSBMWFOUJMBUJPO
BQFSUVSFT PQFO PS JOTUBMM B WFOUJMBUJPO TZTUFN
FYUSBDUPSIPPE*OUFOTFQSPMPOHFEVTFPG
UIF BQQMJBODF NBZ SFRVJSF BEEJUJPOBM PS NPSF
FGGFDUJWFWFOUJMBUJPOPQFOBXJOEPXPS
JODSFBTFUIFQPXFSPGUIFWFOUJMBUJPOTZTUFN
5LVNRIEXUQV
■
5IFIPUQMBUFTBOEUIFJSJNNFEJBUFWJDJOJUZ
HFUWFSZIPU/FWFSUPVDIUIFIPUTVSGBDFT
,FFQDIJMESFOVOEFSZFBSTPMEXFMMBXBZ
GSPNUIJTBQQMJBODF
Risk of burns!
■
*GUIFSFTJEVBMIFBUJOEJDBUPSJTOPUXPSLJOH
EJTDPOOFDUUIFIPUQMBUFBOEOPUJGZUIF
5FDIOJDBM"TTJTUBODF4FSWJDF
5LVNRIILUH
■
5IFIPUQMBUFTHFUWFSZIPU%POPUSFTU
JOGMBNNBCMFPCKFDUTPOUIFIPC%POPU
TUPSFPCKFDUTPOUIFIPC
Risk of fire!
■
%POPUTUPSFPSVTFDPSSPTJWFDIFNJDBMT
QSPEVDUT XIJDI QSPEVDF GVNFT JOGMBNNBCMF
NBUFSJBMTPSOPOGPPEQSPEVDUTCFMPXPS
OFBSUIJTEPNFTUJDBQQMJBODF
Risk of fire!
■
'BU PS PJM XIJDI JT PWFSIFBUFE DBO DBUDI GJSF
FBTJMZ/FWFSMFBWFGBUPSPJMUPIFBUVQ
VOBUUFOEFE *G PJM PS GBUT EP DBUDI GJSF OFWFS
VTF XBUFS UP QVU UIF GJSF PVU 1VU UIF GJSF PVU
CZ DPWFSJOH UIF QBO XJUI B MJE BOE TXJUDI PGG
UIFIPUQMBUF
5LVNRILQMXULHV
■
1BOTXIJDIBSFEBNBHFEBSFOPUUIFSJHIU
TJ[FIBOHPWFSUIFFEHFPGUIFIPCPSBSF
OPUQPTJUJPOFEDPSSFDUMZDBODBVTFTFSJPVT
JOKVSJFT'PMMPXUIFBEWJDFBOEXBSOJOHT
QSPWJEFESFMBUJOHUPUIFDPPLJOHQBOT
Risk of injuries!
■
5IFQBONBZTVEEFOMZKVNQEVFUPUIF
QSFTFODFPGMJRVJECFUXFFOUIFCBTFPGUIF
QBOBOEUIFIPUQMBUF"MXBZTFOTVSFUIBU
UIFIPUQMBUFBOEUIFCPUUPNPGUIFQBOBSF
LFQUESZ
Risk of injuries!
■
*OUIFFWFOUPGBNBMGVODUJPOUVSOPGGUIF
BQQMJBODF࣐THBTBOEFMFDUSJDJUZTVQQMZ'PS
SFQBJSTDBMMPVS5FDIOJDBM"TTJTUBODF
4FSWJDF
Risk of injuries!
■
%POPUUBNQFSXJUIUIFBQQMJBODFTJOUFSJPS
*GOFDFTTBSZDBMMPVS5FDIOJDBM"TTJTUBODF
4FSWJDF
Risk of injuries!
■
*GPOFPGUIFDPOUSPMLOPCTXJMMOPUUVSOEP
OPUGPSDFJU$BMMUIF5FDIOJDBM"TTJTUBODF
4FSWJDFJNNFEJBUFMZTPUIBUUIFZDBOSFQBJS
PSSFQMBDFUIFN
5LVNRIHOHFWULFVKRFN
■
%POPUDMFBOUIFBQQMJBODFVTJOHTUFBN
DMFBOFST
Risk of electric shock!
■
$SBDLTPSCSFBLTJOUIFHMBTTNBZDBSSZBO
FMFDUSPDVUJPOSJTL%JTDPOOFDUUIFGVTFGSPN
UIFGVTFCPY/PUJGZUIF5FDIOJDBM
"TTJTUBODF4FSWJDF
5
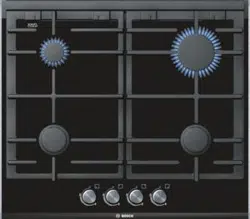
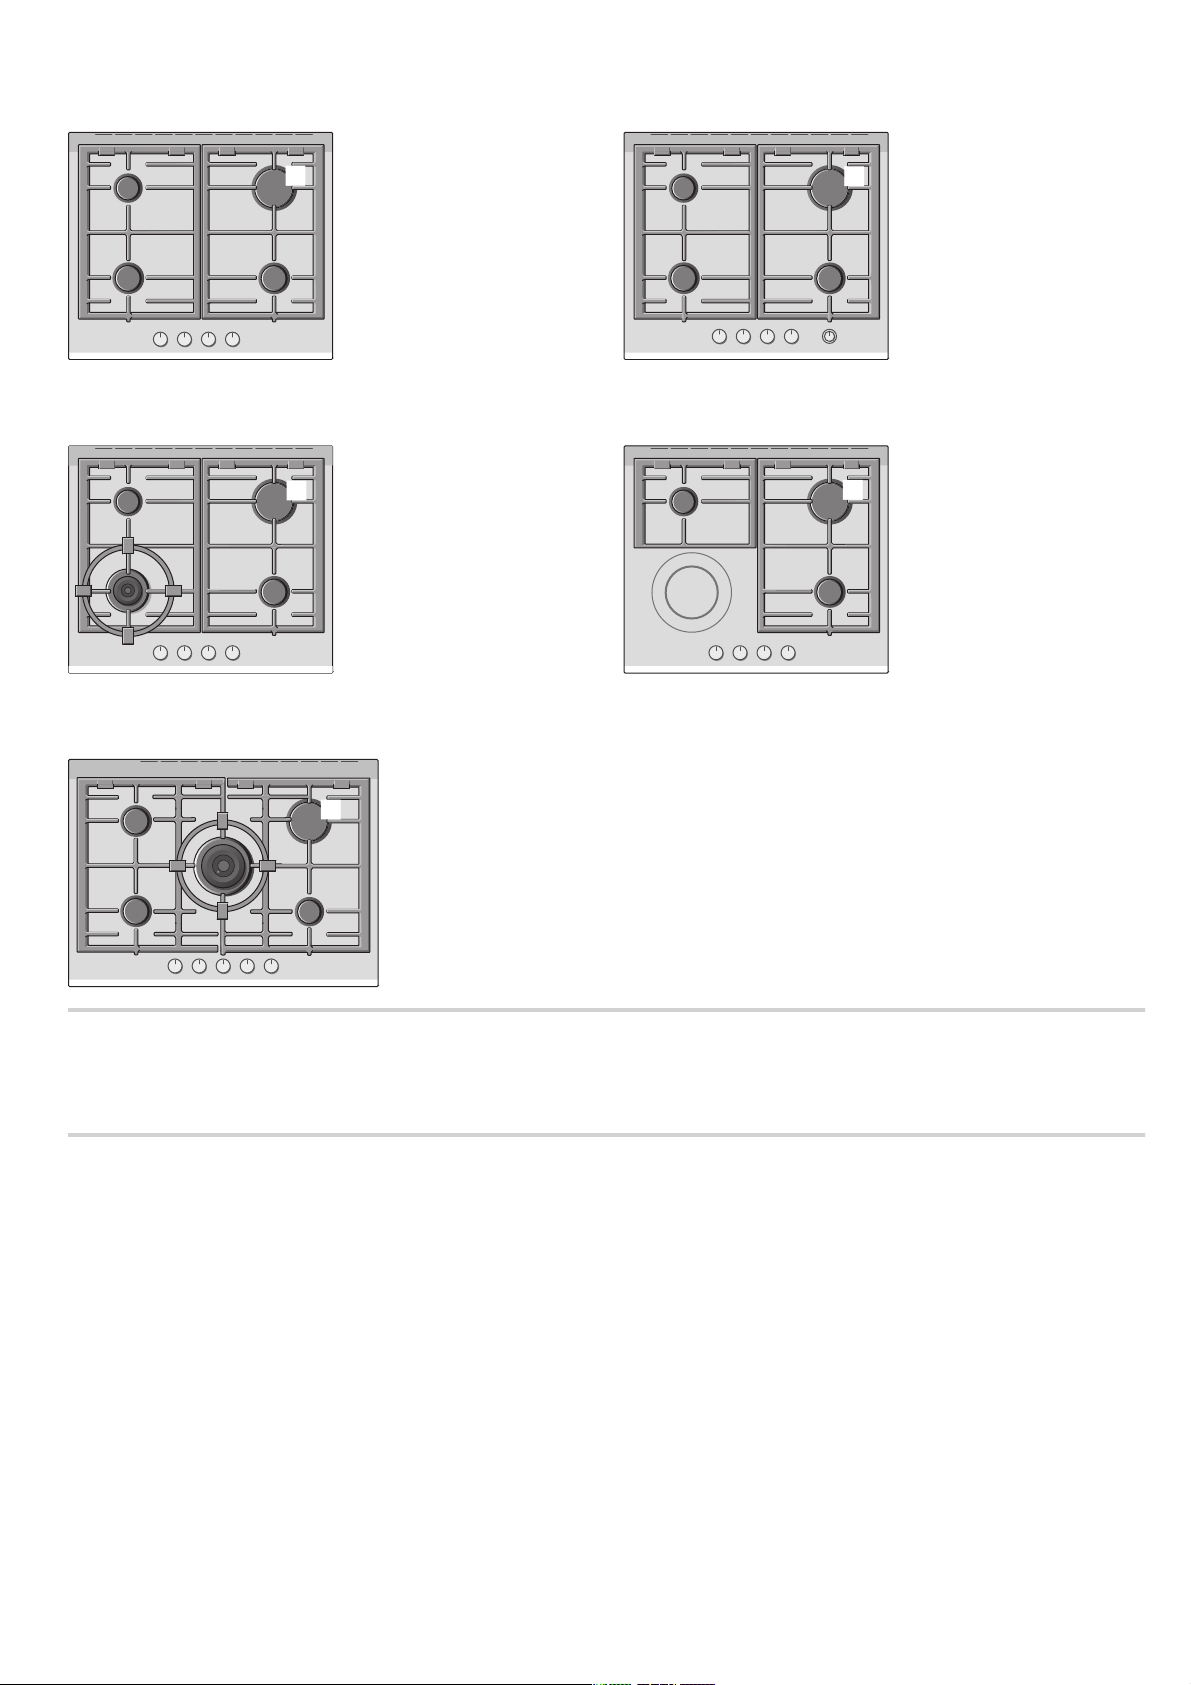
<RXUQHZDSSOLDQFH
1BHF TIPXTBOPWFSBMMWJFXPGZPVSOFXBQQMJBODFBTXFMMBT
UIFCVSOFSQPXFS
$FFHVVRULHV
%FQFOEJOHPOUIFNPEFMUIFIPCNBZJODMVEFUIFGPMMPXJOH
BDDFTTPSJFT5IFTFDBOBMTPCFBDRVJSFEGSPNUIF5FDIOJDBM
"TTJTUBODF4FSWJDF
--------
&RGH
5IF NBOVGBDUVSFS BDDFQUT OP MJBCJMJUZ JG UIFTF BDDFTTPSJFT BSF OPU
VTFEPSBSFVTFEJODPSSFDUMZ
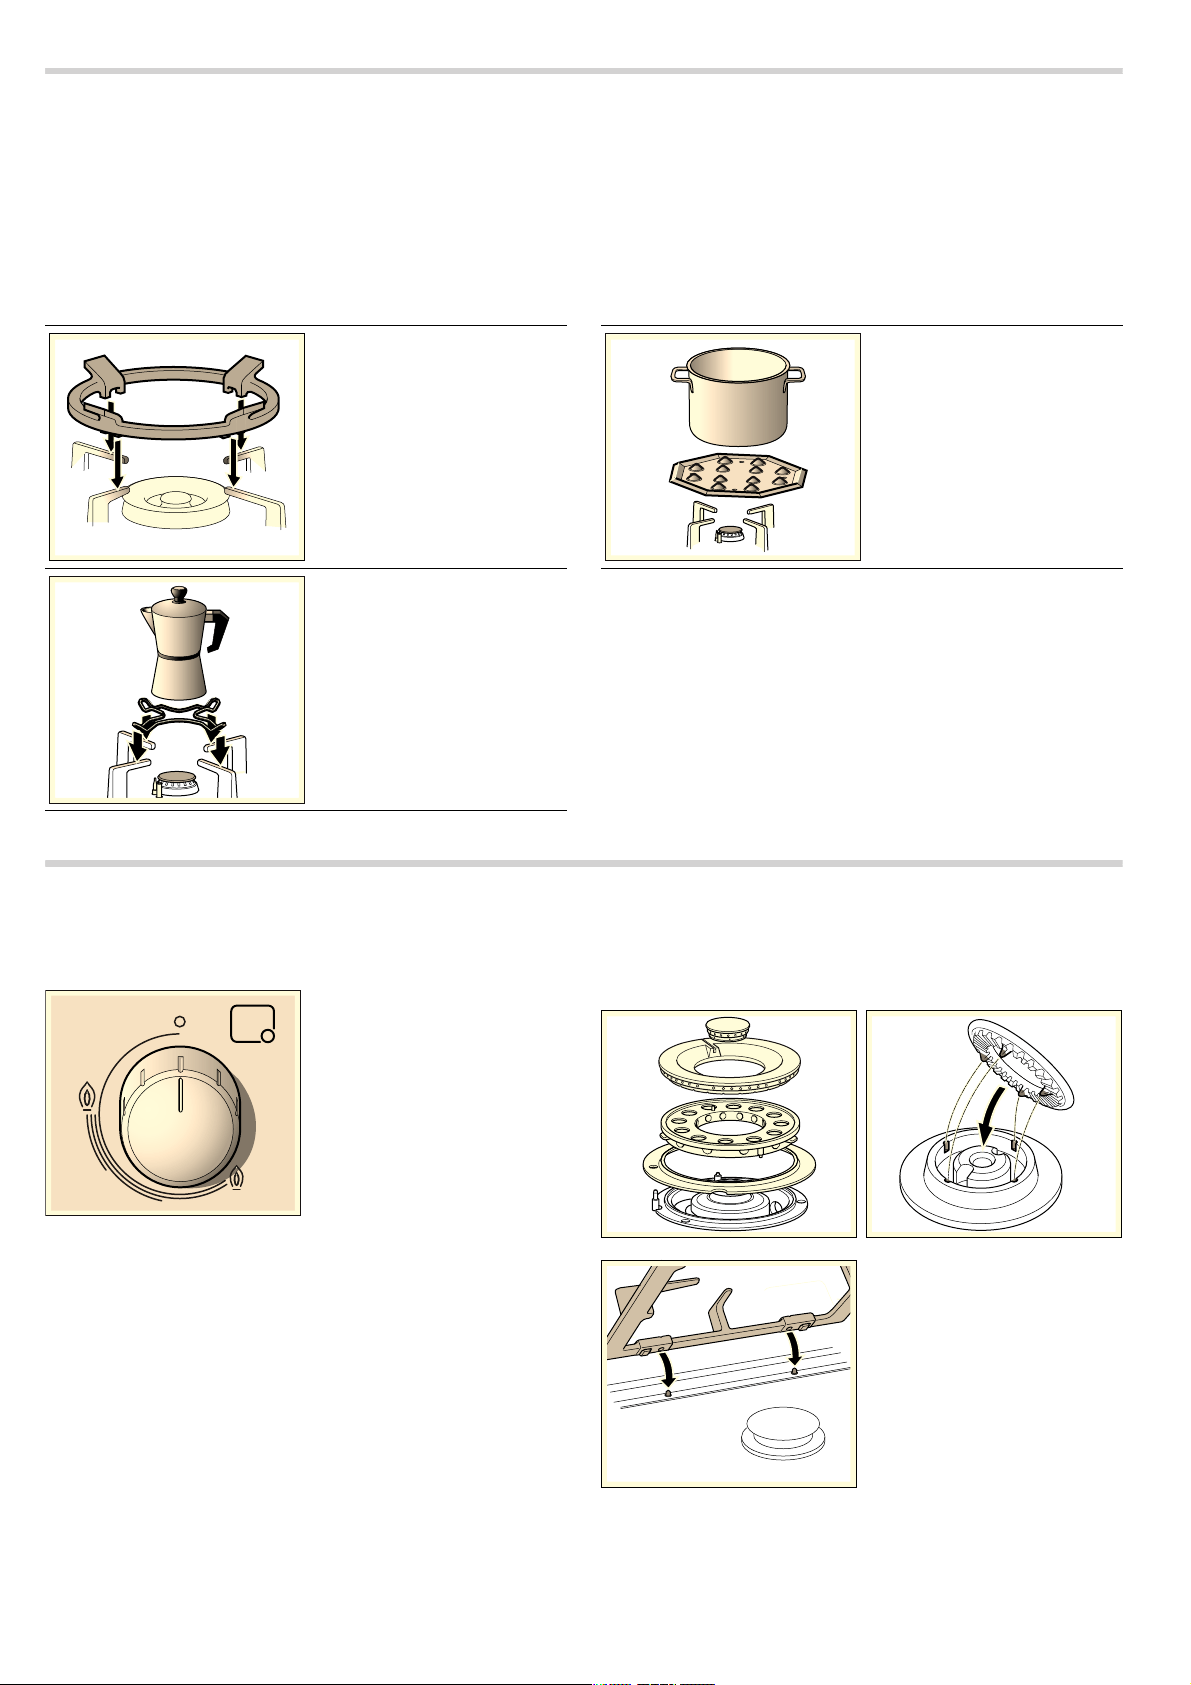
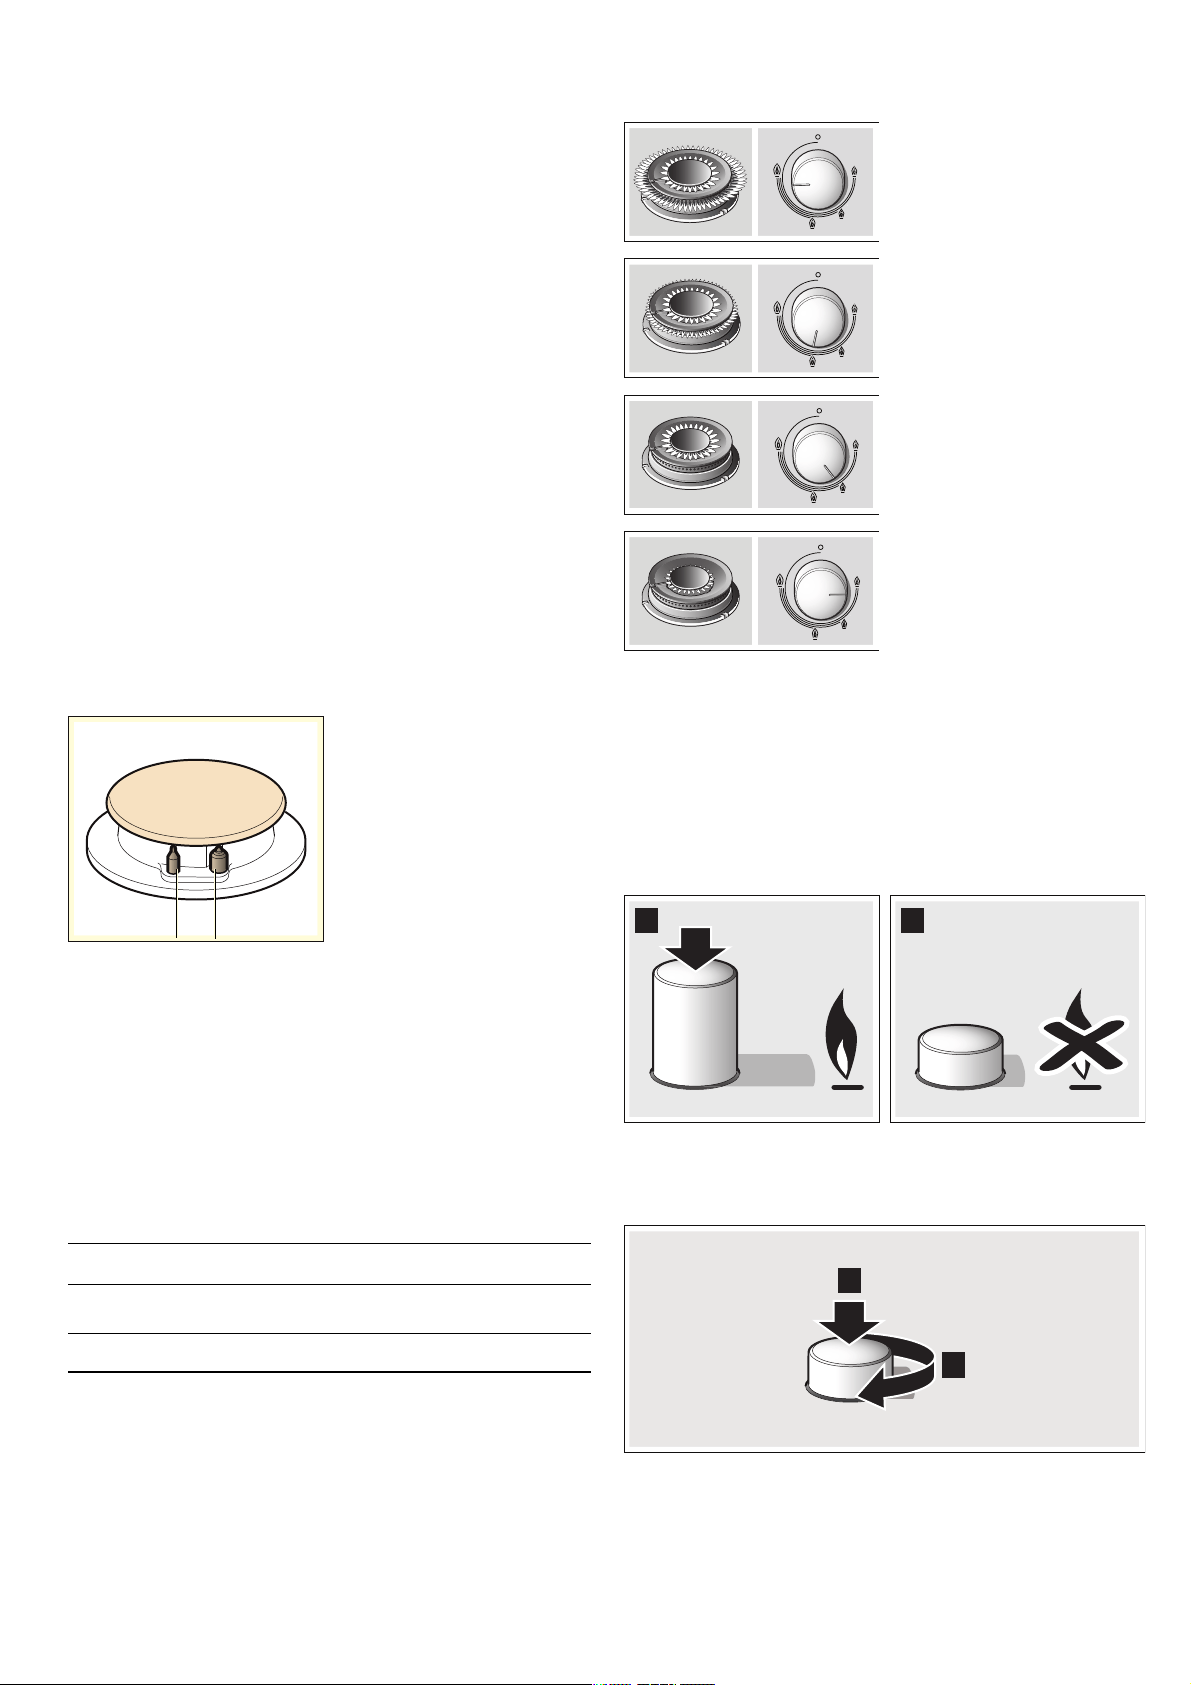
*DVEXUQHUV
5IFSFBSFJOEJDBUJPOTUPTIPXXIJDICVSOFSFBDIDPOUSPMLOPC
PQFSBUFT
*U JT FTTFOUJBM UP FOTVSF UIBU BMM UIF CVSOFS QBSUT BOE QBO TVQQPSUT
BSFDPSSFDUMZJOTUBMMFEGPSUIFBQQMJBODFUPXPSLDPSSFDUMZ%POPU
TXBQUIFCVSOFSDBQTBSPVOE
$GGLWLRQDOZRNSDQVXSSRUW
0OMZGPSVTFPOEPVCMFBOEUSJ
QMFGMBNFXPLCVSOFSTXJUI
QBOTXIJDIBSFNPSFUIBO
DNJOEJBNFUFSHSJMMQBOT
FBSUIFOXBSF DBTTFSPMF EJTIFT
MBSHFQBOTXJUIBSPVOECBTF
FUD
5IFBEEJUJPOBMXPLQBOTVQ
QPSU TIPVME CF VTFE UP QSPMPOH
UIFBQQMJBODFTVTFGVMMJGF
$GGLWLRQDOFRIIHHPDNHU
VXSSRUW
0OMZGPSVTFPOUIFBVYJMJBSZ
CVSOFSXJUIQBOTXIJDIBSFOP
NPSFUIBO DNJOEJBNFUFS
6LPPHU3ODWH
5IJTBDDFTTPSZIBTCFFO
EFTJHOFE UP SFEVDF UIF MFWFM PG
IFBUBUUIFMPXFTUQPXFSTFU
UJOH
1MBDF UIF BDDFTTPSZ EJSFDUMZ PO
UIF QBO TVQQPSU XJUI UIF DPOFT
GBDJOHVQXBSETOFWFSEJSFDUMZ
PWFSUIFCVSOFS$FOUSFUIF
QBOPWFSUIFBDDFTTPSZ
)&; "EEJUJPOBMDPGGFFNBLFSTVQQPSU
)&; 4JNNFS1MBUF
6
6ZLWFKLQJRQPDQXDOO\
1SFTTUIFDIPTFOCVSOFSDPOUSPMLOPCBOEUVSOJUBOUJDMPDLXJTF
UPUIFSFRVJSFETFUUJOH
6TF BOZ UZQF PG MJHIUFS PS GMBNF DJHBSFUUF MJHIUFS NBUDIFT FUD
BOECSJOHJUDMPTFUPUIFCVSOFS
6ZLWFKLQJRQDXWRPDWLFDOO\
*GZPVSIPCDBOCFTXJUDIFEPOBVUPNBUJDBMMZJHOJUJPOTQBSLFST
1SFTTUIFDIPTFOCVSOFSDPOUSPMLOPCBOEUVSOJUBOUJDMPDLXJTF
UPUIFNBYJNVNQPXFSTFUUJOH
8IJMFUIFDPOUSPMLOPCJTTUJMMQSFTTFEEPXOTQBSLTBSF
QSPEVDFEPOBMMCVSOFST5IFGMBNFJHOJUFT
3FMFBTFUIFDPOUSPMLOPC
5VSOUIFDPOUSPMLOPCUPUIFSFRVJSFETFUUJOH
*GJUEPFTOPUDPNFPOUVSOUIFDPOUSPMLOPCUPUIFPGGTFUUJOHBOE
SFQFBU UIF TUFQT BCPWF 5IJT UJNF QSFTT BOE IPME UIF DPOUSPM LOPC
GPSMPOHFSVQUPTFDPOET
: 5LVNRIGHIODJUDWLRQ
*G BGUFS TFDPOET UIF GMBNF EPFT OPU JHOJUF TXJUDI PGG UIF CVSOFS
BOEPQFOBOFBSCZXJOEPXPSEPPS8BJUBUMFBTUPOFNJOVUF
CFGPSFUSZJOHUPTXJUDIUIFCVSOFSCBDLPO
6DIHW\V\VWHP
%FQFOEJOHPOUIFNPEFMZPVSIPCNBZIBWFBTBGFUZTZTUFN
UIFSNPDPVQMFUIBUQSFWFOUTUIFGMPXPGHBTJGUIFCVSOFST
BDDJEFOUBMMZTXJUDIPGG
5PFOTVSFUIBUUIJTEFWJDFJTBDUJWF
4XJUDIPOUIFCVSOFSBTVTVBM
8JUIPVU SFMFBTJOH UIF DPOUSPM LOPC QSFTT BOE IPME JU EPXO GJSNMZ
GPSTFDPOETBGUFSMJHIUJOHUIFGMBNF
6ZLWFKLQJRIIDEXUQHU
5VSOUIFDPSSFTQPOEJOHDPOUSPMLOPCDMPDLXJTFUPUIFTFUUJOH
3RZHUOHYHOV
5IFQSPHSFTTJWFDPOUSPMLOPCTDBOCFVTFEUPDPOUSPMUIFQPXFS
OFFEFEGSPNNJOJNVNUPNBYJNVNQPXFS
'PS EVBM EPVCMFGMBNF CVSOFST UIF JOOFS BOE PVUFS GMBNFT DBO CF
DPOUSPMMFETFQBSBUFMZ5IFBWBJMBCMFQPXFSMFWFMTBSFBTGPMMPXT
0DLQVZLWFK+REORFN0DLQ6ZLWFK
5IFIPCNBZIBWFBNBJOTXJUDIUPDVUPGGUIFNBJOTHBTTVQQMZ
BOE TXJUDI PGG BMM UIF CVSOFST BU UIF TBNF UJNF 5IJT TXJUDI JT WFSZ
QSBDUJDBM JG UIFSF BSF DIJMESFO JO UIF IPVTF PS JG GPS BOZ SFBTPO BMM
UIFCVSOFSTNVTUCFTXJUDIFEPGGRVJDLMZ
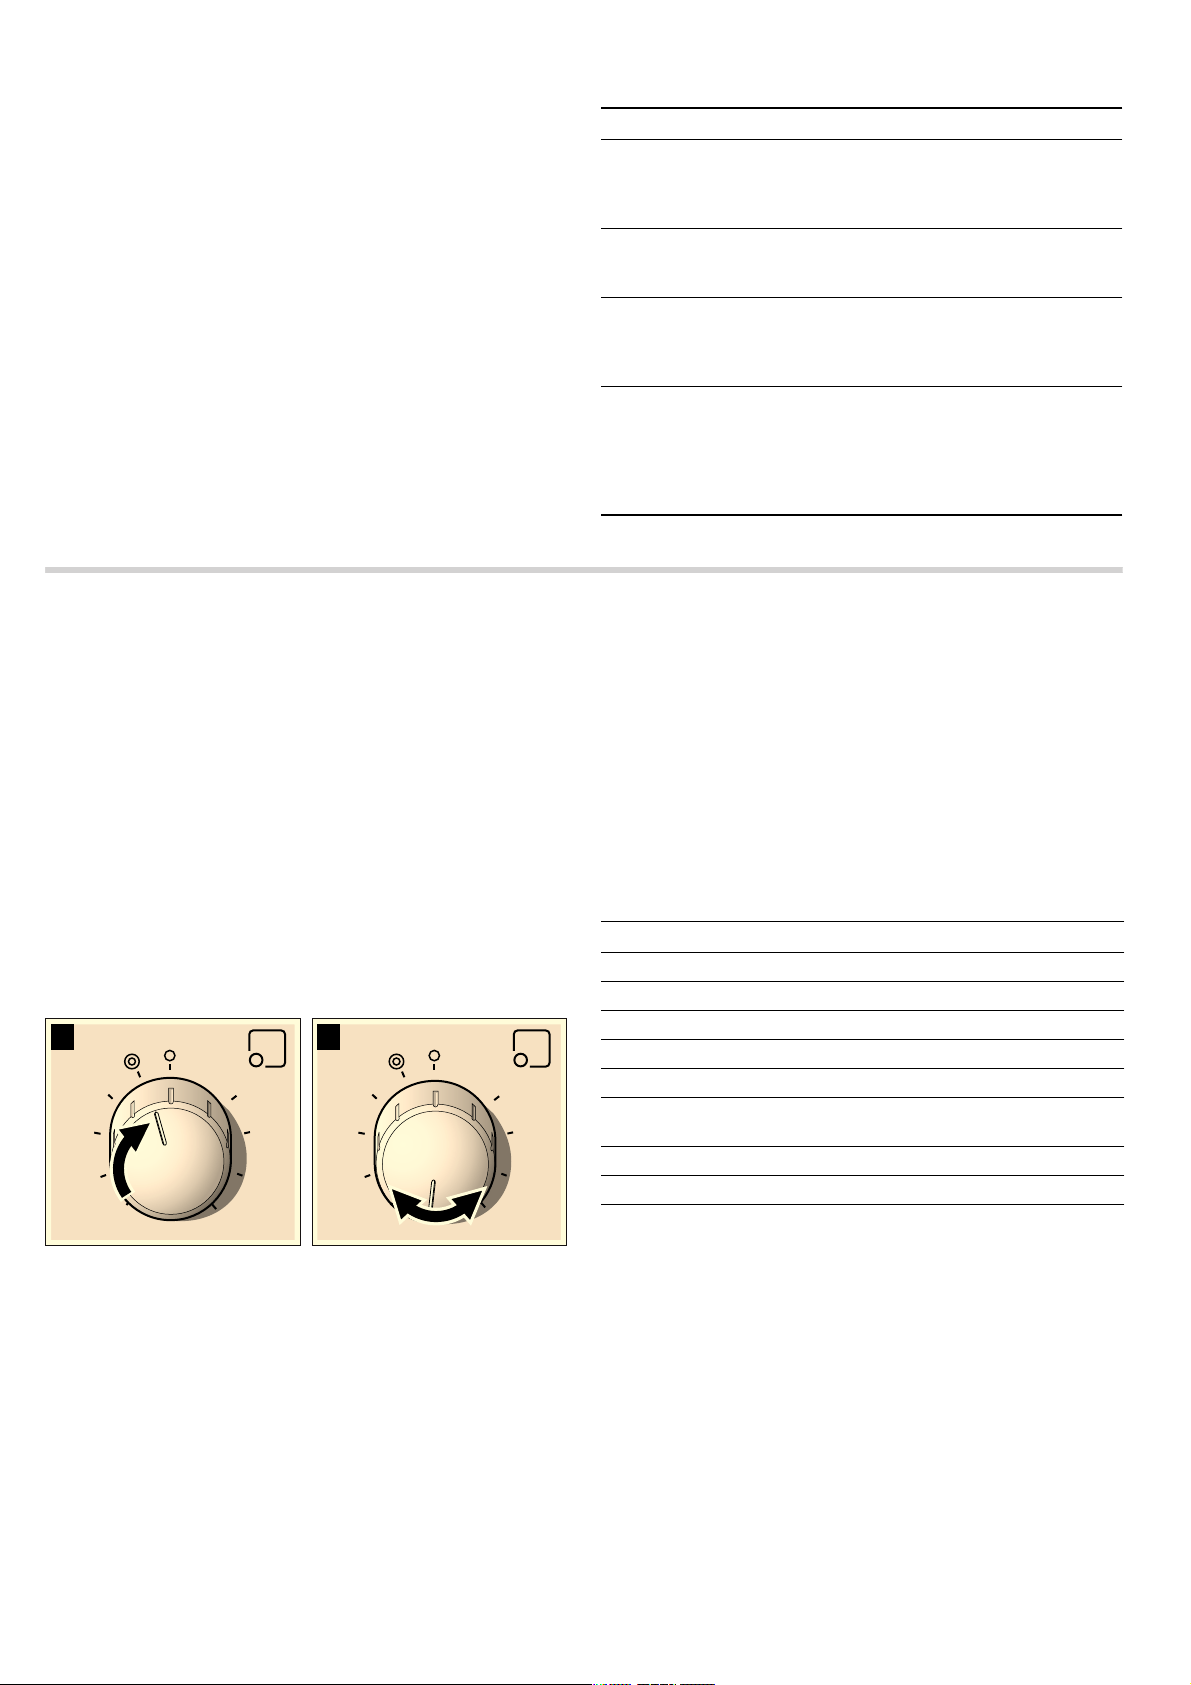
7RORFNWKHKRE
1SFTTUIFNBJOTXJUDI
5IJTTXJUDIFTPGGBMMUIFCVSOFSTXIJDIBSFPO5IFIPCJTMPDLFE
7RXQORFNWKHKRE
5VSOBMMUIFDPOUSPMLOPCTUPUIFPGGQPTJUJPO
1SFTTUIFNBJOTXJUDIBOEUVSOJUGVMMZDMPDLXJTF
5IFNBJOTHBTTVQQMZJTUVSOFEPO:PVDBOOPXVTFZPVSIPC
OPSNBMMZ
4FUUJOH
Û
$POUSPMLOPCPGG
)JHIGMBNF
—
.BYJNVNDBQBDJUZPSBQFSUVSFBOEFMFD
USJDJUZPO
-PXGMBNF
˜
.JOJNVNDBQBDJUZPSBQFSUVSF
WKHUPR
FRXSOH
LJQLWLRQ
VSDUNHU
*OOFSBOEPVUFSGMBNFPOGVMM
QPXFS
0VUFS GMBNF PO MPX QPXFS JOOFS
GMBNFPOGVMMQPXFS
*OOFSGMBNFPOGVMMQPXFS
*OOFSGMBNFPOMPXQPXFS
$ %
$
%
7
:DUQLQJV
*UJTOPSNBMUPIFBSBTPGUXIJTUMJOHOPJTFXIJMFUIFCVSOFSJT
PQFSBUJOH
8IFO GJSTU VTFE JU JT OPSNBM GPS UIF CVSOFS UP HJWF PGG PEPVST 5IJT
EPFT OPU QPTF BOZ SJTL BOE EPFT OPU JOEJDBUF B NBMGVODUJPO 5IFZ
XJMMEJTBQQFBSJOUJNF
"OPSBOHFDPMPVSFEGMBNFJTOPSNBM5IJTJTDBVTFECZUIF
QSFTFODFPGEVTUJOUIFBUNPTQIFSFTQJMUMJRVJETFUD
*GUIFCVSOFSGMBNFTBSFBDDJEFOUBMMZCMPXOPVUTXJUDIPGGUIF
CVSOFS PQFSBUJOH DPOUSPM LOPC BOE EP OPU USZ UP SFMJHIU JU GPS BU MFBTU
NJOVUF
" GFX TFDPOET BGUFS UIF CVSOFS JT TXJUDIFE PGG B TPVOE UIVE XJMM
CF QSPEVDFE 5IJT JT OPU B GBVMU UIJT NFBOT UIBU UIF TBGFUZ EFWJDF
JTOPMPOHFSPQFSBUJOH
,FFQUIFCVSOFSBTDMFBOBTQPTTJCMF*GUIFJHOJUJPOTQBSLFSTBSF
EJSUZUIFZXJMMOPUMJHIUQSPQFSMZ$MFBOUIFNQFSJPEJDBMMZVTJOHB
TNBMM OPOXJSF CSVTI #FBS JO NJOE UIBU UIF JHOJUJPO TQBSLFST NVTU
OPUTVGGFSBOZTFSJPVTJNQBDUT
&RRNLQJJXLGHOLQHV
(OHFWULFKRE
.PEFMTXJUIBUXJODJSDVJUHMBTTDFSBNJDIPUQMBUFQSPWJEFUXP
EJGGFSFOU IPUQMBUF DPOGJHVSBUJPOT B TNBMM IPUQMBUF PG 8 BOE BO
FYUFOEFEIPUQMBUFPG 8JGZPVSBQQMJBODFXPSLTBU 7
2SHUDWLRQ
6ZLWFKLQJRQ
$POOFDUUIFTNBMMIPUQMBUF
5VSOUIFDPOUSPMLOPCDMPDLXJTFUPUIFSFRVJSFETFUUJOH5IF
PQFSBUJPOJOEJDBUPSXJMMMJHIUVQ
4FUUJOH0GGTFUUJOH
4FUUJOHMPXQPXFS
4FUUJOHGVMMQPXFS
$POOFDUUIFFYUFOEFEIPUQMBUF
5VSOUIFDPOUSPMLOPCDMPDLXJTFCFZPOETFUUJOH BOEUIFOUVSOJU
UIFPQQPTJUFEJSFDUJPOUPUIFSFRVJSFETFUUJOH
5PVTFUIFTNBMMIPUQMBUFBHBJOUVSOUIFDPOUSPMLOPC
BOUJDMPDLXJTFUPTFUUJOH BOETXJUDIPOBHBJO
1RWH *UJTSFDPNNFOEFEUPTUBSUDPPLJOHPOGVMMQPXFSBOEUIFO
UPVTFJOUFSNFEJBUFQPXFSMFWFMTBGUFSBGFXNJOVUFT
6ZLWFKLQJRII
5VSOUIFLOPCBOUJDMPDLXJTFUPUIF0GGTFUUJOH5IFSFTJEVBMIFBU
XBSOJOHMJHIUXJMMTXJUDIPGGPODFUIFIPCTVSGBDFIBTDPPMFE
EPXO
5HVLGXDOKHDW
5IF FMFDUSJD IPC DBO CF TXJUDIFE PGG TMJHIUMZ CFGPSF UIF FOE PG UIF
DPPLJOHUJNF5IFSFTJEVBMIFBUXJMMFOBCMFZPVUPDPOUJOVF
DPPLJOHGPSTFWFSBMNJOVUFTUIVTTBWJOHFOFSHZ
:DUQLQJV
%POPUBMMPXMJRVJETUPCFTQJMUPOUIFTVSGBDFPGUIFFMFDUSJDIPC
%POPUDPPLXJUIXFUQBOT
&RRNLQJJXLGHOLQHV
5IF GPMMPXJOH TVHHFTUJPOT BSF JOUFOEFE BT B HVJEF POMZ *ODSFBTF
UIFQPXFSGPS
■ MBSHFRVBOUJUJFTPGMJRVJE
■ QSFQBSBUJPOPGMBSHFEJTIFT
■ VODPWFSFEQBOT
%XUQHU 9HU\KLJK+LJK 0HGLXP /RZ
8PLCVSOFS #PJMJOHTUFBNJOH
HSJEEMJOH UPBTUJOH
QBFMMBT"TJBO
GPPEXPL
3FIFBUJOH BOE LFFQJOH UIJOHT
IPUDPPLFEBOEQSFDPPLFE
EJTIFT
3BQJECVSOFS &TDBMPQFT TUFBLT
PNFMFUUFTGSZJOH
3JDFXIJUF
TBVDFSBHPVU
4UFBNJOH
GJTIWFHFUB
CMFT
4FNJSBQJE
CVSOFS
4UFBNFEQPUB
UPFTGSFTIWFHFUB
CMFTWFHFUBCMF
TUFXTQBTUB
3FIFBUJOH LFFQJOH UIJOHT IPU
BOENBLJOHUBTUZDBTTFSPMFT
"VYJMJBSZ
CVSOFS
$PPLJOHDBTTF
SPMFTSJDFQVE
EJOHDBSBNFM
%FGSPTUJOH
BOETMPX
DPPLJOHWFH
FUBCMFTGSVJU
BOEGSP[FO
QSPEVDUT
.FMUJOHCVU
UFSDIPDP
MBUFKFMMZ
&RRNLQJ 6HWWLQJ
0HOWLQJ DIPDPMBUFCVUUFSHFMBUJOF
&RRNLQJ SJDFXIJUFTBVDFBOESBHPVU
&RRNLQJ QPUBUPFTQBTUBWFHFUBCMFT
/LJKWIU\LQJ TUFXTSPBTUKPJOUT
6WHDPLQJ GJTI
+HDWLQJNHHSLQJWKLQJVZDUPSFBEZ
NFBMT
*ULOOLQJ FTDBMPQFTTUFBLTPNFMFUUFT
&RRNLQJDQGEURZQLQJ
8
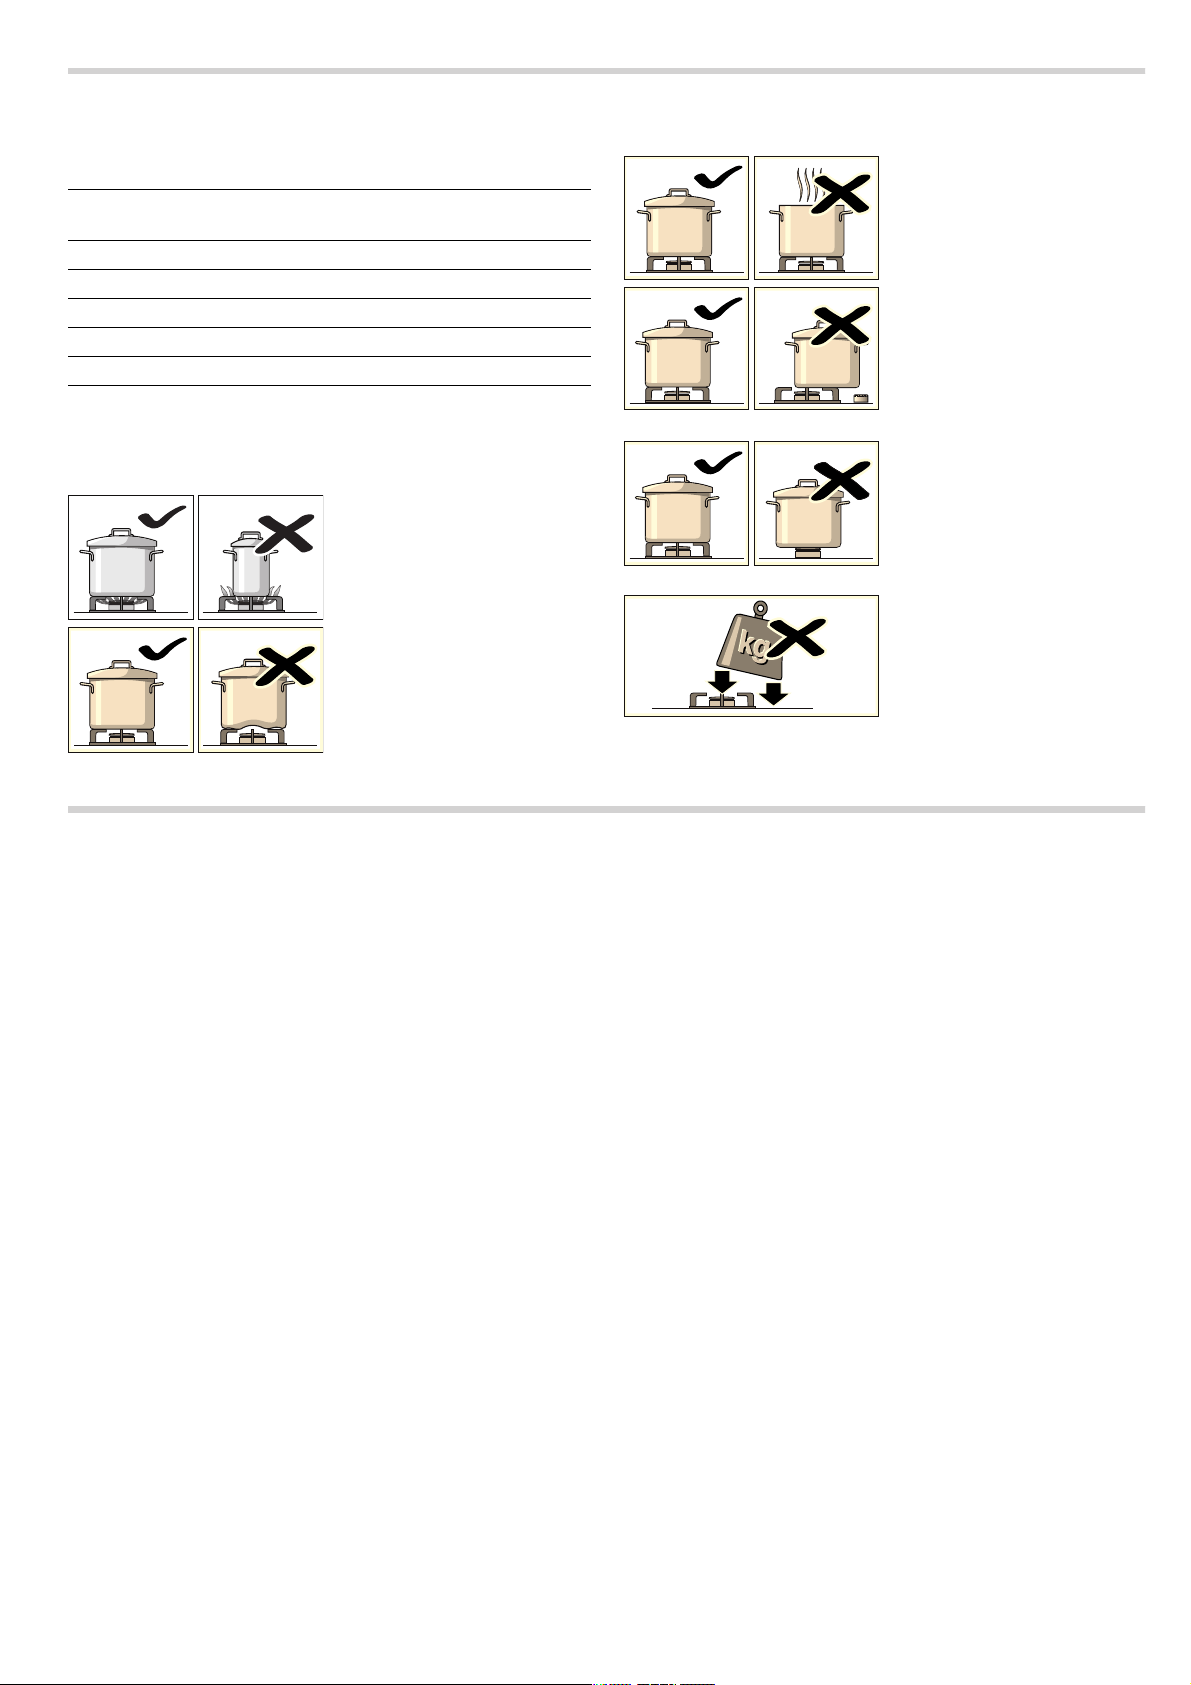
&RRNLQJSDQV
6XLWDEOHSDQV
3UHFDXWLRQVIRUXVH
5IFGPMMPXJOHBEWJDFJTJOUFOEFEUPIFMQZPVTBWFFOFSHZBOE
QSFWFOUQBOEBNBHF
&OHDQLQJDQGPDLQWHQDQFH
&OHDQLQJ
0ODF UIF BQQMJBODF JT DPPM VTF B TQPOHF UP DMFBO JU XJUI TPBQ BOE
XBUFS
"GUFSFBDIVTFDMFBOUIFTVSGBDFPGUIFSFTQFDUJWFCVSOFSQBSUT
PODF UIFZ IBWF DPPMFE EPXO *G BOZ SFTJEVF JT MFGU CBLFEPO GPPE
ESPQTPGHSFBTFFUDIPXFWFSMJUUMFJUXJMMCFDPNFTUVDLUPUIF
TVSGBDF BOE NPSF EJGGJDVMU UP SFNPWF MBUFS 5IF IPMFT BOE HSPPWFT
NVTUCFDMFBOGPSUIFGMBNFUPJHOJUFQSPQFSMZ
5IF NPWFNFOU PG TPNF QBOT NBZ MFBWF NFUBM SFTJEVF PO UIF QBO
TVQQPSUT
$MFBO UIF CVSOFST BOE QBO TVQQPSUT VTJOH TPBQZ XBUFS BOE TDSVC
XJUIBOPOXJSFCSVTI
"MUFSOBUJWFMZ UIF QBO TVQQPSUT DBO CF QVU JO UIF EJTIXBTIFS 6TF
UIFEJTIXBTIFSNBOVGBDUVSFSTSFDPNNFOEFEEFUFSHFOU*GUIF
QBOTVQQPSUTBSFWFSZEJSUZUIFZTIPVMECFDMFBOFEQSFWJPVTMZ
%POPUQVUUIFCVSOFSDBQTJOUIFEJTIXBTIFS
*GUIFQBOTVQQPSUTBSFGJUUFEXJUISVCCFSSFTUTFOTVSFUIBUUIFTF
BSF BMTP DMFBOFE 5IF SFTUT NBZ DPNF MPPTF BOE UIF QBO TVQQPSU
NBZTDSBUDIUIFIPC
"MXBZTESZUIFCVSOFSTBOEQBOTVQQPSUTDPNQMFUFMZ8BUFS
ESPQMFUTPSEBNQQBUDIFTPOUIFIPCBUUIFTUBSUPGDPPLJOHNBZ
EBNBHFUIFFOBNFM
"GUFS DMFBOJOH BOE ESZJOH UIF CVSOFST NBLF TVSF UIF CVSOFS DBQT
BSFDPSSFDUMZQPTJUJPOFEPOUIFEJGGVTFS
&DXWLRQ
■ %POPUVTFTUFBNDMFBOFST5IJTDPVMEEBNBHFUIFIPC
■ /FWFS VTF BCSBTJWF QSPEVDUT TUFFM TDPVSFST TIBSQ JNQMFNFOUT
LOJWFTFUDUPSFNPWFCJUTPGIBSEFOFEGPPEGSPNUIFIPC
■ %POPUVTFLOJWFTTDSBQFSTPSTJNJMBSJNQMFNFOUTUPDMFBOUIF
QPJOUXIFSFUIFHMBTTNFFUTUIFCVSOFSUSJNTUIFNFUBMGSBNFT
PSUIFHMBTTBMVNJOJVNQBOFMTJGGJUUFE
0DLQWHQDQFH
"MXBZTDMFBOPGGBOZMJRVJEBTTPPOBTJUJTTQJMU5IJTXJMMQSFWFOU
GPPESFNBJOTGSPNTUJDLJOHUPUIFIPCTVSGBDFBOEZPVXJMMTBWF
ZPVSTFMGBOZVOOFDFTTBSZFGGPSU
/FWFS TMJEF QBOT BDSPTT UIF HMBTT TVSGBDF BT ZPV NBZ TDSBUDI JU
*OBEEJUJPOUSZOPUUPESPQIFBWZPSTIBSQPCKFDUTPOUIFHMBTT
/FWFSTUSJLFBOZQBSUPGUIFIPC
(SBJOT PG TBOE UIBU NBZ DPNF GSPN DMFBOJOH GSVJUT BOE WFHFUBCMFT
XJMMTDSBUDIUIFHMBTTTVSGBDF
.FMUFETVHBSPSGPPETXIJDIDPOUBJOBMPUPGTVHBSXIJDINBZ
IBWFTQJMUTIPVMECFDMFBOFEPGGUIFIPUQMBUFJNNFEJBUFMZVTJOH
UIFHMBTTTDSBQFS
"WPJETQJMMJOHTBMUPOUIFTVSGBDFPGUIFFMFDUSJDIPC
%XUQHU 0LQLPXPSDQ
GLDPHWHU
0D[LPXPSDQ
GLDPHWHU
8PLCVSOFS DN
3BQJECVSOFS DN DN
4FNJSBQJECVSOFS DN DN
"VYJMJBSZCVSOFS DN DN
&MFDUSJDIPC DN DN
6TFQBOTXIJDIBSFUIFSJHIU
TJ[FGPSFBDICVSOFS
%POPUVTFTNBMMQBOTPOMBSHF
CVSOFST5IFGMBNFNVTUOPU
UPVDIUIFTJEFTPGUIFQBO
%POPUVTFEBNBHFEQBOT
XIJDIEPOPUTJUFWFOMZPOUIF
IPC1BOTNBZUJQPWFS
0OMZVTFQBOTXJUIBUIJDLGMBU
CBTF
%POPUDPPLXJUIPVUVTJOHBMJE
BOENBLFTVSFUIFMJEJT
QSPQFSMZGJUUFE5IJTXBTUFT
FOFSHZ
"MXBZTDFOUSFUIFQBOPWFSUIF
CVSOFSOPUUPPOFTJEF
0UIFSXJTFJUDPVMEUJQPWFS
%POPUQMBDFMBSHFQBOTPOUIF
CVSOFSTOFBSUIFDPOUSPMLOPCT
5IFTFNBZCFEBNBHFECZUIF
WFSZIJHIUFNQFSBUVSFT
1MBDFUIFQBOTPOUIFQBO
TVQQPSUTOFWFSEJSFDUMZPOUIF
CVSOFS
.BLFTVSFUIBUUIFQBO
TVQQPSUTBOECVSOFSDBQTBSF
DPSSFDUMZQPTJUJPOFECFGPSF
VTJOHUIFBQQMJBODF
1BOTTIPVMECFQMBDFEPOUIF
IPCDBSFGVMMZ
%P OPU TUSJLF UIF IPC BOE EP OPU
QMBDFFYDFTTJWFXFJHIUPOJU

9
7URXEOHVKRRWLQJ
4PNFUJNFT DFSUBJO GBVMUT EFUFDUFE DBO CF FBTJMZ SFTPMWFE #FGPSF
DBMMJOHUIF5FDIOJDBM"TTJTUBODF4FSWJDFCFBSJONJOEUIF
GPMMPXJOHBEWJDF
7HFKQLFDO$VVLVWDQFH6HUYLFH
8IFODPOUBDUJOHPVS5FDIOJDBM"TTJTUBODF4FSWJDFQMFBTF
QSPWJEFUIFQSPEVDUOVNCFS&/SBOEQSPEVDUJPOOVNCFS'%
PGUIFBQQMJBODF5IJTJOGPSNBUJPOJTHJWFOPOUIFTQFDJGJDBUJPOT
QMBUFMPDBUFEPOUIFMPXFSTFDUJPOPGUIFIPCBOEPOUIFMBCFMJO
UIFVTFSNBOVBM
1MFBTFGJOEUIFDPOUBDUEBUBPGBMMDPVOUSJFTJOUIFFODMPTFE
DVTUPNFSTFSWJDFMJTU
7RERRNDQHQJLQHHUYLVLWDQGSURGXFWDGYLFH
3FMZPOUIFQSPGFTTJPOBMJTNPGUIFNBOVGBDUVSFS:PVDBO
UIFSFGPSFCFTVSFUIBUUIFSFQBJSJTDBSSJFEPVUCZUSBJOFETFSWJDF
UFDIOJDJBOTXIPDBSSZPSJHJOBMTQBSFQBSUTGPSZPVSBQQMJBODFT
:DUUDQW\FRQGLWLRQV
*OUIFVOMJLFMZFWFOUUIBUUIFBQQMJBODFJTEBNBHFEPSEPFTOPU
NFFUZPVSFYQFDUBUJPOTJOUFSNTPGRVBMJUZQMFBTFJOGPSNVTBT
TPPO BT QPTTJCMF 'PS UIF XBSSBOUZ UP CF WBMJE UIF BQQMJBODF NVTU
OPUIBWFCFFOUBNQFSFEXJUIPSVTFEJOBQQSPQSJBUFMZ
5IFBQQMJDBCMFXBSSBOUZDPOEJUJPOTBSFUIPTFTFUPVUCZUIF
DPNQBOZTSFQSFTFOUBUJWFPGGJDFJOUIFDPVOUSZPGQVSDIBTF
%FUBJMFEJOGPSNBUJPOJTBWBJMBCMFGSPNSFUBJMPVUMFUT1SPPGPG
QVSDIBTFNVTUCFQSFTFOUFEUPPCUBJOUIFCFOFGJUTPGUIF
XBSSBOUZ
8FSFTFSWFUIFSJHIUUPJOUSPEVDFDIBOHFT
)DXOW 3RVVLEOHFDXVH 6ROXWLRQ
5IFHFOFSBMFMFDUSJDBMTZT
UFNJTNBMGVODUJPOJOH
%FGFDUJWFGVTF $IFDLUIFGVTFJOUIFNBJOGVTFCPYBOEDIBOHFJUJG
JUJTEBNBHFE
5IFBVUPNBUJDTBGFUZTXJUDIPSDJSDVJUCSFBLFSIBT
USJQQFE
$IFDLUIFNBJODPOUSPMQBOFMUPTFFJGUIFBVUPNBUJD
TBGFUZTXJUDIPSDJSDVJUCSFBLFSIBTUSJQQFE
5IFBVUPNBUJDTXJUDIJOHPO
GVODUJPOEPFTOPUXPSL
5IFSFNBZCFGPPEPSDMFBOJOHQSPEVDUTTUVDL
CFUXFFOUIFJHOJUJPOTQBSLFSTBOEUIFCVSOFST
5IFTQBDFCFUXFFOUIFJHOJUJPOTQBSLFSBOEUIF
CVSOFSNVTUCFDMFBO
5IFCVSOFSTBSFXFU %SZUIFCVSOFSDBQTDBSFGVMMZ
5IFCVSOFSDBQTBSFOPUDPSSFDUMZQPTJUJPOFE $IFDLUIBUUIFCVSOFSDBQTBSFDPSSFDUMZQPTJUJPOFE
5IF BQQMJBODF JT OPU FBSUIFE JT QPPSMZ DPOOFDUFE PS
UIFFBSUIJOHJTGBVMUZ
$POUBDUUIFJOTUBMMBUJPOUFDIOJDJBO
5IFCVSOFSGMBNFJTOPUVOJ
GPSN
5IFCVSOFSDPNQPOFOUTBSFOPUDPSSFDUMZQPTJ
UJPOFE
$PSSFDUMZQMBDFUIFQBSUTPOUIFBQQSPQSJBUFCVSOFS
5IFHSPPWFTPOUIFCVSOFSBSFEJSUZ $MFBOUIFHSPPWFTPOUIFCVSOFS
5IFHBTGMPXJTOPUOPSNBM
PSUIFSFJTOPHBT
5IFHBTTVQQMZJTCMPDLFECZHBTUBQT 0QFOBMMHBTUBQT
*G UIF HBT JT TVQQMJFE GSPN B HBT DZMJOEFS DIFDL UIBU
JUJTOPUFNQUZ
$IBOHFUIFHBTDZMJOEFS
5IFLJUDIFOTNFMMTPGHBT "HBTUBQIBTCFFOMFGUPO 5VSOPGGUIFUBQT
*ODPSSFDUDPVQMJOHPGHBTDZMJOEFS $IFDLUIBUUIFDPVQMJOHJTTPVOE
1PTTJCMFHBTMFBL 4IVUPGGUIFHBTTVQQMZWFOUJMBUFUIFQSFNJTFTBOE
JNNFEJBUFMZOPUJGZBOBVUIPSJTFEJOTUBMMBUJPOUFDIOJ
DJBOUPDIFDLBOEDFSUJGZUIFJOTUBMMBUJPO%POPUVTF
UIF BQQMJBODF VOUJM FOTVSJOH UIBU UIFSF JT OP HBT MFBL
JOUIFJOTUBMMBUJPOPSBQQMJBODFJUTFMG
5IFCVSOFSJNNFEJBUFMZ
TXJUDIFTPGGBGUFSSFMFBTJOH
UIFDPOUSPMLOPC
5IFDPOUSPMLOPCXBTOPUIFMEEPXOGPSMPOH
FOPVHI
0ODFUIFCVSOFSJTPOIPMEUIFDPOUSPMLOPCEPXOB
GFXTFDPOETMPOHFS
5IFHSPPWFTPOUIFCVSOFSBSFEJSUZ $MFBOUIFHSPPWFTPOUIFCVSOFS
*%
$BMMTGSPNB#5MBOEMJOFXJMMCFDIBSHFEBUVQUP QFODF
QFSNJOVUF"DBMMTFUVQGFFPGVQUP QFODFNBZBQQMZ
,(
QFSNJOVUFBUQFBL0GGQFBL QFSNJOVUF

10
8VHGDSSOLDQFHVDQGSDFNDJLQJ
*G UIF ) TZNCPM JT TIPXO PO UIF TQFDJGJDBUJPOT QMBUF CFBS JO NJOE
UIFGPMMPXJOHJOTUSVDUJPOT
(QYLURQPHQWDOO\IULHQGO\GLVSRVDO
%JTQPTFPGQBDLBHJOHJOBOFOWJSPONFOUBMMZGSJFOEMZNBOOFS
5IFQBDLBHJOHPGZPVSBQQMJBODFIBTCFFONBOVGBDUVSFEVTJOH
POMZUIFNBUFSJBMTXIJDIBSFTUSJDUMZOFDFTTBSZUPHVBSBOUFF
FGGJDJFOUQSPUFDUJPOEVSJOHUSBOTQPSU5IFTFNBUFSJBMTBSF
SFDZDMBCMF UIVT SFEVDJOH UIF FOWJSPONFOUBM JNQBDU :PV DBO BMTP
DPOUSJCVUFUPDBSJOHGPSUIFFOWJSPONFOUCZGPMMPXJOHUIFBEWJDF
CFMPX
■ %JTQPTFPGUIFQBDLBHJOHJOUIFBQQSPQSJBUFSFDZDMJOHCJO
■ #FGPSF ZPV HFU SJE PG BO PME BQQMJBODF NBLF TVSF ZPV EJTBCMF JU
$POUBDUZPVSMPDBMBVUIPSJUZUPGJOEPVUUIFBEESFTTPGZPVS
OFBSFTUSFDZDMJOHDFOUSFUPEJTQPTFPGZPVSBQQMJBODF
■ %POPUQPVSVTFEPJMEPXOUIFTJOL$PMMFDUJUJOBTFBMFE
DPOUBJOFS BOE UBLF JU UP BO BQQSPQSJBUF DPMMFDUJPO QPJOU PS GBJMJOH
UIBUQMBDFJUJOUIFSVCCJTICJOJUXJMMFOEVQJOBDPOUSPMMFE
EVNQUIJTJTQSPCBCMZOPUUIFCFTUPQUJPOCVUJUXJMMBWPJE
DPOUBNJOBUJOHHSPVOEXBUFS
5IJT BQQMJBODF JT MBCFMMFE JO BDDPSEBODF XJUI &VSPQFBO
%JSFDUJWF&6DPODFSOJOHVTFEFMFDUSJDBMBOE
FMFDUSPOJDBQQMJBODFTXBTUFFMFDUSJDBMBOEFMFDUSPOJD
FRVJQNFOU8&&&5IFHVJEFMJOFEFUFSNJOFTUIF
GSBNFXPSLGPSUIFSFUVSOBOESFDZDMJOHPGVTFE
BQQMJBODFTBTBQQMJDBCMFUISPVHIPVUUIF&6
11
ùΛίζλЧμϊ
[kk]Пайдалану нсаулыы
АίςϕξπϕζγϕιρςοίκϊλίЉκЧλίρρίο
ΠϕζγϕЙείЙίБЧοϊκЉϊЙϊζ
Χ
ΒίζείμίοЉϊπϊ
Φ
Φλ
ΟϮ
ΦΧ
ϮΟίνΟϮ
νΧ
άκδιροξκηρί
νΧ
Ξϕπϕοςϊγϊπρίοϊ
Φ
νΧ
ΡίζίκίςεщμδιХρϕλιљοπδρς
λ
ΏБίςκίογϊενύ
ΡδτμηιίκϊБπδοαηπρϕιБϊζλδρνορίκϊЉϊ
ΝοίλίλδμδπιϕБЧοϊκЉϊκίο
ΧνΟΧ
Өнім туралы ақпарат
ϭΧΧΧϮϞΧ
ΧΧ www.bosch-home.com
Ϟ www.bosch-eshop.comλΟ
: АίςϕξπϕζγϕιρςοίκϊλίЉκЧλίρρίο
λΧΟ Χ Χί
ΧΧνΟϞ
λϞ
λΧΧΧΧΧνΟί
λί
Осы нұсқаулық шарттары сақталмаса
өндіруші жауапкерлікті мойындамайды.
νΧΧΟΧ
ΦνΟ
Χί ΦνΟ Χ ί
ΧίίΧ
ΟΟΧίί
ΧνΟ%*/&/
ΧνΟΧνΟ
ίΟ
νΧΟ
Ϯί
νΧνΟ
λ
νΧνΟ
νΧνΟΧ
ΧΧΧΧνΟ
Ο
Барлық орнату, қосу, реттеу және басқа
газ түріне өзгерту жұмыстарын өкілетті
маман мен ережелерге және заңдарға
және жергілікті тоқ және газ
таратушының ережелеріне сай ретте
орындалуы керек.
Ολ
ΧΟί
ΦνΟΧΧ
ΟλΧ
λΧΧν
νΧΟΧλ
ϮλΧ
ν
νΧνΟλλ
ΟΧϮ
ΟνΧΧΦνΟ
λ ί Χ Ϯ
λΧνΟϮ
ΧΟΟϞ
ΧνΟΧ
Χλ
ΟίϮνΟ
ΧΧΟλ
ίϞΧΟ
λϮί
Χ
Χ
νΧνΟϞ
λίΧΧΟ
Ϟλ
ϞΧ
νΟί
ΧΟΟΟ
ΧνΟΧ
νΧϞν
Χ
Χίλ
Ο
ΟΧνΟΟνΧ
ίΟί
ΧΟϞ

12
ΧλϞ
ΟνΧί
ΡЧρίμςБίςϕξϕ
ΟΧϮ
νΧΦνΟ
ίΟϮΧ
λΟί
νΧΧί
κίμϊξБίκςБίςϕξρϕκϕβϕ
ΧΧνΟ
ϮΟΧϞ
Ϯν
ϞνΟ
νΧίΟ
νί
Χ
Χν ί ΦνΟ νΧ Χ
λΧ
ΧνίΧΟί
ΙХθϕξБίκςБίςξϕ
■
ΧϮΧ
Χ Χ ί
Ο
ί
Күйіп қалу қаупі!
■
ΦΟϮν
ϮΧ
ΧΟΧίΟί
јορБίςϕξϕ
■
ϮΧ
Ο Χί
ΟΧΧί
Өрт қауіпі!
■
λΧ
Ϯ
Χ
λΧϮ
νΧΧνΟΧί
ΧΧί
Өрт қауіпі!
■
Φί
ΧΟ
ί
Ϯί
ϮλΧΧΧ
Ϯί
ΕίοίБίρίκςБίςξϕΰίο
■
ΧΟϮϞ
ΧΟΟνΟ
ννΟ
Ολ
ν
νΧί
Жарақат алу қаупі бар.!
■
ί
ΟΧ
λ
ίϞΧνΟΧ
νί
Жарақат алу қаупі бар.!
■
ΧΧΟΧ
ΟΧίϮν
λίΧ
ΟΟΧίί
Жарақат алу қаупі бар.!
■
ΦνΟΧν
ίί
Χί
Жарақат алу қаупі бар.!
■
νλ
ίΧΟ
ΧίϮί
ί
άκδιροБςίρϊμίμζίБϊλЉίЧχϊοίς
Бίςϕξρϕκϕβϕ
■
ΦνΟλ
ί
Электр қуатынан зақымға ұшырау қауіптілігі!
■
ϝ Χ Χ Ο
ΧΧΟ
ΟΧΟϮί
ΧΧϮΟ
Χί
13
ΠϕζγϕЙείЙίБЧοϊκЉϊЙϊζ
ΧνΟϞΟΧΧ
ΙδοδιείοίБρίο
κΟϮ
ΧλΧ
Ολ
--------
Ινγϊ
ϭΧΧ
λΧ
ΒίζείμίοЉϊπϊ
ϝνΧΧΟΧΟ ΦνΟνλΧΟ
ϮννΟΧΧΧ
ί
Қосымша Вок торы
Χλ
Ο
λΟ
Ο
ΟΧν
Χ
ΧνϮίλ
Φ
ν
ΧνΟί
ν
Кофе пісіргіші үшін
қосымша тор
ΟϞ
Ο
ΟΟ
Simmer Plate
νΧίϮ
ΧΟ
Ϯ
Ο
ΧϮί
ΟΟΟΧί
ΧΟΟ
Χί
ΧΧί
)&; λΧ
)&; 4JNNFS1MBUF
14
Аνκλδμνρίκγϊος
ίΟ Οί λ Ο
νί
ϭΧΧίΟΟ
Χί
Ώαρνλίρρϊνρίκγϊος
Ο
ίΟΟίλ
Ονί
νΟΧΟνΧ
ΟΟ
ί
λνί
ϭνΧ
ΧίνΧΧί
: ΡЧρίμςБίςϕξϕ
ίΧΟϮ
ίλΧί
АίςϕξπϕζγϕιεХθδπϕ
κΟίΧλ
Ο Χ Ϯ Ο
Χ
Ϯλ
ΟϞί
ίνί
ΕίμίοЉϊμϊљχϕος
ίΟλνί
АςίρΰίπБϊχρίοϊ
λΧ
ΧϞΧλ
ΦΟίΧ
λλΧΧ
ΐίπљχϕοβϕχξϕπϕοςίθλίЉϊμϊЙΰЧЉίρρίκςϊ
ΐίπљχϕοβϕχ
κ Χ Ο Ϯ ΧΟ
ΟϮΧΟϮϮ
λΟΧ
ΟϮί
Пісіру аймаңын бұғаттау:
Ϯί
ΧΧΟϮΟνΟΟ
Пісіру аймағының бұғаттауын ашу:
ΧΧϮλί
ϮΟνί
Ο Ο Χ
λ
λ
Û
ϭλ
κ
—
ίλΧ
˜
ίΧ
ǖǩǴǰDz
ȁǯǩǰǩDZǶ
ǒǶǤǯǨǿǴǷ
ǥȉǯǶǩǵȉ
Χ
Χ
Χ
Χ
Χ
Χ
$ %
$
%
15
Δπιδορςκδο
ΟΧ
ΧΧΧνΧ
ΧΧΟ
ΟΧΟίϞ
νΧΧ
ΟΧϮΟίΧ
νΧϭΧΟ
ί
ΟϮίΧί
νΧΟΧλϮ
ΦνΟνίΟν
λλΧΧί
ΧΧΧΧλ
ΞϕπϕοςμЧπБίςκίοϊ
άκδιροξκηρί
ϝΧΧλΧ
ν Ο
ί
ΧνΟίν
Ξίθγίκίμς
Аνπς
Χ
ΧΟλνίν
ϮΧ
λϮλ
λΧ
λΧ
ίΧ
ΧΟλνΟ
Χλνί
ΧΧίΧ
ΟΧλνίλ
ί
ΜЧπБίς Ϟί Χ
ίϮΧΧί
ν
јχϕος
ΧΟνϭλί
νϮΧΟϮί
ΟϮ
АίκЉίμϊπρϊБ
ϞίΧϮλ
ΦΟΧλ
ΟΟλ
Δπιδορςκδο
νΧΧίλ
ί
Οί
ΞϕπϕοςμЧπБίςκίοϊ
ϮνΟλϮ
ΟΧϮί
■ λνΧΧϮ
■ λΧϞλ
■ ΧΧΧ
ΕίμίοЉϊ јρδБίρρϊ
Аίρρϊ
Νορίχί Ρљλδμ
Ο
ΧνΧ
ΧΧ
ϞΧν
Χ
Χ
Ο
Χν
λ
Ϟ
Χ
ϮϮ
Ο
ί
ϮϮ
Χ Χ
ΧνϞϞ
ΧϞ
Ο
Χ
λλ
νΧνΧ
ίΟ
Χ
Ξϕπϕοςενκϊ ΙХθ
Еріту:
Пісіру: λ
Пісіру:
Демдеп пісіру:
Бумен әзірлеу: Χ
Жылыту, жылы ұстау: Χ
Құырма:
Пісіру мен құырып алу
16
Ξϕπϕοςϊγϊπρίοϊ
Аνκίθκϊϊγϊπ
ΞίθγίκίμςρςοίκϊμЧπБίςκίο
νΧ Χ λ Ϟ ί Χ
ΟϮ
ΡίζίκίςεщμδιХρϕλιљοπδρς
Ρίζίκίς
ΦνΟΟϞί
ΟϮίϞίνΧ
ΟίΧΧΧΟ
ΧΟλ
ΧνΟλΟ
Χ
Χλ
ΟϞ
ΧΧί
Ο
λΟίϮνΟ
ίΦ
ΟΧΧΟΟί
ί Χ ί
ΦΟΧν
ϝΧΟί
ϞίΟΧ
Χλ
ΟΧίΧΧΧ
λνΧϮί
ΜίζίοίςγίοϊЙϊζ
■ ίΟΧ
λ
■ ΦΧΧΧΧΟλ
ΧΧνΧ
ΧνΧί
■ ϝίΟΟΧ
λϞ
ΧΧΧΟνΧ
ί
ΙХρϕλ
ΟνΧΧϞί
ΧΧλΧίΧ
Ϟ λ ί
λΦνΧϞλί
ίΟίΧΟ
νλϮϮϞ
Χ
ΧΧΟΧ
λϞΧΟλ
λΟλλί
ΕίμίοЉϊ Ξϕπϕος
ϊγϊπϊρίοϊμϊЙ
λημηλίκγϊγηίλδροϕ
ΞϕπϕοςϊγϊπϊμϊЙ
λίιπηλίκγϊ
γηίλρδοϕ
Ο
Φ
Ο
Χ
Ο
Ο
ϝΟλϮ
Χ
ί
κ Ο λ Ϯ
Οί
ίλ
ϝνΧ
νϮ
ί
λ
λΧί
ί
ΦΧΧ
ΧΧΧϞί
ΦίϮϮ
ν
Ο
ΧίϞ
λλ
κϮΟ
λΟΧ
ΧίΧ
Χλ
ϞϮΟ
ΧίΧΧ
ΟΟ
Χί
νΧ
ΟϞ
ΟΟΧΧΧ
νΟϮ
ί
ϝνΟ
ϮϞί
ϝΧίϞ
ίλΟ
Χί

17
ΏБίςκίογϊενύ
ΟΟΧλ
ΧΧίϮ
νΧί
ΡδτμηιίκϊБπδοαηπρϕιБϊζλδρνορίκϊЉϊ
ϮΟΧίΧΧ
ΧνΟίϮϮ&/SϞνίϮϮ
'%νίνΧΟί
νΟΧΧϞνΧΟΟ
ΧϞΧ
Χ
νϮϮΟ
ΧίϮΟΟΧνί
λϞλνΧΧϮ
Ιδξϕκγϕιχίορρίοϊ
ΧνΟΧ
ίΟϞί
λ ΧνΟ νΧ Ϯ
λ
ΧνΟΟϮ
ΦϞ
λΧνΟΧϮ
ϮΧνΧΧΧΧ
ΏБίς ΛХλιϕμπδΰδξ Χδχϕλ
Χ ΧΟΧΟ ΧΟΧΟ
ΧΟί
ί
ΧΟΧΧ
ΧΧΧΧ
ΧΧΟ
ΧΧΧΧΧλ
ί
Ο
ΧλΟΧΧ
λ
Ο
ΟΟ ΟΧΧΧϞί
ΟΧΧΧνΧ ΦΧΧνί
ΦνΟΧΟΧΧΟ
ΧΧΟ
ί
ΧΟ
Ο
ΟϮνΧ ΟϮΟνΧ
ί
ΟΧΟ ΟΧί
ΟΧ
Χ
ΧΧ λΧί
ί
ί
ί
Ο
λΧ λί
ν ί
λί λ Χ ί
λΟ
ΟίΦνΟ
ΧΧΟΧ
ΧνΟί
ΟΧ
νΧ
ίϮ
ΧνΧνΧί ΟΟίΧνΧ
νί
ΟΧΟ ΟΧί

18
ΝοίλίλδμδπιϕБЧοϊκЉϊκίο
ΧνΟίΧΧ )ί
ϮνΧί
άινκνβηώκϊБρЧοЉϊγίμБίςϕξπϕζενκλδμ
ςρηκηζίυηώκίς
ΧνΟΧ
ί
ΦνΟίΧΟ
ΧλΟ
ΧϞλΧΟ
ΧΟΟϮϮνΧ
ΧΟΧΟΟϮ
■ Ϟ
ί
■ ΟΧνΟ
ΧίϞΧΧ
ίΧνΟ
ί
■ ΟΟί
ί
λΧΧί
ΧΧΧλίν
νΧνΟ&ϞΧ
ΧΧΧϞΧΧ
8&&&ΧΟ
νΧΧί
ΧνΟΧϞϞ
Χ

B
*9000918873*
9000918873
Robert Bosch Hausgeräte GmbH
Carl-Wery-Straße 34
81739 München
Germany
www.bosch-home.com

