Loading ...
Loading ...
Loading ...
5
WARNING
To avoid the risk of fire, electric shock or personal
injury:
• Turn power OFF to the hood at the circuit breaker
panel or fuse box before cleaning.
• Clean the hood only in the manner specified.
• Use only the types of cleaning solutions specified in
this manual.
Cleaning the Filters
Be careful not to scratch the grease channel!
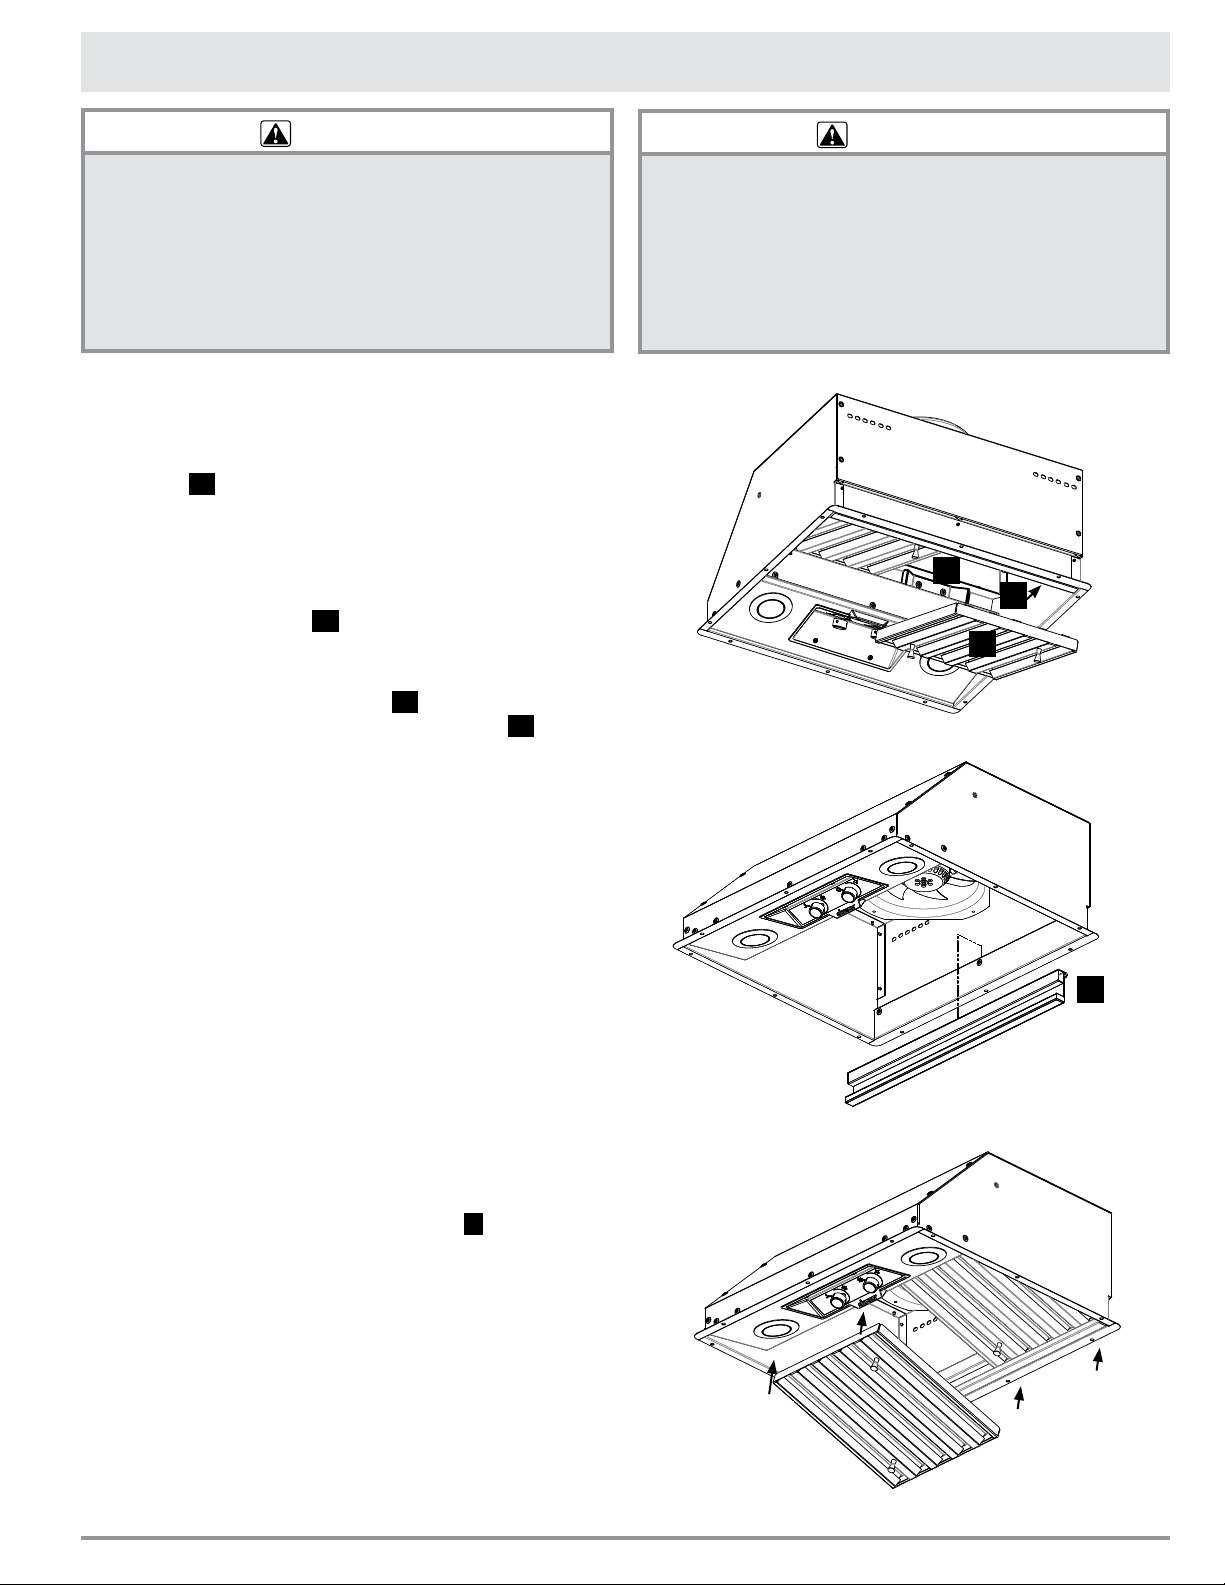
Removing the Filters
The filters
A
are located on the bottom of the unit.
They are external, exposed pieces that lay directly
above all heat, steam, and particulates that draw
upward into the fan(s).
1. Study the illustrations and notice that the:
● tension clips B in the front of the unit
secure the filters in place.
2. Grasp the filter knobs. Lift and push the filter for-
ward into the tension clips B until the back
no longer touches the grease channel C .
3. Carefully remove the filter without scratching the
grease channel.
Cleaning the Filters and Grease Channel
1. Wash the filters in hot soapy water or place
them in a dishwasher.
2. Unhinge the grease channel and clean with a
hot, soapy sponge.
You may need to carefully stand on a sturdy
chair (with assistance) while you: reach
inside the unit, lift up the grease channel
with both hands, and detach the piece.
3. Dry the grease channel.
4. Shake, then dry the filters before reinstalling
them.
Inserting the Filters
1. Grasp the filter knobs, and push the front of the
filter firmly against the tension clip B
.
This will give you clearance to:
2. Carefully lift the rear of the filter up into the unit,
and
3. With the front still pressed against the tension clip,
lower the rear and set it on the grease channel.
4. Wipe fingerprints and adjust as necessary.
Care and Cleaning
Removing the Filters
Inserting the Filters
Model Shown:
RNIVS1
C
WARNING
• Thoroughly dry the filter(s) immediately after
cleaning.
• Turn off the cooktop or range and make sure that the
appliance and range hood are cool before cleaning.
• To avoid damage to the fan, do not reinstall damaged
filters (see page 7 for replacement part numbers).
B
Grease Channel
C
Front
A
rear
Cleaning the
Rear edge
second
Front edge
first
Front
rear
Front
rear
Loading ...
Loading ...
Loading ...