Loading ...
Loading ...
Loading ...
-48
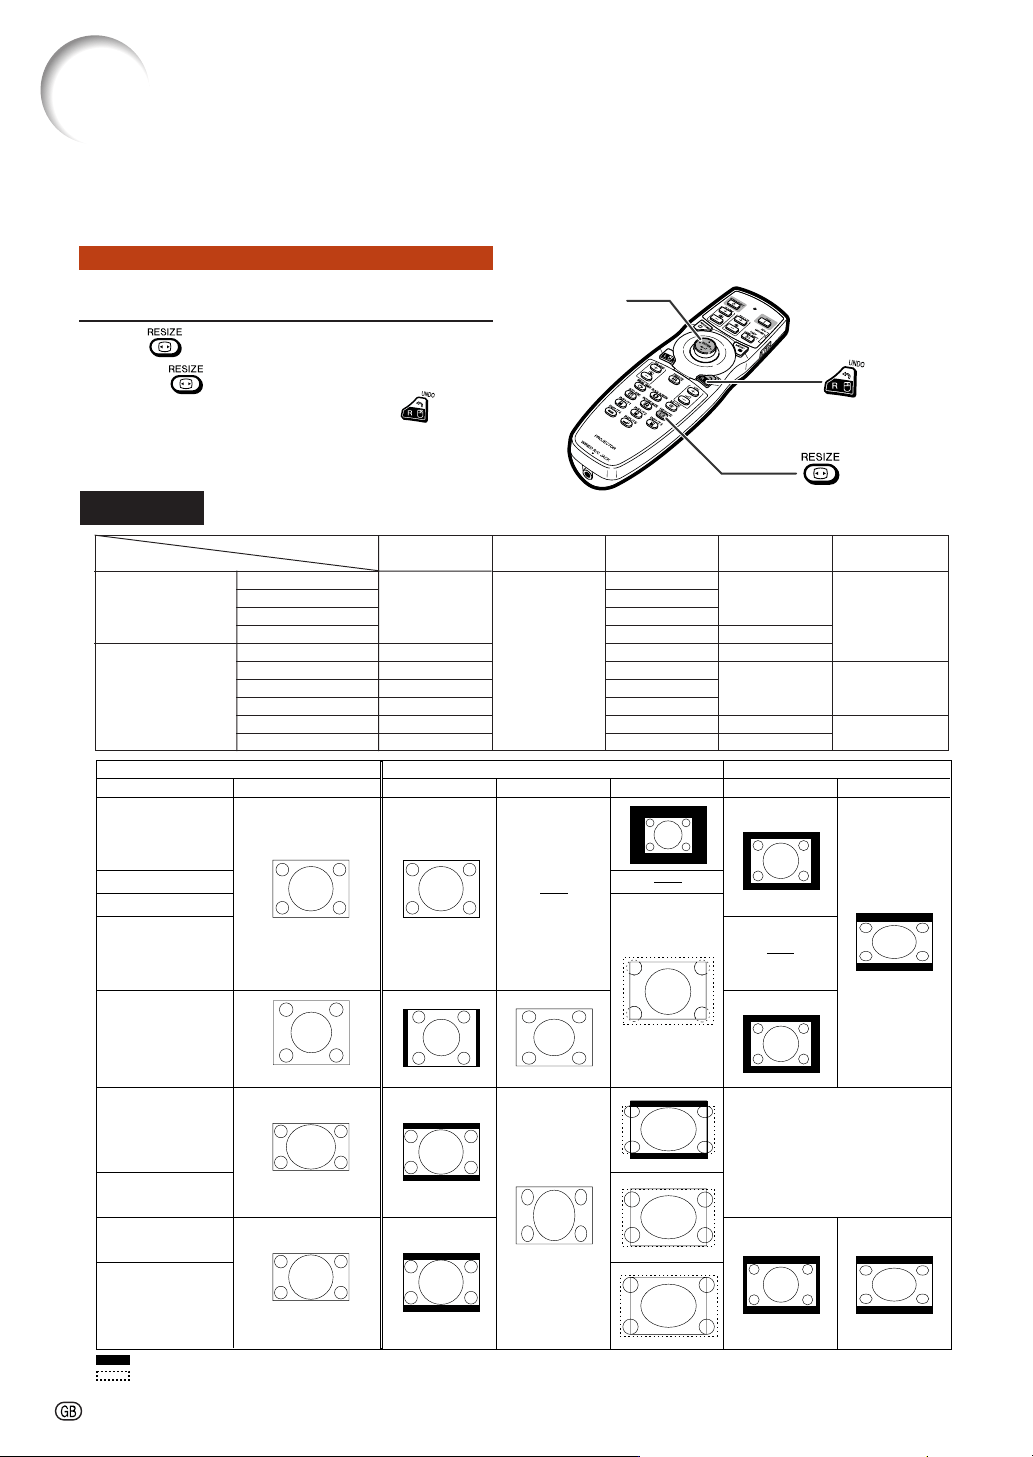
Resize Mode
Press on the remote control.
• Pressing changes the display as shown.
• To return to the standard image, press
while
“RESIZE” is displayed on the screen.
• This function can also be accessed from the OSD
menu (see page 74).
This function allows you to modify or customize the resize mode to enhance the input image. Depend-
ing on the input signal, you can choose a desired image.
COMPUTER
RESIZE button
Mouse/adjustment button
('/"/\/|)
UNDO button
Image Projection
STRETCH
For 4:3 screen For 16:9 screen
Input signal
Image type
NORMAL FULL BORDER
4:3 aspect ratio
5:4 aspect ratio
16:10 aspect ratio
16:9 aspect ratio
: Cutout area on which images cannot be projected
: Area where the signals are off screen
*The Digital Shift function can be used for these images.
Computer
Resolution
lower than
XGA
XGA
SXGA (1280 × 960)
Resolution
higher than
SXGA
SXGA (1280 × 1024)
1280 × 720
Select “Normal”
1280 × 768
1280 × 800
1360 × 768
1366 × 768
DOT BY DOT
*
*
*
*
*
*
4:3 aspect ratio
Other aspect ratios
SVGA (800 × 600)
XGA (1024 × 768)
SXGA (1280 × 960)
SXGA+ (1400 × 1050)
SXGA (1280 × 1024)
1280 × 720
1360 × 768
1366 × 768
1280 × 768
1280 × 800
1024 × 768
968 × 768
1024 × 576
1024 × 578
1024 × 576
1024 × 614
1024 × 640
1024 × 768
768 × 576
—
720× 576
—
960 × 576
922 × 576
1024 × 576
—
1024 × 576
NORMAL FULL BORDER STRETCHDOT BY DOT
800 × 600
1024 × 768
1280 × 960
1400 × 1050
1280 × 1024
1280 × 720
1360 × 768
1366 × 768
1280 × 768
1280 × 800
Loading ...
Loading ...
Loading ...