Tap CLOCK. On the display, the colon between minutes and seconds blinks.
Via the numeric pad, enter the current time (e.g., if the time is 12:08, tap 1-2-0-8).
Tap # to set AM or PM.
Tap START/CONTINUE. The colon between minutes and seconds stops blinking.
Switching to 24-Hr (Military) Time
The default clock display is 12-hr time. You can change to 24-hr (military) time as desired (e.g., 1:36 pm = 13:36 military time.)
Tap-hold CLOCK for 6 seconds. The display shows the current time mode.
On the numeric pad, tap # to change to 24-hr mode.
Touch CANCEL/SECURE. The display shows the time of day in 24-hr mode.
Setting the Temperature Scale
You can select Fahrenheit (factory default) or Celsius as the cooking temperature scale.
Tap-hold BROIL (under UPPER OVEN on double ovens) for 6 seconds. The display shows the current temp scale (“F” or “C”).
Touch # to change the scale.
Touch CANCEL/SECURE. The display shows the selected temperature scale.
About the Control Panel “Beep”
The control panel beeps when you tap a key, when a timer reaches zero (Pg. 8), when there is an error, and when the oven performs certain functions. You can silence/activate the beep.
Tap-hold START TIME for 6 seconds until “beep” appears on the display.
Tap # to switch off/on the beep.
Tap CANCEL/SECURE to set your selection.
Turning On the Oven
After adjusting the racks to the cooking task, select the best mode.
• CONVECTION BAKE - Uses the convection fan and a bottom heat source (for single-rack items in a deep pan).
• CONVECTION BROIL - Uses the convection fan and a top heat source (for items that do not need turning: e.g., fish, garlic bread, thinner cuts of meat).
• PURE CONVECTION™ - Uses only convection cooking for even heat (for baked goods, multi-rack cooking).
• CONVECTION ROAST - Uses top and bottom heat sources with the convection fan (for rib roasts, turkeys, chickens, etc).
• BAKE - Uses a bottom heat source (common for basic recipes).
• BROIL - Uses a top heat source (for grilling smaller cuts of meat or toasting bread).
1. Tap a cook mode key.
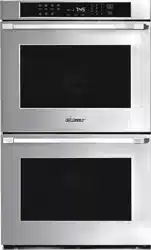
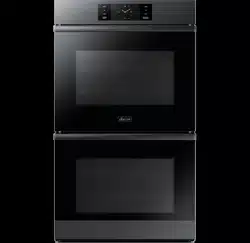
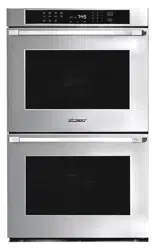
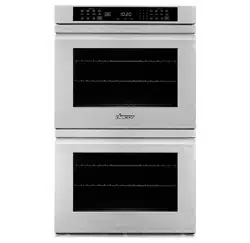
The preset temperature appears on the display with the icon(s) for the selected cook mode. Double ovens: Select the desired oven by tapping the cook mode key under UPPER OVEN or LOWER OVEN.
2. To cook at the preset temperature, touch START/CONTINUE; otherwise, enter the temperature (ex. 4-2-5) on the numeric pad, then touch START/CONTINUE.
You can enter any temperature from 100°F (37°C) to 555°F (291°C). The suggested broil temperature is 555°F. Double ovens have one START key (control panel, left side) that starts both ovens.
3. When the preheat chime sounds, carefully place your food in the oven.
Placing the food in the oven during preheating will overcook the food.
Turning Off the Oven
To turn the oven off, tap CANCEL/SECURE. Double ovens: Tap CANCEL/SECURE under the operating oven (UPPER or LOWER).
Changing the Oven Temperature
To change the cooking temperature while the oven is on:
Tap the selected cooking-mode key. The symbol for that cooking mode appears on the display.
Enter the temperature on the keypad (ex: 3-7-5), and tap START/CONTINUE.
Changing the Cook Mode
To change the cooking mode while the oven is on (ex: to change from Convection Bake to Bake), tap the key for the new cooking mode, then tap START/CONTINUE.
Enabling/Disabling Control Lock-Out
1. Tap-hold CANCEL/SECURE for 6 seconds.
The control-panel keys deactivate; OFF appears on the display. Only CANCEL/SECURE and the oven-light keys function. Double ovens: Touching the upper or lower CANCEL/SECURE key locks the control panel for both ovens.
2. Touch-hold CANCEL/SECURE for 3 seconds.
Using Time-Delay Cooking
This feature lets you set the oven to turn itself on/off.
About Time-Delay Cooking
• Time-delay can be used for all but the Broil modes.
• You may use the timers while using time-delay cooking.
• Cancel a time-delay cycle any time by tapping CANCEL/SECURE.
3 Ways to Use Time-Delay Cooking
The keys are used for time-delay cooking.
• START TIME: The time when the oven starts cooking.
• COOK TIME: The amount of time the oven cooks before entering Hold mode.
• STOP TIME: The time when the oven turns off and enters Hold mode.
When you set two of these times, the oven automatically calculates the third.
• Set the time the oven turns on (START TIME), and set it to turn off later using either COOK TIME or STOP TIME.
• Set START TIME only, then turn the oven off manually when you are done cooking.
• Turn the oven on manually, and set it to turn off later using either COOK TIME or STOP TIME.
About Hold Mode
• When you use COOK TIME or STOP TIME to set the oven to stop cooking, it enters Hold mode (HLd appears on the display) when it reaches the end of the set cook time. The oven keeps the temperature at 150°F (66°C) for 2 hours.
• Touch CANCEL/SECURE to turn the oven completely off.
• To avoid sickness, do not leave foods in the oven after hold mode turns off.
Using Time-Delay Cooking
1. Adjust the racks as needed, and put the food in the oven.
2. Select the cooking mode (except the Broil modes).
3. Enter a cook temperature.
If you want to turn the oven on immediately and turn off automatically at a later time, go to Step 5.4. Tap START TIME, and enter the time you want the oven to start. For 12:35, tap 1-2-3-5. You may enter a time up to 22 hrs and 59 mins ahead of the present time; tap # to change AM or PM.
5. (To set the stop time or cooking duration) Tap either STOP TIME or COOK TIME (otherwise, go to Step 6).
COOK TIME lets you determine when the oven stops cooking by entering the amount of time the oven is on. STOP TIME lets you determine when the oven stops cooking by entering the clock time. Either key achieves the same result.
6. TAP START/CONTINUE
Using the Proof Feature
You can proof yeasted dough at a low, draft-free temperature in Bake mode. This procedure assumes the dough is in a greased bowl covered with a damp cloth or with plastic wrap sprayed with a non-stick substance.
1. Tap BAKE.
(Double ovens: The PROOF key is with the LOWER OVEN controls. You may tap PROOF instead of BAKE. If so, the oven sets the temperature.)
2. On the numeric pad, enter 100°F (38°C), and tap START/CONTINUE.
3. Put the dough in the oven, and turn on the oven lights.
4. Set the timer for the recipe’s rise time.
Using Sabbath Mode
Sabbath mode complies with Jewish law for Sabbath and Holy Day use. When active, only Bake and Pure Convection modes can be used, and the oven lights are disabled as well as all keys except CANCEL/SECURE, START, and the 0 and 2 keys on the numeric pad.
Activating Sabbath Mode
Double ovens: perform this procedure for one oven, then use Steps 2 – 4 to activate Sabbath mode on the other oven.
Tap #.
Tap a cook mode (BAKE or PURE CONV only). Double ovens: Tap the key for the intended oven.
Tap the 0 or 2 key repeatedly to change the pre-selected cooking temperature shown on the display.
Tap START/CONTINUE. The oven enters Sabbath mode and cooks in the mode you selected in Step 2.
Adjusting the Oven Temperature
Your oven was factory-calibrated to cook at the displayed temperature, but cook times may vary from your old oven.
IMPORTANT: Do not measure interior oven temperature with a thermometer. Opening the door compromises the reading. Also, the interior temperature varies as the elements cycle on and off. If you are unsatisfied with the results from your oven, you can adjust the temperature offset.
1. With the oven off, tap-hold both 0 and # on the numeric pad. In about 3 seconds, PASS appears on the display.
2. Immediately enter 6428 on the numeric pad, then tap START/ CONTINUE. SLCt (select) appears on the display.
3. Select the intended cook mode. The current offset temperature appears on the display (e.g., 00, if you have never adjusted the temperature.)
4. On the numeric pad, enter the desired increase/decrease in temperature.
You may enter a number from 35°F to -35°F (18°C to -18°C). To enter a minus sign, tap # after entering the number(s). A minus sign means the oven will be cooler by the amount shown. If you do not touch #, the oven will be hotter by the amount shown. Edit appears on the display as you enter the offset value.
5. Tap START/CONTINUE to save the setting.
6. Repeat Steps 3 – 5 for any other cook-mode temperatures you want to offset.
7. Tap CANCEL to exit Offset mode.
CARE AND CLEANING
About Self-Clean Mode
• For best results, the oven chambers should be cleaned regularly. The self-cleaning feature heats the oven to very high temperatures to burn off surface deposits and takes about 2 1/2 hours.
• Smoke is normal during the first few self-clean cycles. The oven also emits popping sounds during self-cleaning due to metal expanding/contracting as the oven heats and cools.
• Remove the meat-temp probe before entering self-clean mode.
• If soild remains after self-cleaning, you may run another cycle.
• Self-clean the oven regularly to prevent residue buildup.
Using the Self-Clean Feature
Remove the racks and all other loose objects from the oven chamber. (See Pg. 12 for filter cleaning instructions).
Wipe the interior door surfaces outside the door gasket with a vinegar-water solution, then wipe them dry. Clean heavily soiled areas with a plastic scouring pad.
Dab the door gasket gently with a soft cloth moistened with a mild-soap and water solution.
Turn on kitchen fans or vents to help remove odors during self-cleaning.
Shut the oven door, and tap SELF CLEAN.
Tap START/CONTINUE.
The oven door locks automatically to prevent personal injury from the high temperature generated during the cycle. If the door is ajar, an error message appears on the display. To clear the error, touch CANCEL/SECURE, wait 1 minute, and close the door. When the error clears, redo Steps 5 and 6.
The display shows the self-clean cycle status:
• The clean symbol indicates that self-clean is in process.
• The lock symbol indicates that the door is latched.
• “ON” indicates that the heating elements are on
To stop self-cleaning, tap CANCEL/SECURE. The oven door remains locked until the oven cools sufficiently. (The lock symbol disappears from the display). The oven may still be hot, so be cautious.
When self-cleaning is complete:
• The door latch releases when the inside has cooled down. The Clean icon, Lock icon, and ON indicator disappear from the display. The oven, however, is still HOT.
• Reinstall the convection filter before using the oven.
• A powdery residue normally coats the oven floor after selfcleaning. When the oven is cool, wipe up the residue with a damp cloth or sponge.
Setting Delayed Self-Cleaning
Prepare the oven for self-cleaning as instructed in the previous procedure, and close the oven door.
Tap SELF CLEAN > START TIME.
On the numeric keypad, enter a start time (e.g., for 12:30, tap 1-2-3-0). Maximum delayed start period is 22 hr, 59 min.
Tap START/CONTINUE. DELAY appears on the display; the oven door locks. Selfcleaning will start at the set time.
When the oven is set for time-delay self-cleaning:
• you can tap CLOCK to view the time of day; with the clock is displayed), you can tap START TIME to view the self-cleaning start time.
• when self-cleaning starts, DELAY disappears from the display, and ON appears.
To cancel time-delay self-cleaning, tap CANCEL/SECURE.
If
Then
self-cleaning has not started,
allow 1 minute for the door to unlock before using the oven
self-cleaning has started,
the oven door unlocks when the oven chamber has cooled somewhat—the oven will still be about 400°F (205°C).
About Steam-Clean Mode
This is a quick, easy way to clean light soil inside the oven. Double ovens: Both ovens may be steam cleaned at once. Perform steam cleaning whenever you see soil collecting in the oven chamber.
1. Remove the oven racks and all foreign objects.
2. In the cool oven chamber, pour 11/2 cups water (preferably distilled) into the recessed area of the floor. For slightly heavier buildup, you may mix a teaspoon of dish soap into the water before pouring.
3. Fold a dish towel in half lengthwise; lay the long edge along the oven-chamber floor so the towel’s front edge overhangs the front between the door and door gasket to catch water that may dribble out during cleaning.
4. Close the oven door, tap BAKE, then set the oven to 185°F (85°C), and tap START/CONTINUE.
5. Set the timer (see Pg. 8) for 20 minutes.
6. When the timer beeps, tap CANCEL/SECURE, wait 10 minutes, and open the door. (Stand aside to let steam escape safely; condensation and some water will remain inside.)
7. With a soapy sponge, wipe the inside of the door window, then carefully wipe up the water from the oven chamber.
8. With the soapy sponge, scrub the oven chamber until all surfaces are completely clean. Lime deposits can be removed with a vinegar-soaked cloth.
9. Dry all interior surfaces with paper towels, and leave the door ajar so all moist air can escape.
Cleaning the Exterior
Control Panel
To avoid accidentally turning the oven on while cleaning the control panel, lock out the panel by tap-holding CANCEL/SECURE for 6 seconds. OFF appears on the display. (To re-activate the control panel, tap-hold CANCEL/SECURE for 6 seconds.)
Clean the control panel with the soft side of a sponge dampened with a mild detergent-and-warm-water solution. Dry the panel completely with a soft, lint-free cloth.
Stainless-Steel Surfaces
Using a soft cloth, clean metal surfaces with a mild-soap and warm water solution. Rinse and dry with a soft, lint-free cloth.
Glass (Interior/Exterior)
Clean glass surfaces with a mild glass cleaner or with Dacor Cooktop Cleaning Creme (per package directions).
You may clean the oven’s light lens by scrubbing softly with the rough side of a sponge moistened with warm, soapy water.
Cleaning the Oven Interior
Cleaning the Convection Filter
The convection filter is in the oven chamber’s rear wall. Clean the filter regularly so convection modes work properly. When the oven is cool, put your fingers around the edges of the filter, and gently push up.
Soak the filter in hot, soapy water, or (put it in the dishwasher’s top rack).
If cleaning by hand, rinse the filter well, wipe it dry.
Taking care not to mar the oven-chamber finish, center the filter over the fan hole, and carefully hook the metal clips over the hole’s crossbar.
Cleaning the Door Gasket
Clean the door gasket by dabbing it with a solution of water and mild soap. Do not scrub it or it will become damaged.
Cleaning the Oven Racks
‣ Apply a hot-water and detergent solution. For heavy soil, use a scouring pad with ample water. (Instead of water, you may use a solution of 1 cup of ammonia to 2 gallons of water.)
Cleaning the Meat-Temperature Probe
The meat probe has silicone handles, a wire, a plug and a stainless-steel skewer.
Clean the skewer with a scouring pad and hot, soapy water.
Wipe thehandles with a soft sponge soaked with a solution of detergent and warm water.
Dry all surfaces thoroughly with a clean, soft cloth.
Replacing the Light Bulbs
This task can be done by the owner. If none of the lights work, before replacing them, consult Troubleshooting, Pg. 17.
1. Replace the light bulb only with Dacor bulb PN 100429, 12V 20W.
2. Turn off power to the oven at the circuit breaker/fuse box.
3. Supporting the lens from below, gently pry it loose with a table knife, and pull the lens cover straight out.
4. Pull the old bulb straight out of the socket.
5. Wearing a glove, take the new bulb, and insert it in the socket.
6. Align the lens cover cutout with the light socket, and gently press the cover into place.
7. Return power to the oven, and reset the clock (pg. 4).
TROUBLESHOOTING
Before you call for service, review this section to see if you can resolve the issue on your own.
Issue
May Be Caused By
What to Do
Oven will not turn on
Oven not connected to power
Have a licensed electrician connect oven to properly wired outlet
Power to oven is off
Turn on power at circuit breaker/fuse box; check for tripped breaker/blown fuse.
Control panel locked
Touch CANCEL/SECURE for 6 sec’s to reactivate control panel
Power outage
Contact power company
Oven will not heat
Incorrect temp setting
Touch CANCEL/SECURE; see directions in Operating the Oven
Oven set for time-delay cooking
Oven will turn itself on at preset time; touch CANCEL/ SECURE to return to normal operation.
Trying to broil with meat probe connected
Broil settings do not work in this condition; disconnect meat probe.
Foods over or under cook
Incorrect cooking time/temperature
Follow directions in Operating Your Oven
Oven shuts itself off after 12 hours
12-hr timer is on
Turn off 12-hr timer (see pg. 6)
Oven does not self-clean
Oven door is ajar
Check for obstructions; shut door tightly
Oven set for time-delay cleaning
Oven will start self-cleaning at preset time; touch CANCEL/SECURE to return to normal operation
Self-clean mode not set properly
Follow directions in Care and Cleaning section
Meat probe connected
Oven will not start self-clean cycle when meat probe is connected. Disconnect and remove meat probe
Oven door does not open
Oven is set to self-clean
If lock symbol appears on display, oven door cannot be opened; wait for self-cleaning to end, or touch CANCEL/ SECURE; door unlocks once oven is cool
Oven lights do not work
Oven in self-clean mode
Lights do not work in self-clean mode (see pg. 12)
Oven in Sabbath mode
Lights do not work in Sabbath mode (see pg. 10)
Light bulbs burnt out
Replace light bulbs.
Oven lights will not turn off
Light key is set to on
Touch light key to turn lights off.
Sabbath mode does not work
Meat probe connected
Sabbath mode cannot start if probe is connected; disconnect and remove meat probe
Oven enters Hold mode too quickly after meat probe is connected
Meat probe connector is still wet after cleaning
Dry metal portion of the plug that connects to the oven using a soft dry rag
Cooling fan runs after oven is turned off
Normal operation
Cooling fan runs after oven is turned off to cool internal parts
Time on display not correct
Time of day not set
Set time (see pg 4)
Power failure or power was turned off
Reset time (see pg 4)
Cannot set clock
Oven is in use
Turn off oven, then set clock
Time flashes on display
Power failure or power was turned off
Reset time (see pg 4)
Control panel does not beep when touching keys and when timer hits zero
Control panel beep function is turned off
Turn on control panel beep (see pg 4)
Error code (letter followed by two numbers: ex. U55) stays on display
Oven controller has detected a malfunction
Error code C33 may be caused by open oven door during cooking/broiling; let oven cool and C33 error to reset; do not leave door open for long periods during while broiling; some error codes indicate issue unresolvable by customer; call for service