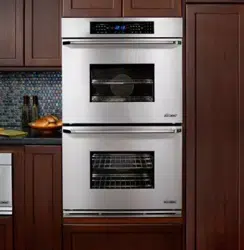

User Manual
Mo
dernist Built-In Electric Wall Oven
DOB30M977
Part No. 112177 Rev B

English2
Contents
Important information 5
Energy-saving tips 5
Safety information 6
What you need to know about safety instructions 6
State of California Proposition 65 warning (US only) 8
For your safety 8
Electrical safety 10
Child safety 10
Oven 11
Self-cleaning ovens 12
Ventilating hood 12
Critical installation warnings 13
Critical usage warning 14
Usage cautions 16
Critical cleaning warnings 17
Introducing your new oven 18
Overview 18
What’s included with your oven 18
Operations 19
Control panel 19
Display 20
Water reservoir 21
Control lockout 23
Kitchen timer 24
Timed cooking 26
Delay start 28
Using the oven racks 29
Using the gliding rack 32
Using the temp probe 34
Oven functions 37
Setting the mode 41
Setting the temperature 42
Basic baking and broiling instructions 42

English 3
Using the special function feature 46
Using the Chef Mode feature 49
Using the iQ control feature 50
Using the clean feature 52
Settings 61
Using the sabbath feature 65
Care and maintenance 67
67
75
76
78
Care and cleaning of the oven
Removing the oven doors
Reinstalling the oven doors
Changing the oven light
Tro
ubleshooting
79
Information codes 83
Warranty and Service 85
Getting Help 85
Warranty 85
Regulatory Notice 88
Open Source Announcement 90

English4
To Our Valued Customer:
Congratulations on your purchase of the very latest in Dacor® products! Our unique
combination of features, style, and performance make us a great addition to your home.
To familiarize yourself with the controls, functions and full potential of your new Dacor
wall oven, read this manual thoroughly, starting at the Before you begin section (pg. 5).
Dacor appliances are designed and manufactured with quality and pride, while working
within the framework of o
ur company values. Should you ever have an issue with your
wall oven, first check the Troubleshooting section (Pt. 2, pgs. 29 –35) for guidance. It
gives suggestions and remedies that may pre-empt a call for service.
Valuable customer input helps us co
ntinually improve our products and services, so feel
free to contact our Customer Assurance Team for assistance with all yo
ur product-
support needs.
Dacor Customer Assurance Team
14425 Clark Avenue
City of Industry, CA 91745
Telephone:
Fax:
Hours of Operation:
Website:
(800) 793-0093
(626) 403-3130
Mon – Fri, 5:00 A.M. to 5:00 P.M. Pacific
Time
www.dacor.com/customer-care/contact-us
Thanks for choo
sing Dacor for your home. We are a company built by families for
families, and we are dedicated to serving yours. We are confident that your new Dacor
wall oven will deliver a top-level performance and enjoyment for decades to come.
Sincerely,
The Dacor Customer Assurance Team

English 5
Important information
Clean the oven thoroughly before using it the first time. Then, remove the racks, set the
oven to Bake at 400 °F for 1 hour. There will be a distinctive odor. This is normal.
The kitchen should be well ventilated during this conditioning session.
Energy-saving tips
• Leave the oven door closed except to turn food.
• For cook times over 30 minutes, you can turn the oven off 5-10 minutes early. The
residual heat will finish cooking the food.
• Plan your cooking schedule so you do not have to turn the oven off between items.
• When possible, cook multiple items together.
English6
Safety information
Read and follow all directions before using your oven to avoid risk of fire, electric shock,
personal injury, or oth
er damage. Contact your service agent or the manufacturer about
issues you do not understand or cannot resolve through troubleshooting (pg. 79).
What you need to know about safety instructions
Warnings and important safety inst
ructions in this manual do not cover all possible
conditions and si
tuations that may occur. It is your responsibility to use common sense,
caution, and care when maintaining, and operating your oven.
Important safety symbols and precautions
What the icons and signs in this user manual mean:
WARNING
Hazards or unsafe practices that may result in severe personal injury or death.
CAUTION
Hazards or unsafe practices that may result in minor personal injury or property damage.
CAUTION
To reduce the risk of fire, explosion, electric shock, or personal injury when using your
oven, follow these basic safety precautions.
Do NOT attempt.
Do NOT disassemble.
Do NOT touch.
Follow directions explicitly.
Unplug the power plug from the wall socket.
Make sure the machine is grounded to prevent electric shock.
Call a Dacor Customer Service for help.
Note
Keep this manual in a convenient place for reference.
St
ate of California Proposition 65 Warning (US only)
T
his product contains chemicals known to the State of California to cause cancer and
birth defects or other reproductive harm.

Safety information
For your safety
When using electrical appliances, follow basic safety precautions, including:
CAUTION
• Use the oven only as instructed in this manual.
• Potentially hot surfaces include oven vents and nearby surfaces, and door seams.
Ensure the oven is properly installed and grounded by a qualified technician.
Do not repair/replace any components unless as specifically recommended in this
manual. A qualified technician should perform all other service.
Before servicing the oven, remove power at the fusebox or circuit breaker.
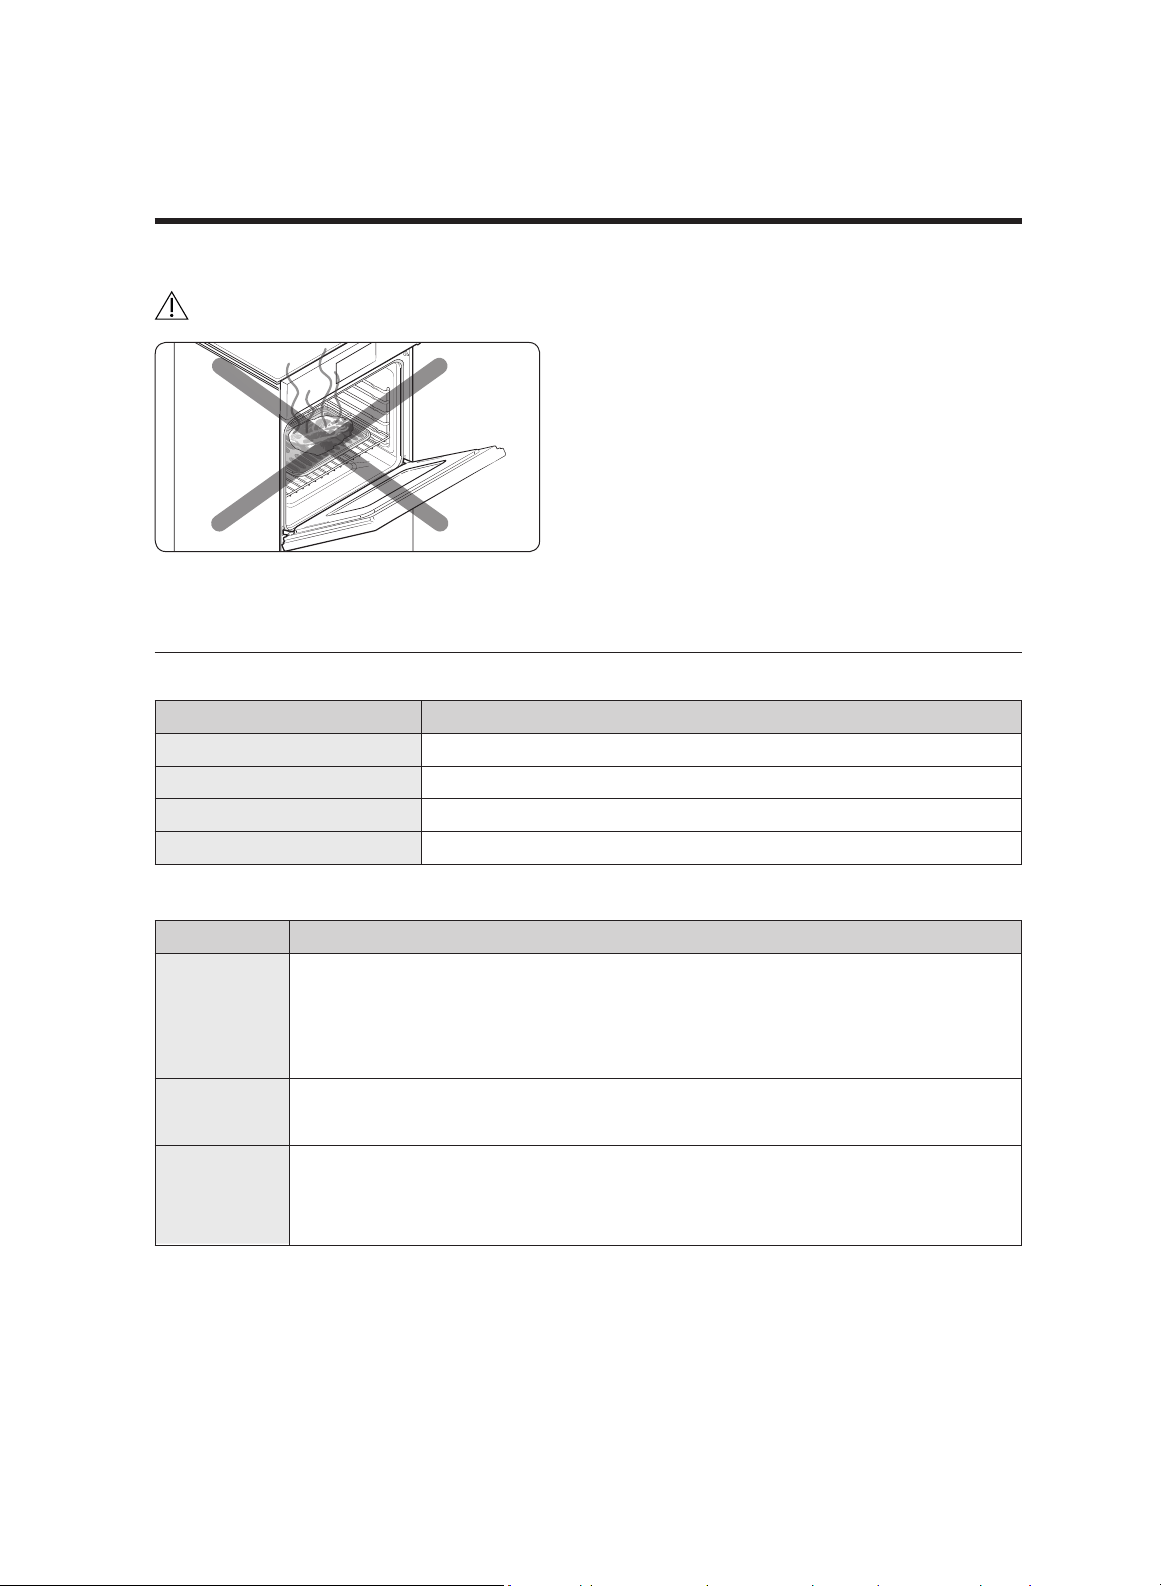
• Do not leave children unattended near the oven when it is in use.
• Do not let children climb on or play with any part of the oven.
• Do not use the oven as a space heater.
• Do not use water on grease fires. Turn off the oven, and smother the fire by
closing the door, or use a dry-chemical, baking soda, or foam-type extinguisher.
• Avoid scratching or striking the glass doors and control panel. Do not use the
oven if the door glass is damaged.
•
Do not keep flammable material (gasoline, plastic, clothing, paper) near the oven.
• Do not wear loose-fitting or hanging garments while using the oven.
• Do not use high-pressure water cleaners or steam-jet cleaners on th
e oven.
• If there is an oven fire during self-cleaning, turn the oven off, and wait for the
fire to die. Do not force the door open. Introducing fresh air at self-cleaning
temperatures may cause a burst of flame from the oven.
• Oil buildup in the oven chamber is a fire hazard. Periodically wipe up oil with a
paper towel or rag, then run a self-cleaning cycle before using the oven again.
• Remove all packing material before using the oven.
• Use only dry potholders. Placing moist or damp potholders on hot surfaces may
cause steam burns. Do not let the potholder touch hot heating elements. Do not
substitute a towel or other bulky cloth for a potholder.
• A damaged power cord is an electric-shock hazard. Have the cord replaced by
the manufacturer, its service agent, or an electrician.
•
The oven should be operated only by trained users. Children and they of reduced
physical, sensory, or mental capacity should be supervised by a responsible party.
English 7

8
English
Safety information
Electrical safety
•
Use only the factory installed flexible power cord to connect to the power supply.
• The oven should be serviced only by qualified personnel. Repairs by unqualified
persons may cause injury and oven malfunction, and may void the warranty. For
service, contact a Dacor-authorized center.
• A flush-mounted oven should be operated only if installed in cabinetry that
conforms to accepted safety standards as instructed in this manual.
• If your oven malfunctions, or if fractures, cracks, or splits appear:
- turn off and unplug the oven.
- contact Dacor Customer Service (pg. 4).
WARNING
Turn off the oven before replacing the lamp to avoid the possibility of electric shock.
Child safety
WARNING
• Children and infirm persons should only use the oven under the supervision of a
responsible adult.
• Children should not be allowed to play with the oven.
• Keep children away from the oven door when opening or closing.
• During self-cleaning and even during normal use, oven surfaces get very hot. Keep
children away from the oven during these times.

English 9
Oven
• DO NOT TOUCH THE HEATING ELEMENTS OR INTERIOR SURFACES. Heating
elements may be hot even if dark in color. Interior surfaces become hot enough
to cause severe burns. Do not touch or let clothing or other flammable materials
touch the heating elements or interior oven surfaces unless those surfaces are
cool to the touch. Other oven surfaces (e.g., oven vents and nearby surfaces , the
oven door including the window) become hot enough to cause burns.
• Do not heat sealed food containers. Pressure buildup may burst the containers.
• Do not use the oven to dry newspapers.
• Do not the oven for storage.
• Open the oven door carefully to let out hot air or steam before removing food.
• Do not line the oven chamber or racks with aluminum foil. Doing so causes
inefficient heating and creates fire and electric-shock hazards.
• To avoid a burn or fire risk, do not block the vents at the front base of the oven.
• Always adjust the racks when the oven is cool. If a rack must be moved while
the oven is hot, use potholders (keeping them away from the heating element).
• Do not let aluminum foil or a meat probe touch the heating element.
• Do not clean the oven door glass with abrasive cleaners or sharp metal
scrapers. These can mar the glass, possibly causing it to shatter in the future.
C
AUTION
Do not operate the oven during a power failure.
If the p
ower fails, turn the oven off. If the oven is on when power returns, the oven may
begin to operate again. Forgotten food may catch fire or spoil.

1
0 English
Safety information
Self-cleaning ovens
Do not clean the door gasket. The door gasket is essential for a good seal. Care
should be taken not to rub, damage, or move the gasket.
• Fumes released during a self-clean cycle may be fatal to pet birds. Move birds
to a well-ventilated room.
• Before self-cleaning the oven, remove all accessories and food, and wipe up
cooking residue. (Excess grease may ignite and cause smoke damage.)
• Do not use commercial oven cleaners or protective coatings on the oven.
• If self-cleaning mode malfunctions, turn the oven off, and disconnect the power
supply. Have the oven serviced by a qualified technician.
Critical usage warning
CAUTION
• If the oven is flooded by any liquid, call Dacor Customer Assurance (pg. 4). Failure
t o do so may result in electric shock or fire.
• If the oven emits a odd noise, burning smell, or smoke, unplug it immediately to
a void possible electric shock or fire. Contact Dacor Customer Assurance (pg. 4).
• During and immediately after operation, take care not to touch cookware or oven
surfaces without oven mitts.
• If fire ignites in the oven, keep the oven door closed, turn off and unplug the
oven, or shut off power at the fuse box or circuit-breaker panel.
• Carefully remove the wrapping from hot food to avoid steam burns.
• Do not repair, disassemble, or modify the oven. For repair assistance, call Dacor
Customer Assurance (pg. 4).
• Do not touch the power cord with wet hands.
• Do not turn the oven off while an operation is in progress.
• Do not insert fingers, foreign substances, or metal into slots or holes in the oven.
• Do not store or use the oven outdoors.
• Use the oven only for cooking tasks consistent with residential use.
• Do n ot heat sealed containers or food items with shells (eggs, nuts) in the oven.
• Do n ot heat plastic or paper containers/wrapping in the oven.
• Do not strike the door or the oven chamber.
• Do not hang on, slam, or yank the door. If the door is damaged, do not use the
ove n. Call Dacor Customer Assurance (pg. 4).
Safety information
Usage cautions
CAUTION
• In removing coverings from hot cookware, direct steam away from exposed skin.
• Remove lids from baby food jars before heating. Afterward, stir the food well to
distribute heat, and taste-test the temperature before feeding the baby.
• Take care when heating water or other beverages.
• Avoid using a slippery container with a narrow neck. Wait at least 30 seconds
after heating before removing the heated container to avoid an abrupt overflow
and possible burns.
• When opening the oven door, stand to one side to avoid exposure to the heat.
• Take care not to pinch fingers or hands when opening or closing the door.
• The door reveals wires at the bottom for connecting LED lights. Take care not to
damage the wires when handling the door.
• Do not operate the oven with wet hands.
• Do not spray volatile substances (insecticide, benzene, etc) directly on the oven.
• Do not pour water in the oven chamber or other surfaces directly after cooking.
• Do not heat the oven while empty except for self-cleaning.
• Do not defrost beverages in narrow-necked bottles. The bottles can break.
• Do not let the food in the oven touch the heating element.
• Do not overheat food. Overheating food may result in fire.
Critical cleaning warnings
CAUTION
• Do not spray water directly on the oven.
• Do not use substances such as benzene, thinner, or alcohol to clean the
appliance. Discoloration, deformation, electric shock, or fire may result.
• When cleaning, take care not to injure yourself on the oven's sharp edges.
• Do not clean the oven with a steam cleaner, which may corrode metal parts.
• Keep the oven chamber clean. Residue can mar the finish and hinder oven
function.
English 11
1
2 English
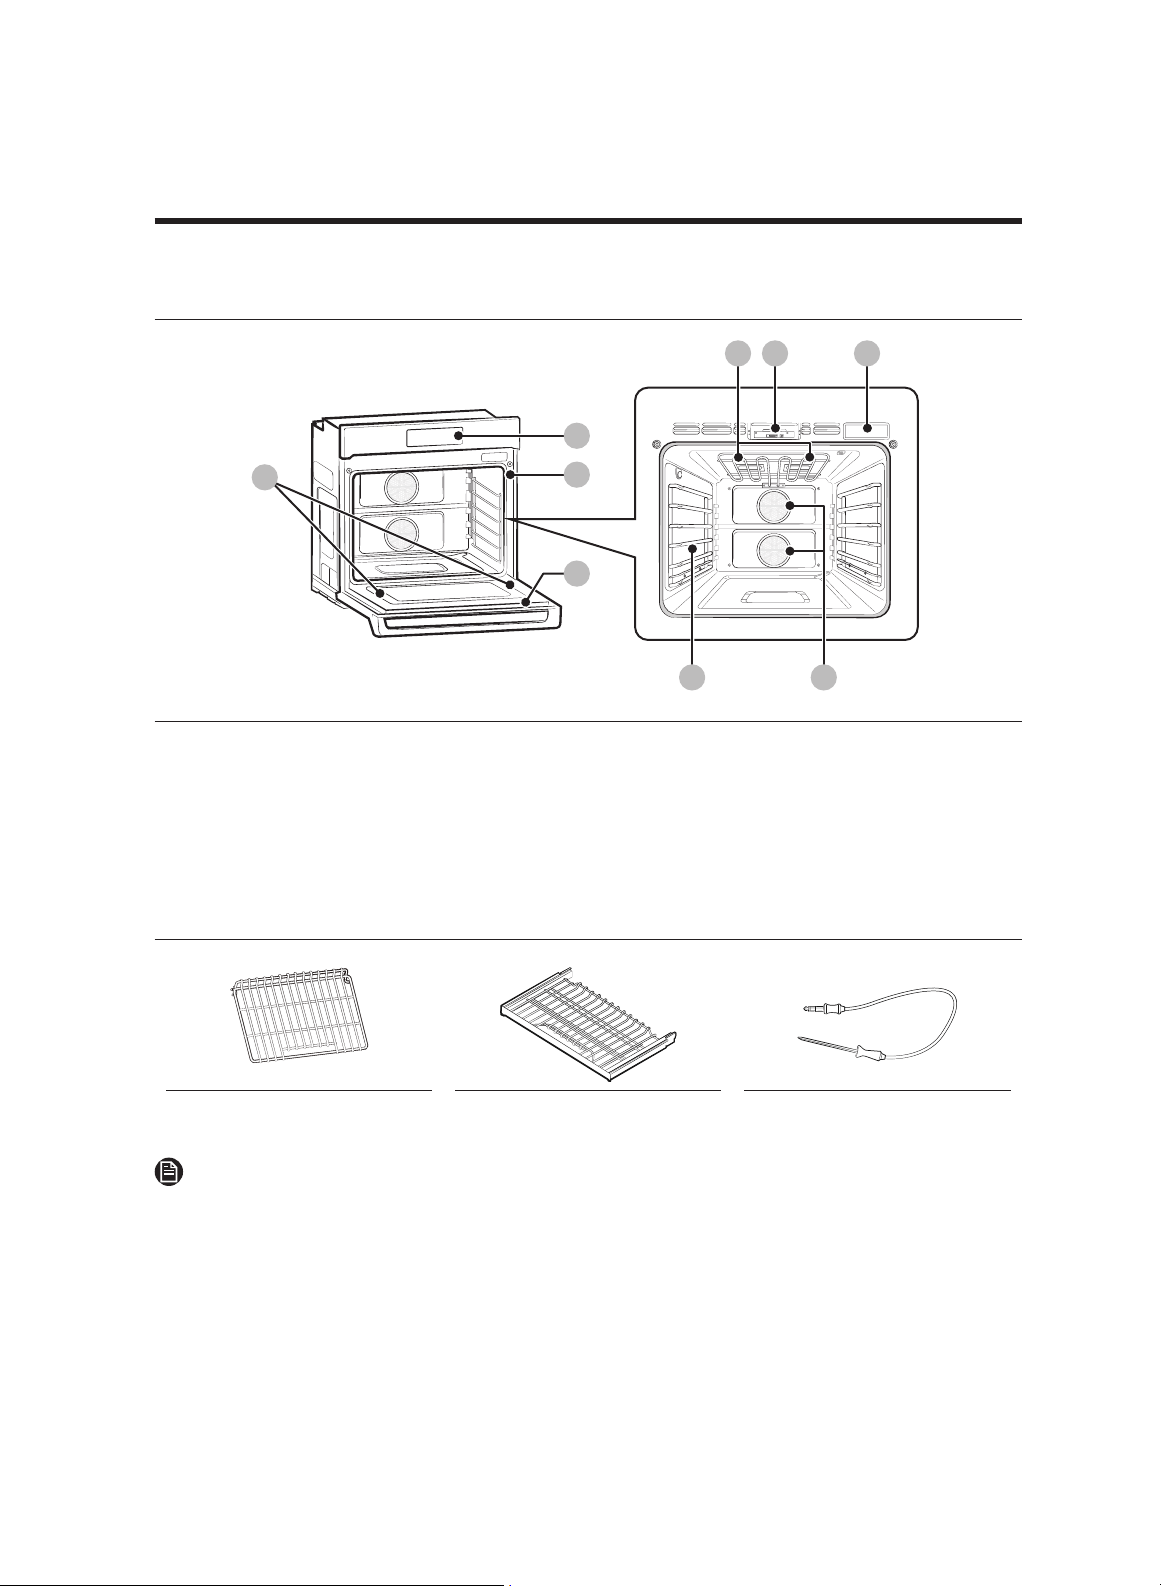
Introducing your new oven
Overview
01
03
04
08
06 07
05
02
09
01 Oven control panel 02 Oven door 03 Oven gasket
04 Halogen lamp* 05 Door LED light 06 Door latch
07 Water reservoir 08 Convection filter 09 Rack support
What’s included with your oven
Wire racks (1)* Gliding rack (2)* Temp probe (1)*
NOTE
Accessories marked with an * can be purchased from Dacor Customer Assurance.
English 13
Operations
Control panel
TIMER
SETTINGS
LOCK
(3sec)
OFF
LIGHT
OPEN/CLOSE
RESERVOIR
01 04
05
06
02
03
07
01 TIMER: Use to display the set Timer screen.
02 SETTINGS: Use to display the Setting screen.
03 LOCK (CONTROL LOCKOUT): Press-hold for 3 seconds to disable all oven functions.
04 OFF: Use to cancel when oven is cooking.
05 LIGHT: Use to turn the oven light on or off.
06 OPEN/CLOSE RESERVOIR: Touch to open or close the water reservoir.
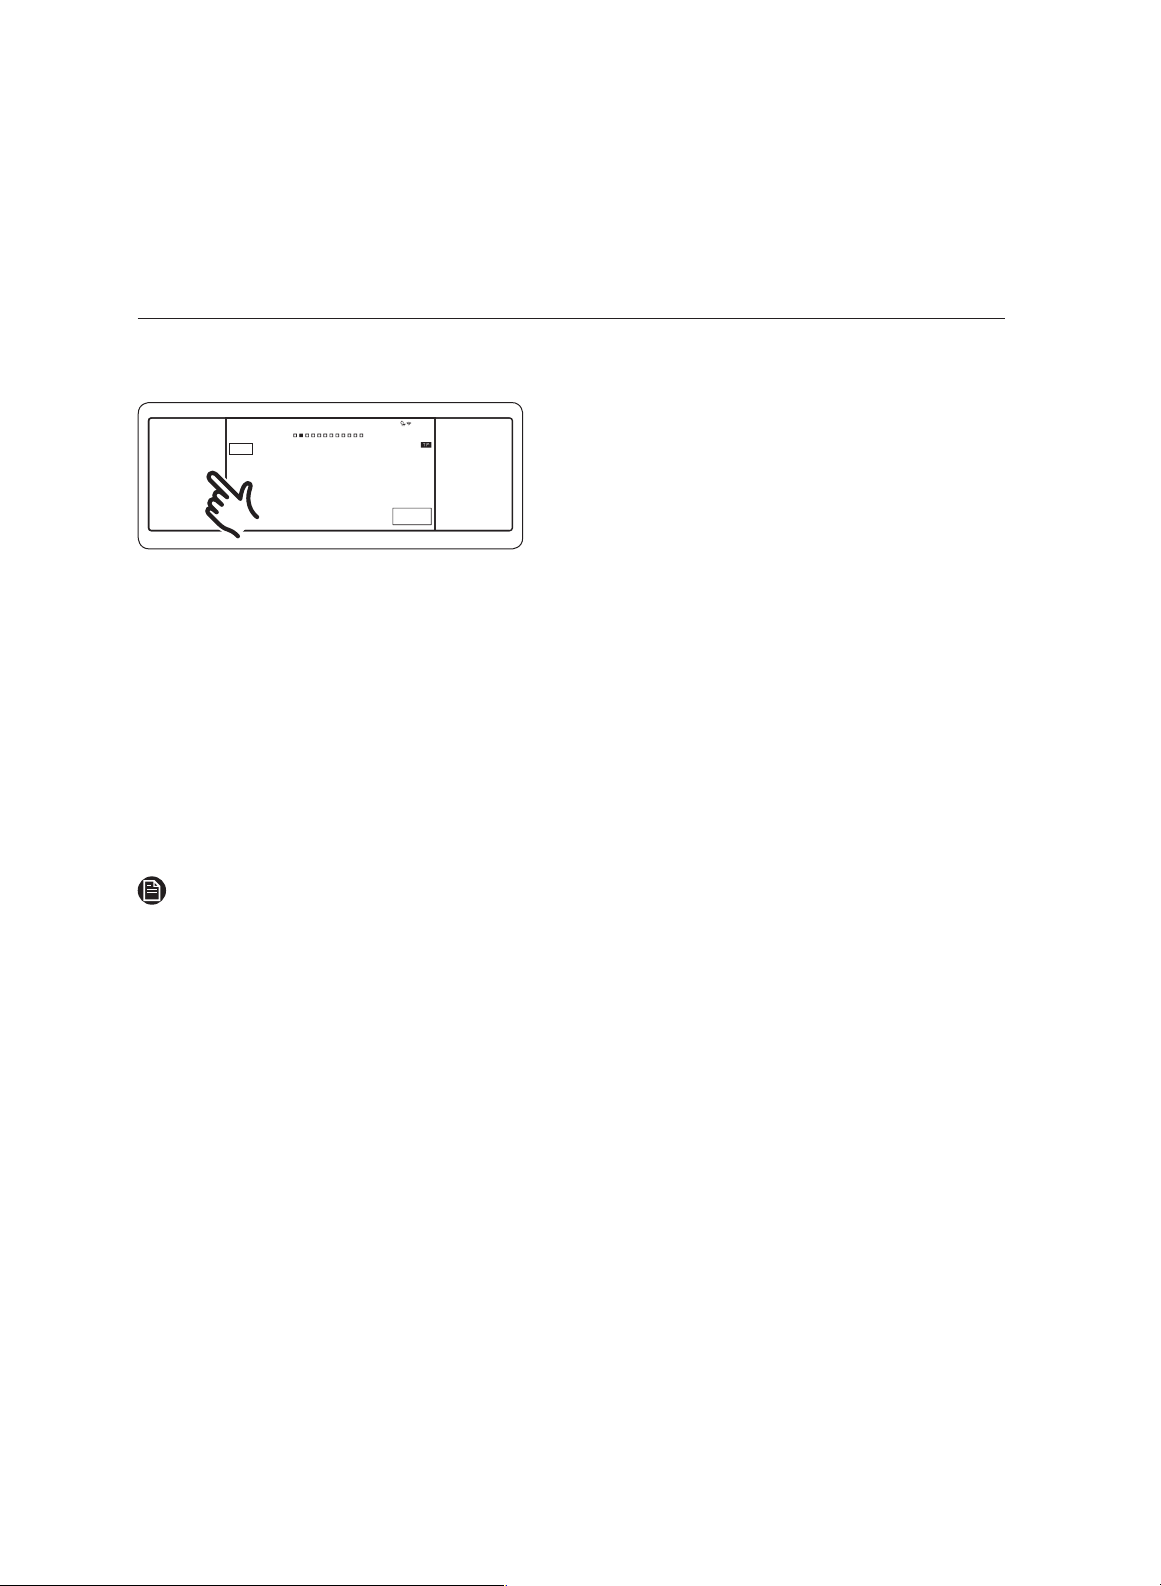
07 Display: Swipe to navigate the menus and tap to select a desired setting.
NOTE
You cannot operate the display while wearing gloves/mitts. Always touch the display
with a bare finger.
14 English
Operations
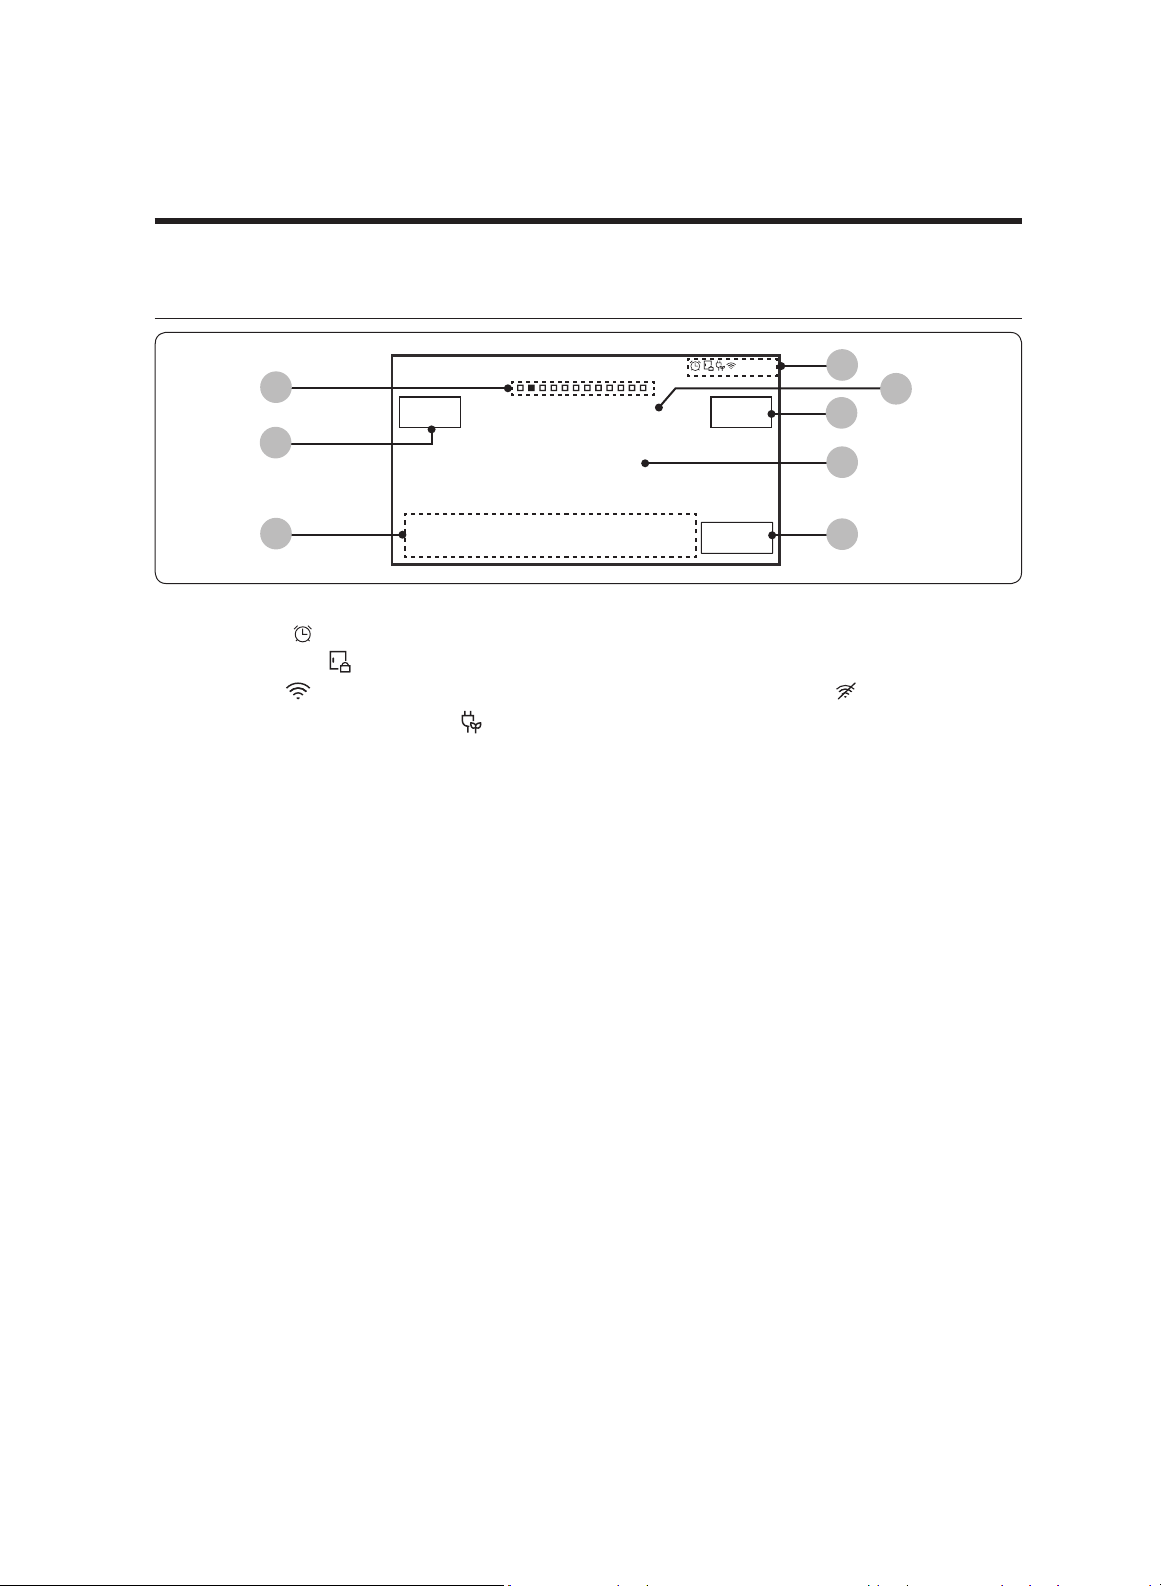
Display
Convection Bake
Faster, more even baking
325
°F
Temp Probe
150
°
InstantHeat™
Off
Cook Time
None
Delay Start
None
START
4:35 PM
OVEN
MODE
View
Summary
01
03
04
06
02
05
07
08
01 Indicator area
• Timer ( ): When the timer is set, the timer indicator is displayed.
• Door lock ( ): Displayed when the oven door is locked.
• Wi-Fi ( ): Shows Wi-Fi signal strength. If Wi-Fi is disconnected, is appears.
• 12-hour energy saving ( ): Displayed when 12-hour energy saving is turned on.
• Current time: The current time is displayed.
02 Page indicator: Shows location of current mode.
03 Mode: The current or selected menu is displayed with a mode description.
04 Temperature: The current or selected temperature is displayed. When you tap this
area, the temperature adjustment screen is displayed.
05 Information area
• Temp Probe: Tap to show the Temp Probe screen.
• Cook Time: Tap to show the Cook Time screen.
• Delay Start: Tap to show the Delay Start screen.
• InstantHeat™: Shows that InstantHeat™ is on/off. (Convection Bake, Convection
Roast modes only.)
• Steam: Tap to show the Steam Level screen. (Steam Bake, Steam Roast modes
only.)
06 START: Tap to start the oven using the displayed settings.
07 View Summary: Tap to display the oven's cooking modes.
08 OVEN MODE:
Tap to select an oven mode.
English 15
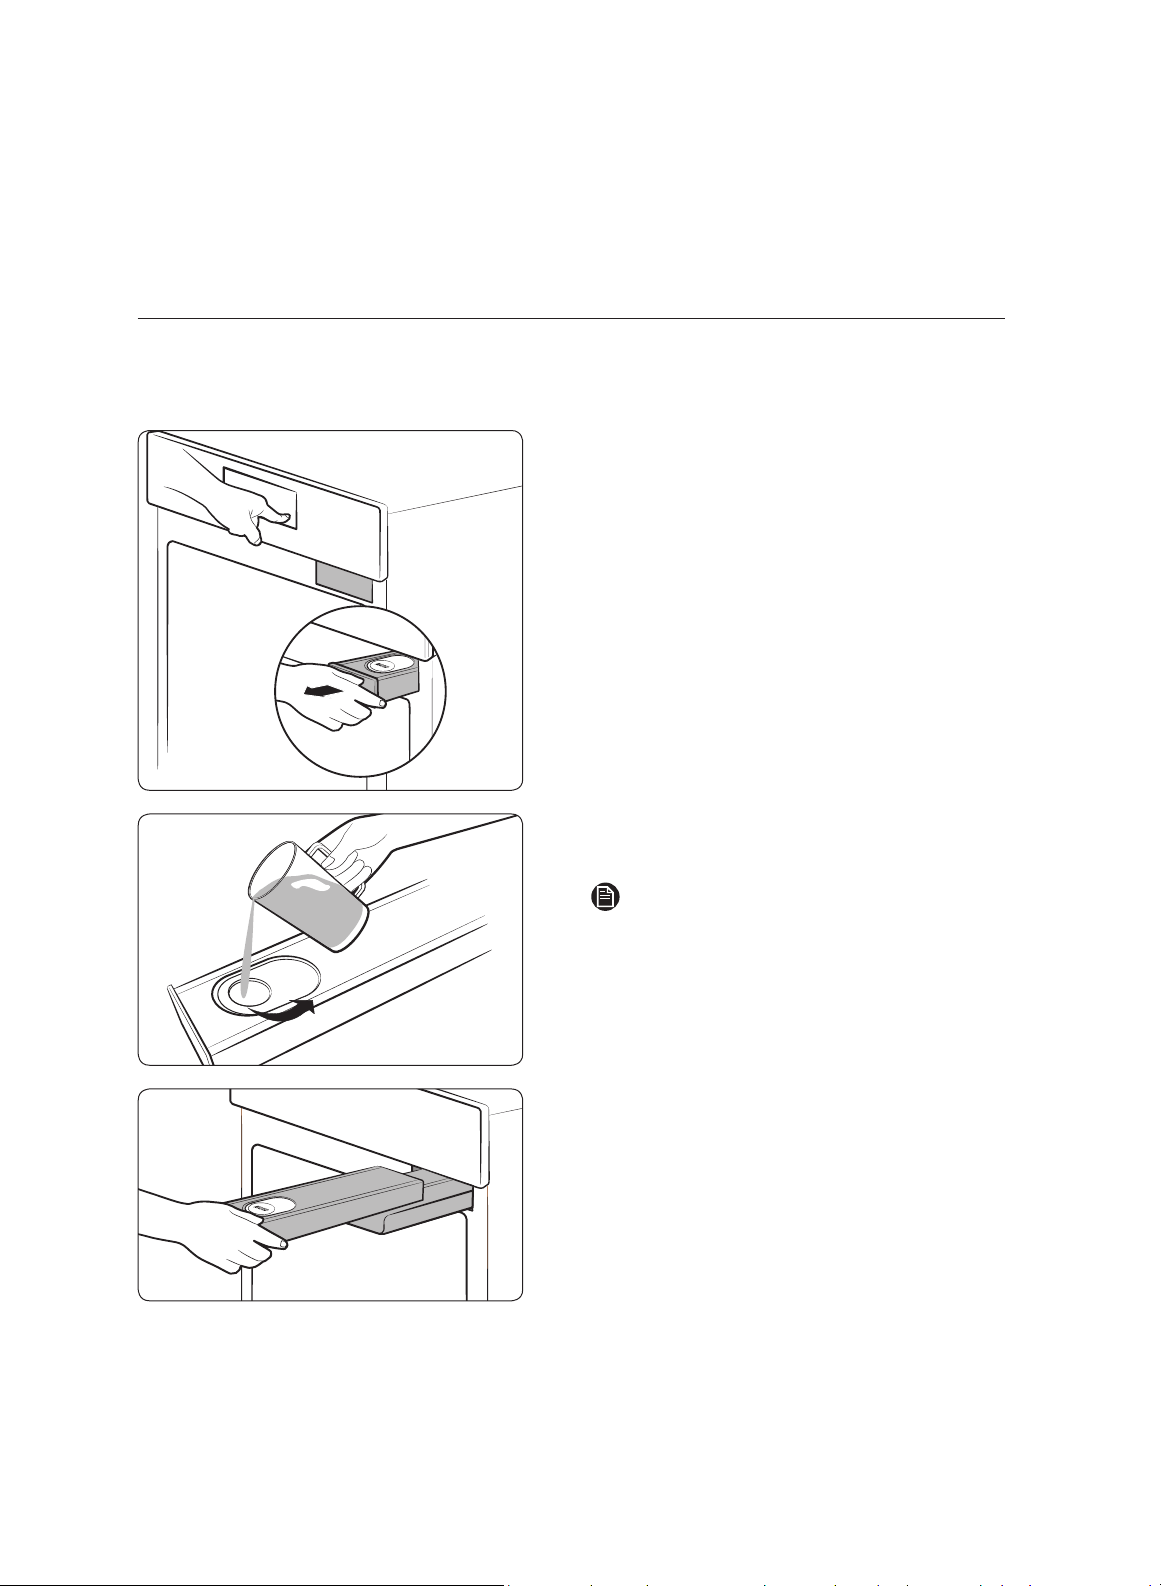
Water reservoir
The reservoir is used in Steam Bake and Steam Roast modes and to remove water scale
left on the oven walls after steam-cooking modes.
1. Open the oven door. The reservoir is
on the right-hand side of the oven
above the oven opening. On the
control panel, touch OPEN/CLOSE
RESERVOIR. The reservoir ejects.
Pull the reservoirfrom its slot.
2. Open the reservoir cap, and fill it
with 22 oz (650ml) of drinkable water.
NOTE
You could also remove the rubber cap.
3. Replace the cap (or plastic top), and
slide the reservoir into its slot. A soft
click indicates it is seated correctly.
4. Touch OPEN/CLOSE RESERVOIR. The
oven retracts the reservoir.
5. Close the oven door.
16
English
Operations
Max
0.5L
0.3L
NOTE
Do not exceed the max line.
A
NOTE
Close the cap and top portion of the
reservoir (A) before using the oven.
CAUTION
The reservoir heat
s up during
cooking. Wear oven mitts to
remove/refill the reservoir.
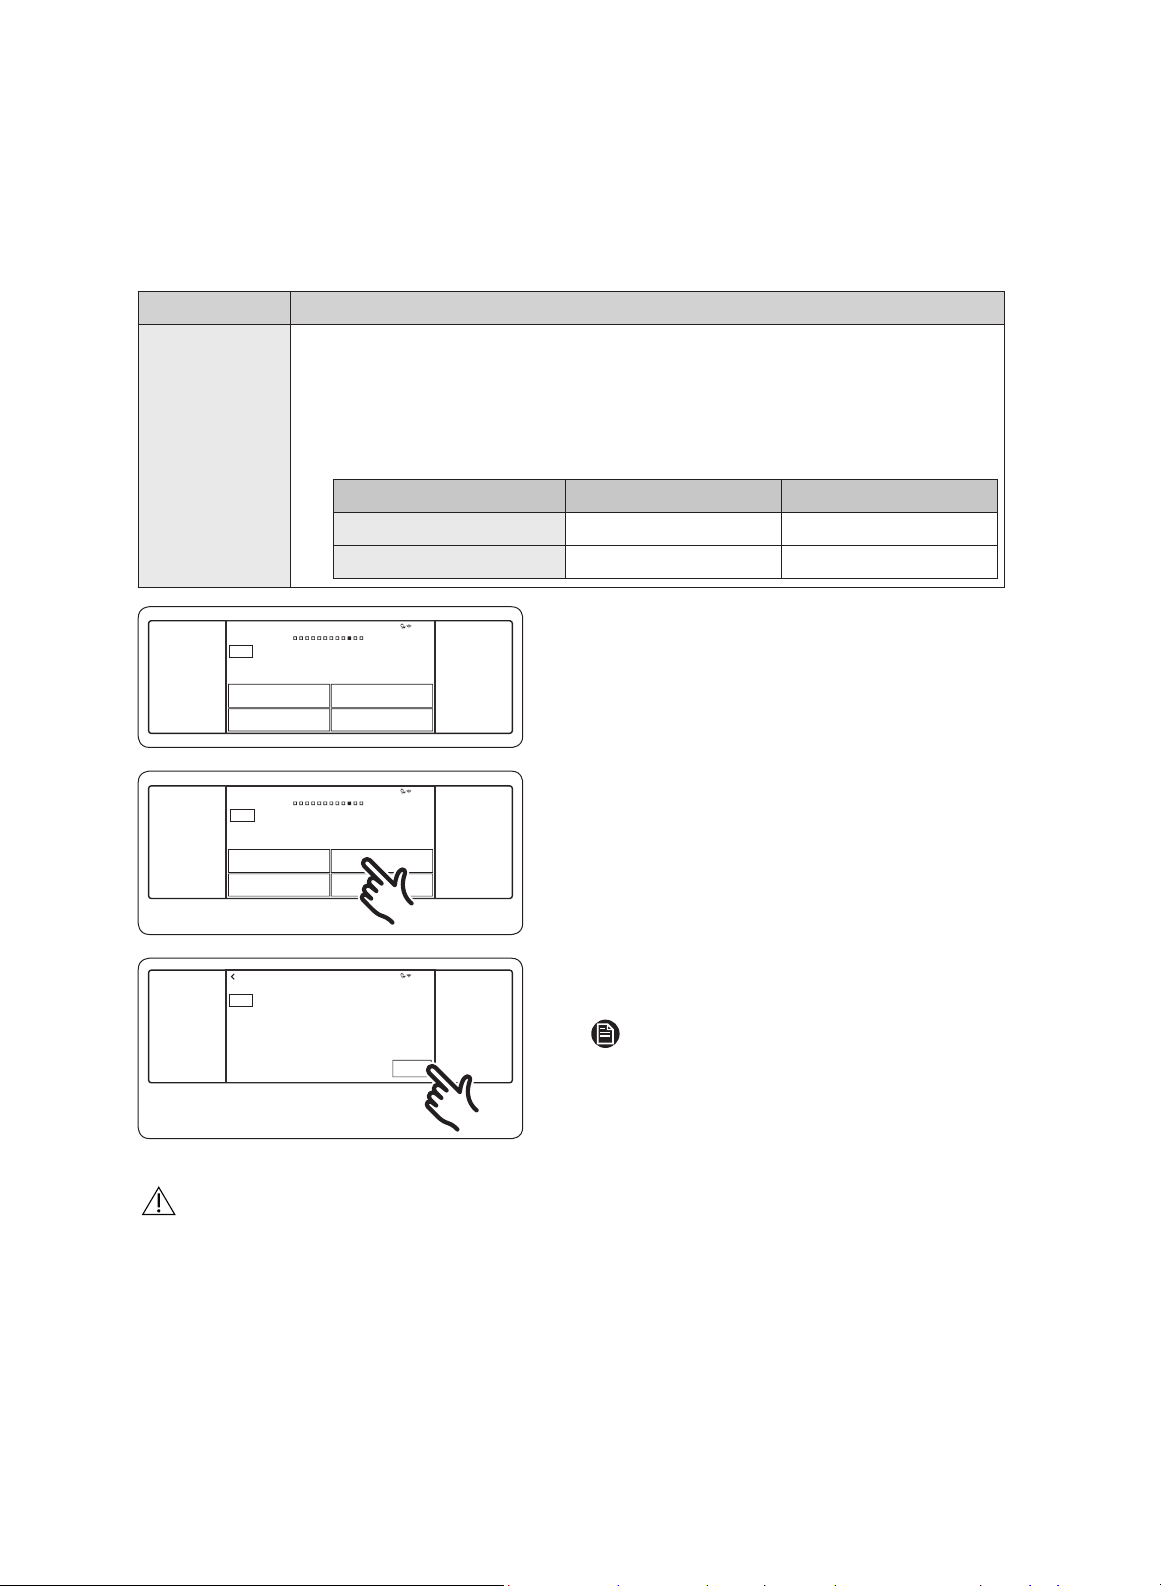
Control lockout
Control lockout lets you lock touchpad buttons to prevent undesired changing of the
controls. This feature also locks the oven door(s). Control lockout must be activated
when the oven is in Standby mode.
How to activate Control Lockout
Convection Bake
Faster, more even baking
325
°F
Temp Prob
e
150
°
None
InstantH
eat™
Off
Cook Tim
e
Delay Sta
rt
None
START
4:35 PM
TIMER
SETTINGS
LOCK
(3sec)
OFF
LIGHT
OPEN/CLOSE
RESERVOIR
OVEN
MODE
1. Cancel or turn off all functions.
2. Touch LOCK for 3 seconds.
TIMER
SETTINGS
LOCK
(3sec)
OFF
LIGHT
OPEN/CLOSE
RESERVOIR
Child Lock
4:35 PM
• The display changes to the Child Lock
screen, and the control lock
confirmation appears at the bottom of
the screen.
NOTE
• Control Lockout is available only when the oven temperature is under 400 °F.
• All other functions must be cancelled before you activate Control Lockout.
English 17
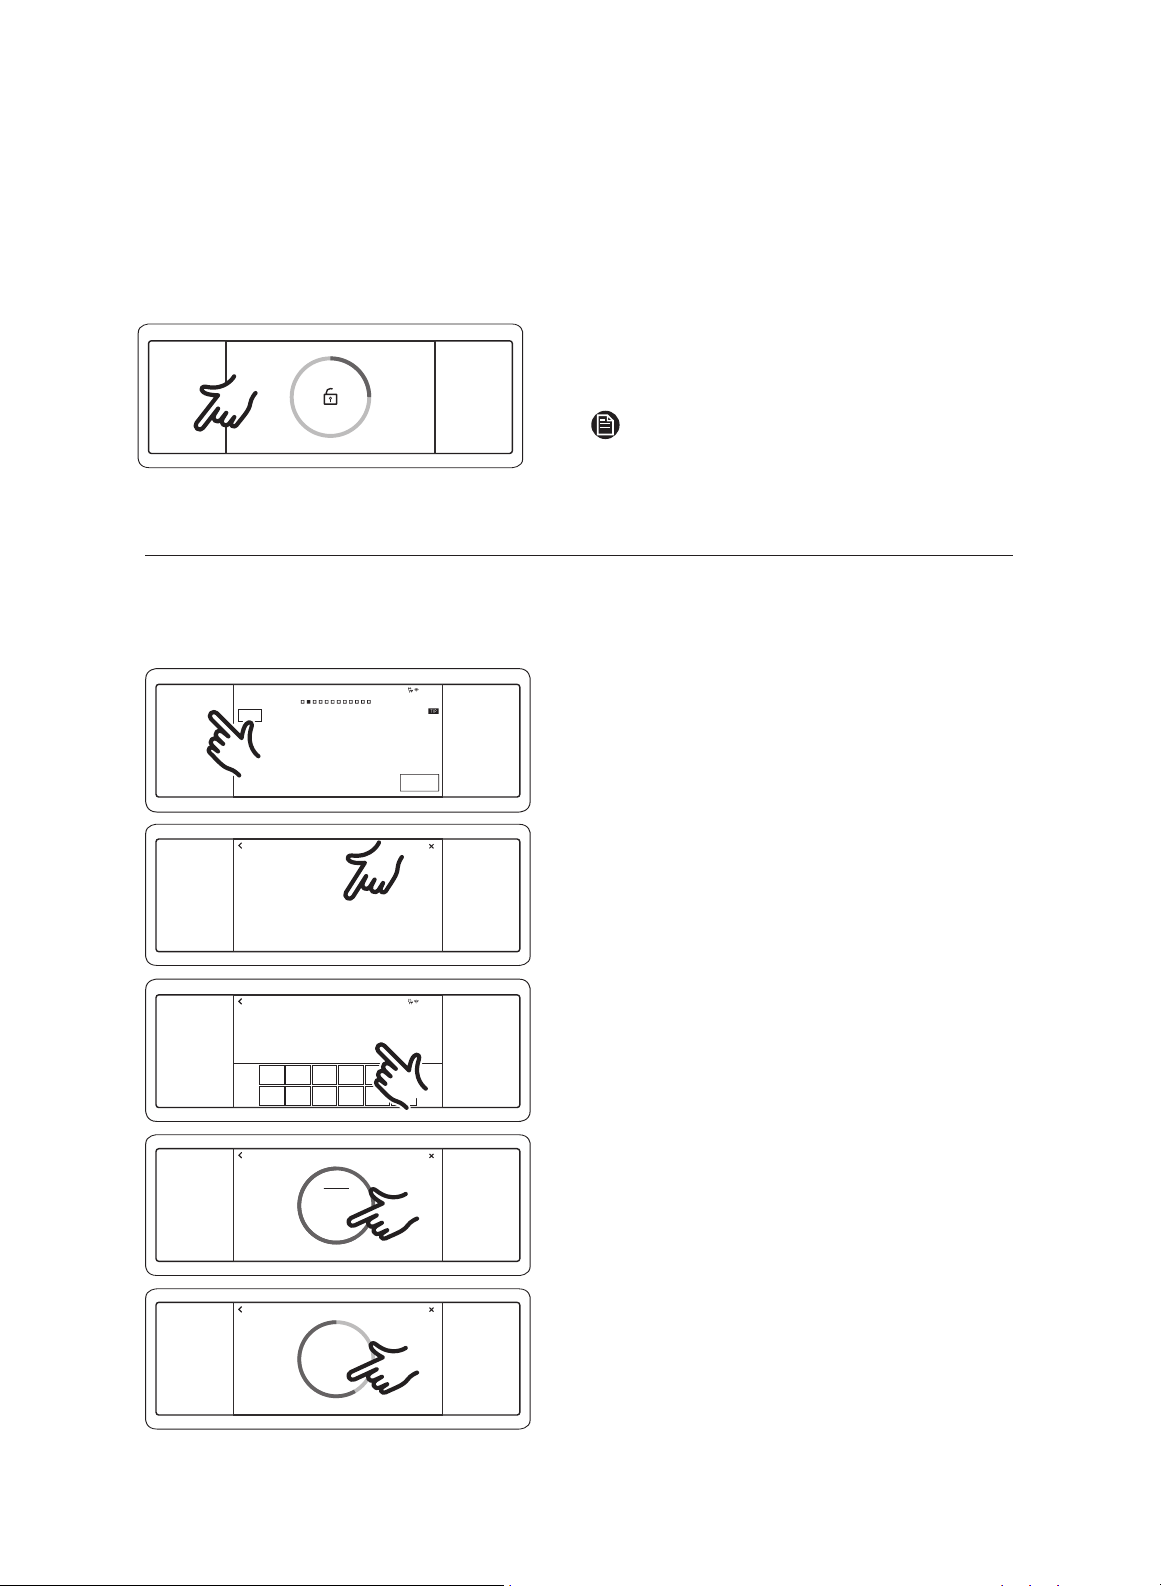
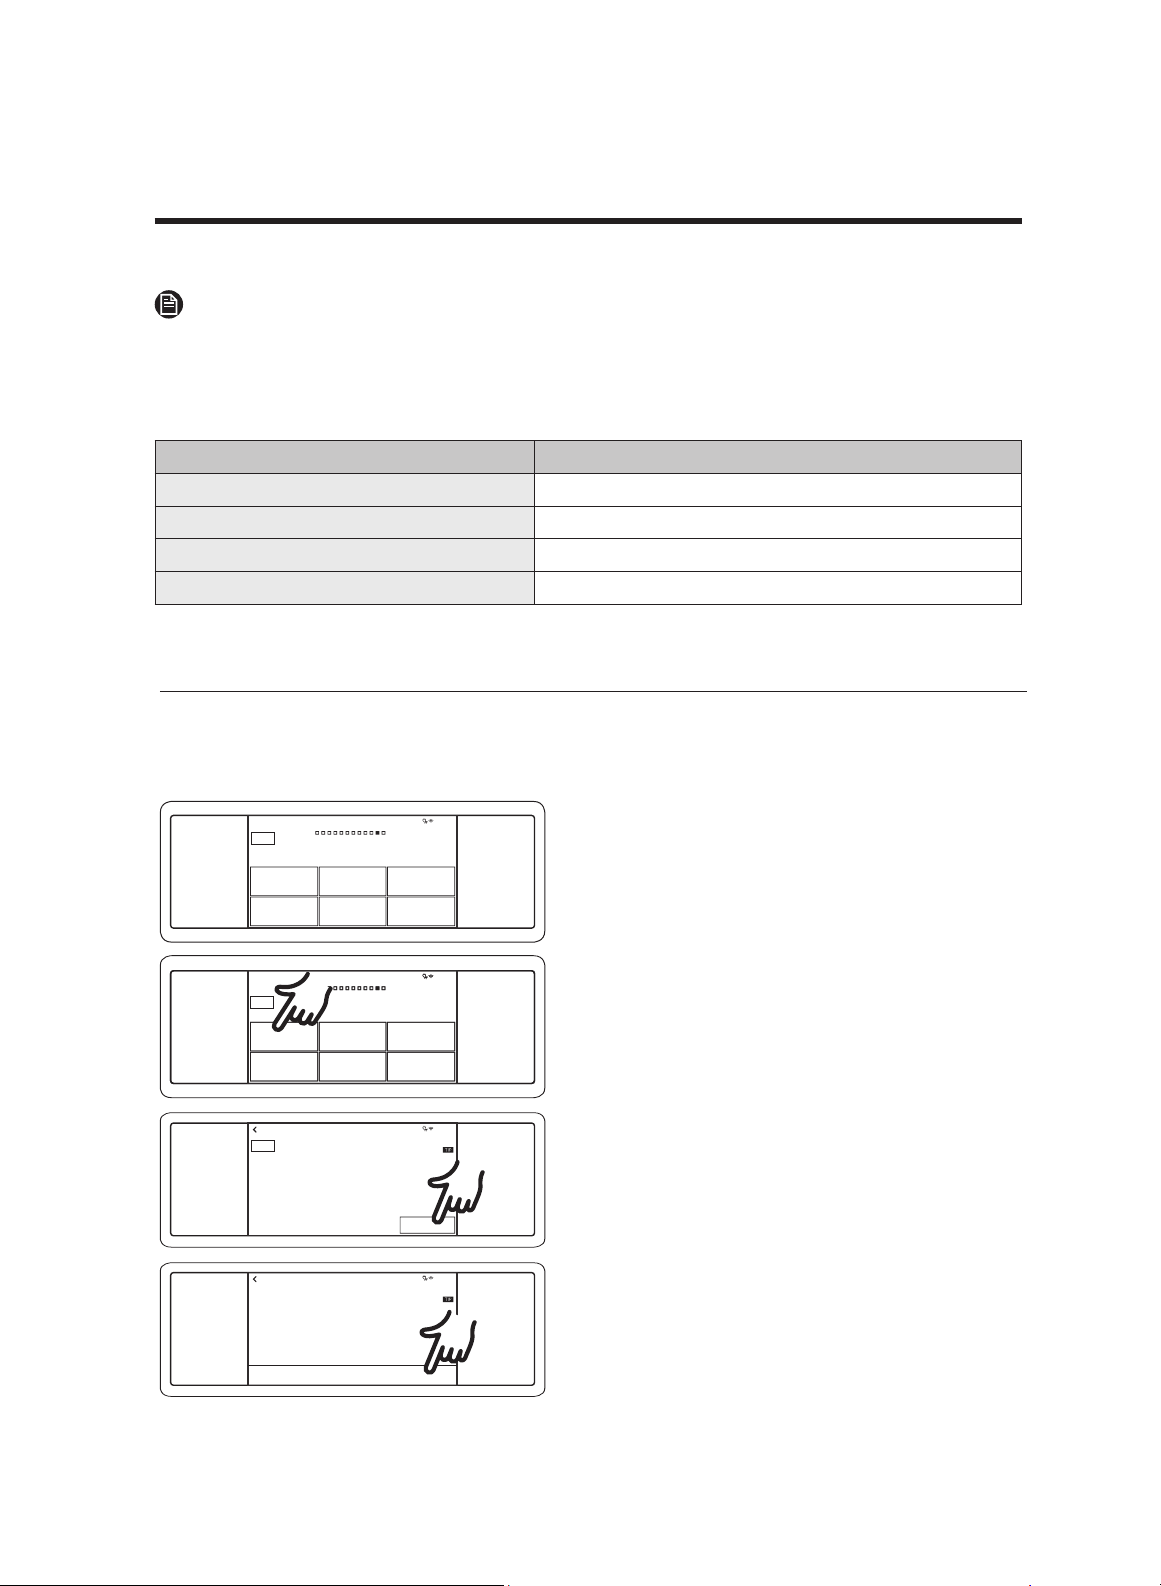
How to unlock the controls
TIMER
SETTINGS
LOCK
(3sec)
OFF
LIGHT
OPEN/CLOSE
RESERVOIR
1. Touch LOCK for 3 seconds. The control
lock confirmation and the lock icon
disappear.
NOTE
It may take 10 seconds for the doors to
unlock.
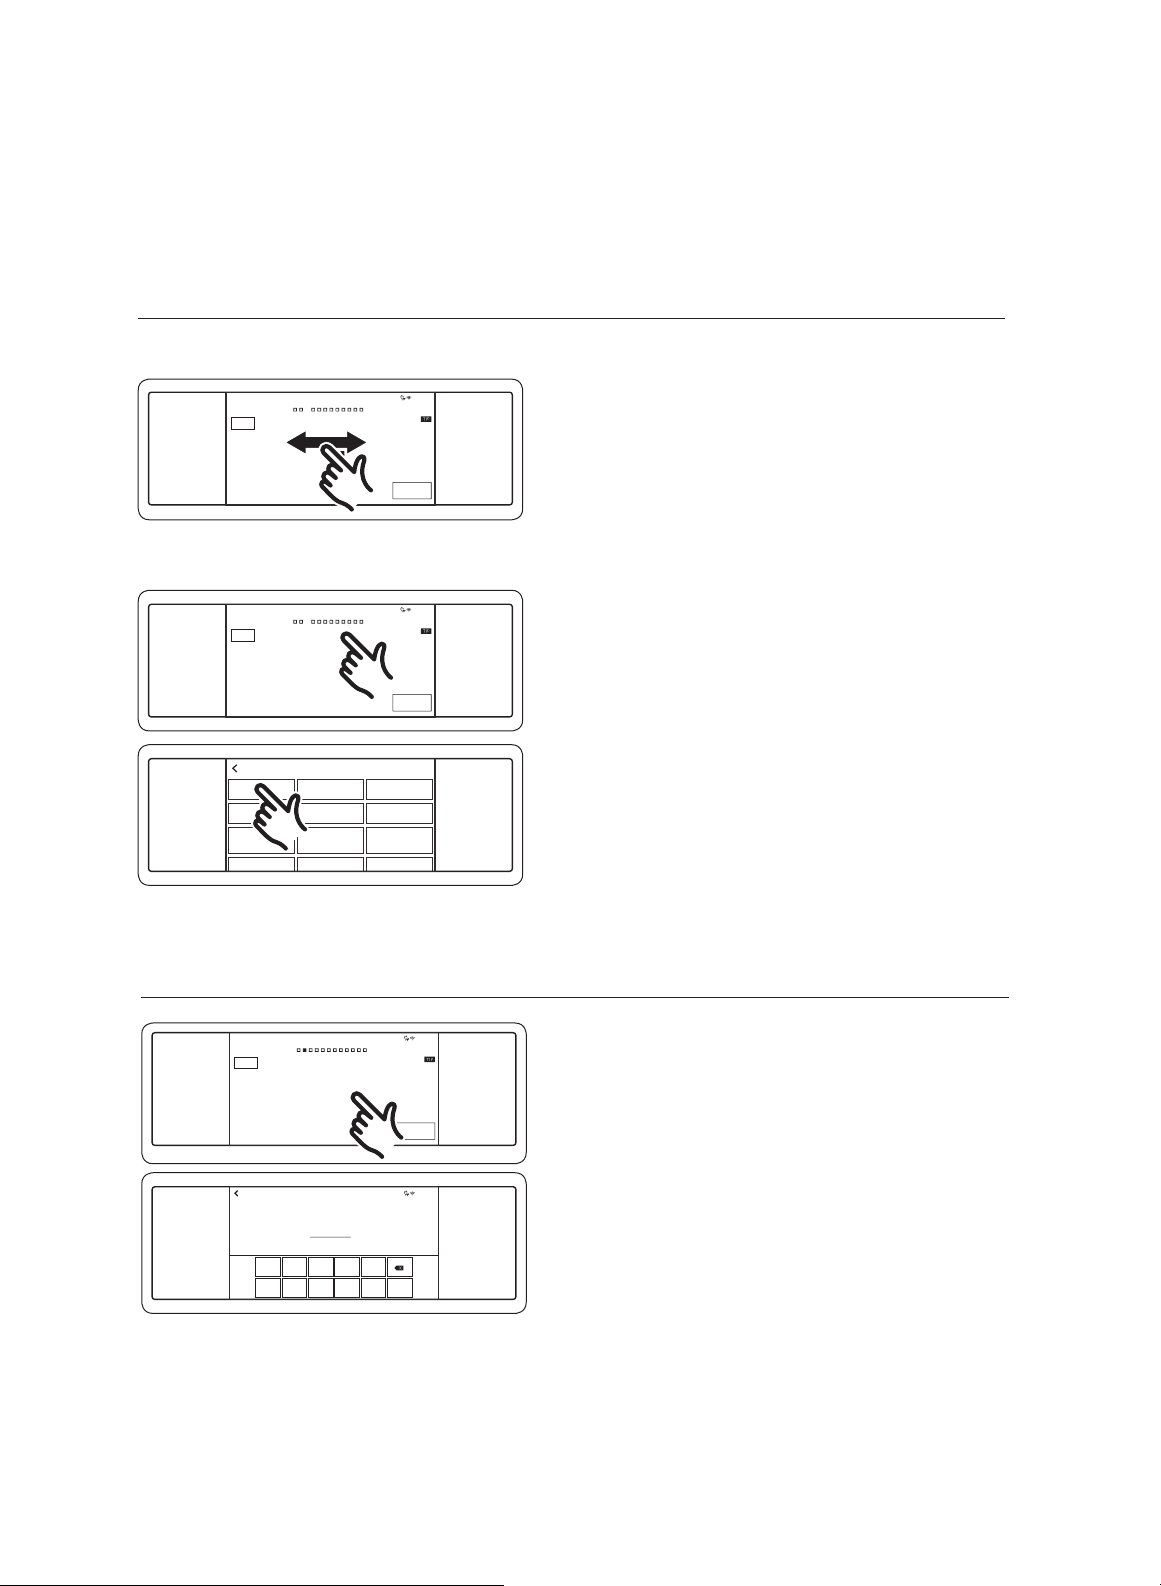
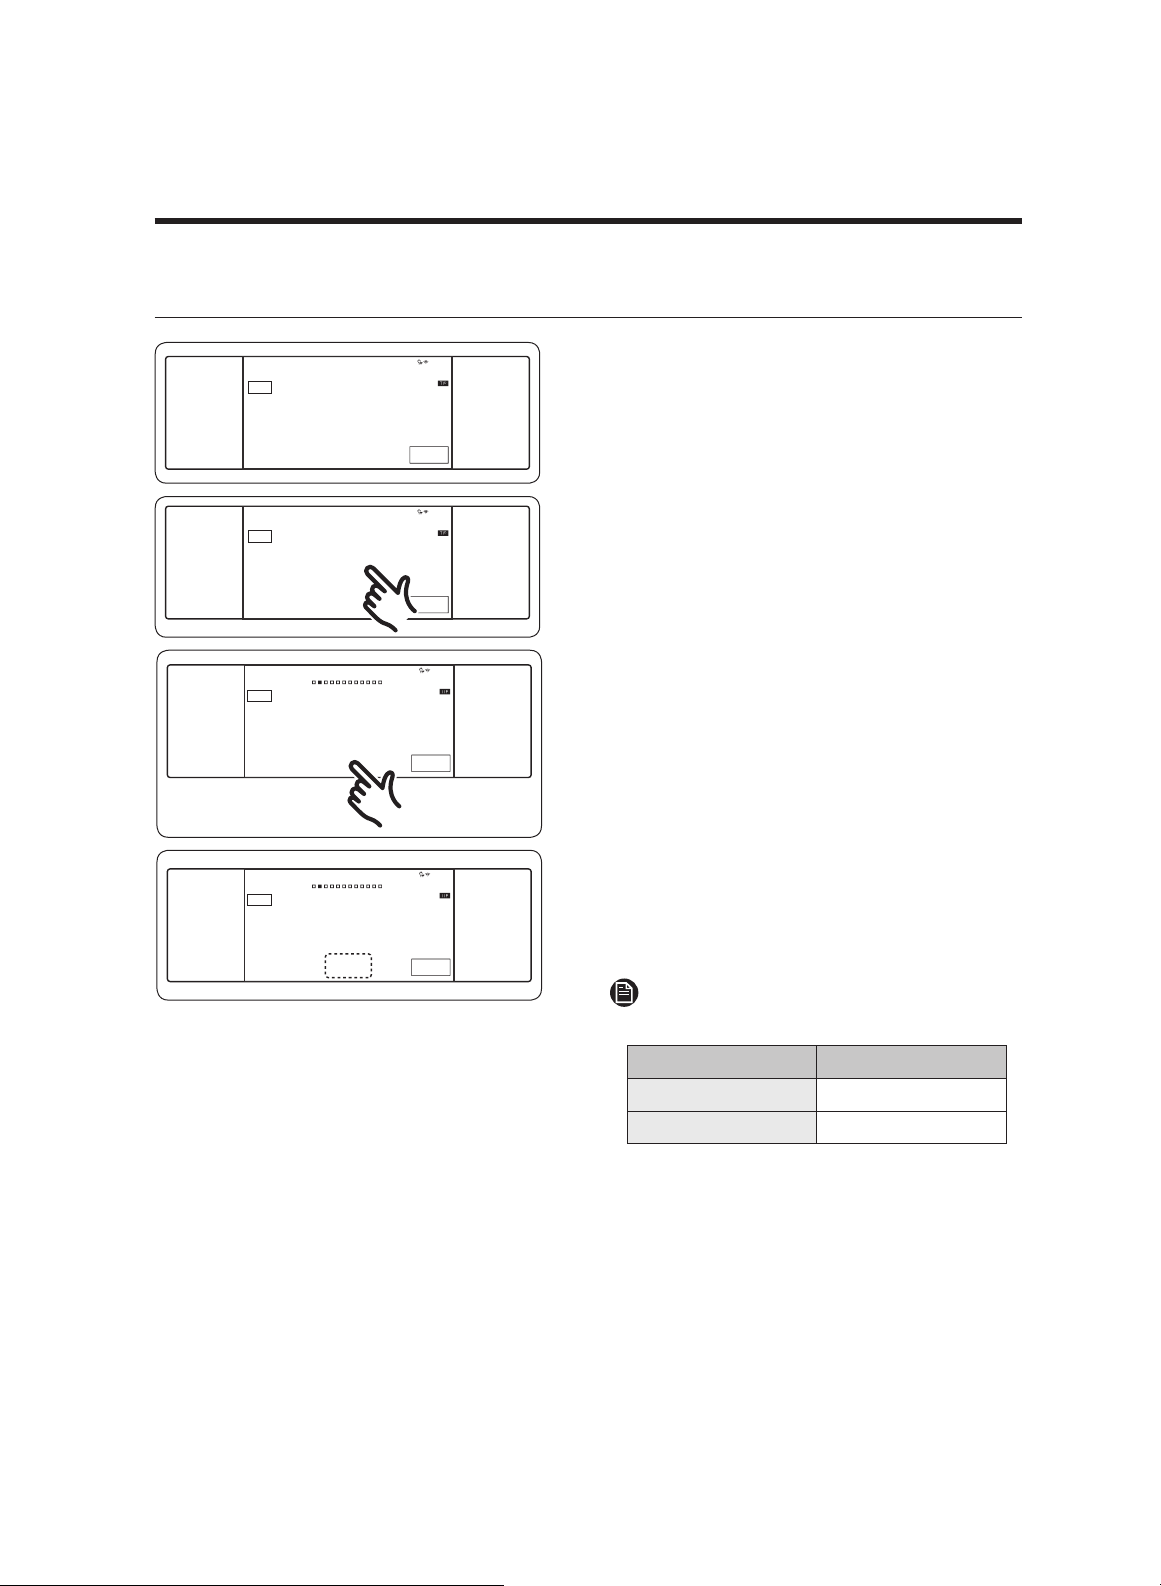
Kitchen timer
This timer beeps when the set time elapses. It does not start/stop cooking functions.
You can use the kitchen timer with any oven function.
How to set the timer
4:35 PM
Convection Bake
Faster, more even baking
325
°F
Temp Probe
150
°
None
InstantH
eat™
Off
Cook Time
Delay Star
t
None
START
TIMER
SETTINGS
LOCK
(3sec)
OFF
LIGHT
OPEN/CLOSE
RESERVOIR
OVEN
MODE
1. Touch TIMER. The display changes
to the timer screen.
+
Add timer
Timer
TIMER
SETTINGS
LOCK
(3sec)
OFF
LIGHT
OPEN/CLOSE
RESERVOIR
2. Tap + Add timer.
1
6 7 8 9 0
2 3 4 5
OK
0
hr 00 min 00 sec
TIMER
SETTINGS
LOCK
(3sec)
OFF
LIGHT
OPEN/CLOSE
RESERVOIR
4:35 PM
TIMER
SETTINGS
LOCK
(3sec)
OFF
LIGHT
OPEN/CLOSE
RESERVOIR
DELETE RESET
Timer 01
00
:
00
:
20
START
Timer
+ ADD
DELETE RESET
Timer 01
00
:
00
:
18
PAUSE
Timer
+ ADD
TIMER
SETTINGS
LOCK
(3sec)
OFF
LIGHT
OPEN/CLOSE
RESERVOIR
3. Tap the numbers on the touchpad to
set the time (from 1 sec to 23 hr 59
min 59 sec).
4. Tap START. When the time elapses,
the oven beeps, and the display
shows the timer has finished.
• You can pause, reset, or delete the timer
at any time by touching the screen.
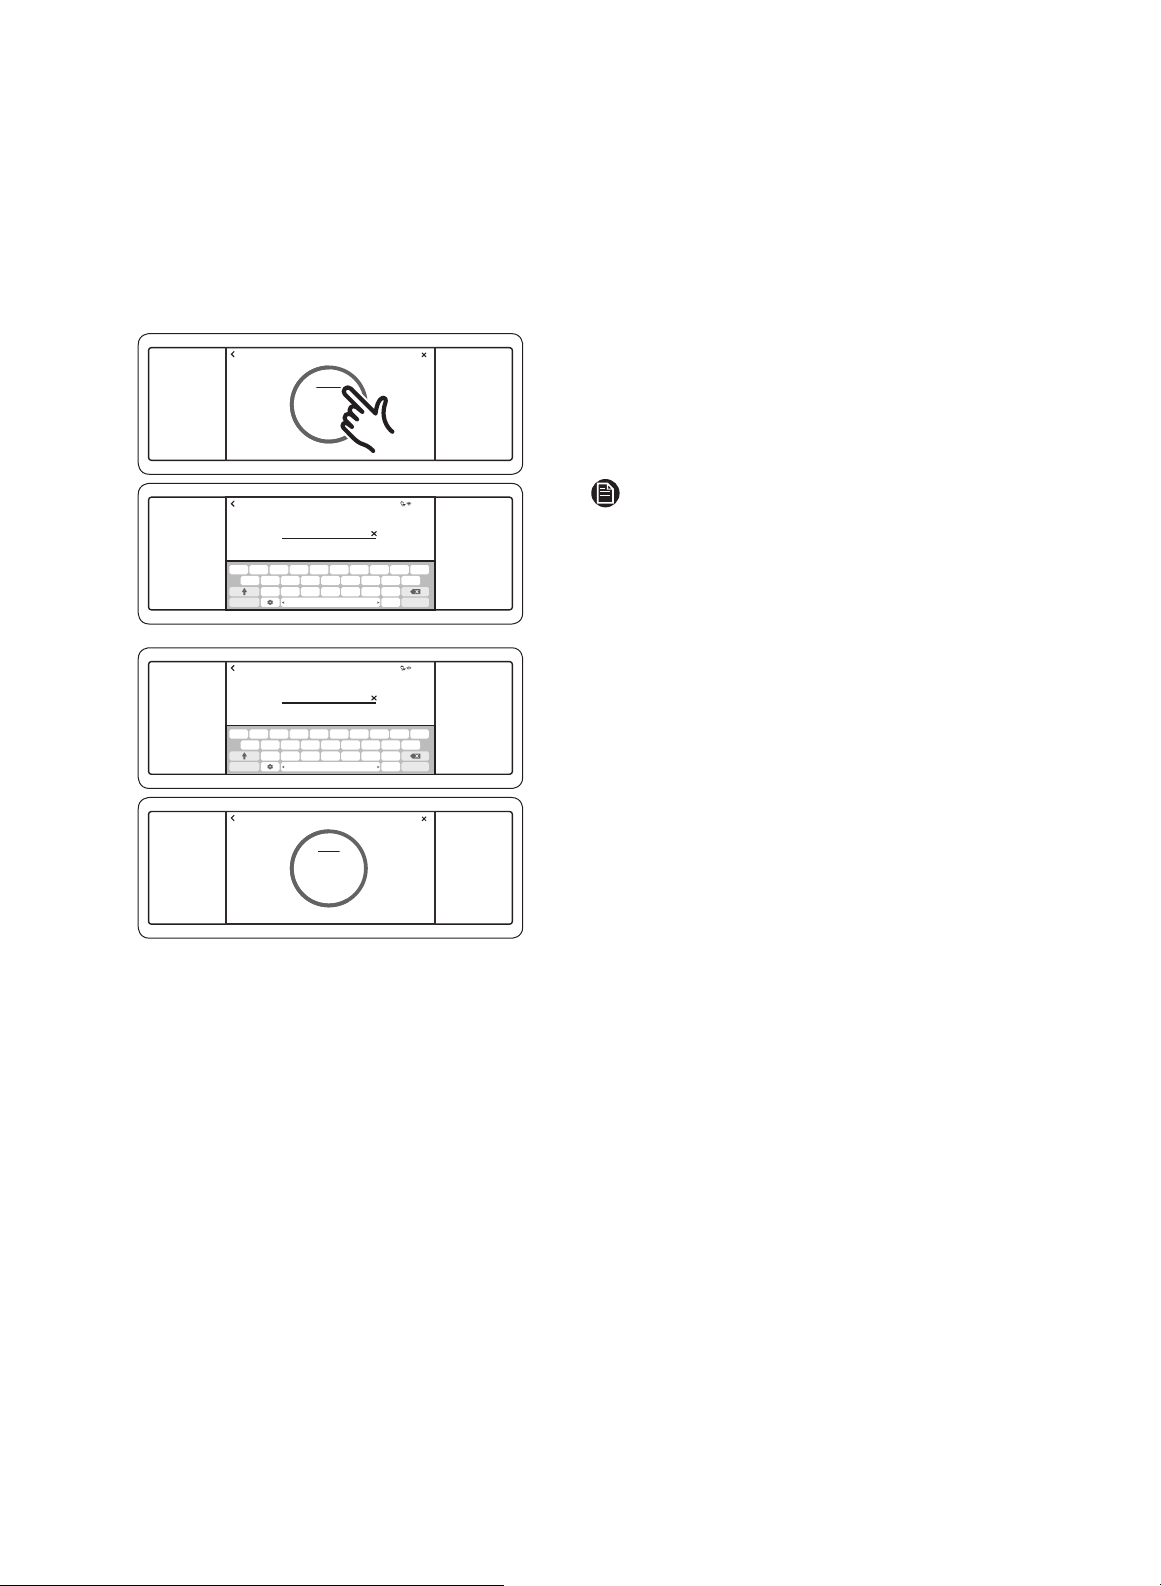
How to change timer name
DELETE RESET
Timer 01
00
:
00
:
20
START
Timer
+ ADD
TIMER
SETTINGS
LOCK
(3sec)
OFF
LIGHT
OPEN/CLOSE
RESERVOIR
Enter timer name.
Timer 01
OK
English?123
sa d f g h j k l
wq e r t y u i o p
z x c v b n m
.
... ...
1 2 3 4 5 6 7 8 9 0
- @ * ^ : ; ( )
/ ‘ “ : , ? !
~
4:35 PM
TIMER
SETTINGS
LOCK
(3sec)
OFF
LIGHT
OPEN/CLOSE
RESERVOIR
You can change the timer name to identify
what you are timing, for example, a
chicken defrosting.
1. Tap the timer name area.
• The keyboard appears.
NOTE
• You can name the timer in a max of 13
characters.
Chicken
OK
English?123
sa d f g h j k l
wq e r t y u i o p
z x c v b n m
.
... ...
1 2 3 4 5 6 7 8 9 0
- @ * ^ : ; ( )
/ ‘ “ : , ? !
~
4:35 PM
Enter timer name.
TIMER
SETTINGS
LOCK
(3sec)
OFF
LIGHT
OPEN/CLOSE
RESERVOIR
DELETE RESET
Chicken
00
:
00
:
20
START
Timer
TIMER
SETTINGS
LOCK
(3sec)
OFF
LIGHT
OPEN/CLOSE
RESERVOIR
+ ADD
2. Tap the keyboard to set the new timer
name.
• The display shows the changed timer
name.
18
English

Operations
Timed cooking
In this mode, the oven turns on immediately and cooks for the length of time you set.
At the end of the cooking time, the oven turns off automatically.
You can use Timed Cooking only with another cooking mode (Bake, Convection Bake,
Convection Roast, Pure Conv. Sear, Convection Broil, Steam Bake, Steam Roast, Dual
Four Part Pure Convection, Proof, Stone Bake Mode, Dehydrate).
How to set the oven for timed cooking
START
4:35 PM
Convection Bake
Faster, more even baking
325
°F
InstantHeat™
Off
Cook Time
None
Delay Start
None
TIMER
SETTINGS
LOCK
(3sec)
OFF
LIGHT
OPEN/CLOSE
RESERVOIR
OVEN
MODE
4:35 PM
1
6 7 8 9 0
2 3 4 5
OK
TIMER
SETTINGS
LOCK
(3sec)
OFF
LIGHT
OPEN/CLOSE
RESERVOIR
0 hr 00 min
Set cooking time
1. Swipe to the desired cooking mode.
2. Tap Cook Time. The display changes to
the Set Cooking Time screen.
4:35 PM
1
6 7 8 9 0
2 3 4 5
OK
Ready at 5:05PM
0 hr 30 min
Set cooking time
TIMER
SETTINGS
LOCK
(3sec)
OFF
LIGHT
OPEN/CLOSE
RESERVOIR
4:35 PM
1
6 7 8 9 0
2 3 4 5
OK
1 hr 45 min
Set cooking time
TIMER
SETTINGS
LOCK
(3sec)
OFF
LIGHT
OPEN/CLOSE
RESERVOIR
Ready at 5:05PM
3. Tap numbers on the touchpad to
set the cooking time (from 1 min to 9
hr and 59 min).
START
4:35 PM
Convection Bake
Faster, more even baking
325
°F
None
InstantH
eat™
Off
Cook Tim
e
1hr 45 min
Delay St
art
TIMER
SETTINGS
LOCK
(3sec)
OFF
LIGHT
OPEN/CLOSE
RESERVOIR
OVEN
MODE
•
•
The cook time appears in the Cook
Time area of the screen.
Cancel the cook time at any time by
setting the Cook Time to 0 minutes.
CAUTION
You can use timed cooking and delay start to cook cured or frozen meats, and most
fruits and vegetables. Food that spoils easily (e.g., eggs, meat) should be chilled first.
Even so, it should sit in the oven no longer than 1 hour before cooking and should be
removed promptly when done. Eating spoiled food can cause food poisoning.
English 19
2
0 English
Operations
Delay start
In this mode, the oven timer turns the oven on at your preset time. At the same
time, you can
set the oven to turn off automatically via the Timed Cooking function.
• You can use Delay Start only with another cooking operation (Bake, Convection Bake,
Convection Roast, Pure Conv. Sear, Steam Bake, Steam Roast, Dual Four Part Pure
Convection, Proof, Stone Bake Mode, Dehydrate, Self clean, GreenClean™).
• You can set Delay Start before setting other cooking operations.
• The oven clock must be set to the current time.
How to set the oven for delay timed cooking
START
4:35 PM
Convection Bake
Faster, more even baking
325
°F
InstantHeat™
Off
Cook Time
None
Delay Start
None
TIMER
SETTINGS
LOCK
(3sec)
OFF
LIGHT
OPEN/CLOSE
RESERVOIR
OVEN
MODE
4:35 PM
1
6 7 8 9 0
2 3 4 5
OK
4
:
35
AM
PM
Set start time
TIMER
SETTINGS
LOCK
(3sec)
OFF
LIGHT
OPEN/CLOSE
RESERVOIR
4:35 PM
1
6 7 8 9 0
2 3 4 5
OK
5
:
35
AM
PM
Set start time
TIMER
SETTINGS
LOCK
(3sec)
OFF
LIGHT
OPEN/CLOSE
RESERVOIR
1. Place the food in the oven.
2. On the control screen, swipe to the
desired cooking operation.
3. Set the cook time if you want the oven
to turn off automatically. (See Timed
cooking, pg. 26.)
4. Tap Delay Start. The current time
appears as the first entry.
5. Tap numbers on the touchpad to set
the oven start time.
START
4:35 PM
Convection Bake
Faster, more even baking
325
°F
InstantHeat™
Off
Cook Time
1hr 45min
Delay Start
5:35 PM
TIMER
SETTINGS
LOCK
(3sec)
OFF
LIGHT
OPEN/CLOSE
RESERVOIR
OVEN
MODE
• The Delay Start screen closes. The start
time (and, if you set it) the cook time
are displayed.
English 21
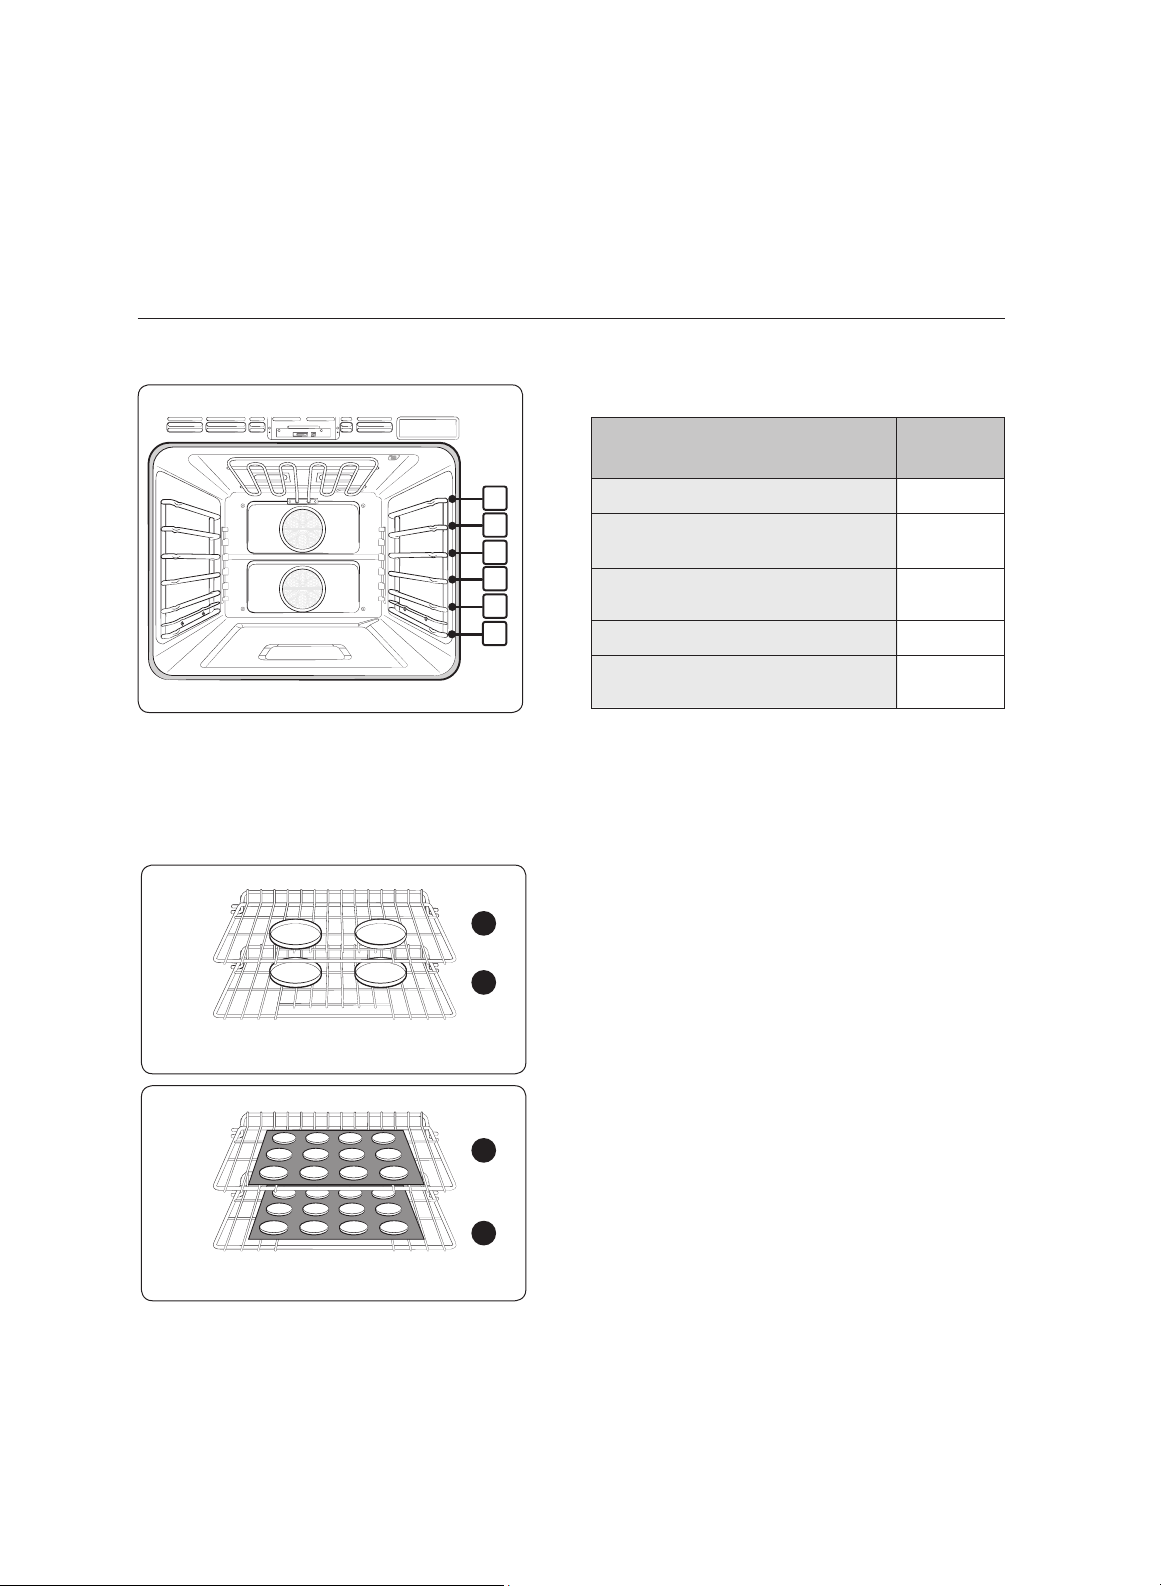
Using the oven racks
Oven rack levels
1
2
3
4
5
6
Recommended rack levels for cooking
TYPE OF FOOD
RACK
LEVEL
Broiling hamburgers 6
Broiling meats or small
cuts of poultry, fish
3-5
Bundt cakes, pound cakes,
frozen pies, casseroles
3 or 4
Angel-food cakes , small roasts
2
Turkeys, roasts, hams, fresh
pizza
1
This table is for reference only.
Rack and pan placement
Multiple Oven Racks
5
3
Multiple Oven Racks
5
3
•
•
•
Center baking pans if possible to
improve results. If using multiple pans,
le
ave 1˝ to 1½˝ of space around them. If
using one oven rack, place it at Level 3
or 4 (graphic, pg. 29).
When baking cakes/cookies on multiple
racks, place the racks at Levels 3 and 5.
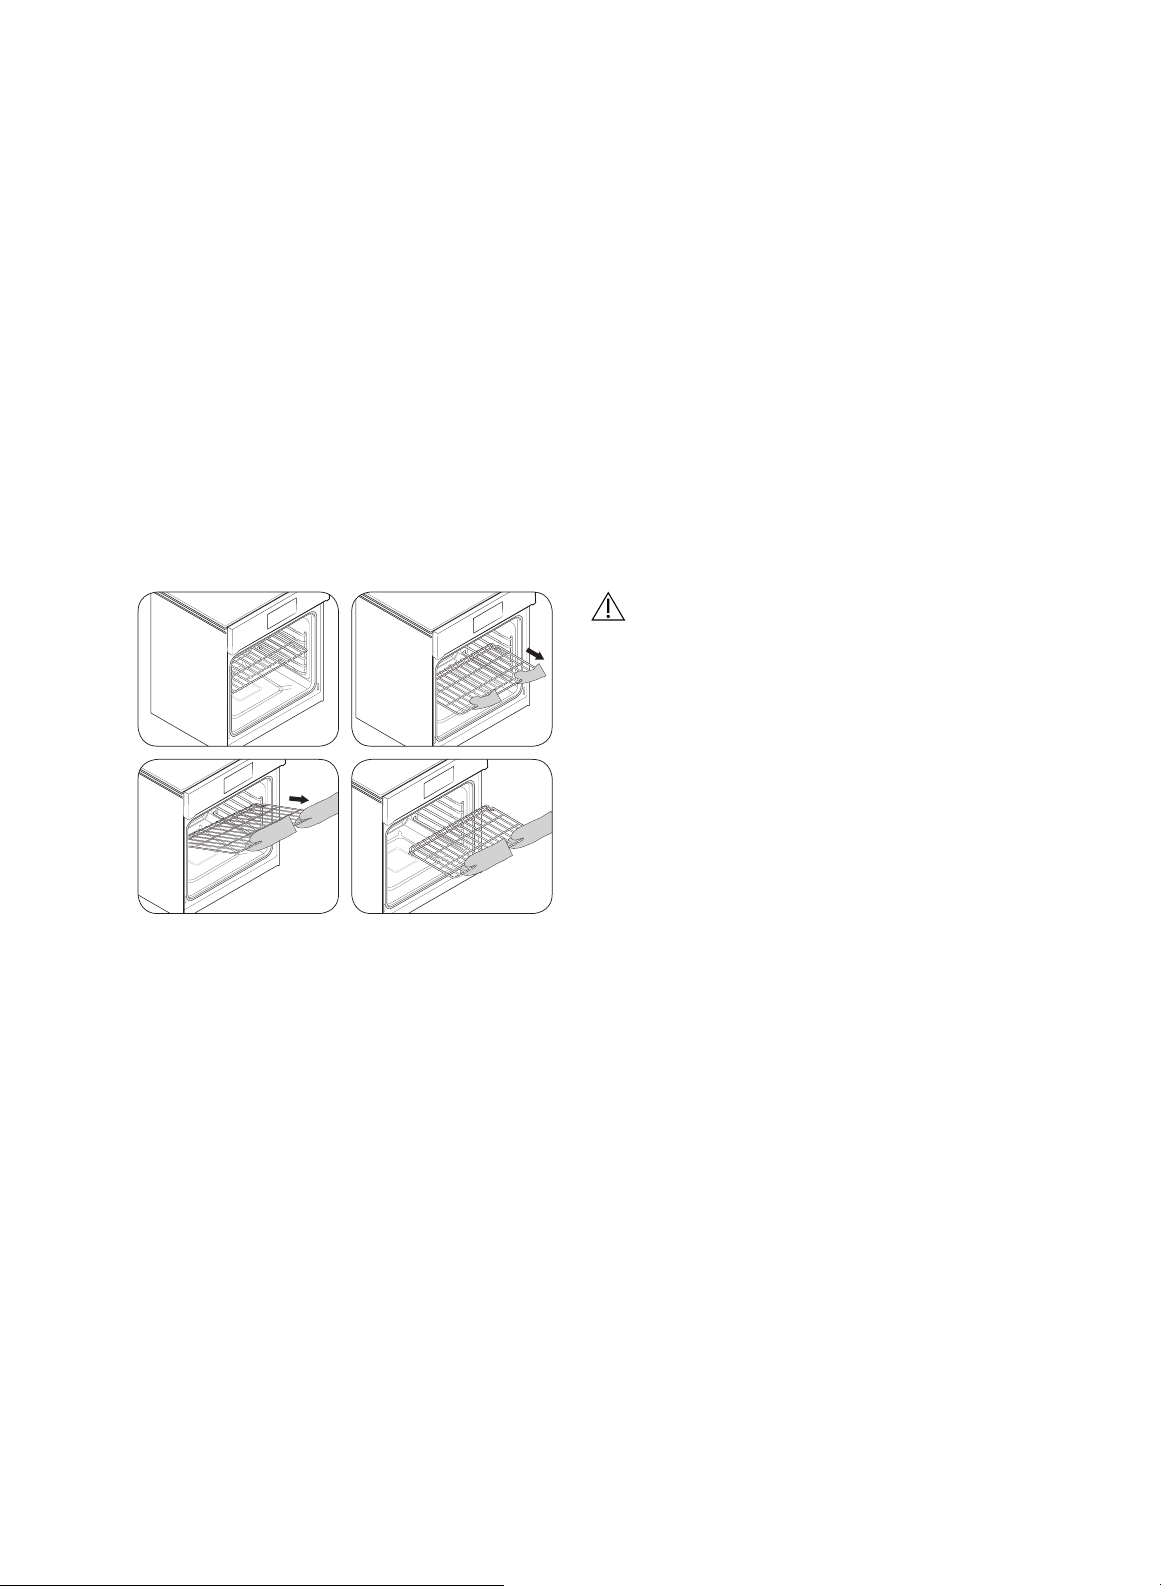
Before using the racks
Each rack has stops that must be placed correctly on the supports so the rack cannot be
accidentally pulled from th
e oven.
Removing the racks
1. Pull the rack straight out until it stops.
2. Lift up the front of the rack, and then pull it out.
Replacing the racks
1. Place the end of the rack on the support.
2. Tilt the front end up and push the rack in.
CAUTION
• Do not line the racks or oven chamber
with aluminum foil. Doing so impedes
heat circulation, causes poor results,
and may harm oven-chamber surfaces.
• Arrange the oven racks only when the
oven is cool.
2
2 English
Operations
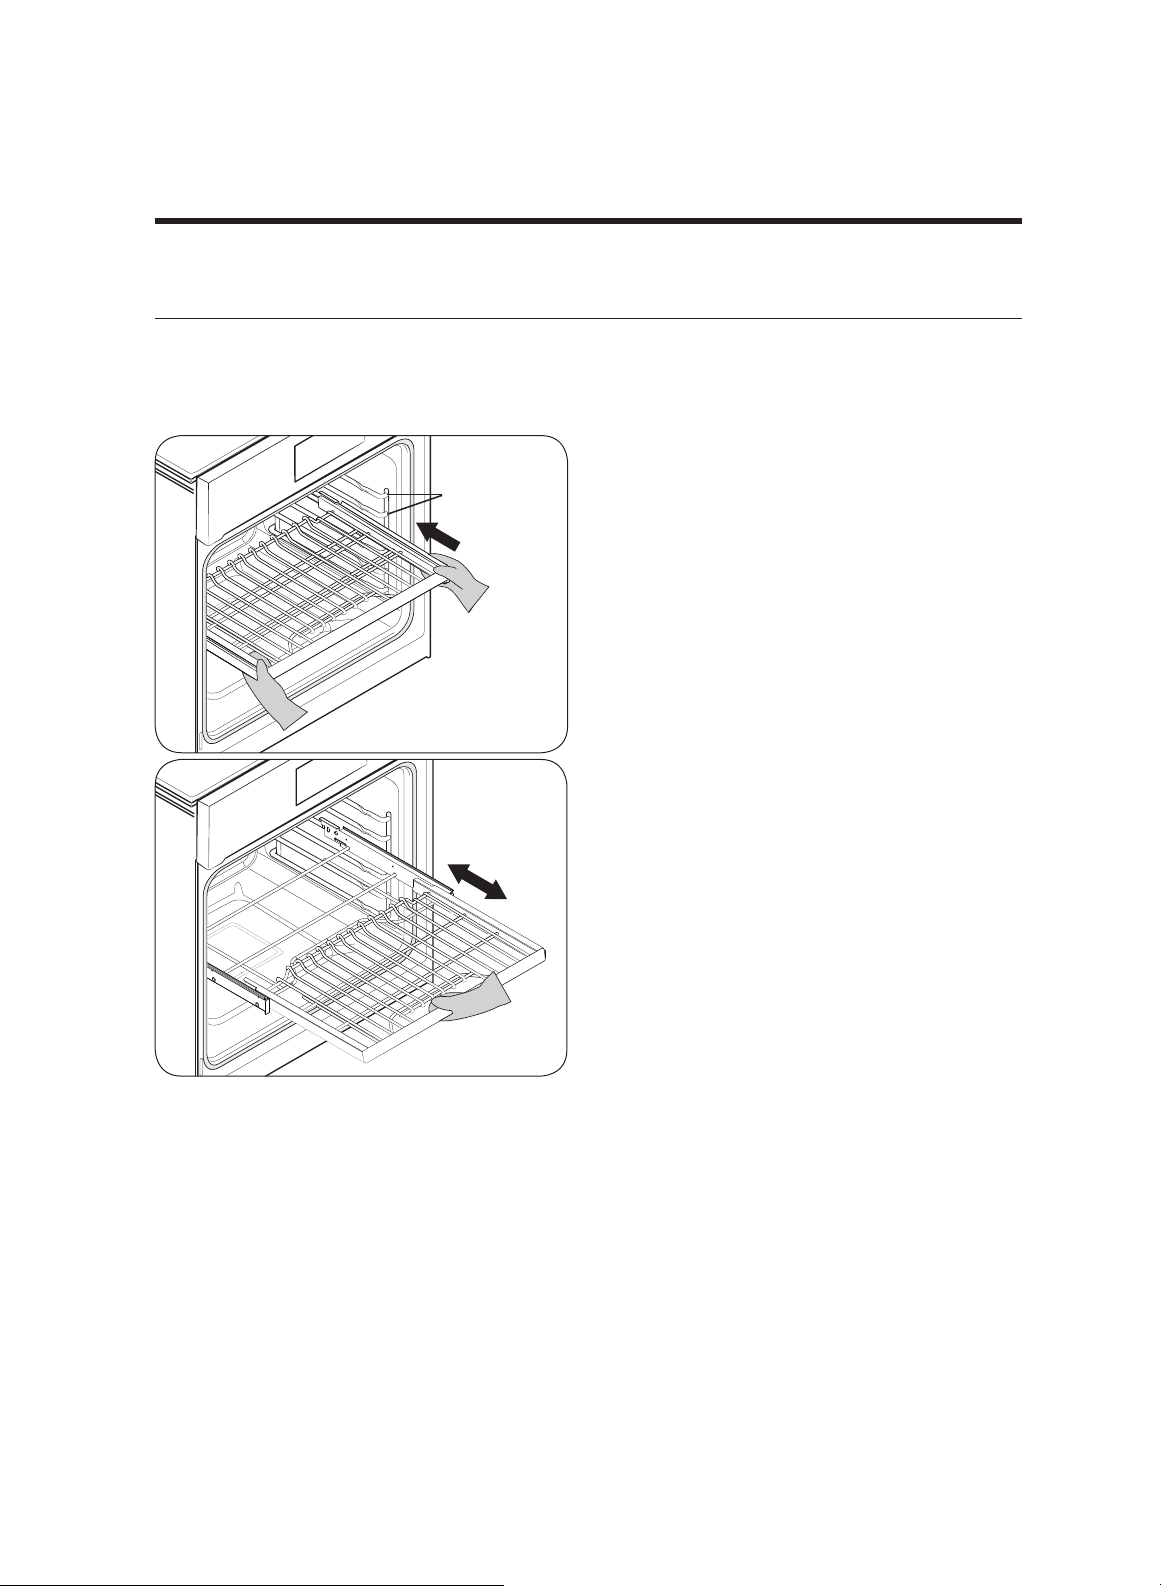
Using the gliding rack
This fully extendable rack has glide tracks that let you extend the rack fully out of the
oven for safe placement and removal of cookware (especially heavy dishes).
Installing the gliding rack
Rack Guides
•
With the rack glides retracted and the
oven off, carefully insert the rack
between the guides until the rack
reaches the back of the oven chamber.
•
Grasp the handle to slide the rack in/
out. (If you grasp either side of the
handle, the rack may come loose.)
•
Use oven mitts to handle the gliding
rack when cooking.
English 23

Removing the gliding rack
• With the rack fully in and the oven
off and cool, grasp the rack and
frame, and pull outward and off
the guides.
CAUTION
Do not place the gliding rack one level
above a wire rack. The gliding rack
will not seat properly and may fall.
NOTE
You can install the gliding rack at any level except 1 (bottom).
24 English
6. (Optional) Set the Cook Time or Delay Start, and tap START.
When the set internal temperature is reached, the probe sensor deactivates, and an
alarm sounds.
CAUTION
To protect the probe’s tip, defrost the food fully, and ensure it does not protrude.
CAUTION
• Do not store the probe in the oven or leave it there during a self-cleaing or broiling
cycle. You can permanently damage the probe.
• Do not use tongs to insert/remove the probe.
• Use the temp probe only as instructed.
NOTE
•
If you remove the temp probe while it is active or insert it while baking or cooking
normally, cooking will stop after 1 minute.
If you use the probe to cook frozen food, it may not function.
(The probe icon will not
appear on the control screen.)
Temp probe table
Type of Food Internal temperature
Beef / Lamb
Rare 140 °F
Medium 160 °F
Well done 170 °F
Pork 170 °F
Poultry
180 - 185 °F
NOTE
If you cover the meat with aluminum foil and allow it to stand for 10 minutes after
cooking, the Internal temperature will rise 5-10 degrees.
Removing the temp probe
Remove the temp probe plug from the socket.
CAUTION
After cooking, the Temp probe is hot enough to cause burns. Let it cool sufficiently before
attempting to remove it.
26
English
English 27
Oven functions
Cooking mode
Swipe to select the cooking mode. Set the temperature you want. See Setting the
Temperature and Basic Baking and Broiling Instructions, both on pg. 42.
Mode Temperature range Temp probe InstantHeat™
Bake
175 °F (80 °C) -
550 °F (285 °C)
-
Convection Bake
175 °F (80 °C) -
550 °F (285 °C)
Convection Roast
175 °F (80 °C) -
550 °F (285 °C)
Broil L0 / HI - -
Pure Conv. Sear
175 °F (80 °C) -
475 °F (245 °C)
-
Convection Broil
175 °F (80 °C) -
550 °F (285 °C)
- -
Steam Bake
230 °F (110 °C) -
550 °F (285 °C)
-
Steam Roast
230 °F (110 °C) -
550 °F (285 °C)
-
Dual Four Part Pure
Convection
175 °F (80 °C) -
550 °F (285 °C)
-
= Available / - = Not Available
28 English
Operations
Mode Instruction
Bake
• This is for cakes, cookies, and casseroles. Always preheat the oven.
•
Baking temps/times vary with
ingredients and cookware size/shape.
• Dark or nonstick coatings may cook faster with more browning.
NOTE
Convection baking: It is normal for the fan to turn on/off during baking.
Convection
Bake
•
•
Uses a fan to circulate oven heat evenly and continuously.
Better heat distribution provides even cooking and excellent
results, even for multi-rack use.
• Breads and pastries brown more evenly.
Convection
Roast
• Good for cooking large, tender cuts of meat uncovered; the fan
circulates oven-heated air evenly all around the food.
• Meat and poultry are browned on all sides as if rotisserie-cooked.
• Juices are sealed in quickly for moist, tender results and richly
browned meat.
Broil
• For cooking tender cuts of meat, fish, and poultry up to 1" thick by
direct heat.
• High heat cooks quickly, providing a rich, brown exterior.
• Always preheat the oven for 5 minutes.
• See Broiling recommendation guide, pg. 40.
Pure Conv.
Sear
• Uses the convection element and fan
• Best for game hens, chickens, stuffed/unstuffed turkeys, turkey
breasts, pork tenderloin, and pork-loin roasts.
• For the first 15 minutes, meat is cooked 75 °F (42 °C) higher than
the set temp to trap the meat's natural juices.
Convection
Broil
•
•
Similar to Broil, but with air circulation by oven fan.
In this mode, the broil element cycles on and off to maintain oven
temperature, while the fan circulates hot air.
• For gentle browning and trapping of natural juices of thicker cuts of
meat, fish, and poultry.
• For optimum browning, preheat for 5 min.
Steam Bake
• For baking breads, pastries, and desserts; increases moisture
content and improves texture/flavor.
• See Steam cook recommendation guide, pg. 40.
English 29
Mode Instruction
Steam Roast
• For roasting meats and poultry; maintains a crispy surface while
trapping juices for a moist and tender result.
• See Steam cook recommendation guide, pg. 40.
Dual
, Four-
Part Pure
Convection
• Uses the convection element and fan.
• Uniform air circulation lets you use more oven space.
• For single-/multi-rack baking, roasting, and complete meals.
• Many foods (e.g., pizza, cake, cookies, biscuits, muffins, rolls, and
frozen convenience foods) can be prepared on 2-3 racks at a time.
• Good for whole, roasted duck, lamb sh
oulder, short leg of lamb.
Broiling recommendation guide
The size, weight, thickness, starting temperature, and doneness preference affect broil
times. This guide is based on refrigerator-temperature meat. Always use a broil pan and
grill when broiling. Preheat the oven for 5 minutes.
Food Doneness Size Thickness Level
Rack
positon
Cooking time (min)
1st side 2nd side
Hamburgers
Medium 9 patties 3/4” Hi 6 3:00 2:00
Medium 9 patties 1” Hi 6 3:20 2:20
Beef steaks
Rare - 1” Hi 5 3:00-4:00 2:00-3:00
Medium - 1- 1 1/2” Hi 5 4:00-5:00 3:00-4:00
Well done - 1- 1 1/2” Lo 4 7:00-8:00 4:00-5:00
Chicken
pieces
Well done 4.5 lbs. 1/2-3/4” Lo 3 16:00-18:00 13:00-15:00
Well done 2 lbs. 1/2-3/4” Lo 3 or 4 15:00-16:00 10:00-12:00
Pork chops Well done 1 lbs. 1” Lo 3 8:00-10:00 6:00-8:00
Fish fillets Well done - 1/4-1/2” Lo 3 or 4 7:00-8:00 4:00-5:00
Steam cook recommendation guide
Steam mode level Foods
Steam bake
High Rye breads, Desserts (Flan caramel)
Med Croissants, Pies, Reheats (Pizza, Casseroles)
Low Pastries
Steam Roast
High -
Med Meats, Poultry, Fish
Low Turkey, Large meats
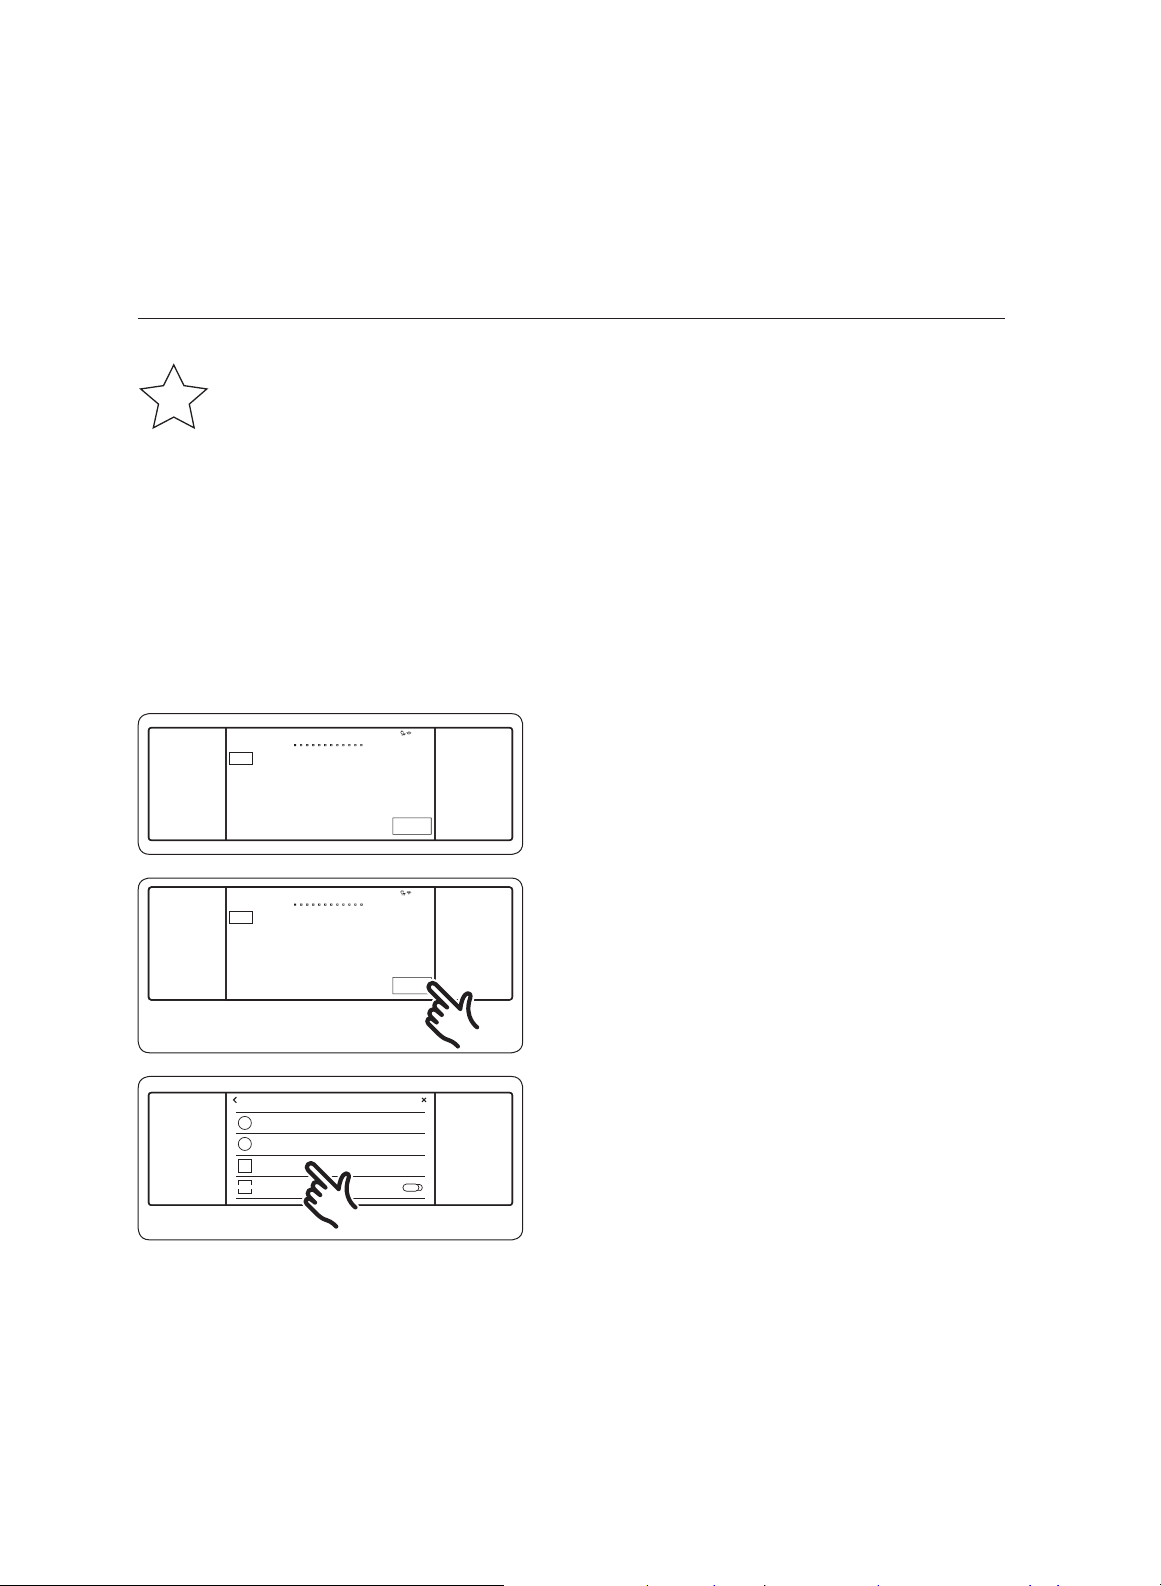
Setting the mode
Swipe the screen
START
4:35 PM
Convection Bake
Faster, more even baking
325
°F
InstantHeat™
Off
Cook Time
None
Delay Start
None
TIMER
SETTINGS
LOCK
(3sec)
OFF
LIGHT
OPEN/CLOSE
RESERVOIR
OVEN
MODE
• Swipe the screen to select mode you
want. (You can swipe left or right).
Summarized mode
START
4:35 PM
Convection Bake
Faster, more even baking
325
°F
InstantHeat™
Off
Cook Time
None
Delay Start
None
TIMER
SETTINGS
LOCK
(3sec)
OFF
LIGHT
OPEN/CLOSE
RESERVOIR
OVEN
MODE
• Tap the mode area to display the
summarized mode.
Oven mode
Bake
350°F
Broil
High
Steam Bake
350°F
Special Function
Conv. Bake
325°F
Pure Conv. Sear
350°F
Steam Roast
350°F
Chef Mode
Conv. Roast
325°F
Conv. Broil
325°F
Dual Four Part
Pure Conv.
325°F
Clean
TIMER
SETTINGS
LOCK
(3sec)
OFF
LIGHT
OPEN/CLOSE
RESERVOIR
• Tap the mode you want.
Setting the temperature
START
4:35 PM
Convection Bake
Faster, more even baking
325
°F
None
InstantH
eat™
Off
Cook Ti
me
Delay S
tart
None
TIMER
SETTINGS
LOCK
(3sec)
OFF
LIGHT
OPEN/CLOSE
RESERVOIR
OVEN
MODE
4:35 PM
1
6 7 8 9 0
2 3 4 5
OK
325
°F
Adjust temp. 175°F ~ 550°F
TIMER
SETTINGS
LOCK
(3sec)
OFF
LIGHT
OPEN/CLOSE
RESERVOIR
• Tap the temperature area to display the
numeric pad.
• Tap the numbers to set the temperature.
•
Tap OK.
30 English
Operations
Basic baking and broiling instructions
START
4:35 PM
Convection Bake
Faster, more even baking
325
°F
InstantHeat™
Off
Cook Time
None
Delay Start
None
TIMER
SETTINGS
LOCK
(3sec)
OFF
LIGHT
OPEN/CLOSE
RESERVOIR
OVEN
MODE
1. Swipe to select a cooking mode.
START
4:35 PM
Convection Bake
Faster, more even baking
325
°F
InstantHeat™
Off
Cook Time
None
Delay Start
None
TIMER
SETTINGS
LOCK
(3sec)
OFF
LIGHT
OPEN/CLOSE
RESERVOIR
OVEN
MODE
2. Set the temperature.
• Broil mode can be set only Hi or Low.
• The Keep Warm setting cannot be
changed.
START
4:35 PM
Convection Bake
Faster, more even baking
325
°F
None
InstantH
eat™
Off
Cook Tim
e
Delay St
art
None
TIMER
SETTINGS
LOCK
(3sec)
OFF
LIGHT
OPEN/CLOSE
RESERVOIR
OVEN
MODE
START
4:35 PM
Convection Bake
Faster, more even baking
325
°F
None
InstantH
eat™
On
Cook Tim
e
Delay St
art
None
TIMER
SETTINGS
LOCK
(3sec)
OFF
LIGHT
OPEN/CLOSE
RESERVOIR
OVEN
MODE
3. Follow the steps below to use the
InstantHeat™ feature, Steam Bake, or
Steam Roast. If you are not using these
features, skip to Step 4, next page.
• InstantHeat™
a.
b.
If you select Convection Bake/
Roast, InstantHeat™ info appears
on the display (default: OFF).
Tap the InstantHeat™ area. The
InstantHeat™ feature activates; the
display shows ON.
NOTE
For best performance, use one rack.
Type Rack Positions
Baking 3 or 4
Roasting 1 or 2
• When using InstantHeat™, put food in
the oven before you start cooking.
•
Always preheat the oven when baking
rising foods (e.g., cake, muffins, bread).
English
31
32 English
Operations
START
4:35 PM
Cook Time
0hr 40min
Steam
Medium
Steam Bake
Steam baking
350
°F
Delay Start
4
:
35 PM
TIMER
SETTINGS
LOCK
(3sec)
OFF
LIGHT
OPEN/CLOSE
RESERVOIR
OVEN
MODE
Low
High
Medium
CANCEL OK
TIMER
SETTINGS
LOCK
(3sec)
OFF
LIGHT
OPEN/CLOSE
RESERVOIR
Low
High
Medium
CANCEL OK
TIMER
SETTINGS
LOCK
(3sec)
OFF
LIGHT
OPEN/CLOSE
RESERVOIR
START
4:35 PM
Cook Time
0hr 40min
Steam
High
Steam Bake
Steam baking
350
°F
Delay Start
4
:
35 PM
TIMER
SETTINGS
LOCK
(3sec)
OFF
LIGHT
OPEN/CLOSE
RESERVOIR
OVEN
MODE
START
4:35 PM
Convection Bake
Faster, more even baking
325
°F
InstantHeat™
Off
Cook Time
None
Delay Start
None
TIMER
SETTINGS
LOCK
(3sec)
OFF
LIGHT
OPEN/CLOSE
RESERVOIR
OVEN
MODE
• Steam Bake, Steam Roast
a. If you select Steam Bake or Steam
Roast, the steam-level info appears
on the display (default: Medium).
b. Tap Steam to adjust the steam level.
The steam-level adjustment screen
appears.
Set the steam level (Low,
Medium, or High).
c. Tap OK. The steam-level adjustment
screen closes; the steam-level info
appears on the screen.
Important: You must fill the water
reservoir before start steam cooking.
(See Water reservoir, pg. 21.)
• If you want to use Cook Time
or Delay Start, set them now. (See pgs.
26 and 28 for instructions.)
• Tap START to begin cooking.
View
Summary
Convection Bake
325
°F
175
°F
Temp Probe
100
°F
150
°F
Cook Time
None
OFF
4:35 PM
Preheating...
TIMER
SETTINGS
LOCK
(3sec)
OFF
LIGHT
OPEN/CLOSE
RESERVOIR
OVEN
MODE
6. Tap OFF when cooking is done or if you
want to cancel cooking.
English 33
How to adjust the temperature while cooking
START
4:35 PM
Convection Bake
Faster, more even baking
325
°F
InstantHeat™
Off
Cook Time
None
Delay Start
None
TIMER
SETTINGS
LOCK
(3sec)
OFF
LIGHT
OPEN/CLOSE
RESERVOIR
OVEN
MODE
4:35 PM
1
6 7 8 9 0
2 3 4 5
OK
325
°F
Adjust temp. 175°F ~ 550°F
TIMER
SETTINGS
LOCK
(3sec)
OFF
LIGHT
OPEN/CLOSE
RESERVOIR
Tap the temperature area, enter the new
temperature using the numeric keypad and
then tap OK.
• Place food in the oven after preheating if the recipe calls for it. Preheating is
important for best results when baking cakes, cookies, pastry, and breads.
• The convection oven fan shuts off when the oven door is opened.
• DO NOT leave the door open for long periods of tim
e while using convection
cooking or you may shorten the life of the convection heating element.
NOTE
• If you leave the oven door open over 2 minutes when it is on, all heating elements
shut off automatically.
• When finished cooking, th
e cooling fan runs until the oven has cooled down.
• When a steam function is complete, empty the water reservoir so the remaining water
does not affect other cooking modes.
• When using a thermometer in the oven chamber, the temperature on the
thermometer may differ from the set oven temperature.
• It is normal for the convection fan to cycle on/off during cooking.
• Always keep the oven door closed when broiling.
34 English
Operations
CAUTION
Always broil with the oven door closed.
Use care when opening the door. Let hot
air or steam escape before you remove
food from or put food into the oven.
Using the special function feature
Special function provides 4 different specialized cooking options.
Mode Temperature range
Keep Warm **None
Proof
95 °F (35 °C) / 105 °F (40 °C)
Stone Bake Mode 175 °F (80 °C) - 550 °F (285 °C)
Dehydrate 105 °F (40 °C) - 225 °F (105 °C)
** A factory-set, non-adjustable temperature is applied for best performance.
Mode Instruction
Keep Warm
• Keeps food warm for serving up to 3 hours after cooking.
• Can be used without any other cooking operations, or you can set it to
activate after a timed or delay timed cooking operation.
• Not for reheating cold food.
Proof
• Provides optimal temp (95 °F / 105 °F) for proofing bread dough.
• For the best results, always start the Proof option with a cool oven.
Stone Bake
Mode
• Stone accessory required.
• Bake on a baking or pizza stone for pizza and bread.
• Always preheat with a stone for the best results.
English 35
Mode Instruction
Dehydrate
• Dries food via heat circulation.
• Keep dehydrated food in a cool, dry place.
• Adding lemon or pineapple juice, or sprinkling sugar on fruit helps
retain sweetness.
• Dehydrate mode settings:
Category Rack position Temperature (°F)
Vegetables or Fruit 3 or 4 105-150
Meat 3 or 4 145-225
Keep Warm
Stone Bake Mode
Proof
Dehydrate
4:35 PM
Special Function
Additional Cooking Modes
TIMER
SETTINGS
LOCK
(3sec)
OFF
LIGHT
OPEN/CLOSE
RESERVOIR
OVEN
MODE
1. Swipe the screen to the Special
function. The display will show the
specialized cooking options.
Keep Warm
Stone Bake Mode
Proof
Dehydrate
4:35 PM
Special Function
Additional Cooking Modes
TIMER
SETTINGS
LOCK
(3sec)
OFF
LIGHT
OPEN/CLOSE
RESERVOIR
OVEN
MODE
2. Tap the cooking option you want.
Proof
Proofing
105
°F
START
4:35 PM
Delay Start
None
Cook Time
None
TIMER
SETTINGS
LOCK
(3sec)
OFF
LIGHT
OPEN/CLOSE
RESERVOIR
OVEN
MODE
3. Set the temperature you want.
4. Tap START.
NOTE
You cannot adjust the temperature of the
Keep Warm mode.
CAUTION
• If the oven temperature is above 125 °F, Proof mode will not function properly.
• Do not use Proof to warm food. (The temperature is insufficient to keep food warm.)
• Put the dough in a heat-safe container, cover it with a cloth or plastic wrap, and place
it on rack Level 3 or 4. (F
ix the covers so the oven fan cannot blow them off.)
• So as not to lower the temperature and prolong proofing, leave the oven door closed.
36 English
Operations
NOTE
• Preheating is unnecessary for special functions except Stone Bake mode.
• An error beep sounds if the temperature setting is out of the set range.
Rack position chart for special cooking options
Mode Rack position
Keep Warm 3
Proof 3
Stone Bake Mode 1 or 2
Dehydrate 3 or 4
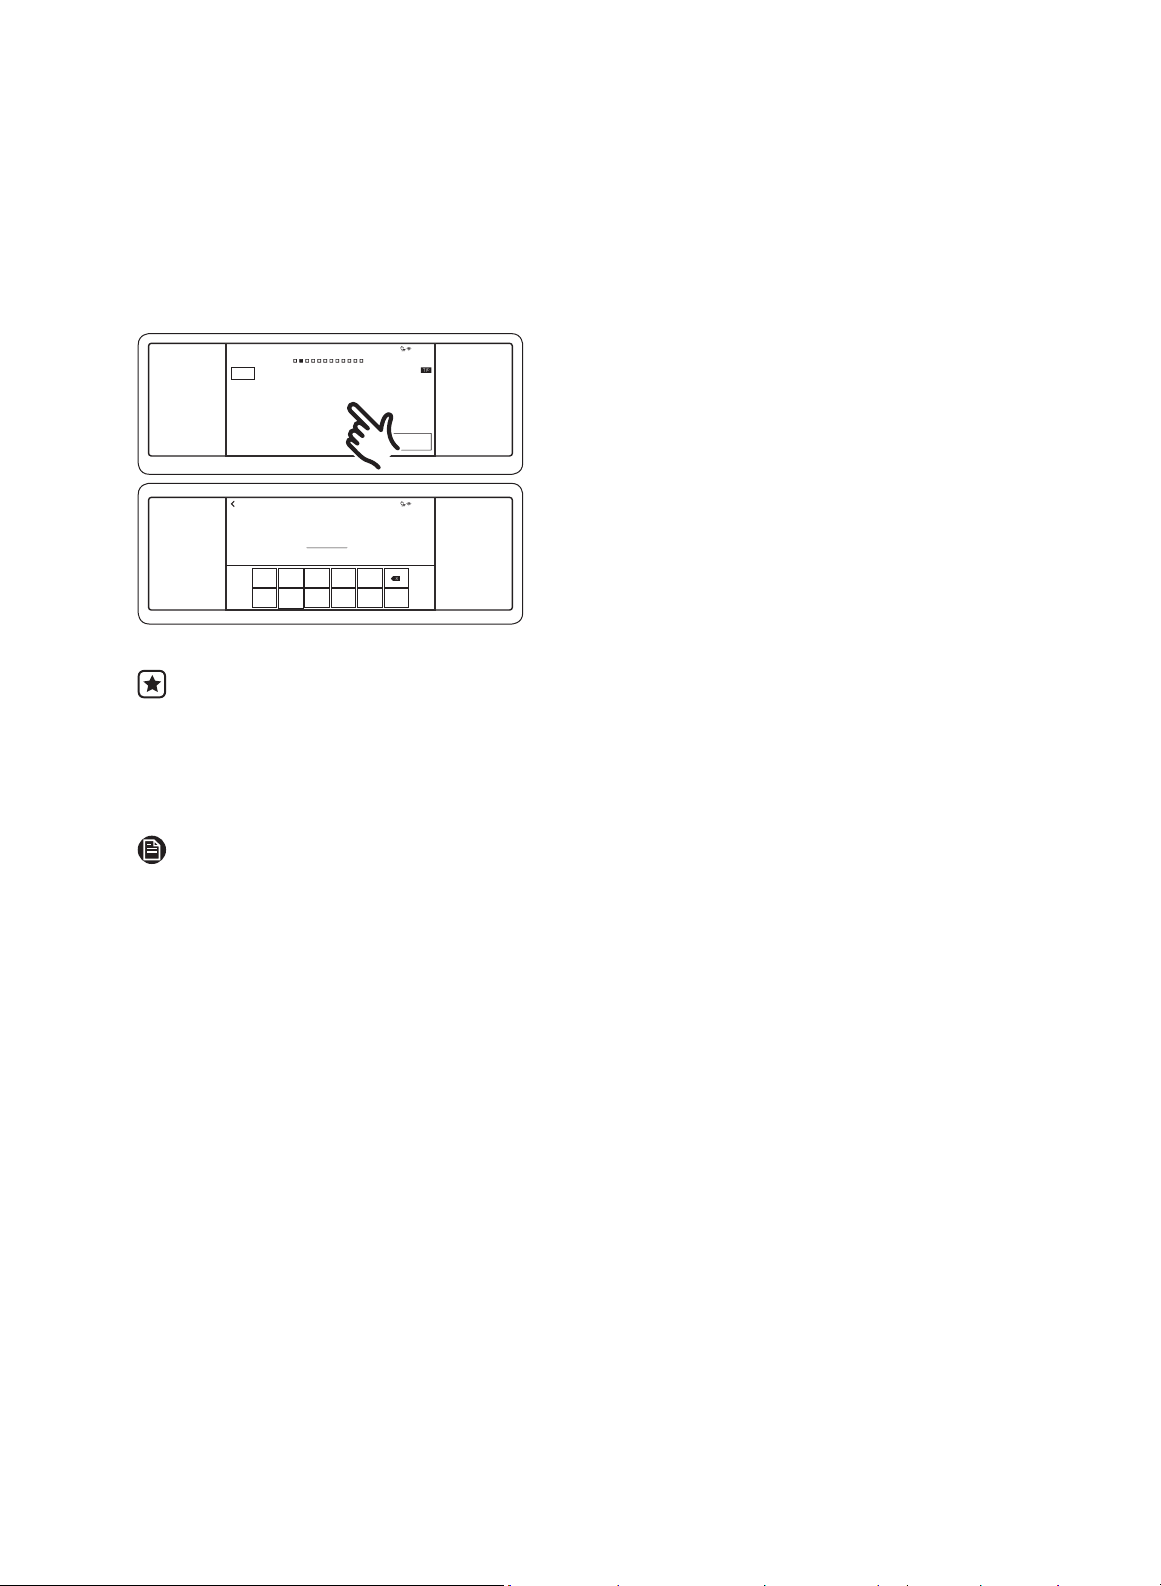
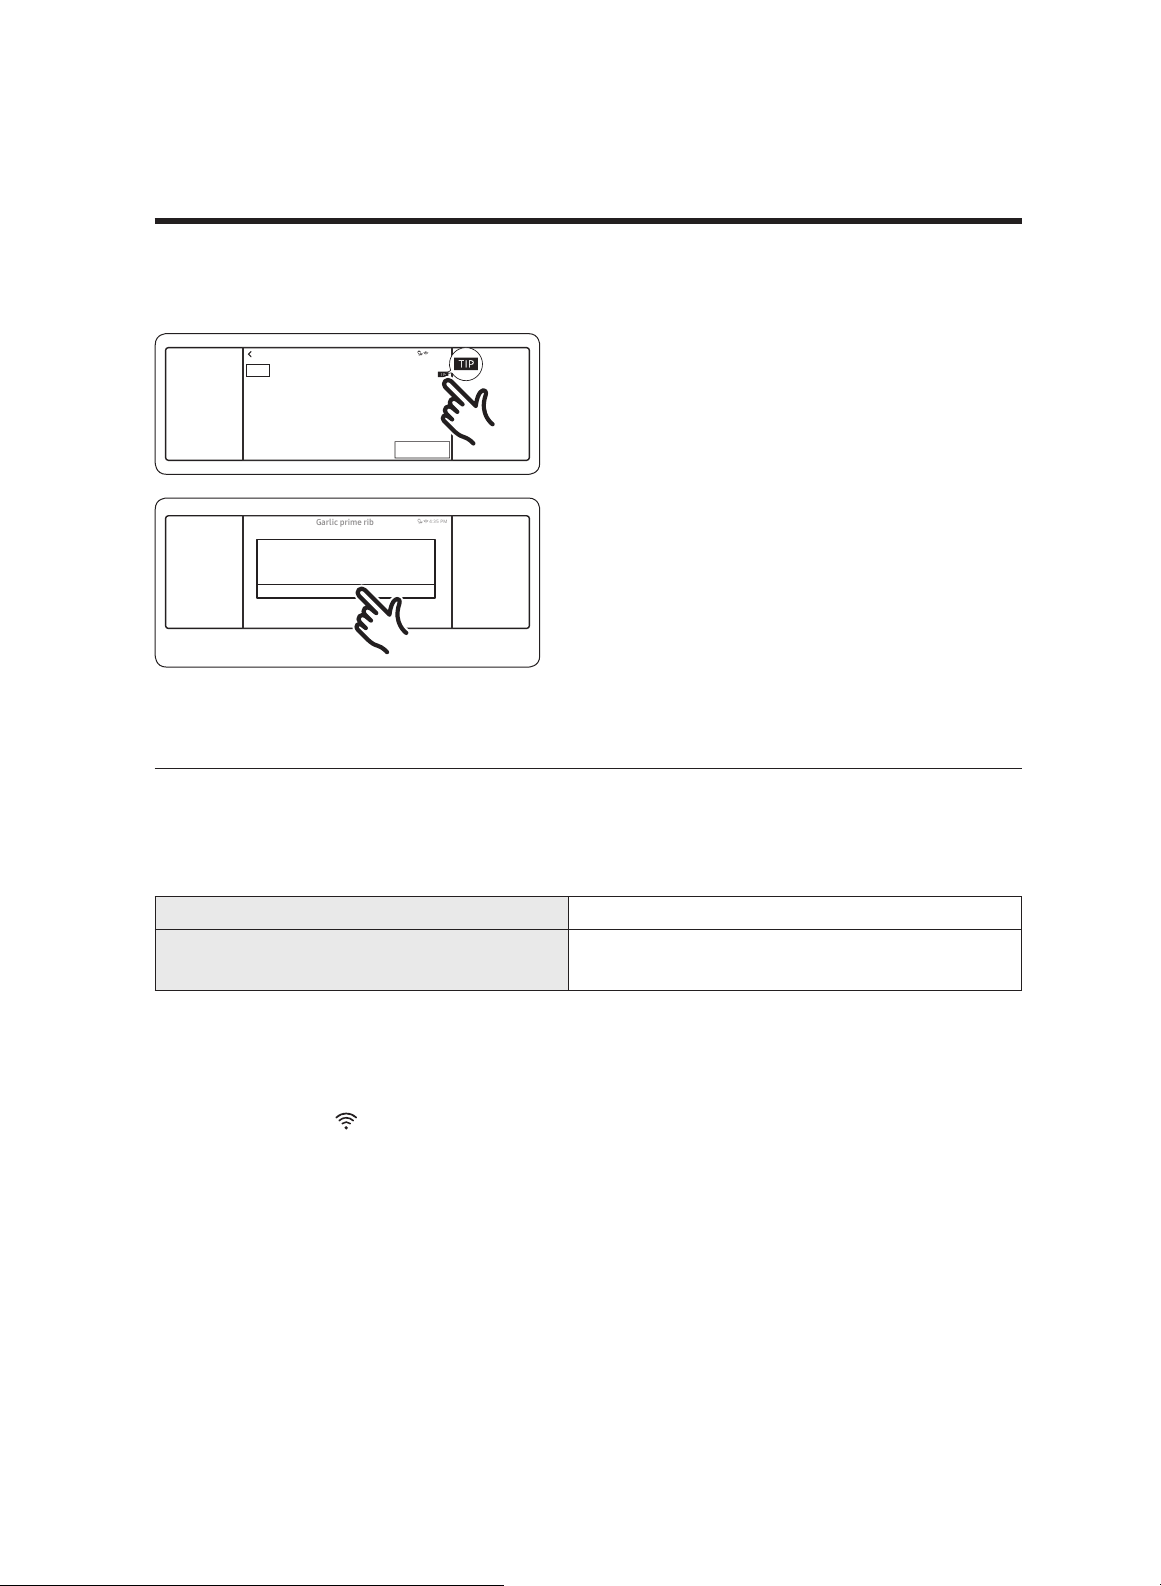
Using the Chef Mode feature
This mode offers 15 recipes that will save time and shorten the learning curve for novice
cooks. Cook time and temperature
automatically adjust to the selected recipe. You can
download detailed recipes for each dish from www.dacor.com.
Chef Mode
Garlic prime rib
Mustard Filet
mignon steak
Roasted lemon
chicken thighs
Garlic basil
shrimp
Roasted honey
mustard chicken
breasts
Sweet banana nut
bread
Pre-programmed cooking temperature and time
4:35 PM
TIMER
SETTINGS
LOCK
(3sec)
OFF
LIGHT
OPEN/CLOSE
RESERVOIR
OVEN
MODE
Chef ModeChef Mode
Garlic prime ribGarlic prime rib
MuMustastard Filetrd Filet
mignon steakmignon steak
Roasted lemonRoasted lemon
chicken thighschicken thighs
Garlic baGarlic basilsil
shrishrimpmp
Roasted honeyRoasted honey
mustamustard chickenrd chicken
brbreastseasts
Sweet baSweet banana nutnana nut
breadbread
PrPre-progre-programmed cooking temperature aammed cooking temperature andnd ti timeme
4:4:35 35 PPMM
TIMERTIMER
SETSETTINGSTINGS
LLOCKOCK
(3sec)(3sec)
OFFOFF
LIGHTLIGHT
OPEN/CLOPEN/CLOOSESE
RESERRESERVVOIROIR
OVEN
MODE
1. Swipe the screen to Chef Mode.
15 auto-cook features appear.
(You
can scroll down through the list.)
2. Scroll through the list, and tap the
desired feature.
Garlic prime rib
OK
- For 8-9 servings
- Use Roasting Pan with Roasting Rack
- Use Temperature probe
4:35 PM
TIMERTIMER
SETSETTINGSTINGS
LLOCKOCK
(3sec)(3sec)
OFFOFF
LIGHTLIGHT
OPEN/CLOPEN/CLOOSESE
RESERRESERVVOIROIR
OVEN
MODE
3. Follow the on-screen instructions.
4
:
35
PM
AM
4:35 PM
Garlic prime rib
Previous START
Set start time
TIMERTIMER
SETSETTINGSTINGS
LLOCKOCK
(3sec)(3sec)
OFFOFF
LIGHTLIGHT
OPEN/CLOPEN/CLOOSESE
RESERRESERVVOIROIR
4. Tap START to start cooking.
Operations
Cooking tips in the Chef Mode
Garlic prime rib
OK
- For 8-9 servings
- Use Roasting Pan with Roasting Rack
- Use Temperature probe
4:35 PM
TIMER
SETTINGS
LOCK
(3sec)
OFF
LIGHT
OPEN/CLOSE
RESERVOIR
TIMER
SETTINGS
LOCK
(3sec)
OFF
LIGHT
OPEN/CLOSE
RESERVOIR
OVEN
MODE
1. Tap TIP to see a cooking tip.
4:35 PM
Garlic prime rib
OK
Insert temperature probe into center of
meat. Avoid touching bone, fat or gristle.
TIMER
SETTINGS
LOCK
(3sec)
LIGHT
OPEN/CLOSE
RESERVOIR
TIMER
SETTINGS
LOCK
(3sec)
OFF
LIGHT
OPEN/CLOSE
RESERVOIR
2. The display will show the cooking tip.
You can see the cooking tip before you
start cooking or while you are cooking.
Using the iQ control feature
To use the oven’s iQ Control feature, you must download the Dacor i
Q Kitchen app to a
mobile device. F
unctions th
at can be operated via this app may not work well if there are
communications conflicts or the Wi-Fi signal is weak.
This table lists the main functions that can be operated from the app:
When iQ Control on the oven is off: Monitoring (Oven, Probe), Oven off
When iQ Control on the oven is on:
Monitoring (Oven, Probe), Oven start, Oven
off, Error check
How to connect the oven
1. Download and open the Dacor iQ Kitchen app on your smart device.
2. Follow the app’s on-screen instructions to connect your oven.
• The connected icon on your oven appears; the app confirms you are connected.
• If the connection icon does not appear, follow the directions in the app to reconnect.
English 37
To start the oven remotely
iQ Control
Start a cooking at your mobile.
Turn the mode knob to release this mode.
4:35 PM
TIMER
SETTINGS
LOCK
(3sec)
LIGHT
OPEN/CLOSE
RESERVOIR
TIMER
SETTINGS
LOCK
(3sec)
OFF
LIGHT
OPEN/CLOSE
RESERVOIR
Tap SETTINGS > Connections > iQ Control,
and then tap ON.
When iQ control is on you can remotely:
• Turn on/off the oven.
• Change cook mode, time, and temperature once cooking starts.
NOTE
Important: Self-clean mode cannot be started remotely.
NOTE
• Opening the oven door deactivates iQ Control so you cannot control the oven
remotely, except for monitoring oven status and turning the oven off.
• When cooking is finished or cancelled, iQ Control deactivates.
Using the clean feature
The Clean feature has four selections: Self-Clean, GreenClean™, Descale, and Draining.
Self clean
This self-cleaning oven uses high temperatures (well above cooking temperatures) to
reduce food residue to a fine powder that you can wipe away with a damp cloth.
CAUTION
• During and for some time after self-cleaning, the outside of the oven is very hot. Do
not allow children near the oven.
• The fumes emitted during self-cleaning are harmful to pet birds. Move birds to
another well-ventilated room.
• The oven door locks during self-cleaning. Forcing the door open will likely damage the
automatic door lock. When self-cleaning is complete, stand to the side when opening
the door so hot air and steam can safely escape.
38
English
English 39
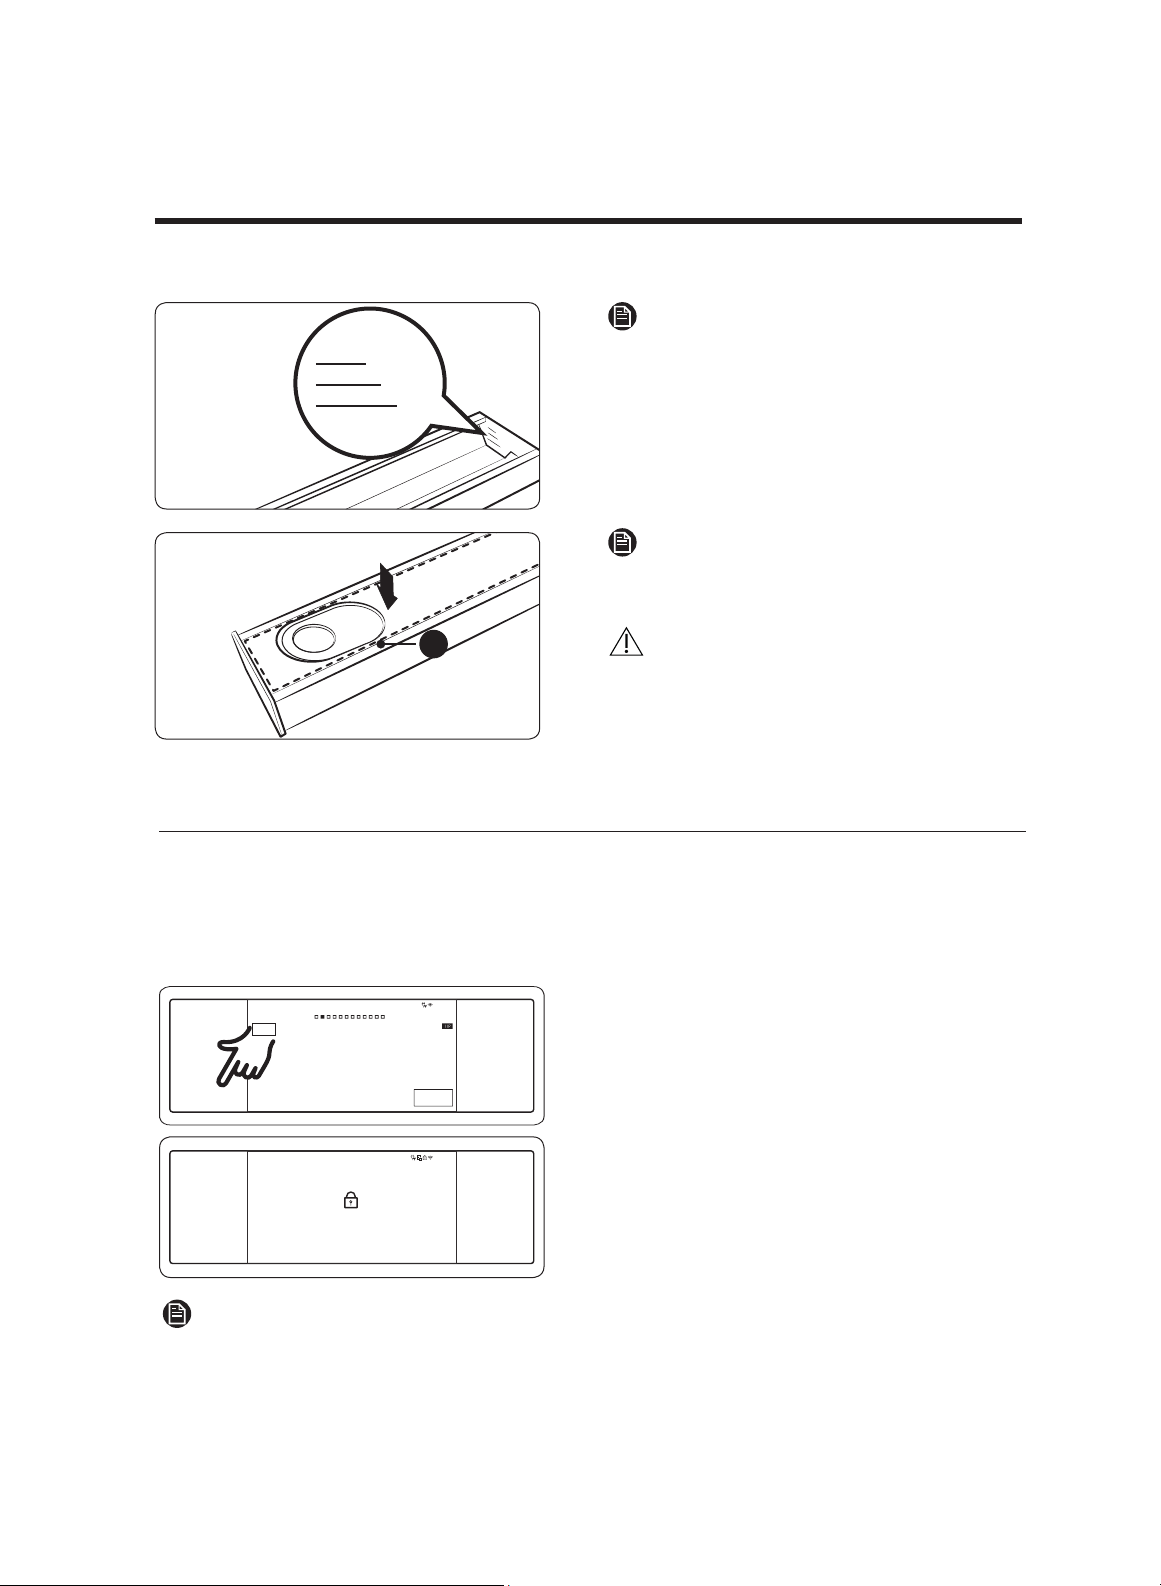
Self clean
Fig. 1
Fig. 2
Don’t hand
clean the oven
door gasket.
You may hand
clean the door.
• Ventilate the kitchen by opening a
window and even using a fan or hood
during the self-cleaning cycle.
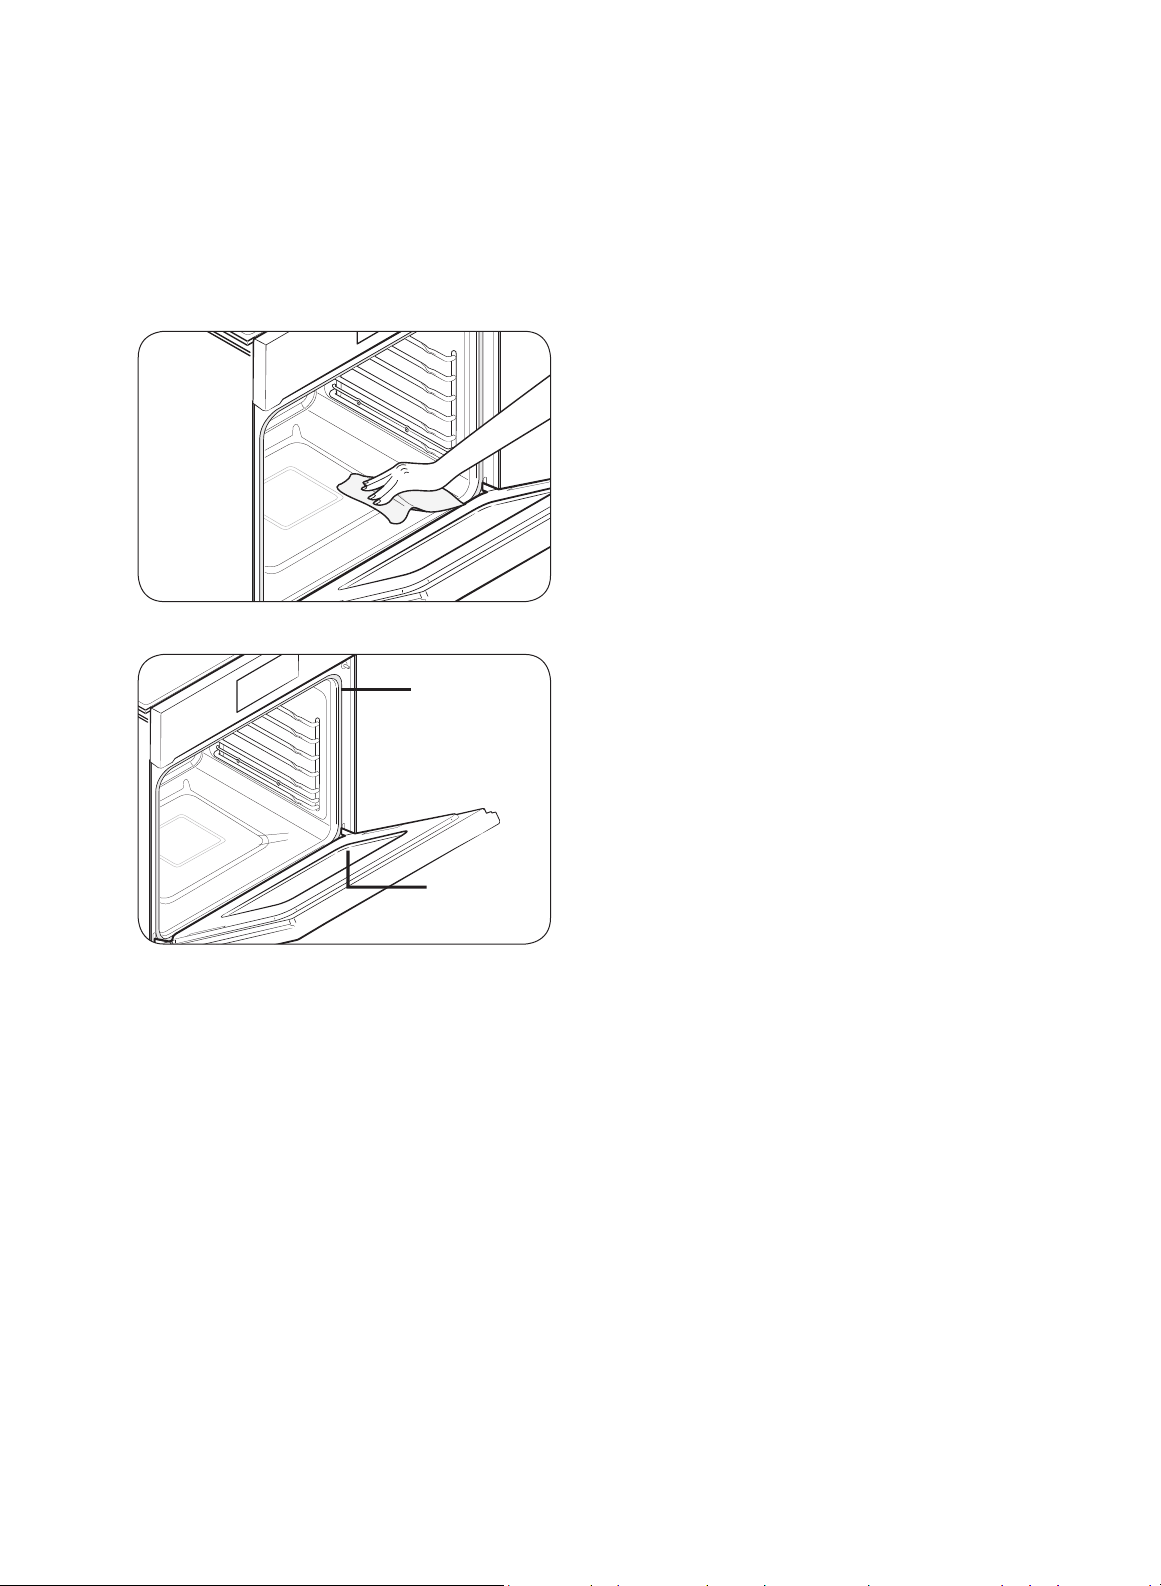
• Remove the racks, rack supports, broil
pan, broil-pan insert, and cookware.
• Wipe down the ov
en floor (Fig. 1).
• The oven racks can be self-cleaned, but
they will darken, lose their luster, and
become hard to slide.
• Clean residue on the front frame and
outside the door gasket by hand with
hot water, soap-filled steel-wool pads,
or cleansers such as Soft Scrub. Rinse
well with clean water and dry.
• Do not clean the gasket (Fig. 2). The
fiberglass material cannot withstand
abrasion. The gasket to remain intact. If
it becomes worn, have it replaced.
• Make sure the oven light cover is in
place and the oven light is off.
40
English
Operations
How to run a self-cleaning cycle
Self clean
Descale
4:35 PM
GreenClean™
Draining
Clean
TIMER
SETTINGS
LOCK
(3sec)
LIGHT
OPEN/CLOSE
RESERVOIR
TIMER
SETTINGS
LOCK
(3sec)
OFF
LIGHT
OPEN/CLOSE
RESERVOIR
Oven cleaning
OVEN
MODE
1. Swipe the screen to Clean. The display
will show 4 cleaning selections.
Self clean
Descale
4:35 PM
GreenClean™
Draining
Clean
TIMER
SETTINGS
LOCK
(3sec)
LIGHT
OPEN/CLOSE
RESERVOIR
TIMER
SETTINGS
LOCK
(3sec)
OFF
LIGHT
OPEN/CLOSE
RESERVOIR
Oven cleaning
OVEN
MODE
2. Tap Self clean.
Self clean
Oven cleaning
4:35 PM
Delay Start
None
Clean Time
3hr 00min
START
TIMER
SETTINGS
LOCK
(3sec)
LIGHT
OPEN/CLOSE
RESERVOIR
TIMER
SETTINGS
LOCK
(3sec)
OFF
LIGHT
OPEN/CLOSE
RESERVOIR
OVEN
MODE
3. Tap Clean Time.
05
02
03
CANCEL OK
hr
TIMER
SETTINGS
LOCK
(3sec)
LIGHT
OPEN/CLOSE
RESERVOIR
TIMER
SETTINGS
LOCK
(3sec)
OFF
LIGHT
OPEN/CLOSE
RESERVOIR
4. Flick the screen to set the clean time.
You can choose 2 hours, 3 hours, or 5
hours. (The default is 3h).
5. Tap OK.
4:35 PM
Self clean
Oven cleaning
Delay Start
None
Clean Time
3hr 00min
START
TIMER
SETTINGS
LOCK
(3sec)
LIGHT
OPEN/CLOSE
RESERVOIR
TIMER
SETTINGS
LOCK
(3sec)
OFF
LIGHT
OPEN/CLOSE
RESERVOIR
OVEN
MODE
6. If you don’t want to use the Delay Start
feature, go to Step 8. Otherwise, tap
Delay Start, and then go to Step 7.
English 41
4:35 PM
1
6 7 8 9 0
2 3 4 5
OK
4
:
35
Set start time
End at 12:38PM
AM
PM
TIMER
SETTINGS
LOCK
(3sec)
LIGHT
OPEN/CLOSE
RESERVOIR
TIMER
SETTINGS
LOCK
(3sec)
OFF
LIGHT
OPEN/CLOSE
RESERVOIR
7. Set the time you want self-cleaning to
start, and then tap OK.
Self clean
Oven cleaning
4:35 PM
Delay Start
None
Clean Time
3hr 00min
START
TIMER
SETTINGS
LOCK
(3sec)
LIGHT
OPEN/CLOSE
RESERVOIR
TIMER
SETTINGS
LOCK
(3sec)
OFF
LIGHT
OPEN/CLOSE
RESERVOIR
OVEN
MODE
8. Tap START to begin self-cleaning. The
motor-driven door lock will engage
automatically.
End at 07:48 AM
Self clean
Cleaning in progress...
OFF
4:35 PM
Clean Left
3hr 00min
TIMER
SETTINGS
LOCK
(3sec)
LIGHT
OPEN/CLOSE
RESERVOIR
TIMER
SETTINGS
LOCK
(3sec)
OFF
LIGHT
OPEN/CLOSE
RESERVOIR
OVEN
MODE
9. If you need to stop or interrupt a self
cleaning cycle, tap OFF.
NOTE
• You cannot start a self-cleaning cycle if the control lockout feature is active or the
oven is too hot.
• The oven door locks automatically. The display shows the cleaning time remaining.
You cannot open the oven door until the temperature drops to a safe level.
After a self-cleaning cycle
• Wipe up any ash with a damp cloth after the oven cools. (Remove any white spots
with a soap-filled steel wool pad and rinse thoroughly with a vinegar-water solution.)
• If the oven is not clean after one cycle, repeat the cycle.
• You cannot set the oven to cook until the oven is cool enough for the door to unlock.
42
English
Operations
GreenClean™
This function saves time and energy by removing leftover grease and residue that you
can wipe away with a damp cloth.
NOTE
The oven door locks during Green cleaning. Forcing th
e door open will likely damage the
locking system. After a Green cleaning cycle, stand to the side of the oven when opening
the door so hot air and steam can escape safely.
How to run a Green cleaning cycle
Self clean
Descale
4:35 PM
GreenClean™
Draining
Clean
TIMER
SETTINGS
LOCK
(3sec)
LIGHT
OPEN/CLOSE
RESERVOIR
TIMER
SETTINGS
LOCK
(3sec)
OFF
LIGHT
OPEN/CLOSE
RESERVOIR
Oven cleaning
OVEN
MODE
1. Swipe the screen to Clean. The display
will show 4 cleaning selections.
Self clean
Descale
4:35 PM
GreenClean™
Draining
Clean
TIMER
SETTINGS
LOCK
(3sec)
LIGHT
OPEN/CLOSE
RESERVOIR
TIMER
SETTINGS
LOCK
(3sec)
OFF
LIGHT
OPEN/CLOSE
RESERVOIR
Oven cleaning
OVEN
MODE
2. Tap GreenClean™.
GreenClean™
Quick 20 minute steam clean
4:35 PM
Clean Time
0hr 20min
START
TIMER
SETTINGS
LOCK
(3sec)
LIGHT
OPEN/CLOSE
RESERVOIR
TIMER
SETTINGS
LOCK
(3sec)
OFF
LIGHT
OPEN/CLOSE
RESERVOIR
OVEN
MODE
3. Tap START to begin Green cleaning.
GreenClean™
OK
4:35 PM
TIMER
SETTINGS
LOCK
(3sec)
LIGHT
OPEN/CLOSE
RESERVOIR
TIMER
SETTINGS
LOCK
(3sec)
OFF
LIGHT
OPEN/CLOSE
RESERVOIR
Pour 10 oz (300ml) of water
in oven.
4. Follow the on-screen instructions.
Green-cleaning will start automatically.
English 43
Cleaning is complete.
Please wipe remaining residue from interior cavity.
OK
4:35 PM
TIMER
SETTINGS
LOCK
(3sec)
LIGHT
OPEN/CLOSE
RESERVOIR
TIMER
SETTINGS
LOCK
(3sec)
OFF
LIGHT
OPEN/CLOSE
RESERVOIR
5. After th
e Green-cleaning cycle, there
will be a significant amount of water
on the oven floor. Wipe up the water
with a sponge or soft, dry cloth. (Wipe
also the oven face below the door seal.
NOTE
• For Green-cleaning, exactly 10 oz (300 ml) of water produces the best results.
• Green-cleaning will not function if Control lockout is active or the oven is too hot.
After a Green-cleaning cycle
• Open the door carefully, avoiding hot air and steam. The water on the floor is hot.
• With a detergent-soaked sponge, soft brush, or nylon scrubber, wipe the oven
chamber. Remove stubborn residue with a nylon scourer. Remove lime deposits with
a cloth soaked in vinegar.
• If significant residue remains, you can repeat the process once the oven is cool.
• For heavy residue, such as grease left over from roasting, rub detergent into the
residue before starting Green-cleaning.
• After cleaning, leave the oven door ajar 15°, and let the oven chamber dry thoroughly.
44 English
Operations
Descale
If you use Steam Bake or Steam Roast frequently, you should regularly remove minerals
deposits that may affect the taste or quality of food. When running a descaling cycle, use
only descaling agents designed for steam ovens or coffee machines.
NOTE
If you use Steam Bake/Steam Roast functions for more than 12 total hours, the Descale
indicator turns on. You can still enable Steam Bake or Steam Roast for two more hours
without descaling. When those two hours are up, Steam Bake and Steam Roast will be
disabled until you have run a descaling cycle.
How to run a descale cycle
Clean
Self clean
Descale
4:35 PM
GreenClean™
Draining
TIMER
SETTINGS
LOCK
(3sec)
LIGHT
OPEN/CLOSE
RESERVOIR
TIMER
SETTINGS
LOCK
(3sec)
OFF
LIGHT
OPEN/CLOSE
RESERVOIR
Oven cleaning
OVEN
MODE
1. Swipe the screen to Clean. The display
will show 4 cleaning selections.
2. Tap Descale.
Descale
Please descale Water Reservoir to improve quality.
4:35 PM
Clean Time
3hr 00min
START
TIMER
SETTINGS
LOCK
(3sec)
LIGHT
OPEN/CLOSE
RESERVOIR
TIMER
SETTINGS
LOCK
(3sec)
OFF
LIGHT
OPEN/CLOSE
RESERVOIR
OVEN
MODE
3. Tap START.
Descale
OK
4:35 PM
TIMER
SETTINGS
LOCK
(3sec)
LIGHT
OPEN/CLOSE
RESERVOIR
TIMER
SETTINGS
LOCK
(3sec)
OFF
LIGHT
OPEN/CLOSE
RESERVOIR
Pour 13.5oz (400ml) water
and 1.7oz (50ml) descaling
solution into Water
Reservoir.
4. F
ollow the on-screen directions. (The
process takes 3 hours.)
Empty, clean, and refill the water
reservoir with 1.7 oz (50 ml) of
descaling agent and 13.5 oz (400 ml) of
drinkable water.
English 45
Descale
Draining…
Caution: Hot Water.
Do not remove Water Reservoir while draining.
4:35 PM
TIMER
SETTINGS
LOCK
(3sec)
LIGHT
OPEN/CLOSE
RESERVOIR
TIMER
SETTINGS
LOCK
(3sec)
OFF
LIGHT
OPEN/CLOSE
RESERVOIR
OVEN
MODE
Descale
4:35 PM
TIMER
SETTINGS
LOCK
(3sec)
LIGHT
OPEN/CLOSE
RESERVOIR
TIMER
SETTINGS
LOCK
(3sec)
OFF
LIGHT
OPEN/CLOSE
RESERVOIR
Pour 22oz (650ml) of water
into Water Reservoir to rinse.
OK
5. When descaling is complete, the oven
drains water automatically.
6. Use oven mitts to remove and empty
the water reservoir, then refill it with
22 oz (650 ml) of drinkable water.
7. Follow the on-screen directions, and
tap OK to start rinsing.
Descaling complete.
OK
4:35 PM
TIMER
SETTINGS
LOCK
(3sec)
LIGHT
OPEN/CLOSE
RESERVOIR
TIMER
SETTINGS
LOCK
(3sec)
OFF
LIGHT
OPEN/CLOSE
RESERVOIR
8. When rinsing is complete, use oven
mitts to empty/clean the reservoir.
WARNING
Use only descaling agents designed for steam ovens or coffee machines.
CAUTION
• Running Descaling disables Steam Bake and Steam Roast. If you cancel a descaling
cycle, you must restart and complete it within 3 hours to re-enable Steam Bake and
Steam Roast.
• Keep children away from the oven during the descaling cycle.
• If the descaling agent's ratio of water to descaling agent differs from Dacor's ratio
(8:1), use the descaling agent's ratio.
NOTE
Though the oven automatically starts descaling in 5 seconds without your confirmation,
you should confirm your selection to keep descaling from starting by mistake.
46
English
Operations
Draining
When a steam function is complete, drain the remaining water so it does not affect
other cooking modes.
How to run a draining
Self clean
Descale
4:35 PM
GreenClean™
Draining
Clean
TIMER
SETTINGS
LOCK
(3sec)
LIGHT
OPEN/CLOSE
RESERVOIR
TIMER
SETTINGS
LOCK
(3sec)
OFF
LIGHT
OPEN/CLOSE
RESERVOIR
Oven cleaning
OVEN
MODE
1. Swipe the screen to Clean. The display
will show 4 cleaning selections.
2. Tap Draining.
Draining
Water is draining after Steam function use.
4:35 PM
START
TIMER
SETTINGS
LOCK
(3sec)
LIGHT
OPEN/CLOSE
RESERVOIR
TIMER
SETTINGS
LOCK
(3sec)
OFF
LIGHT
OPEN/CLOSE
RESERVOIR
OVEN
MODE
3. Tap START. The oven drains water
from the steam generator to the water
reservoir.
Draining
Draining…
Caution: Hot Water.
Do not remove Water Reservoir while draining.
4:35 PM
TIMER
SETTINGS
LOCK
(3sec)
LIGHT
OPEN/CLOSE
RESERVOIR
TIMER
SETTINGS
LOCK
(3sec)
OFF
LIGHT
OPEN/CLOSE
RESERVOIR
Draining is complete.
OK
4:35 PM
TIMER
SETTINGS
LOCK
(3sec)
LIGHT
OPEN/CLOSE
RESERVOIR
TIMER
SETTINGS
LOCK
(3sec)
OFF
LIGHT
OPEN/CLOSE
RESERVOIR
4. When draining is complete, use oven
mitts to remove and empty the water
reservoir.
NOTE
Once the oven starts draining, wait until the draining cycle is complete.
English 47
Settings
In Settings, you can change the default settings to your preference or diagnose problems
with the network connection.
4:35 PM
Convection Bake
Faster, more even baking
325
°F
InstantHeat™
Off
Cook Time
None
Delay Start
None
START
TIMER
SETTINGS
LOCK
(3sec)
LIGHT
OPEN/CLOSE
RESERVOIR
TIMER
SETTINGS
LOCK
(3sec)
OFF
LIGHT
OPEN/CLOSE
RESERVOIR
OVEN
MODE
Tap SETTINGS. The display will show the
Setting item.
Wi-Fi
To enable a Wi-Fi connection
1. Tap SETTINGS > Connections > Wi-Fi, then tap ON in the right screen.
2. Tap
Wi-Fi, and then tap a Wi-Fi network in the list that appears.
3. You will be prompted to provide a password for a secure network. Enter the password.
To manually input an IP
1. Tap SETTINGS > Connections > Wi-Fi, then tap ON in the right screen.
2. Tap
Wi-Fi, and then tap Add Network.
3. Enter an IP, then tap CONNECT to apply your settings.
NOTE
• To disable a Wi-Fi connection,
tap SETTINGS > Connections > Wi-Fi, then tap OFF in the
right screen.
•
For details about the Wi-Fi connection and using the Dacor iQ Kitchen app, see the
Dacor iQ Kitchen instruction manual.

48
English
Operations
Display
1. Brightness
You can change the brightness of the display screen.
• Tap SETTINGS > Display > Brightness, and then use the bar next to Brightness to adjust
the brightness of the screen.
2. Screen saver
If screen saver is turned off, the Clock theme and Timeout menu are disabled.
• Tap SETTINGS > Display > Screen saver, and then tap OFF in the right screen.
3. Clock theme
• Tap SETTINGS > Display > Clock theme, and then tap in the right screen. You can select
a theme.
4. Timeout
• Tap SETTINGS > Display > Timeout, and then tap in the right screen. You can select a
time from 5 minutes to 60 minutes.
Date & Time
To enable automatic date and time
1. Turn on the Wi-Fi connection.
2. Tap SETTINGS > Date & Time, and then tap Date & Time > Automatic date and time, and
then tap ON in the right screen. The date and time are set automatically.
To manually input date and time
1. Tap SETTINGS > Date & Time, and then tap Date & Time > Automatically date and time,
and then tap OFF in the right screen. Time zone, set date, and set time are activated.
2. You can set the time zone, date, and time.
To change the time format
1. Tap SETTINGS > Date & Time > Select time format, and then tap in the right screen.
2. You can select 12-hour clock or 24-hour clock.
Language
Choose a disply language.
1. Tap SETTINGS > Language, and then tap in the right screen.
2. You can select English, Spanish, or French.

English 49
Volume
Adjust the volume level for beeps and melodies.
• Tap SETTINGS > Volume, and then use the bar next to Volume to adjust the volume.
Temp
1. Temp unit
You can program the oven control to display the temperature in Fahrenheit or Celsius. The
oven has been preset at the factory to display in Fahrenheit.
• Tap SETTINGS > Temp > Temperature Unit, and then tap in the right screen. You can
select °C or °F.
2. Temp adjust
Oven temperature is factory-calibrated. When first using the oven, be sure to follow
recipe times and temperatures.
If you think the oven is too hot or too cool, you can adjust the tempera
ture setting. First,
test a recipe by using a temperature above or below what is recommended. The results
should help you make the adjustment. Oven temperature can be adjusted ±35 °F (±19 °C).
• Tap SETTINGS > Temp > Temperature Adjust, and then tap in the right screen. You can
increase or decrease the temperature by 35 °F (19 °C).
NOTE
This adjustment will not affect the broiling or the self-cleaning temperatures. The
adjustment will be retained in memory after a power failure.
12 hour energy Saving
If you accidently leave the oven on, this feature will automatically turn off the oven after
12 hours during baking functions or after 3 hours during a broil function.
1. Tap SETTINGS > 12 hour energy Saving, and then tap ON in the right screen.
2. The 12 hour energy saving icon will appear in the indicator area.
iQ control
To start the oven remotely.
• Tap SETTINGS > Connections > iQ Control, and then tap ON. (See the using the iQ control
feature section on page 50.)

50
English
Operations
Easy connection
Easy connection enables you to easily configure the network settings including the
authentication procedure.
• Tap SETTINGS > Connections > Easy connection, and then tap CONNECT.
Help
Help provides useful tips and explanations on a specific item that you select.
1. Troubleshooting
• Tap a checkpoint directly on the screen, and try the suggestions.
2. Guide for first use
• Provides simple instructions on the basic use of the oven.
About device
You can see information about the oven and do a software update.
To update the software:
1. Tap SETTINGS > About device > Software update, and then tap Update in the right
screen.
2. Tap INSTALL. The software is updated and the system restarts automatically.
Sabbath
You can set Sabbath mode. See the Using the sabbath feature section on the next page.
Demo mode
This option is for use by retail establishments for display purposes only. (The heating
element does not operate.)
1. Tap SETTINGS > Demo mode, and then tap ON in the right screen.
2. The Demo mode indicator appears on screen.
Remote Management
The call center will access your product remotely to check internal when you have some
problems.
• Tap SETTINGS > Connections > Remote management, and then tap ACTIVATE.
English 51
Using the sabbath feature
(For use on the Jewish Sabbath & Holidays)
K
For further assistance, guidelines for proper usage, and a complete list of
models with the Sabbath feature, visit http:\\www.star-k.org.
You can use Sabbath with baking only. The oven temperature may be set higher or lower
after you set Sabbath. (The oven temperature adjustment feature should be used only
during Jewish holidays.) The display will not change, and no tones sound if a change is
made. Once the oven is set for baking with Sabbath active, the oven stays on until Sabbath
is cancelle d. This overrides the factory preset 12-hr energy-saving feature. If the oven light
is needed while Sabbath is active, touch LIGHT before activating Sabbath. Once the oven
light is on and Sabbath is active, the oven interior light stays on until Sabbath is turned off.
If the oven lig ht needs to be off, turn the oven light off before activating Sabbath.
How to use the Sabbath feature
Bake
Thermal heat baking
350
°F
START
4:35 PM
Cook Time
None
Delay Start
None
TIMER
SETTINGS
LOCK
(3sec)
LIGHT
OPEN/CLOSE
RESERVOIR
TIMER
SETTINGS
LOCK
(3sec)
OFF
LIGHT
OPEN/CLOSE
RESERVOIR
OVEN
MODE
1. Swipe the screen to Bake mode.
Bake
Thermal heat baking
350
°F
START
4:35 PM
Cook Time
None
Delay Start
None
TIMER
SETTINGS
LOCK
(3sec)
LIGHT
OPEN/CLOSE
RESERVOIR
TIMER
SETTINGS
LOCK
(3sec)
OFF
LIGHT
OPEN/CLOSE
RESERVOIR
OVEN
MODE
2. Set the temperature and cook time you
want.
3. Tap START.
Settings
About device
Sabbath
Demo mode
Help
?
i
12th
+
DEMO
OFF
TIMER
SETTINGS
LOCK
(3sec)
LIGHT
OPEN/CLOSE
RESERVOIR
TIMER
SETTINGS
LOCK
(3sec)
OFF
LIGHT
OPEN/CLOSE
RESERVOIR
4. Tap SETTINGS > Sabbath, to activate.
You may change the oven temperature
once baking starts.
The oven will not beep or show further
changes while Sabbath is active.
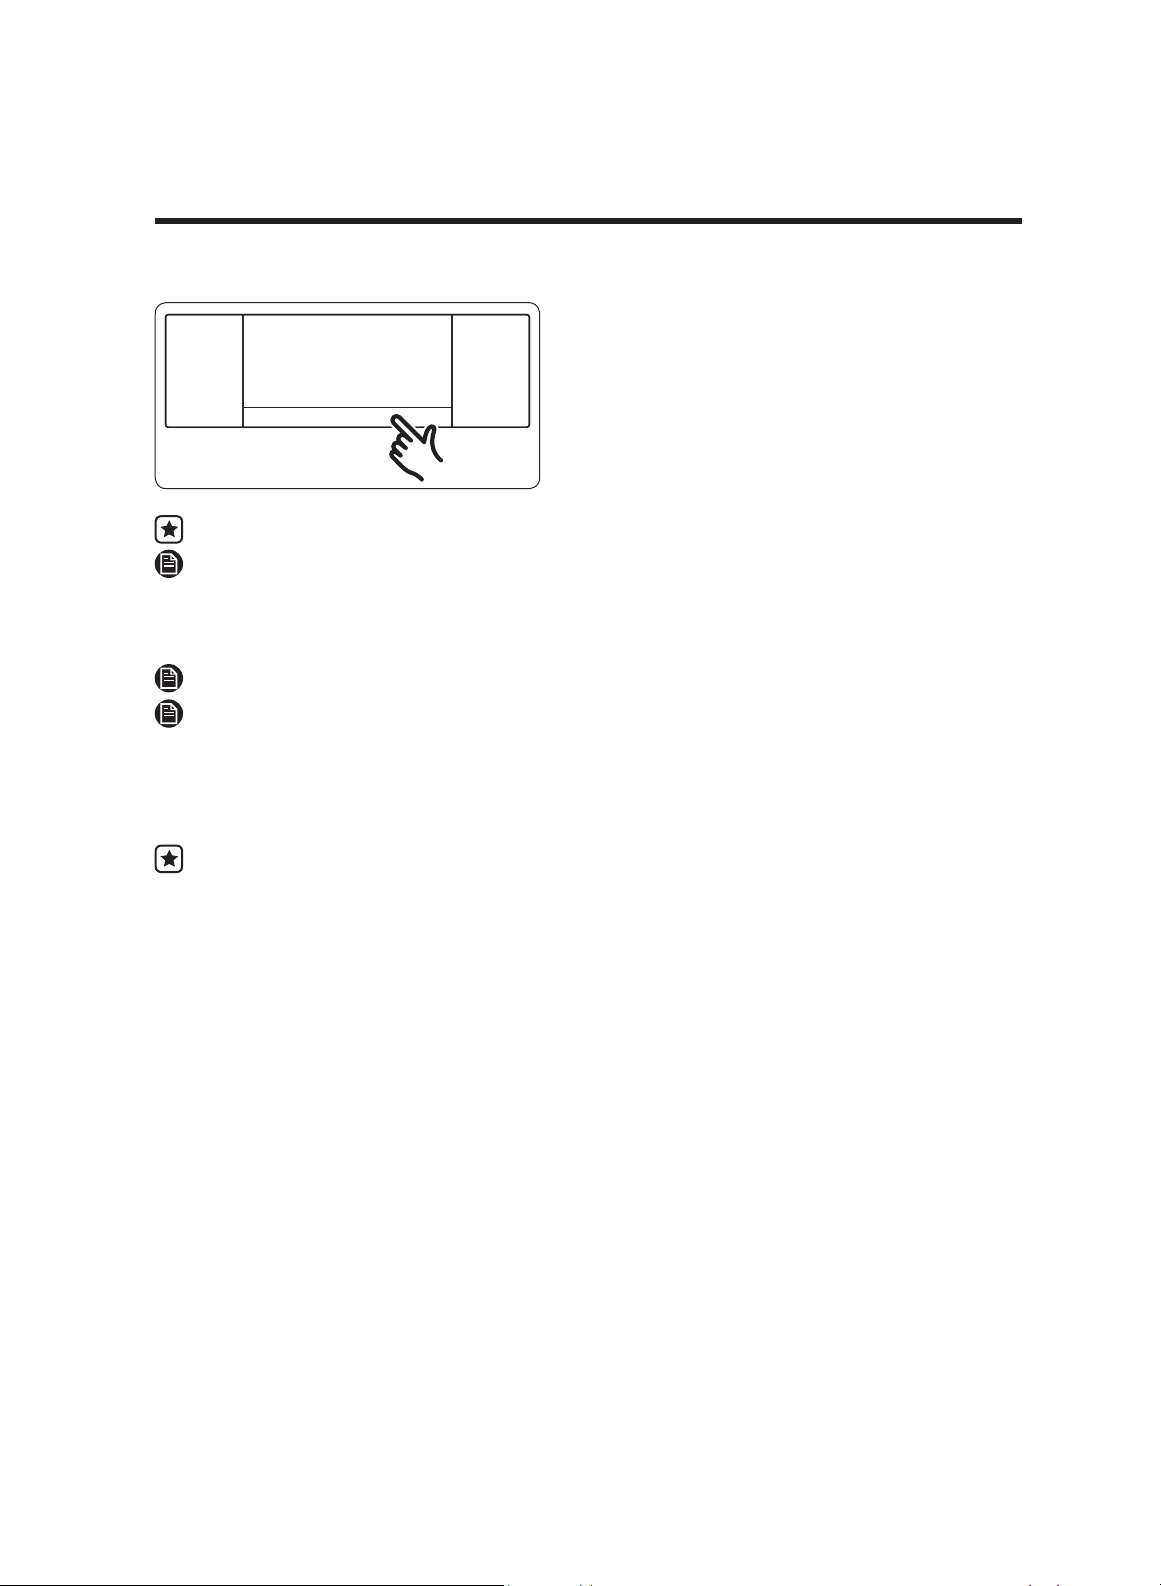
52 English
Operations
Sabbath
- Temperature +
Sabbath Off (3 sec)
TIMER
SETTINGS
LOCK
(3sec)
LIGHT
OPEN/CLOSE
RESERVOIR
TIMER
SETTINGS
LOCK
(3sec)
OFF
LIGHT
OPEN/CLOSE
RESERVOIR
5. You can turn the oven off at any time
by touching OFF. Note that this does
not turn Sabbath mode off.
6. To turn Sabbath mode off, touch and
hold Sabbath Off for 3 seconds.
Do not try to activate programs other than Bake while Sabbath is active.
You can change the oven temperature, but the display will not change nor tones
sound when a change occurs. (The oven temperature adjustment feature should
be used only on Jewish holidays.) When you change the temperature in Sabbath
mode, the oven takes 15 seconds to recognize the change.
You can set Cook Time before activating Sabbath.
If there is a power failure/interruption, the oven shuts itself off. When power
returns, the oven does not turn itself on. Sabbath
appears on the control screen,
but the oven will not operate. Food may be safely removed from the oven during
Sabbath mode, but the oven cannot be turned on until after the Sabbath Holidays.
Touch-hold Sabbath Off for 3 seconds to turn off Sabbath mode.
Do not open the oven door or change the temperature for 30 minutes after
entering Sabbath mode to let the oven reach the set temperature. For best
performance, the oven fan operates only when the oven temperature is rising.

English 53
Care and maintenance
Care and cleaning of the oven
Cleaning painted parts and decorative trim
• For general cleaning, use a cloth with hot, soapy water.
• For more difficult residue and greasy buildup, apply a liquid detergent directly to
the area. 30 – 60 minutes later, wipe with a damp cloth, then wipe with a wet cloth,
and dry. Do not use abrasive cleaners anywhere on the oven.
Cleaning stainless-steel surfaces
1. Shake a bottle of stainless-steel appliance cleaner/polish well.
2. Place a small amount of cleaner/polish on a damp cloth/paper towel.
3. Clean a small area, rubbing with the grain of the metal (if applicable).
4. Dry and buff with a clean, dry paper towel, or soft cloth.
5. Repeat as needed.
NOTE
• Do not use a steel-wool pad.
• If a mineral-oil-based stainless-steel appliance cleaner has been used to clean the
oven, wash the surface with dish soap and water before using the stainless-steel
appliance cleaner/polish.
Convection filter
This is in the back wall of each oven chamber. Clean the filter regularly. If you let it
become clogged, the oven’s convection cooking modes will not work properly.
Remove the filter during a self-clean cycle.
NOTE
For your safety and proper oven performance, re-install the filter before using the oven
to cook so the spinning fan blades at the back of the oven are not exposed.
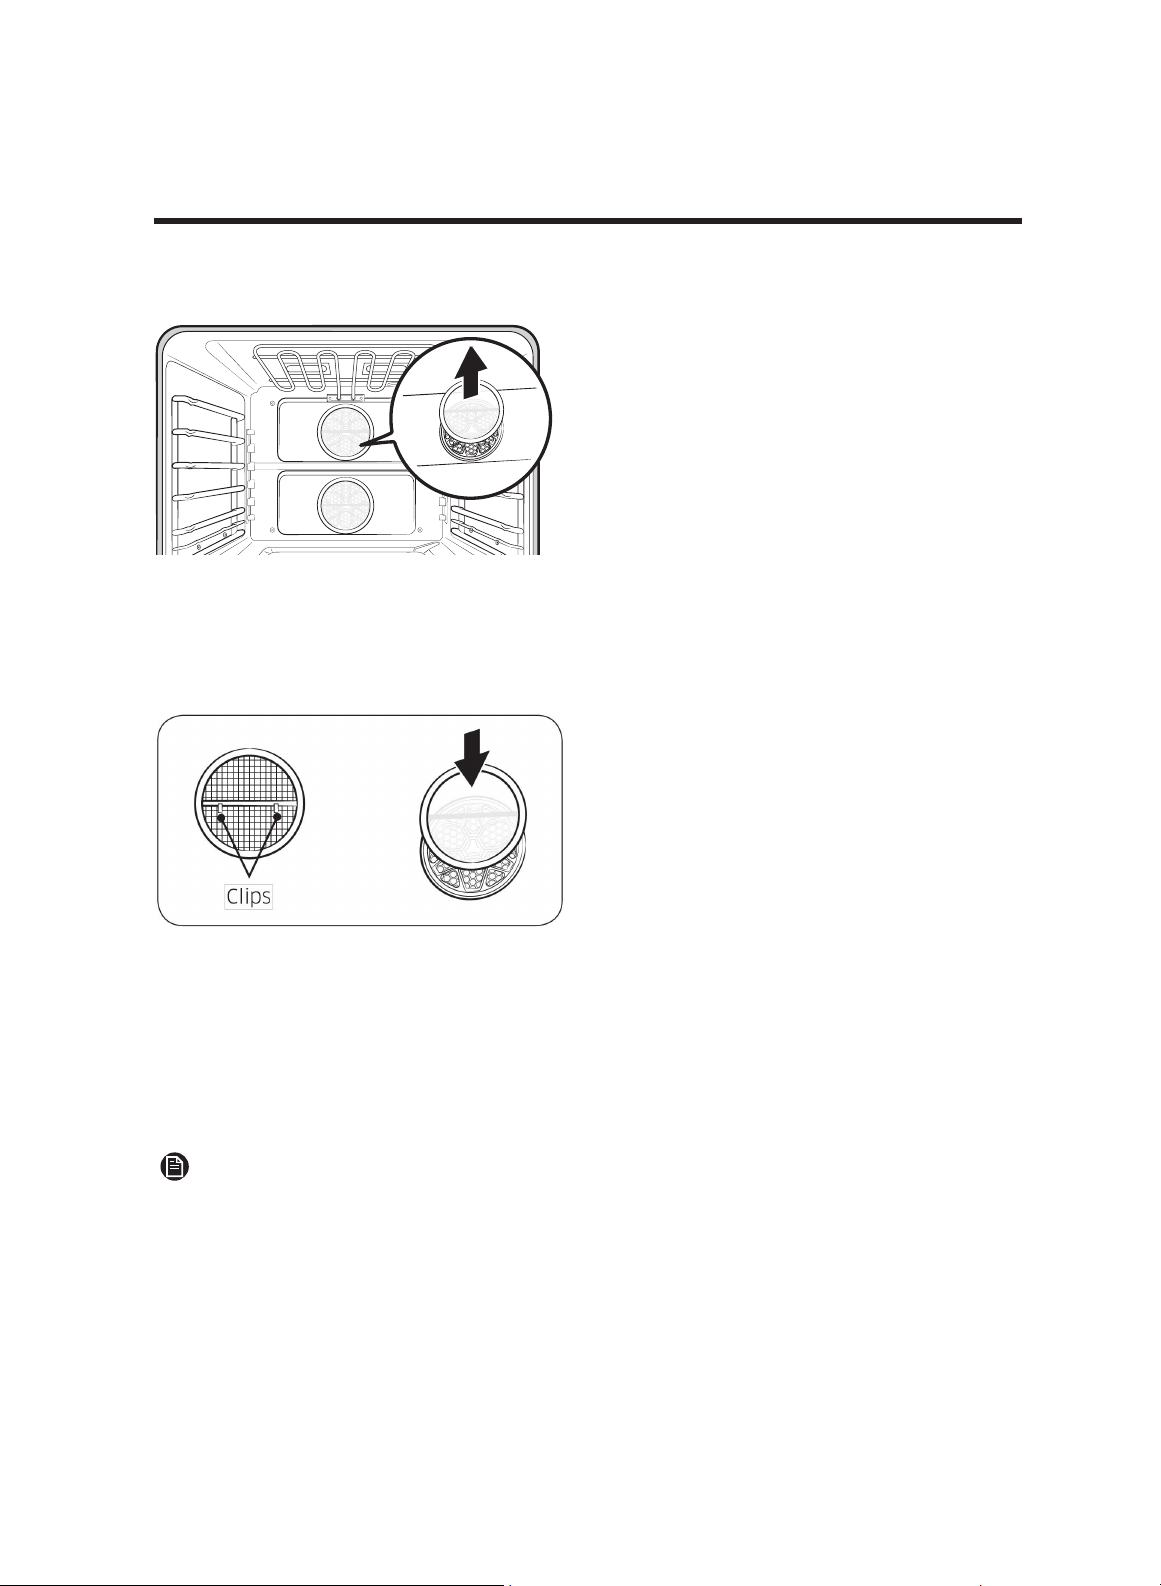
54
English
Care and maintenance
Removing your oven’s convection filter
When the oven is cool, grasp the edges
of the filter with your fingertips, and
gently push up.
To clean the filter
Soak the filter in hot, soapy water, then rinse it well. You may also put it on the top
rack of a dishwasher. Dry the filter before re-installing it.
Installing your oven’s convection filter
Carefully hook the metal clips on the
back of the filter over the metal bar
across the fan hole. Center the filter over
the hole. Take care not to scratch the
porcelain with the back of the filter.
Oven racks
•
If left in the oven during self-cleaning, the racks will discolor and turn dull. After self-
cleaning when the oven is cool, rub the sides of the racks with wax paper or a cloth
dabbe
d with a small amount of oil. The racks will glide more smoothly.
• Gliding racks may be cleaned by hand with an abrasive cleaner or steel wool. Do not
let water or cleaner get into the rack slides.
NOTE
• Do not clean the racks in a dishwasher.
• If a rack becomes hard to remove/replace, lightly wipe the guides with cooking oil. Do
not wipe cooking oil on the slides.
• If oil does not help sufficiently, a graphite lubricant may be applied to the rack. (To
order graphite lubricant., call Dacor Customer Assurance: (800) 793-0093 or visit:
www.dacor.com/customer-care/service-parts) and search Part # DG81-01629A.
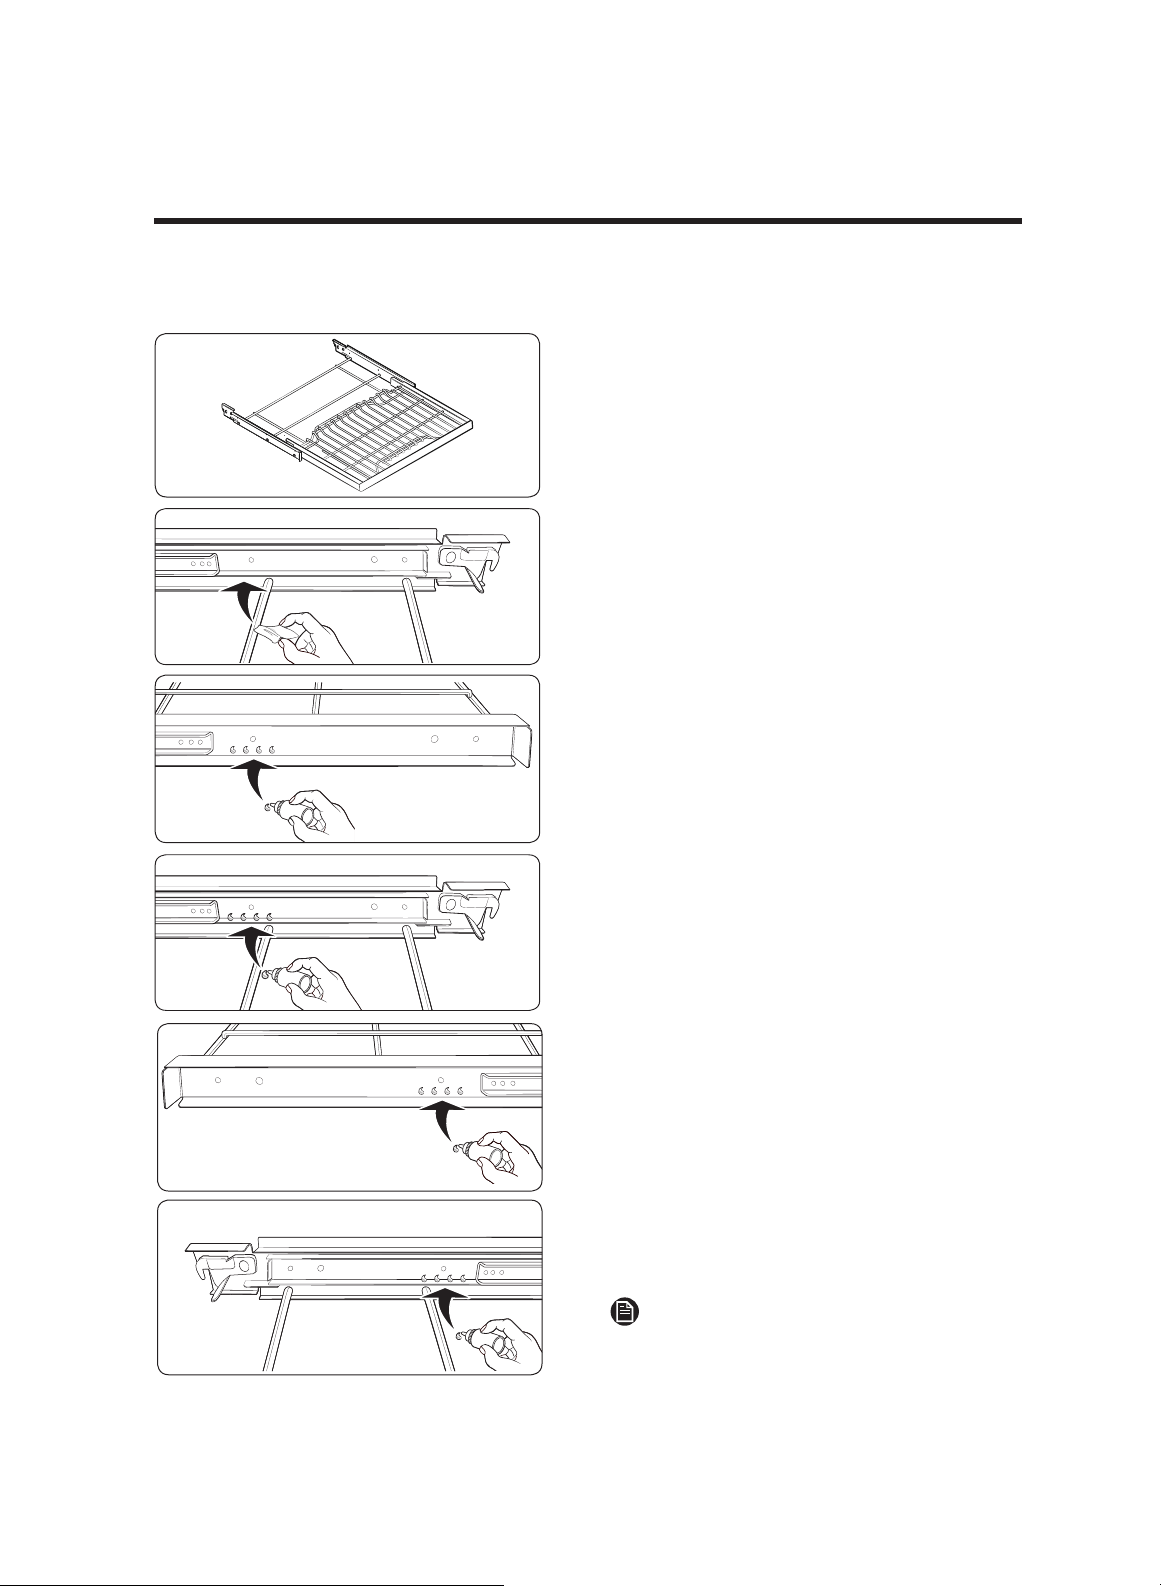
Care and maintenance
To lubricate the slides of the gliding rack
1. Remove the rack from the oven. (See
pg. 32.)
2. Fully extend the rack on a large, flat
surface. (Lay newspaper under the
rack for easy cleanup.)
3. Wipe debris from the slide tracks with
a paper towel.
4. Shake the lubricant bottle before
opening it. Starting with the left (front
and back) slide mechanism, place 4
small drops of lubricant on the 2 bottom
slide tracks close to the bearing carriers.
5. Repeat for the right (front and back)
slide mechanism.
6. Open-close the rack several times to
distribute the lubricant.
7. Replace the cap on the lubricant and
shake it again.
Turn the rack over and
repeat Steps 3 – 6.
8. Close th
e rack, turn it right-side up,
and install it in the oven. (See pg. 32.)
NOTE
Do not spray the gliding rack with cooking
spray or other lubricants.
English 55
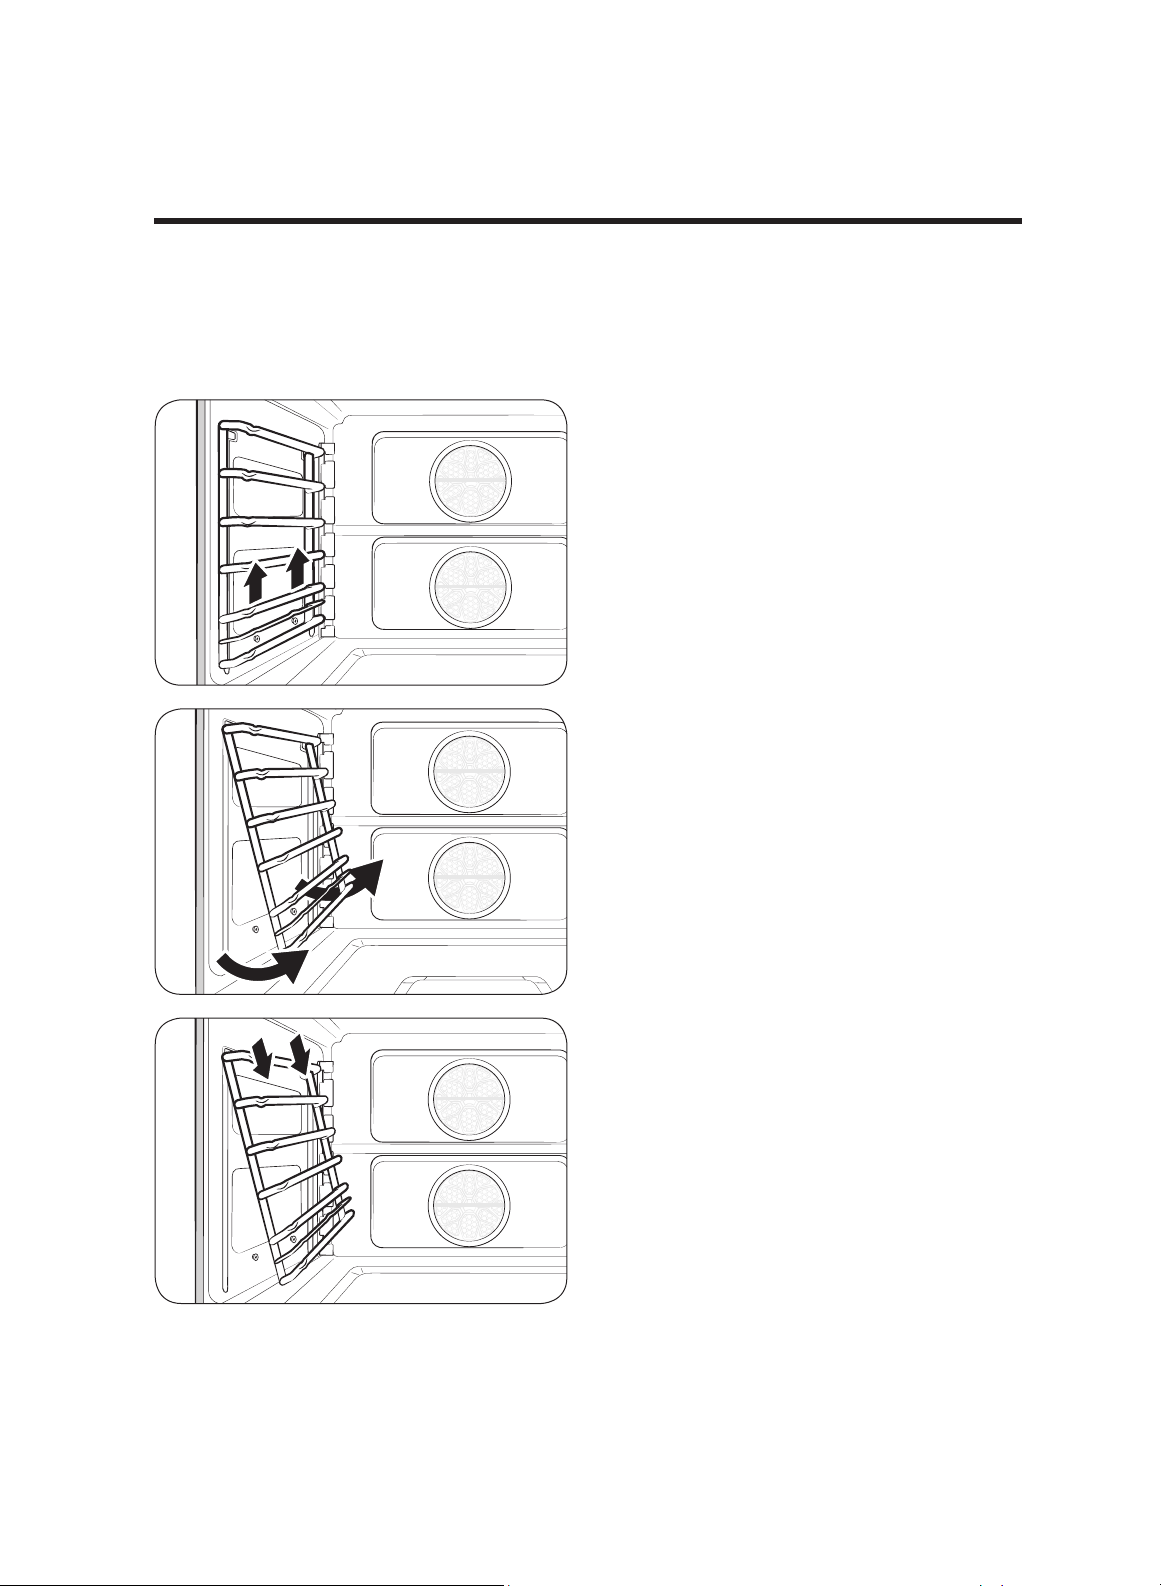
56 English
Care and maintenance
Rack support
Rack supports can be removed for cleaning. (Self clean, GreenClean™ and Manual clean).
Removing the rack supports
1. Grasping from the middle, lift the rack
support upward.
2. Rotate the rack support about 45°.
3. Pull the rack support from its two holes.
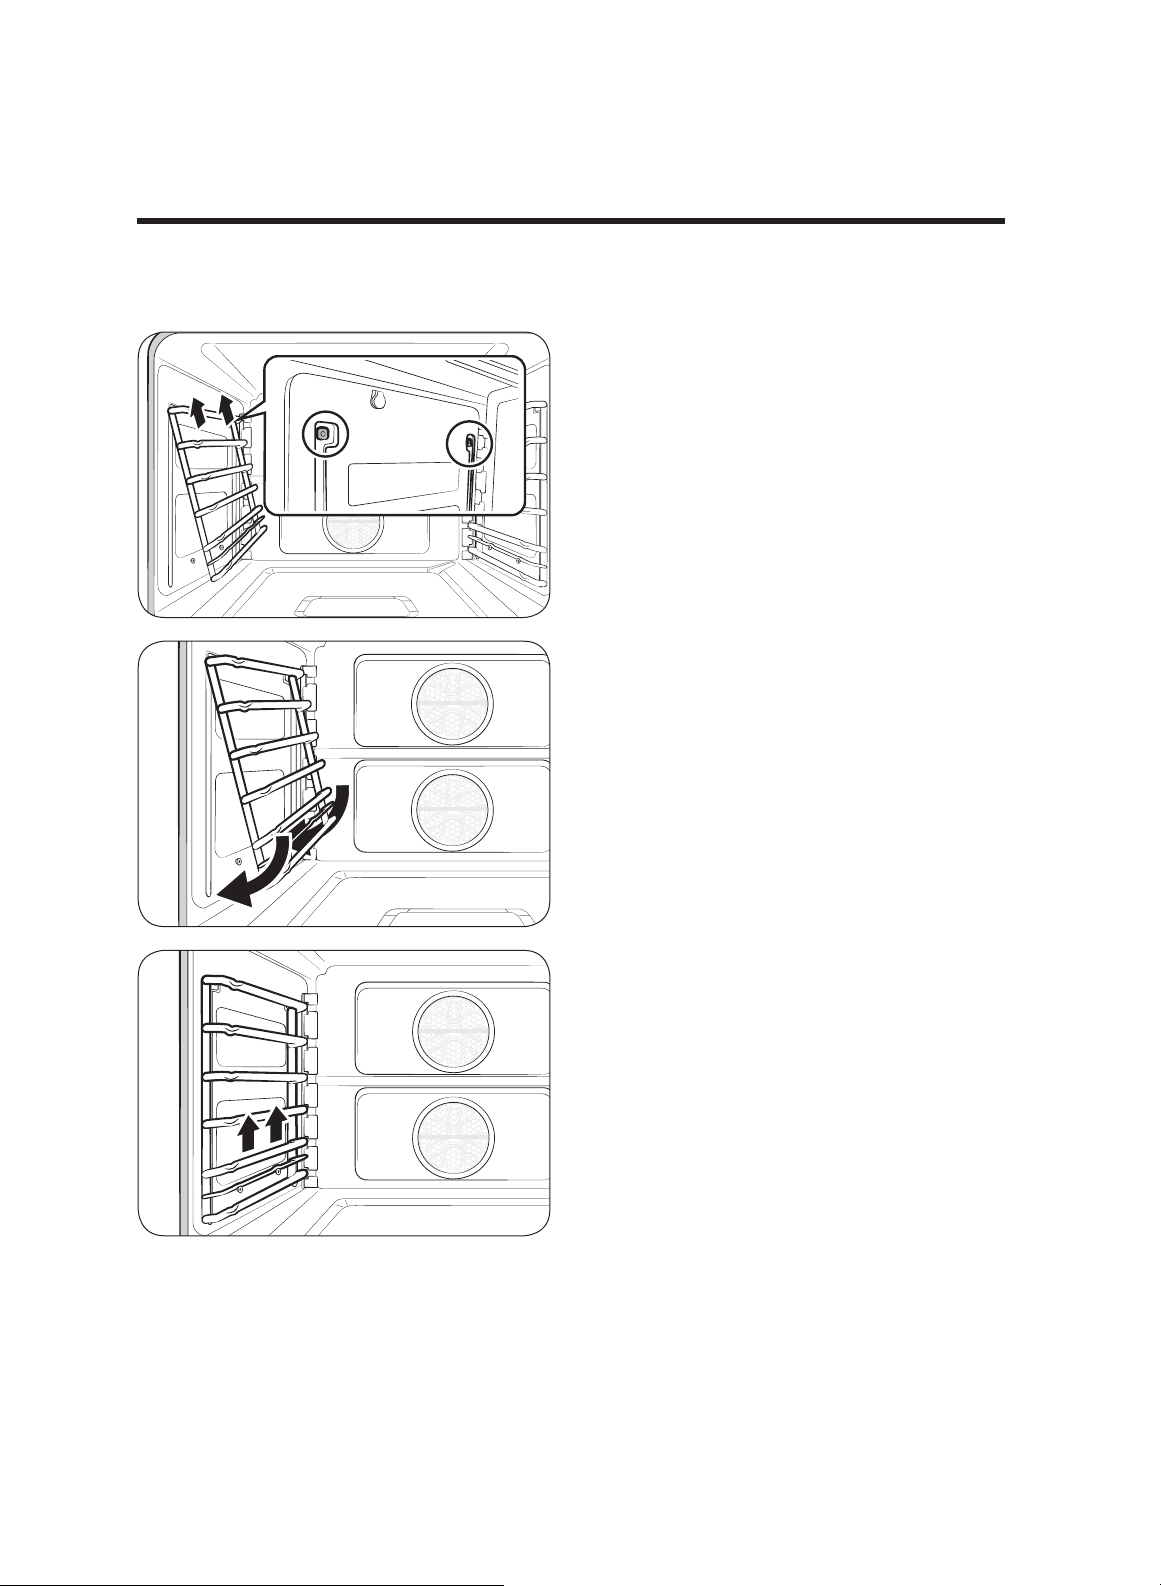
English 57
Replacing the rack supports
1. Put the rack support into the two holes.
2. Rotate the bottom of the rack support
to the oven wall.
3. Grasping at the middle, push the rack
support downward, then press the
support into the holes in the oven wall.
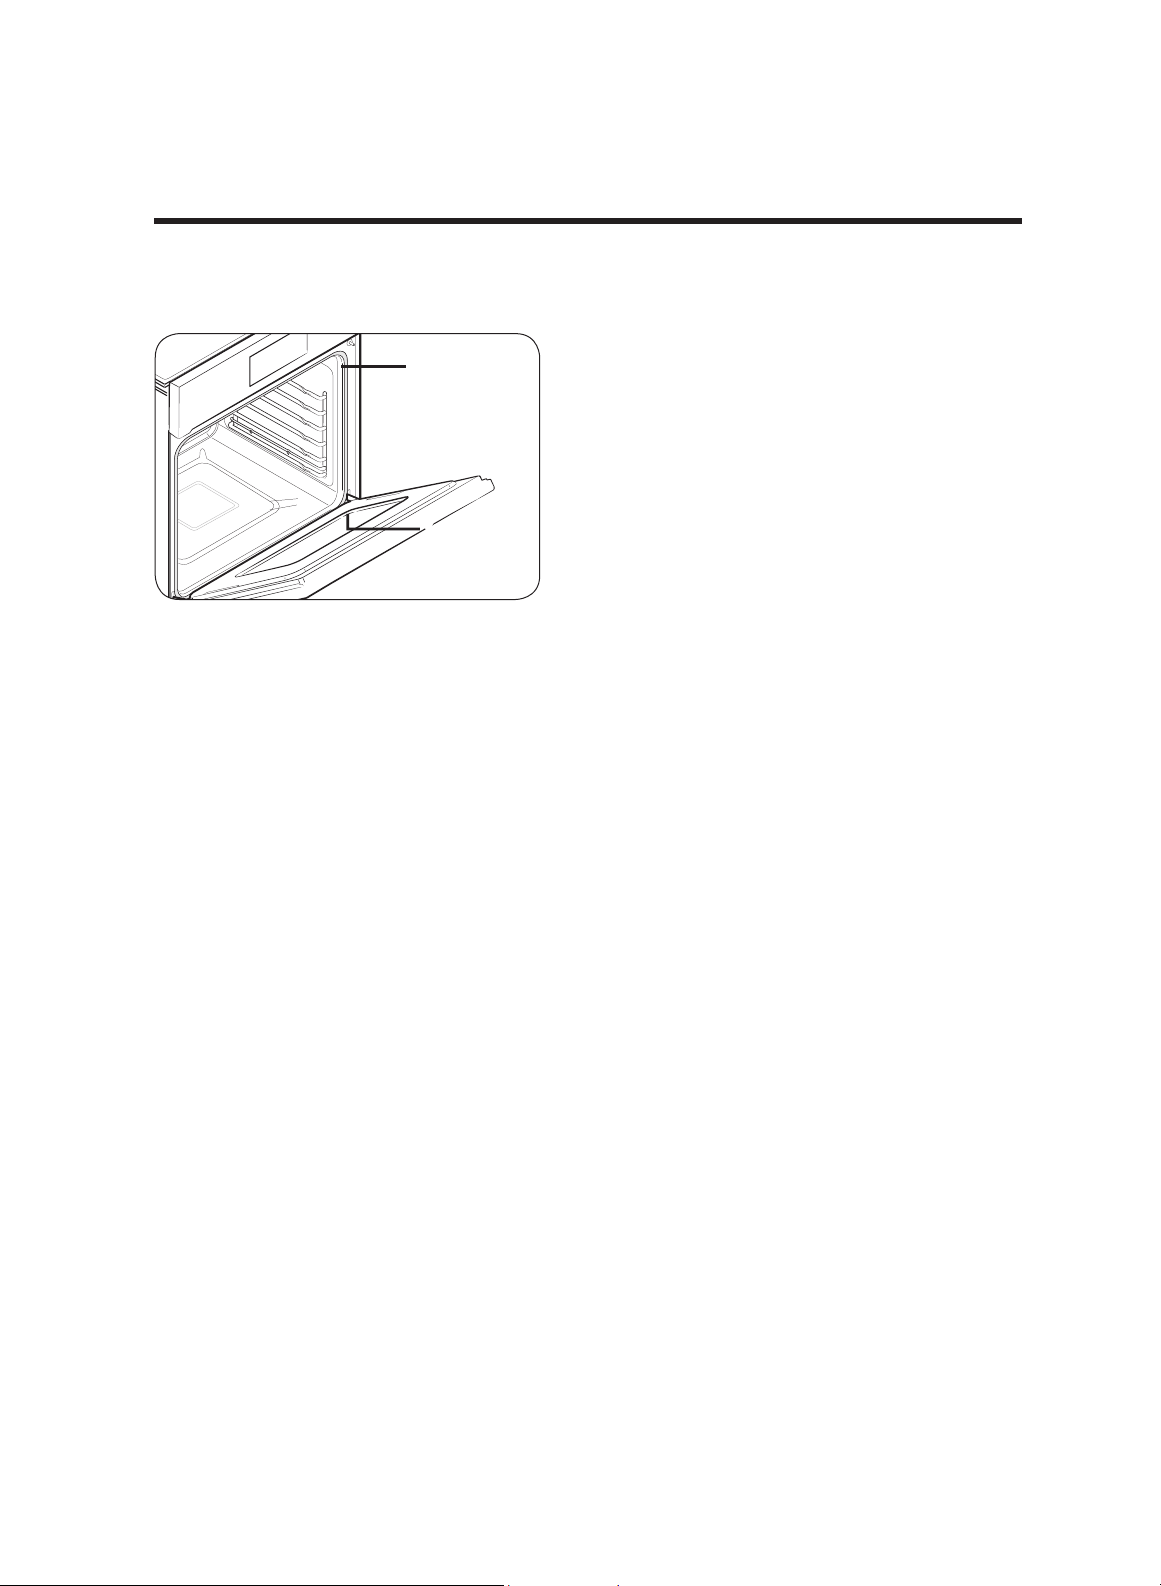
58 English
Care and maintenance
Oven door
Don’t hand clean
the oven door
gasket.
You may hand
clean the
door.
• With soap and water, thoroughly clean
the top, sides, and front of the oven
door. Rinse well. You may use a glass
cleaner on the exterior glass. For stains
on the inside of the door, use a cloth
with vinegar or soap. Wipe with a
damp cloth and dry. DO NOT immerse
the door in water. DO NOT spray or let
water or glass cleaner into the door
vents. DO NOT use oven cleaners,
powders, or harsh abrasive material on
the outside of the door.
• DO NOT clean the oven door gasket,
which is made of a woven material that
is essential for a good seal. Do not rub,
damage, or remove the gasket.
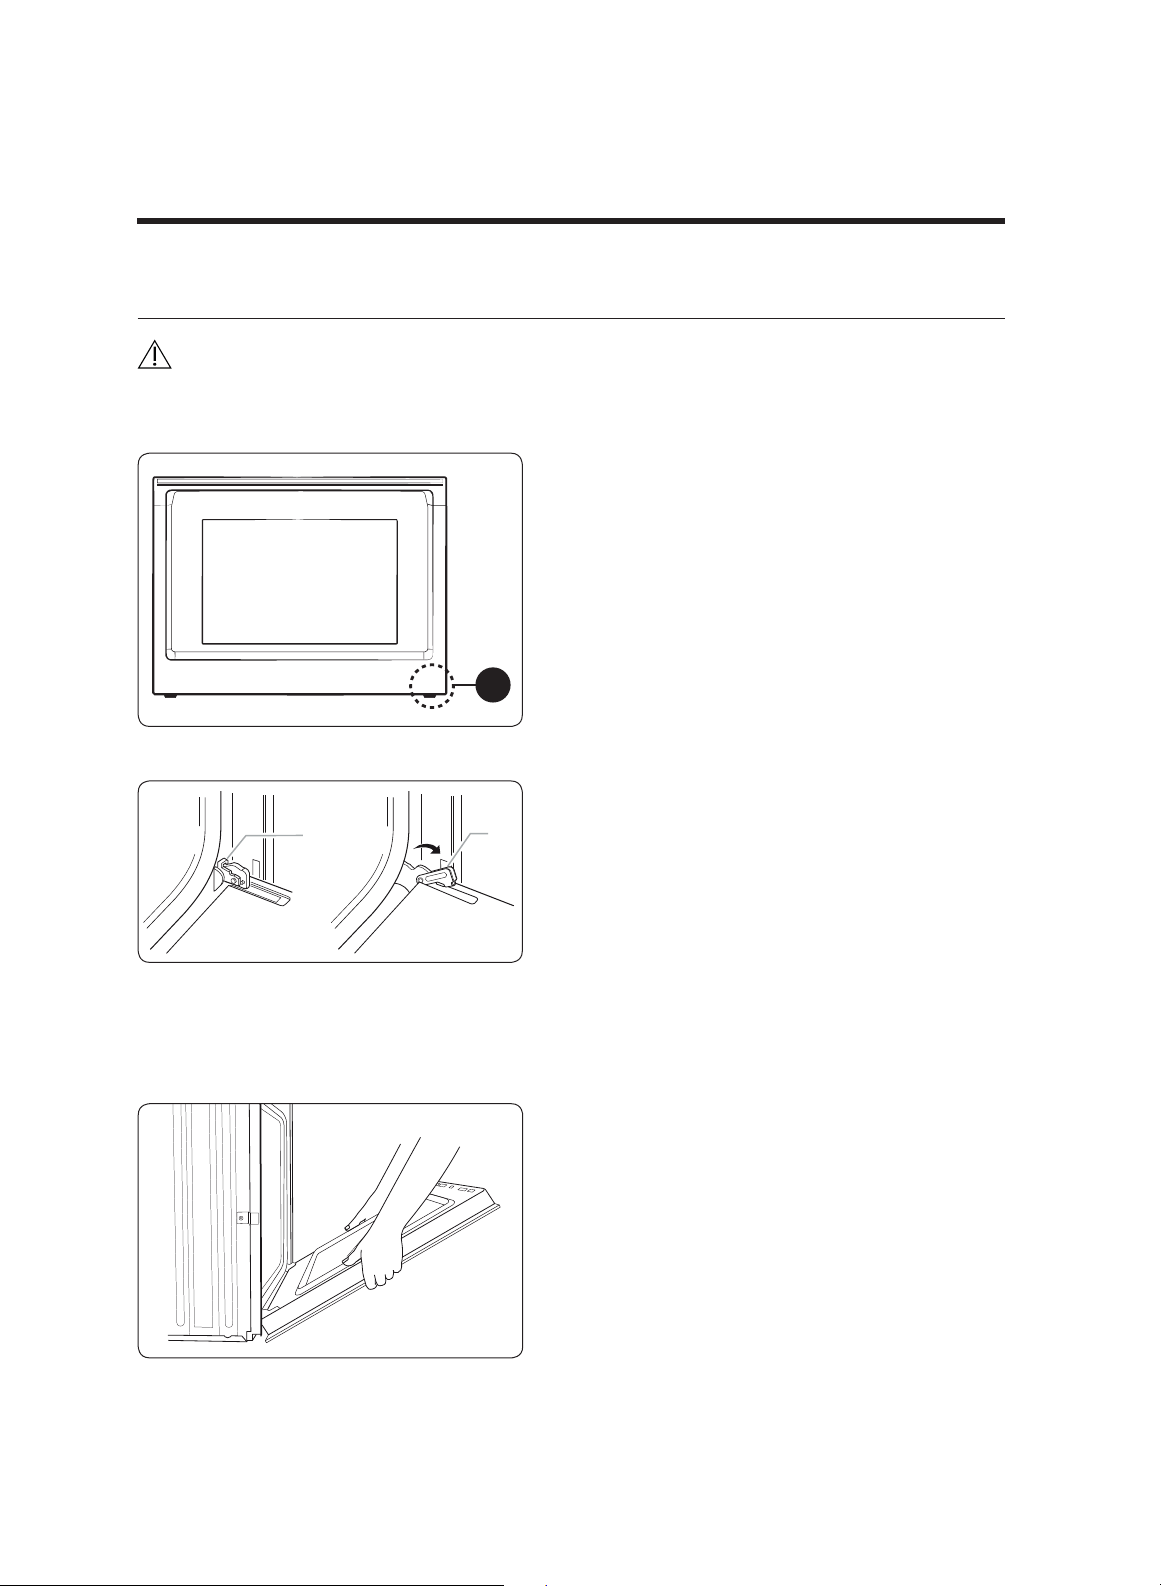
English 59
Removing the oven doors
CAUTION
• The door is very heavy. Be careful when removing and lifting the door.
• Do not lift the door by the handle.
A
A. Wire Harness
1. Lay out a soft blanket on a large, flat,
sturdy surface, or use the corner posts
from your packing material.
2. Disconnect the LED’s wire harness
(bottom right corner of the door).
A
B
A. Oven door hinge lock in locked
position
B. Oven door hinge lock in unlocked
position
3. Open the oven door.
4. Find the hinge locks in both corners of
the door, and
flip the locks outward to
the unlocked position. If the hinge lock
is not rotated fully (graphic B, at left),
the door will not come off properly.
5. Partially close the door to engage the
door latch locks. The door stops at
this point.
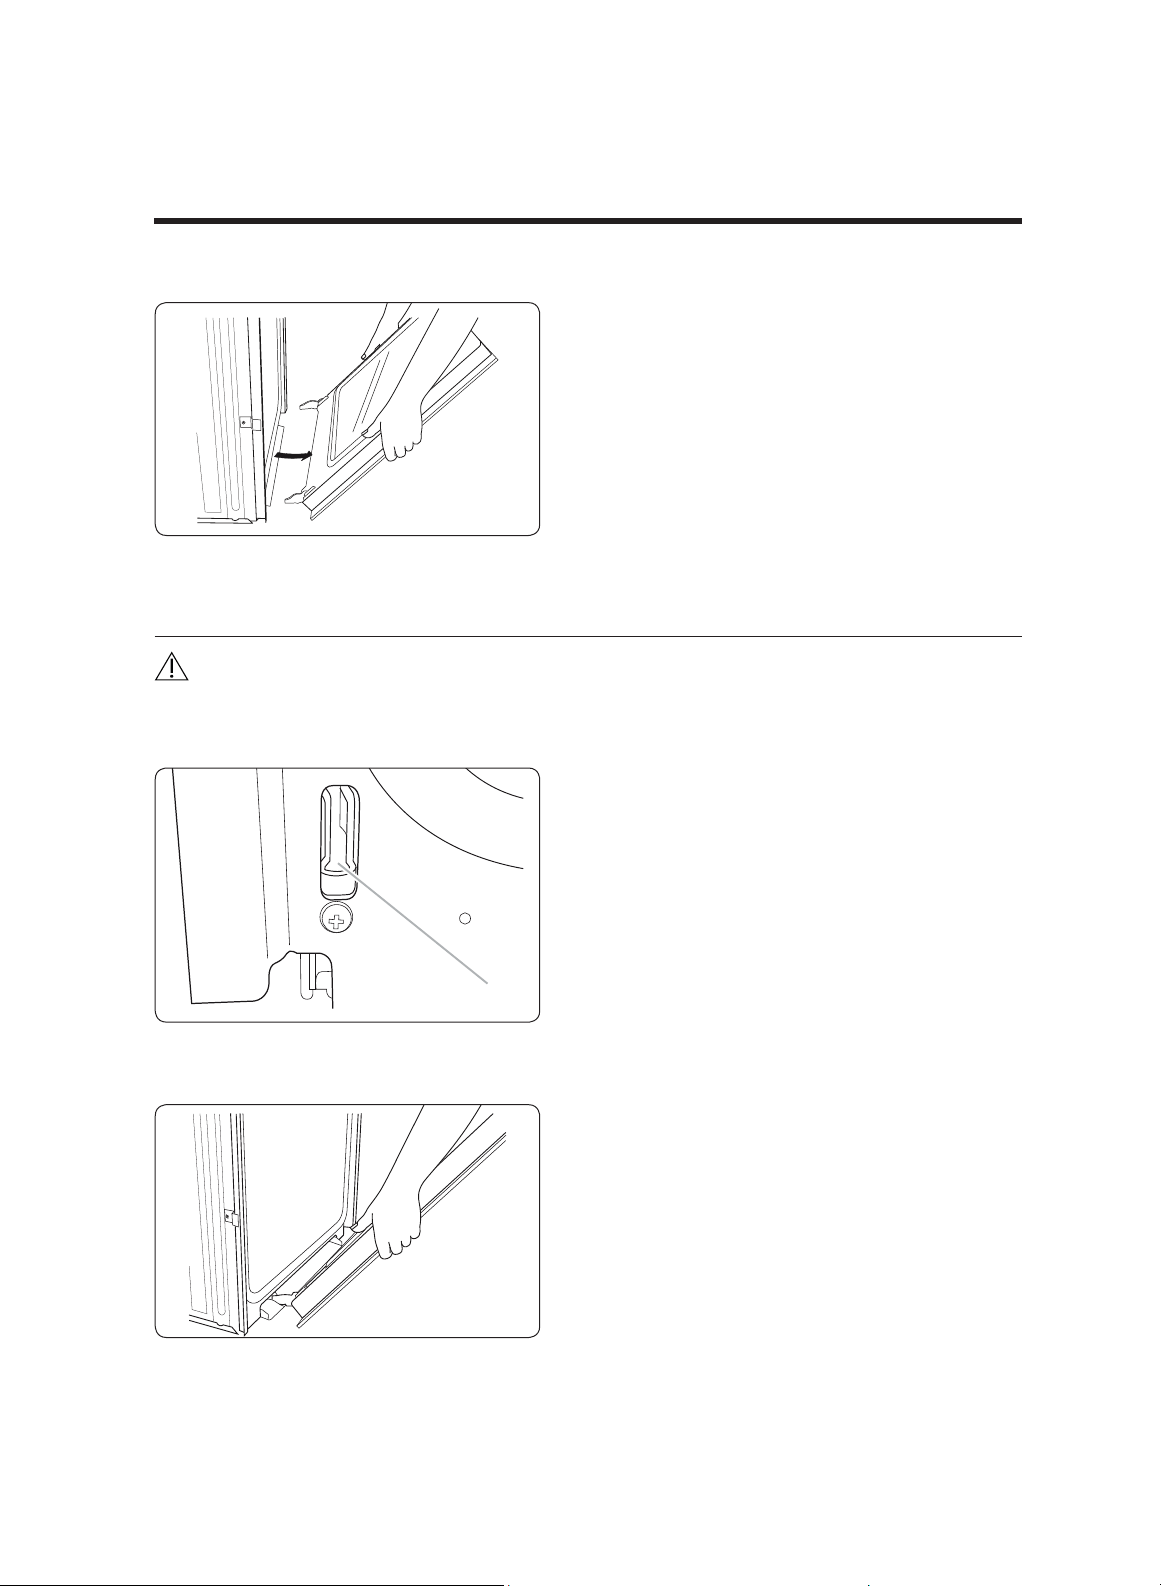
60
English
Care and maintenance
6. Grasp both sides of the oven door
below the handle. Lift and pull the door
away from the oven. Gently rock the
door side to side if needed.
7. Set the oven door, handle down, on the
prepared surface.
Re-installing the oven doors
CAUTION
The door is very heavy. You may need help lifting the door high enough to slide it into the
hinge slots.
Do not lift the door by the handle.
A
A. Slot in the oven chamber for the door
hinge lock
1. Grasp both sides of the door below
the handle.
2. Position the door hinge locks before
the slots at the bottom-front of the
oven face.
3. Maintaining a 45° angle, slowly insert
the hinge locks into the slots. You will
know the door is engaged when you
feel a slight drop.

English 61
4. Open the door fully. If it does not lie
perpendicular to the oven, remove the
door, and repeat Steps 1 – 3.
5. Flip the hinge locks up into the locked
position.(See Removing the oven
doors, Step 3, graphic A, pg. 75.)
6. Close the oven door, and check the gap
between the door and control panel. If
one side has a wider gap, the hinge on
that side is improperly installed.
7. Reconnect the LED wire harness.
CAUTION
To avoid damaging the wire, reinsert it as it was before you removed the door.
Changing the oven light
The oven light is a standard, 40-watt appliance halogen bulb. It comes on automatically
when the oven door is opened. If the door is closed, touch LIGHT on the control screen
to turn the light on/off. You cannot turn the light on during a self-cleaning cycle.
1. Remove power to the oven at the main
fuse or circuit breaker, and ensure the
oven and bulb are cool.
2. (Support th
e element) Turn the circular
nut on the rear wall counter-clockwise.
The element loosens and tilts down.
Important: The broil element is not
removable. Do not force the element
down or let it drop.
3. Remove the glass cover and bulb cover.
4. Replace the bulb.
5. Re-install the covers, then hold the
broil element in its operating position,
and turn the nut clockwise to tighten.
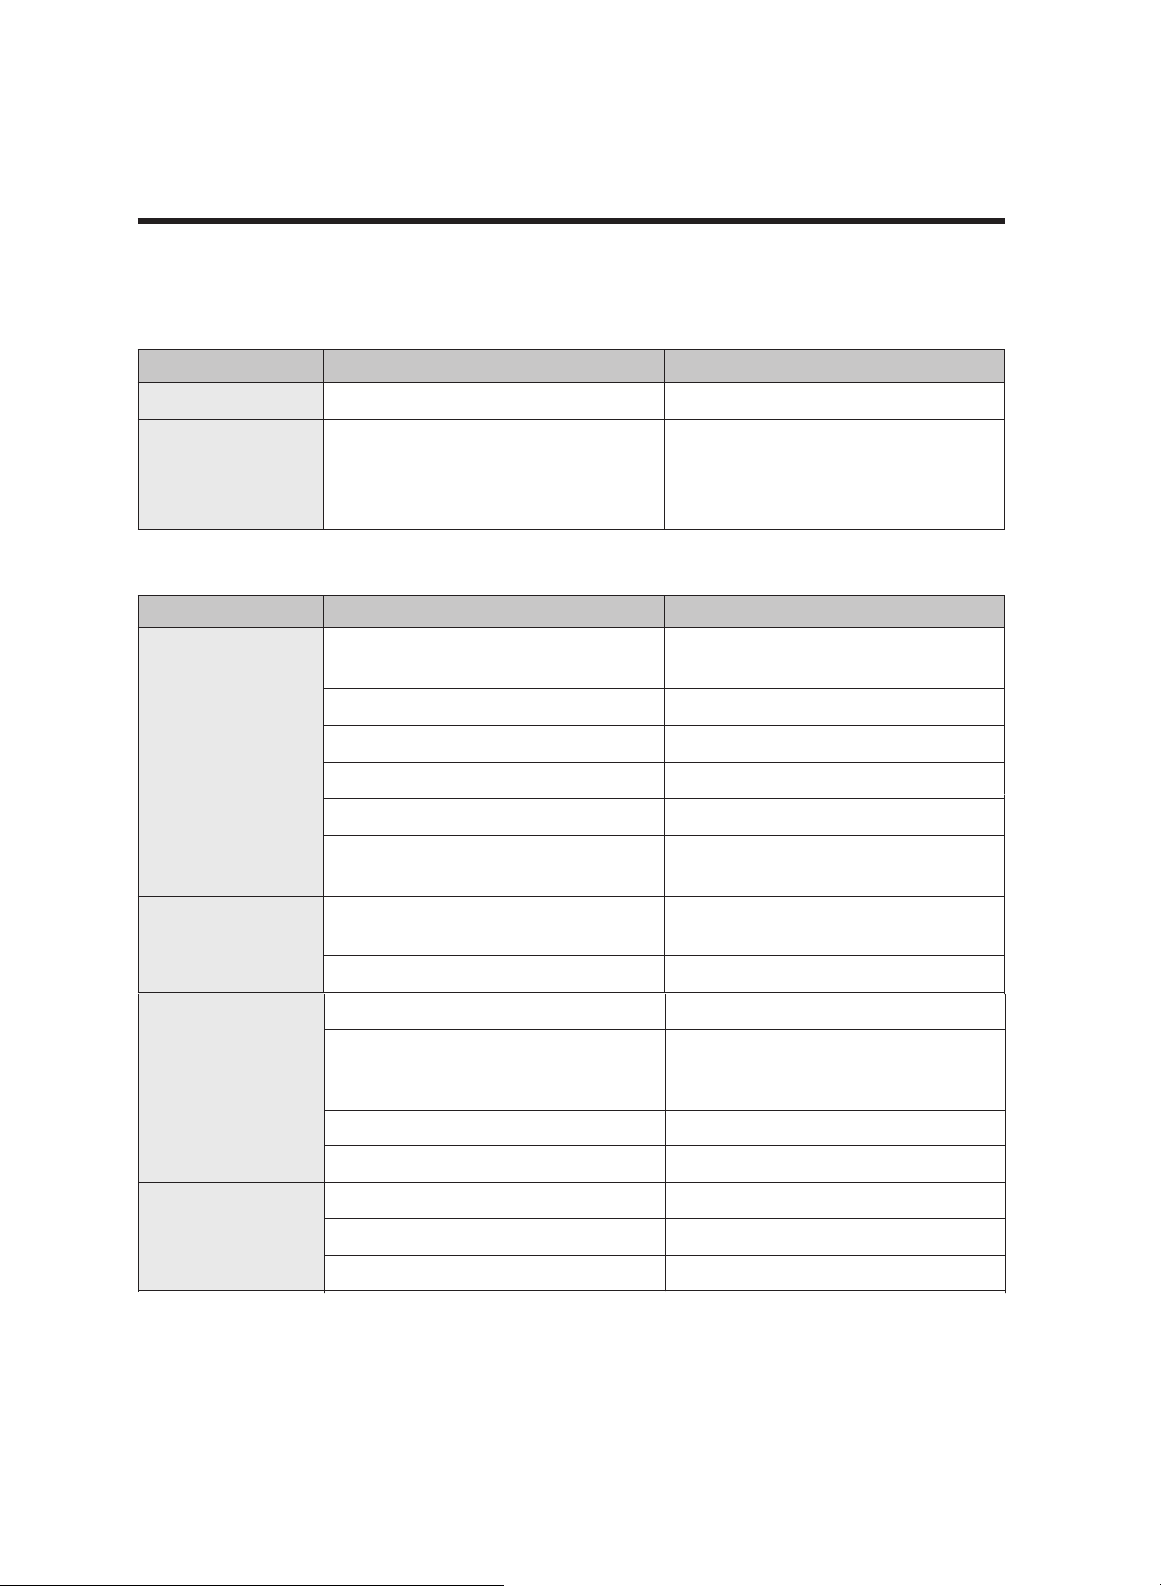
Troubleshooting
If there is an issue with the oven, review these tables for a possible resolution. If you
are unable to resolve the issue, call Dacor Customer Assurance: (800) 793-0093.
Control display
Problem Possible cause Solution
Display goes blank
Blown fuse or tripped circuit breaker
Replace fuse or reset circuit breaker
Control screen
not responding
• Moisture/residue on screen
• The lock function is set
• User is wearing oven mitt or has
residue on finger
• Remove the moisture/reside; retry
• Cancel lock function
• Remove mitt; wipe off finger
Oven
Problem Possible cause Solution
Oven will not
turn on
Plug improperly inserted in outlet
Properly insert plug; ensure outlet is
properly wired
Blown fuse/tripped circuit breaker Replace fuse or reset circuit breaker
Oven controls improperly set See Operations, pg. 19
Oven too hot Let oven cool
Incomplete service wiring Call for service
Power outage Check house lights; if needed, call
utility supplier for service.
Oven light will
not turn on
Light is loose/defective/burnt out
Tighten/replace lamp; call for service
if new light will not come on.
Operating switch is broken Call for service.
Oven smokes
excessively
during broiling
Oven controls improperly set See Operations, pg. 19
M
eat is too close to broil element
Reposition rack for proper clearance
between meat and element; preheat
broil element for searing
Meat improperly prepared. Trim excess fat from meat
Grease buildup on oven surfaces
Clean oven chamber regularly
Food does not
bake/roast
properly
Oven controls improperly set See Operations, pg. 19
Rack improperly positioned or not level
See Using the oven racks, pg.
29
Oven thermistor needs adjusting
See Temp adjust, pg. 63.
62 English

Troubleshooting
Problem Possible cause Solution
Food does not
broil properly
Serving size too large/small See Broiling recommendation guide,
pg. 40, and retry.
Rack improperly positioned See Broiling recommendation
guide, pg. 40.
Cookware not suited for broiling
Use suitable cookware.
(Some geographic areas) Insufficient
voltage
Preheat broiler 10 min. See Broiling
recommendation guide, pg. 40.
Oven temp too
hot/cold
Oven thermistor needs adjusting
See Temp adjust, pg. 63.
Dripping water
These issues depend on type of food
being cooked; this is not a product
malfunction
Let oven cool, then dry with dish towel
Steam seeps from
door seam
Water left in oven
Boiling sounds when
steam cooking
Water is being heated by steam heater
Normal operation
Oven will not
self-clean
Oven too hot for self-clean cycle
Let oven cool, then reset controls
Oven controls set incorrectly
See Self clean
, pg. 52-53
Self-clean cycle cannot start if
oven lockout is active
Cancel oven lockout (see pg. 23)
Excessive smoke
during self-clean
cycle
Excessive food residue in oven
Press OFF. Vent smoke through windows;
wait for self-clean cycle to cancel; wipe
up excess soil; restart self-clean cycle.
Oven door stays
locked after self
-
cle
an cycle
O
ven too hot Let
oven cool
Oven not clean
after self-clean
cycle
Oven controls set incorrectly
See Self clean
, pg. 52-53
Excessive food residue in oven
Wipe up residue before the self-clean
cycle; very dirty ovens may need
additional or longer cycles.
Steam from vent During convection baking, steam
normally comes f
rom oven vent
Normal operation
High volume of food being cooked
Burning/oily odor
from vent
Normal for new oven; odor
vanishes after a few uses
Run self-clean cycle for at least 3 hrs (see
Self clean, pg. 52-53)
English
63
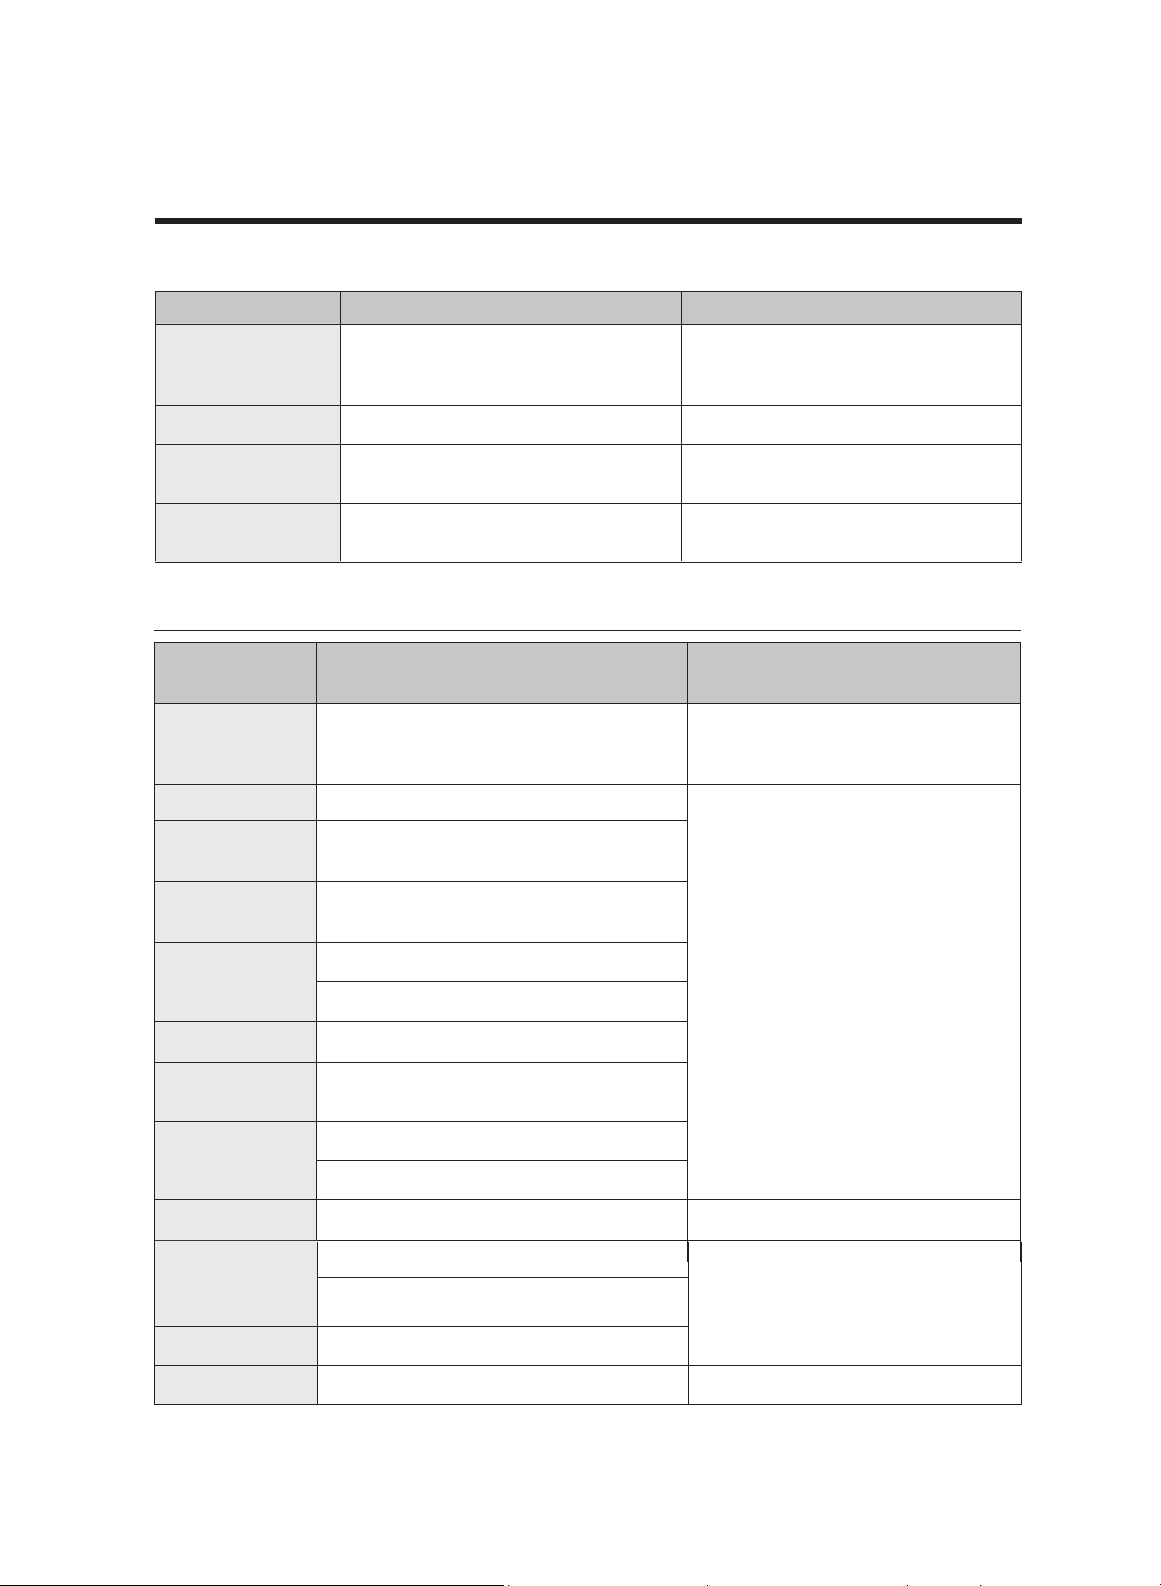
Troubleshooting
64
English
Problem Possible cause Solution
Strong odor
Odor from insulation around oven cavity
is normal initially; odor vanishes after a
few uses
Operate oven empty on Bake at 400
°F for 1 hour
Fan noise
Convection fan normally cycles on/off
Normal operation
Oven racks do
not slide easily
Chrome racks went through self-
clean cycle
Apply dab of veg. oil to paper towel;
wipe edges of racks
Oven door will not
open
Tripped circuit breaker or power
failure while door was locked
Activate Control Lockout, then unlock
the control (see Control Lockout, pg. 23)
Information codes
Displayed
Code
Possible cause Solution
C-d0
Control key was short for 1 minute
Clean buttons
; wip
e off moisture; turn
off ove n, and retry; if issue persists,
contact Dacor Customer Assurance
C-d1
Door lock mispositioned
Press OFF, and restart oven; if issue
persists, disconnect all power to
oven for at least 30 seconds, and
reconnect power; if issue persists,
call for service.
C-F0
Communication between Main and Sub
PBA was interrupted
C-F2
Communication between Main and
Touch was interrupted
C-20
Oven sensor is open when oven operates
Oven sensor is short when oven operates
C-21
Abnormally high internal temp
C-23
Temp probe sensor is short when
oven operates
C-30
PCB sensor is open when oven operates
PCB sensor is short when oven operates
C-31
Abnormally high PCB temp
Call for service
C-70
Steam sen
sor is open when oven operates
Press OFF, and restart oven; if issue
persists, disconnect all power to oven for
at least 30 seconds, and reconnect
power; if issue persists, call for service.
Steam sensor is short when oven operates
C-72
Drain system problems
C-A2
Abnormal cooling motor function
Call for service

English 65
Warranty and Service
Getting Help
Before you request service:
you request service:
1. Review the Troubleshooting section of this manual (see page 79).
2. Use the helpful tips found in our Troubleshooting.
3. Become familiar with the warranty terms and conditions of your product.
4. If none of these tips or suggestions resolves your problem, call our Customer Service
center at the number below.
Dacor’s Customer Assurance center is available 5:00 a.m. to 5:00 p.m. Pacific Time
For warranty repairs or questions and for Dacor Customer Assurance (US, Canada)
Phone: (800) 793-0093, extension 2813
Contact us through our website: www.dacor.com/customer-care/contact-us
Warranty
What Is Covered
CERTIFICATE OF WARRANTIES: DACOR OVENS
WITHIN THE 50 STATES OF THE USA, THE DISTRICT OF COLUMBIA, AND CANADA*:
FULL 2-YEAR WARRANTY
The warranty applies only to the Dacor Modernist appliance sold to the original
purchaser, starting from the original retail purchase date or closing date for new
construction, whichever period is longer. Warranty is valid on
Modernist products
purchased new from a Dacor Authorized Dealer, or other Dacor-authorized seller. If,
within 2 years of the original purchase date, your Dacor Modernist appliance
malfunctions due to a material or manufacturing defect, Dacor will restore the appliance
to its proper function at no charge to you.
*Warranty is null and void if non-ETL-/non-CUL-approved product is transported from the U.S.A.
All cosmetic damage (such as scratches on stainless steel, paint/porcelain blemishes,
etc.) to the product or included accessories must be reported to Dacor within 60 days of
the original purchase date to qualify for warranty coverage.

66
English
Warranty and Service
LIMITATIONS OF COVERAGE
Service will be provided by a Dacor-designated service company during regular business
hours. These servicers are independent and not Dacor agents. Dealer display and model
home-
display products with a production date greater than 5 years, products sold “As Is,”
and products installed for non-residential use (religious organizations, fire stations, bed
and breakfast, spas, etc.) carry a 1-year parts warranty only. All delivery, installation, labor
costs, and other service fees are the responsibility of the purchaser. The warranty is null
and void on products with altered, defaced, or missing serial nos, and tags.
The owner must provide proof of purchase or closing statement for new construction
upon request. All Dacor products must be accessible for service.
OUTSIDE THE FIFTY STATES OF THE U.S.A, THE DISTRICT OF COLUMBIA, AND CANADA:
LIMITED FIRST YEAR WARRANTY
If your Dacor product fails to function within one year of the original date of purchase due
to a defect in material or workmanship, Dacor will furnish a new part, F.O.B. factory to
replace the defective part.
The purchaser shall pay all delivery, installation, labor costs and other service fees.
What Is Not Covered
• Slight color variations due to differences in painted parts, kitchen lighting, product
location, and other factors.
• Service calls to educate the customer on proper use and care of the product.
• Service fees for travel to islands and remote areas (ferries, toll roads, etc.).
• Consequential or incidental damage, including but not limited to food or medicine
loss, time away from work or restaurant meals.
• Failure of the product when used for commercial, business, rental or any application
other than for residential consumer use.
• Failure of the product caused by improper product installation.
• Consumable parts (filters, light bulbs, etc.).
• Replacement of house fuses, fuse boxes or resetting of circuit breakers.
• Damage to the product caused by accident, fire, flood, power interruption, power
surges or other acts of God.
• Liability or responsibility for damage to surrounding property including cabinetry,
floors, ceilings and other structures or objects around the product.
• Breakage, discoloration, or damage to glass, metal surfaces, plastic components, trim,
paint or other cosmetic finish caused by improper usage, care, abuse or neglect.

English 67
Out of Warranty
Should you experience a service issue beyond the standard warranty period, please
contact us. Dacor reviews each issue and customer concern to provide the best possible
solution based on the circumstances.
THE REMEDIES PROVIDED IN THE ABOVE EXPRESS WARRANTIES ARE THE SOLE AND
EXCLUSIVE REMEDIES. THEREFORE, NO OTHER EXPRESS WARRANTIES ARE MADE, AND
OUTSIDE THE FIFTY STATES OF THE UNITED STATES, THE DISTRICT OF COLUMBIA AND
CANADA, ALL IMPLIED WARRANTIES, INCLUDING BUT NOT LIMITED TO, ANY IMPLIED
WARRANTY OF MERCHANTABILITY OR FITNESS FOR A PARTICULAR USE OR PURPOSE,
ARE LIMITED IN DURATION TO ONE YEAR FROM THE DATE OF ORIGINAL PURCHASE. IN
NO EVENT SHALL DACOR BE LIABLE FOR INCIDENTAL EXPENSE OR CONSEQUENTIAL
DAMAGES. IN THE EVENT DACOR PREVAILS IN ANY LAWSUIT, DACOR SHALL BE ENTITLED
TO REIMBURSEMENT OF ALL COSTS AND EXPENSES, INCLUDING ATTORNEY’S FEES, FROM
THE DACOR CUSTOMER. NO WARRANTIES, EXPRESS OR IMPLIED, ARE MADE TO ANY
BUYER FOR RESALE.
Some states do not allow limitations on how long an implied warranty lasts, or do not
allow the exclusion or limitation of inconsequential damages, therefore the above
limitations or exclusions may not apply to you. This warranty gives you specific legal
rights, and you may also have other rights that vary from state to state.

78 English
Regulatory Notice
1. FCC Notice
CAUTION
FCC CAUTION: Any changes or modifications not expressly approved
by the party responsible for compliance could void the user’s
authority to operate the equipment.
This device complies with Part 15 of FCC Rules. Operation is Subject
to following two conditions:
1) This device may not cause harmful interference, and
2) This device must accept any interference received including
interference that cause undesired operation.
For products sold in the US and Canadian markets, only channels
1
~
11 are available. You cannot select any other channels.
FCC STATEMENT:
This equipment has been tested and found to comply within the
limits for a Class B digital device, pursuant to part 15 of the FCC
Rules. These limits are designed to provide reasonable protection
against harmful interference in a residential installation.
This equipment generates, uses, and can radiate radio frequency
energy and, if not installed and used in accordance with
the instructions, may cause harmful interference to radio
communications. However, there is no guarantee that interference
will not occur in a particular installation. If this equipment does
cause harmful interference to radio or television reception, which
can be determined by turning the equipment off and on, the user is
encouraged to try to correct the interference by one or more of the
following measures:
• Reorienting or relocating the receiving antenna
• Increasing the separation between the equipment and receiver

English 69
• Connecting the equipment to an outlet that is on a different circuit
than the radio or TV
• Consulting the dealer or an experienced radio/TV technician for
help.
FCC RADIATION EXPOSURE STATEMENT:
This equipment complies with FCC radiation exposure limits set
forth for an uncontrolled environment. This equipment should be
installed and operated so there is at least 8 inches (20 cm) between
the radiator and your body. This device and its antenna(s) must not
be co-located or operated in conjunction with any other antenna or
transmitter.
2. IC Notice
The term “IC” before the radio certification number only signifies
that Industry Canada technical specifications were met. Operation
is subject to the following two conditions: (1) this device may not
cause interference, and (2) this device must accept any interference,
including interference that may cause undesired operation of the
device.
This Class B digital apparatus complies with Canadian ICES-003.
For products sold in the US and Canadian markets, only channels
1
~
11 are available. You cannot select any other channels.
IC RADIATION EXPOSURE STATEMENT:
This equipment complies with IC RSS-102 radiation exposure limits
set forth for an uncontrolled environment. This equipment should be
installed and operated so there is at least 8 inches (20 cm) between
the radiator and your body. This device and its antenna(s) must not
be co-located or operated in conjunction with any other antenna or
transmitter.
70 English
Open Source Announcement
The software included in this product contains open source software. You may obtain the
complete corresponding source code for a period of three years after the last shipment of
this product by sending an email to mailto:[email protected].
It is also possible to obtain the complete corresponding source code in a physical medium
such as a CD-ROM; a minimal charge will be required.
The following URL http://opensource.samsung.com/opensource/OVEN_HKM_TZ/seq/0
leads to the download page of the source code made available and open source license
information as related to this product. This offer is valid to anyone in receipt of this
information.
cut herecut here
Please visit www.Dacor.com to activate your warranty online.
WARRANTY INFORMATION
IMPORTANT:
Your warranty will not begin until you activate it online or return this form to Dacor. If you have purchased more
than one Dacor product, please return all forms in one envelope, or activate the warranty for each product online.
Please rest assured that under no conditions will Dacor sell your name or any of the information on this form for
mailing list purposes. We are very grateful that you have chosen Dacor products for your home and we do not
consider the sale of such information to be a proper way of expressing our gratitude!
Owner’s Name:
Street:
Last (Please Print or Type) First Middle
City: State: Zip:
Purchase Date: Email: Telephone:
Dealer:
City: State: Zip:
Your willingness to take a few seconds to fill in the section below will be sincerely appreciated. Thank you.
1. How were you first exposed to Dacor products? (Please check one only.)
A. T.V. Cooking Show F. Builder
B. Magazine G. Architect/Designer
C. Appliance Dealer Showroom H. Another Dacor Owner
D. Kitchen Dealer Showroom I. Model Home
E. Home Show J. Other
2. Where did you buy your Dacor appliances?
A. Appliance Dealer D. Builder
B. Kitchen Dealer E. Other
C. Builder Supplier
3. For what purpose was the product purchased?
A. Replacement
only
C. New Home
B. Part of a Remodel E. Other
4. What is your household income?
A. Under $75,000 D. $150,000 – $200,000
B. $75,000 – $100,000 E. $200,000 – $250,000
C. $100,000 – $150,000 F. Over $250,000
5. What are the brands of appliances that you have in your kitchen?
A. Cooktop C. Dishwasher
B. Oven D. Refrigerator
6. Would you buy or recommend another Dacor product?
Yes No
Comments:
Thank you very much for your assistance. The information you
have provided will be extremely valuable in helping us plan for the
future and giving you the support you deserve.
Place Serial Number Label Here
Website: www.Dacor.com
Phone: 1+800+793-0093
Dacor ∙ 14425 Clark Avenue, City of Industry, CA 91745 ∙ Phone: (800) 793-0093 ∙ Fax: (626) 403-3130 ∙ www.dacor.com
DG68-00920A-00