Loading ...
Loading ...
Loading ...
28
HOW TO USE
ENGLISH
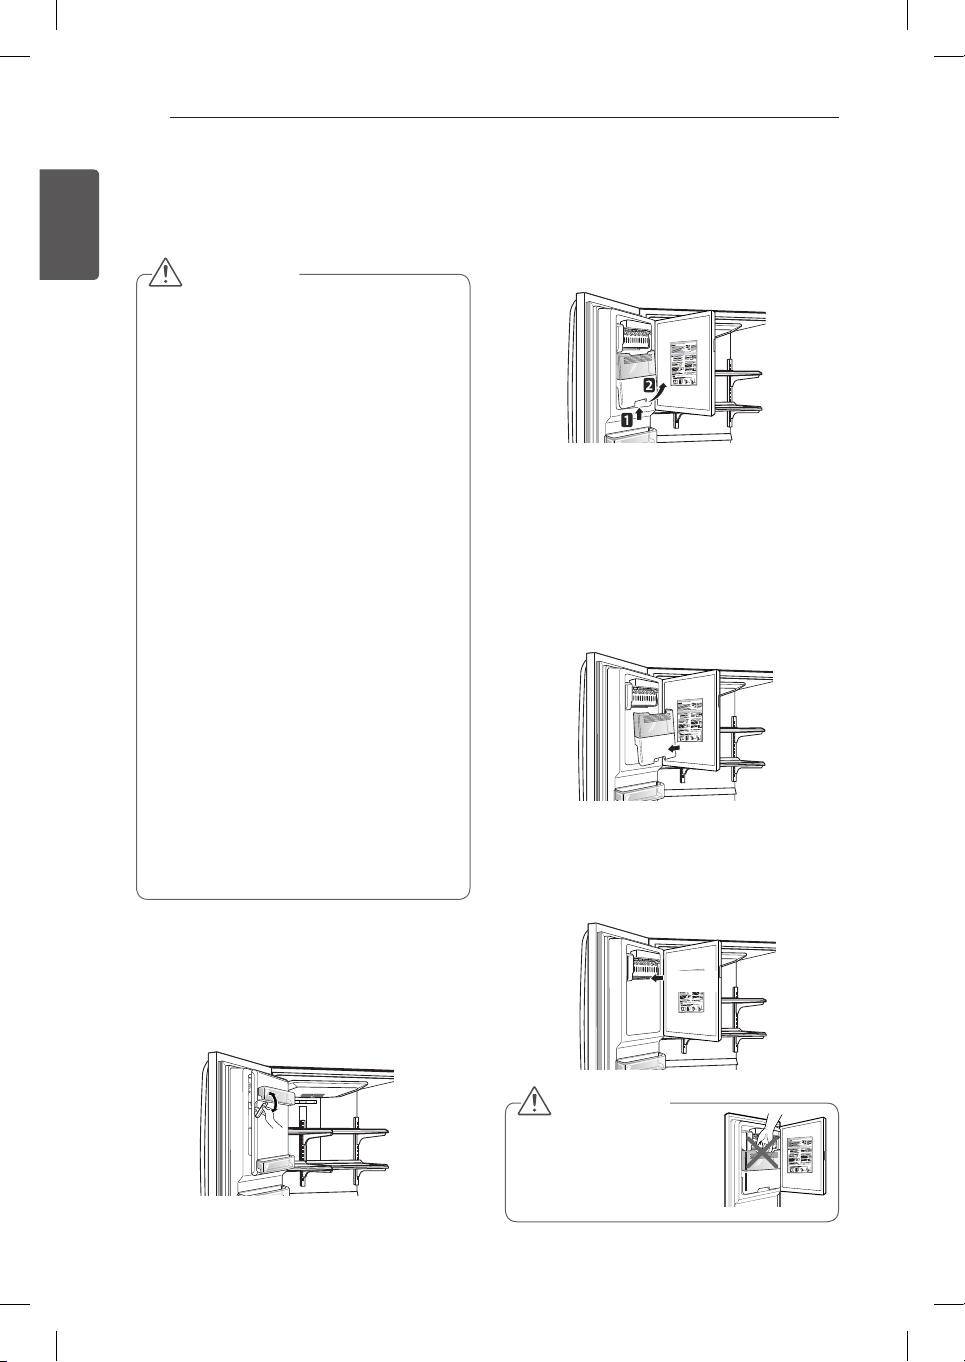
Assembling the In-Door Ice Bin
1
Carefully insert the in-door ice bin while
slightly slanting it to avoid contact with the
icemaker.
2
Avoid touching the auto shutoff (feeler
arm) when replacing the ice bin. See the
label on the ice compartment door for
details.
Auto shutoff
(feeler arm)
CAUTION
When handling the ice bin,
keep hands away from the
icemaker tray area to avoid
personal injury.
In-Door Ice Bin
* Depending on the model, some of the
following functions may not be available.
Detaching the In-Door Ice Bin
1
Gently pull the handle to open the ice
compartment.
2
To remove the in-door ice bin, grip the
front handle, slightly lift the lower part,
and slowly pull out the bin as shown.
CAUTION
y
Keep hands and tools out of the ice
compartment door and dispenser chute.
Failure to do so may result in damage or
personal injury.
y
The icemaker will stop producing ice when
the in-door ice bin is full. If you need more
ice, empty the ice bin into the extra ice bin
in the freezer compartment. During use,
the ice can become uneven causing the
icemaker to misread the amount of ice
cubes and stop producing ice. Shaking the
ice bin to level the ice within it can reduce
this problem.
y
Storing cans or other items in the ice bin will
damage the icemaker.
y
Keep the ice compartment door closed
tightly. If the ice compartment door is not
closed tightly, the cold air in the ice bin
will freeze food in the fridge compartment.
This could also cause the icemaker to stop
producing ice.
y
If the Ice On/Off button on the display is set
to Off for an extended period of time, the
ice compartment will gradually warm up to
the temperature of the fridge compartment.
To prevent ice cubes from melting and
leaking from the dispenser, ALWAYS empty
the ice bin when the icemaker is set to Off
for more than a few hours.
Loading ...
Loading ...
Loading ...