Loading ...
Loading ...
Loading ...
124
Before Use
Basic Guide
Advanced Guide
6
Playback Mode
7
Wi-Fi Functions
8
Setting Menu
9
Accessories
10
Appendix
Index
1
Camera Basics
2
Auto Mode /
Hybrid Auto Mode
3
Other Shooting Modes
4
P Mode
5
Tv, Av, and M Mode
4
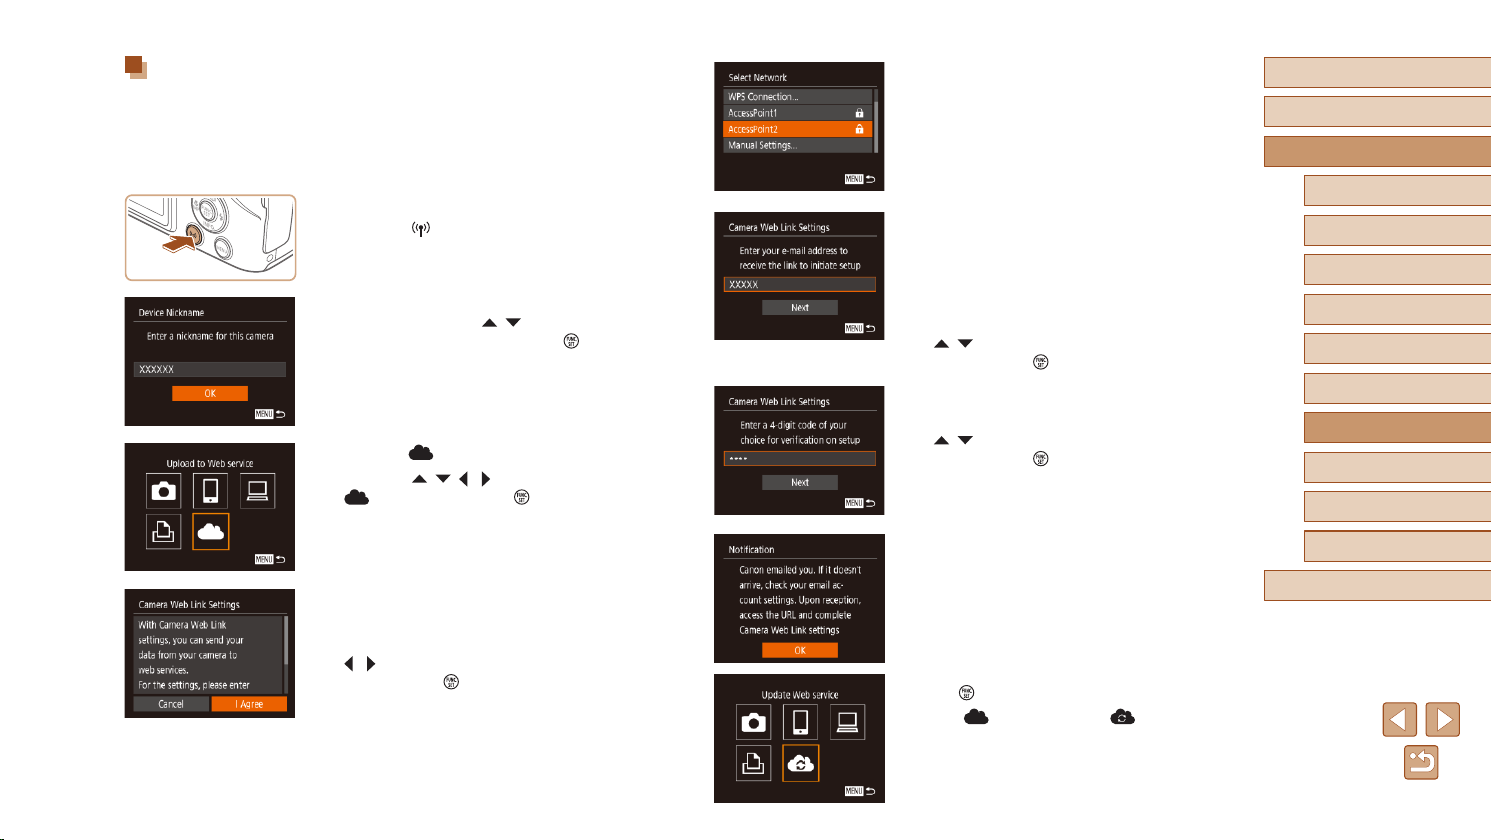
Establish a connection with an
access point.
● Connect to the access point as described
in steps 5 – 7 in “Using WPS-Compatible
Access Points” (
=
120) or in steps 2 – 4
in “Connecting to Listed Access Points”
(
=
122).
5
Enter your e-mail address.
● Once the camera is connected to CANON
iMAGE GATEWAY via the access point, a
screen is displayed for entering an e-mail
address.
● Enter your e-mail address, press the
[
][ ] buttons to choose [Next], and
then press the [ ] button.
6
Enter a four-digit number.
● Enter any four-digit number, press the
[ ][ ] buttons to choose [Next], and
then press the [ ] button.
● You will need this four-digit number later
when setting up linkage with CANON
iMAGE GATEWAY in step 8.
7
Conrm the e-mail notication was sent.
● When information is sent from CANON
iMAGE GATEWAY, an e-mail notication
is sent to the e-mail address you entered
in step 5.
● The screen notifying you that the e-mail
notication was sent is displayed. Press
the [
] button.
● The [
] icon changes to [ ].
Registering CANON iMAGE GATEWAY
To link the camera and CANON iMAGE GATEWAY, add CANON iMAGE
GATEWAY as a destination Web service on the camera. By setting
this, an e-mail notication for Camera Web Link Settings will be sent,
so you must use the e-mail address that you use on your computer or
smartphone.
1
Access the Wi-Fi menu.
● Press the [ ] button.
● After the [Device Nickname] screen is
displayed, press the [
][ ] buttons to
choose [OK], and then press the [ ]
button.
2
Choose [ ].
● Press the [ ][ ][ ][ ] buttons to choose
[ ], and then press the [ ] button.
3
Consent to entering your e-mail
address.
● Read the displayed content, press the
[ ][ ] buttons to choose [I Agree], and
then press the [ ] button.
Loading ...
Loading ...
Loading ...