Loading ...
Loading ...
Loading ...
9
CARE AND CLEANING (CONTINUED)
How to remove the filter
(continued)
4. Remove the air filter attached to the air intake grille.
How to remove the filter (continued)
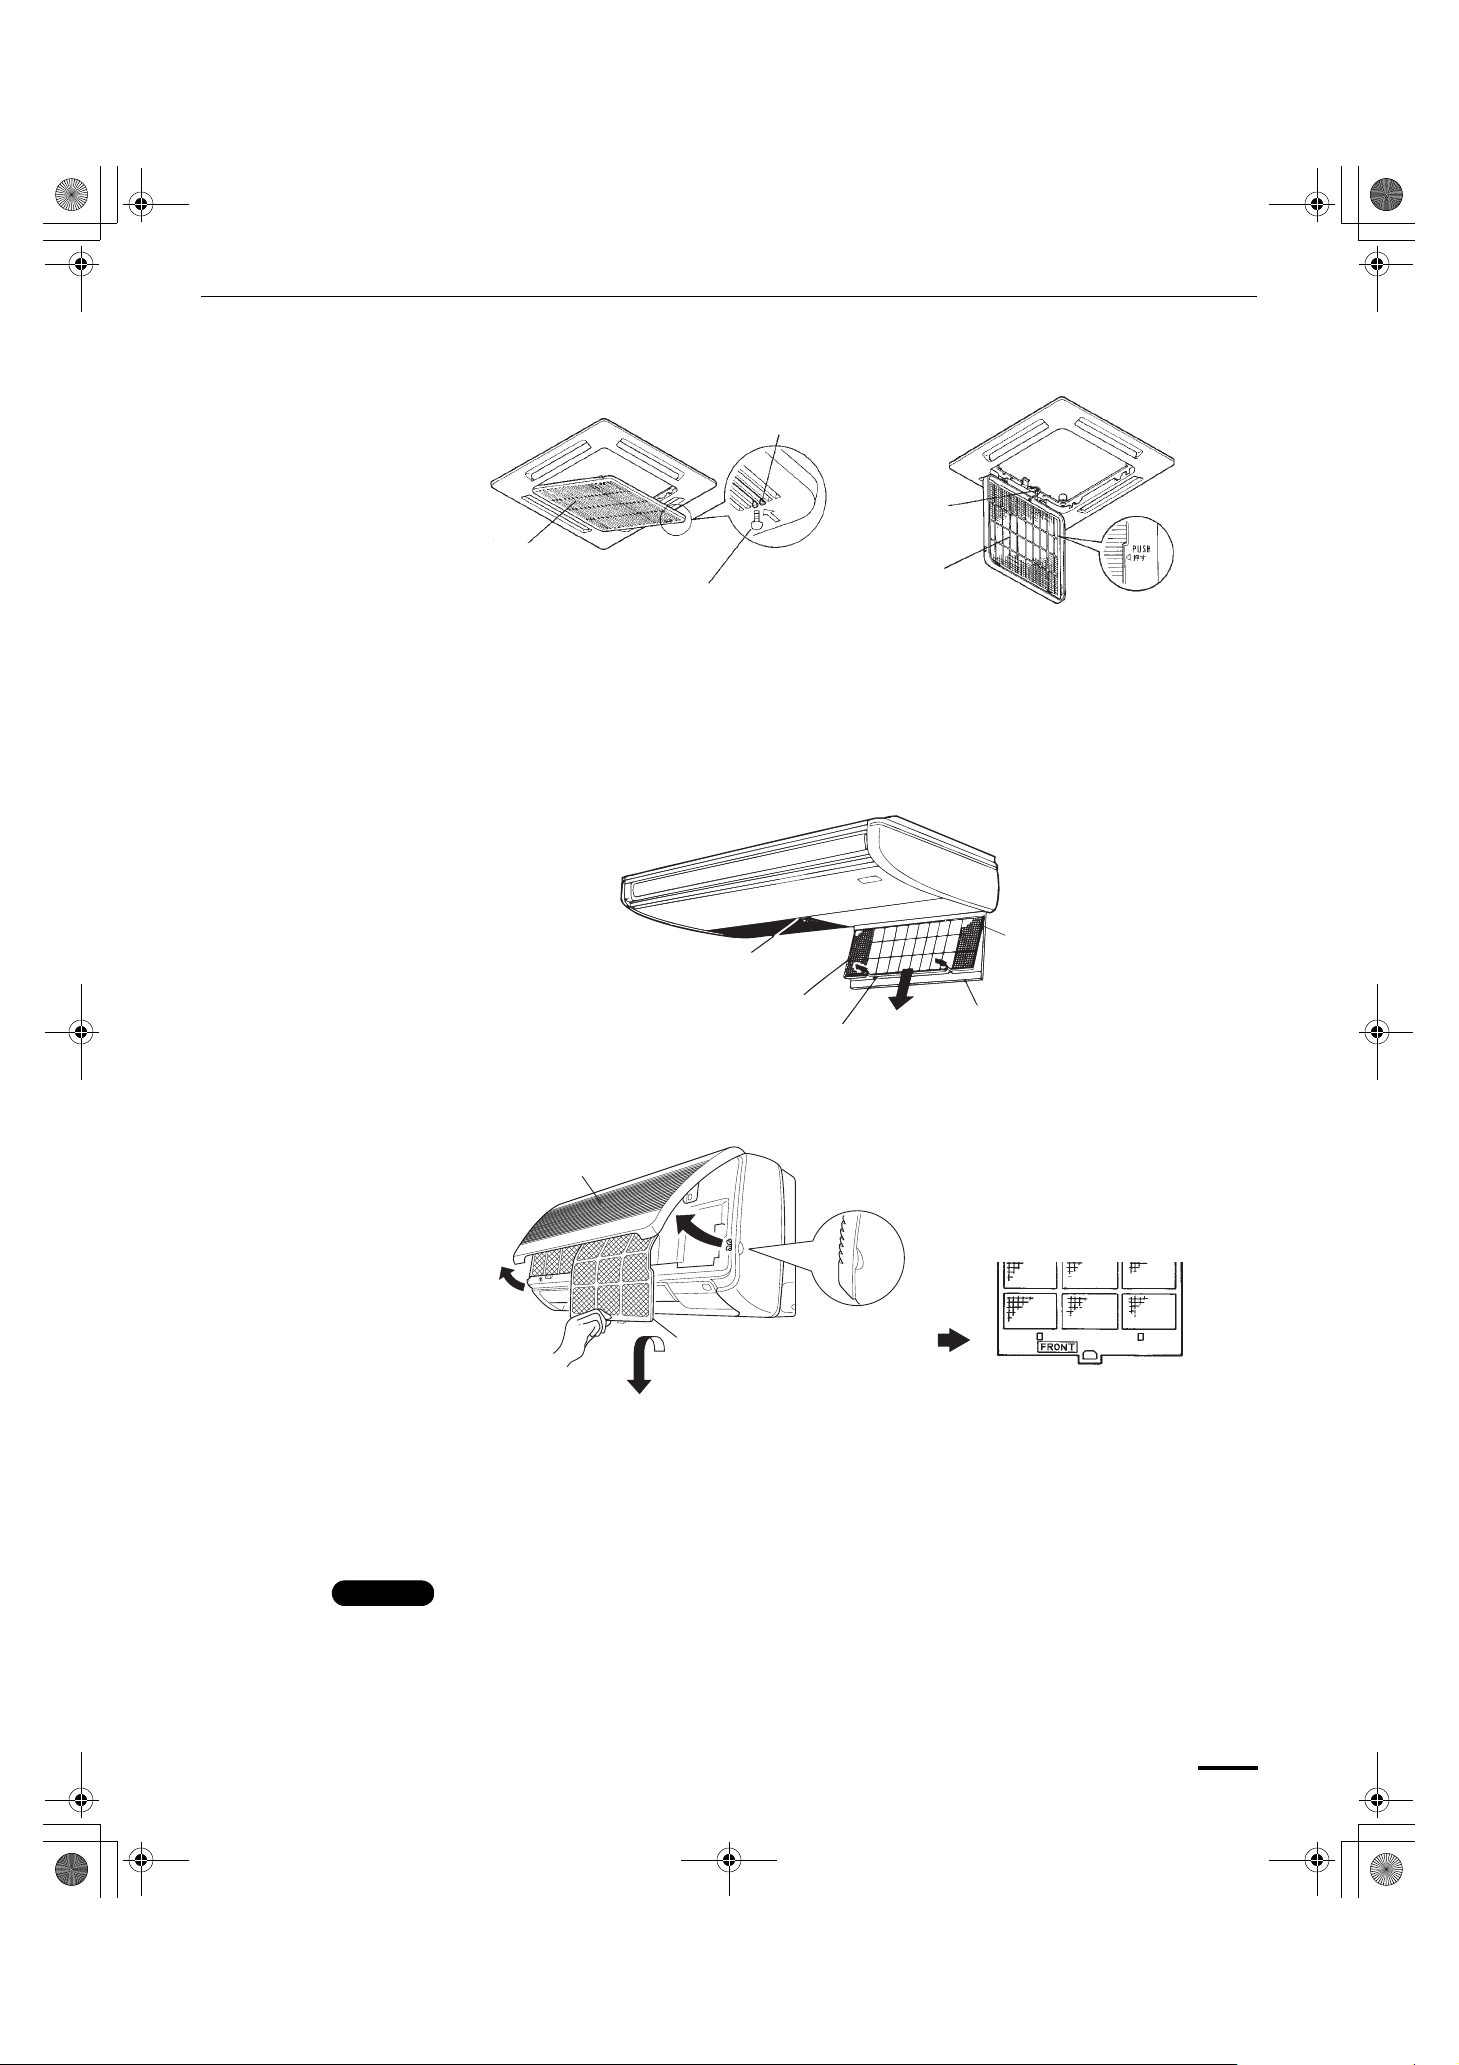
Ceiling type (T1): 1. Remove the bolt screws on the finger-hold using a screw driver. (After cleaning, be sure to
attach the two bolt screws.)
2. Take hold of the finger-hold on the air intake grille and slide it to the rear, and the grille will
open downward.
3. Take hold of the finger-hold on the air filter, first lift it and then pull it toward you to release it
from the catch.
Wall mounted type (K1): 1. Move the flap on the air outlet grille to its lowest position with the remote controller.
2. The filter is disengaged by pushing the tab up gently. Hold the air filter by the tab at the
bottom, and pull downward.
When replacing the filter, make sure that the FRONT mark is facing you.
Push it up until you hear it click back into position.
* Low Silhouette ducted type (F1):
An air filter is not provided with this air conditioner at the time of shipment. To get clean air and
to extend the service life of the air conditioner, an air filter must be installed in the air intake. For
installation and cleaning the air filter, consult your dealer or service center.
The frequency with which the filter should be cleaned depends on the environment in which the
unit is used.
How to clean the filter 1. Remove the air filter from the air intake grille.
2. Use a vacuum cleaner to remove light dust. If there is sticky dust on the filter, wash the filter
in lukewarm, soapy water, rinse it in clean water, and dry it.
Air intake
grille
Safety
chain
Bolt screw
Air filter
Latch
Finger-hold
Air intake grille
Air filter finger-hold
Catch
Air filter
Air intake grille
Air filter
NOTE
163011_SingleSplit_EN_1.fm Page 9 Thursday, September 15, 2011 9:00 AM
Loading ...
Loading ...
Loading ...