
Pleasereadtheseinstructionscarefullybeforeusingthis
product,andsavethismanualforfutureuse.
THEFOLLOWINGAPPLIESONLYINCANADA.
THEFOLLOWINGAPPLIESONLYINTHEU.S.A.
Keeptheunitasfarawayaspossiblefromelectromagnetic
equipment(suchasmicrowaveovens,TVs,videogames,
radiotransmitters,high-voltagelinesetc.).
• Donotusethecameranearcellphonesbecausedoingsomay
resultinnoiseadverselyaffectingthepicturesandsound.
• Ifthecameraisadverselyaffectedbyelectromagneticequipment
andstopsfunctioningproperly,turnthecameraoffandremove
thebatteryand/ortheconnectedACadaptor.Thenreinsertthe
batteryand/orreconnecttheACadaptorandturnthecameraon.
Thelenscanbeusedwithadigitalcameracompatiblewiththe
lensmountstandardforthe“MicroFourThirds
TM
System”.
• ItcannotbemountedontheFourThirds
TM
mount
specificationcamera.
• Theappearanceandspecificationsofproductsdescribedin
thismanualmaydifferfromtheactualproductsyouhave
purchasedduetolaterenhancements.
• MicroFourThirds
TM
andMicroFourThirdsLogomarks
aretrademarksorregisteredtrademarksofOlympus
ImagingCorporation,inJapan,theUnitedStates,the
EuropeanUnionandothercountries.
• FourThirds
TM
andFourThirdsLogomarksaretrademarksor
registeredtrademarksofOlympusImagingCorporation,inJapan,
theUnitedStates,theEuropeanUnionandothercountries.
• GMICROSYSTEMisaninterchangeablelenstype
digitalcamerasystemofLUMIXbasedonaMicroFour
ThirdsSystemstandard.
• Othernamesofsystemsandproductsmentionedin
theseinstructionsareusuallytheregisteredtrademarks
ortrademarksofthemanufacturerswhodevelopedthe
systemorproductconcerned.
∫
LensCare
• Thislenshasadust-proofandsplash-proof
construction.Whenusingit,pleasebecarefulofthe
following.Ifthelensisnotworkingproperly,consultthe
dealeroryournearestServiceCenter.
CANICES-3(B)/NMB-3(B)
FCCNote:
Thisequipmenthasbeentestedandfoundtocomply
withthelimitsforaClassBdigitaldevice,pursuantto
Part15oftheFCCRules.
Theselimitsaredesignedtoprovidereasonableprotection
againstharmfulinterferenceinaresidentialinstallation.This
equipmentgenerates,uses,andcanradiateradiofrequency
energyand,ifnotinstalledandusedinaccordancewiththe
instructions,maycauseharmfulinterferencetoradio
communications.However,thereisnoguaranteethat
interferencewillnotoccurinaparticularinstallation.Ifthis
equipmentdoescauseharmfulinterferencetoradioor
televisionreception,whichcanbedeterminedbyturningthe
equipmentoffandon,theuserisencouragedtotrytocorrect
theinterferencebyoneormoreofthefollowingmeasures:
• Reorientorrelocatethereceivingantenna.
• Increasetheseparationbetweentheequipmentand
receiver.
• Connecttheequipmentintoanoutletonacircuit
differentfromthattowhichthereceiverisconnected.
• Consultthedealeroranexperiencedradio/TV
technicianforhelp.
Anyunauthorizedchangesormodificationstothisequipment
wouldvoidtheuser’sauthoritytooperatethisdevice.
ThisdevicecomplieswithPart15oftheFCCRules.
Operationissubjecttothefollowingtwoconditions:(1)
Thisdevicemaynotcauseharmfulinterference,and(2)
thisdevicemustacceptanyinterferencereceived,
includinginterferencethatmaycauseundesiredoperation.
ResponsibleParty:
PanasonicCorporationofNorthAmerica
TwoRiverfrontPlaza,Newark,NJ07102-5490
SupportContact:
http://shop.panasonic.com/support
InformationforYourSafety
Precautions
1
2
3
ENGLISH
Owner’sManual/
Manueld’utilisation/
Instruccionesde
funcionamiento
INTERCHANGEABLELENSFOR
DIGITALCAMERA
OBJECTIFINTERCHANGEABLE
POURAPPAREILPHOTONUMÉRIQUE
ÓPTICAINTERCAMBIABLEPARA
CÁMARADIGITAL
Model No./Modèle/ModeloN.
H-HSA35100
Registeronlineat
http://shop.panasonic.com/support
(U.S.customersonly/
PourlesÉtats-Unisseulement)
Panasonic Corporation of North America
TwoRiverfrontPlaza,Newark,NJ07102-5490
http://shop.panasonic.com
Panasonic Canada Inc.
5770AmblerDrive,Mississauga,OntarioL4W2T3
www.panasonic.com
C
PanasonicCorporation2017
PrintedinJapan/ImpriméauJapon
Pourtouteassistancesupplémentaire,visiter:
www.panasonic.ca/french/support
Ifyouhaveanyquestions,visit:
USA:http://shop.panasonic.com/support
Canada:www.panasonic.ca/english/support
1
DVZE1008Z
2
3 4
VYC1085VFC4605
VFC4430
6 71 2 3 4 5
DVQX1200ZA
F0117KD0
PP
– Pleaseattachthelenstoadust-proofandsplash-
proofdigitalcamera.
– Whendetachingthelensfromthedigitalcamera,take
caretoensurethatsand,dust,splashesofwateretc.,
donotgetintothelensortheterminals.
– Thislensisnotwaterproofandcannotbeusedtorecord
underwater.Forsplash-proofing,thelensisconstructed
toresisttheentryofwater.Ifsplashesofwateretc.do
adheretothelens,wipeafterusewithasoftdrycloth.
• Toimprovethedust-proofingandsplash-proofingofthis
lens,alensmountrubberisusedinthemounting
portion.Afterchangingthelensanumberoftimes,you
mayfindthatthelensmountrubberhasmarkedthe
mountportionofthedigitalcamerabody,whichdoesnot
affectitsperformance.Forinformationonchangingthe
lensmountrubber,contactyournearestServiceCenter.
• Donotpressthelenswithexcessiveforce.
• Whenthereisdirt(water,oil,andfingerprints,etc.)onthesurface
ofthelens,thepicturemaybeaffected.Lightlywipethesurface
ofthelenswithasoft,dryclothbeforeandaftertakingpictures.
• Topreventdustandotherparticlesfromaccumulating
onorenteringthelens,attachthelensrearcapwhen
thelensisnotinuse.
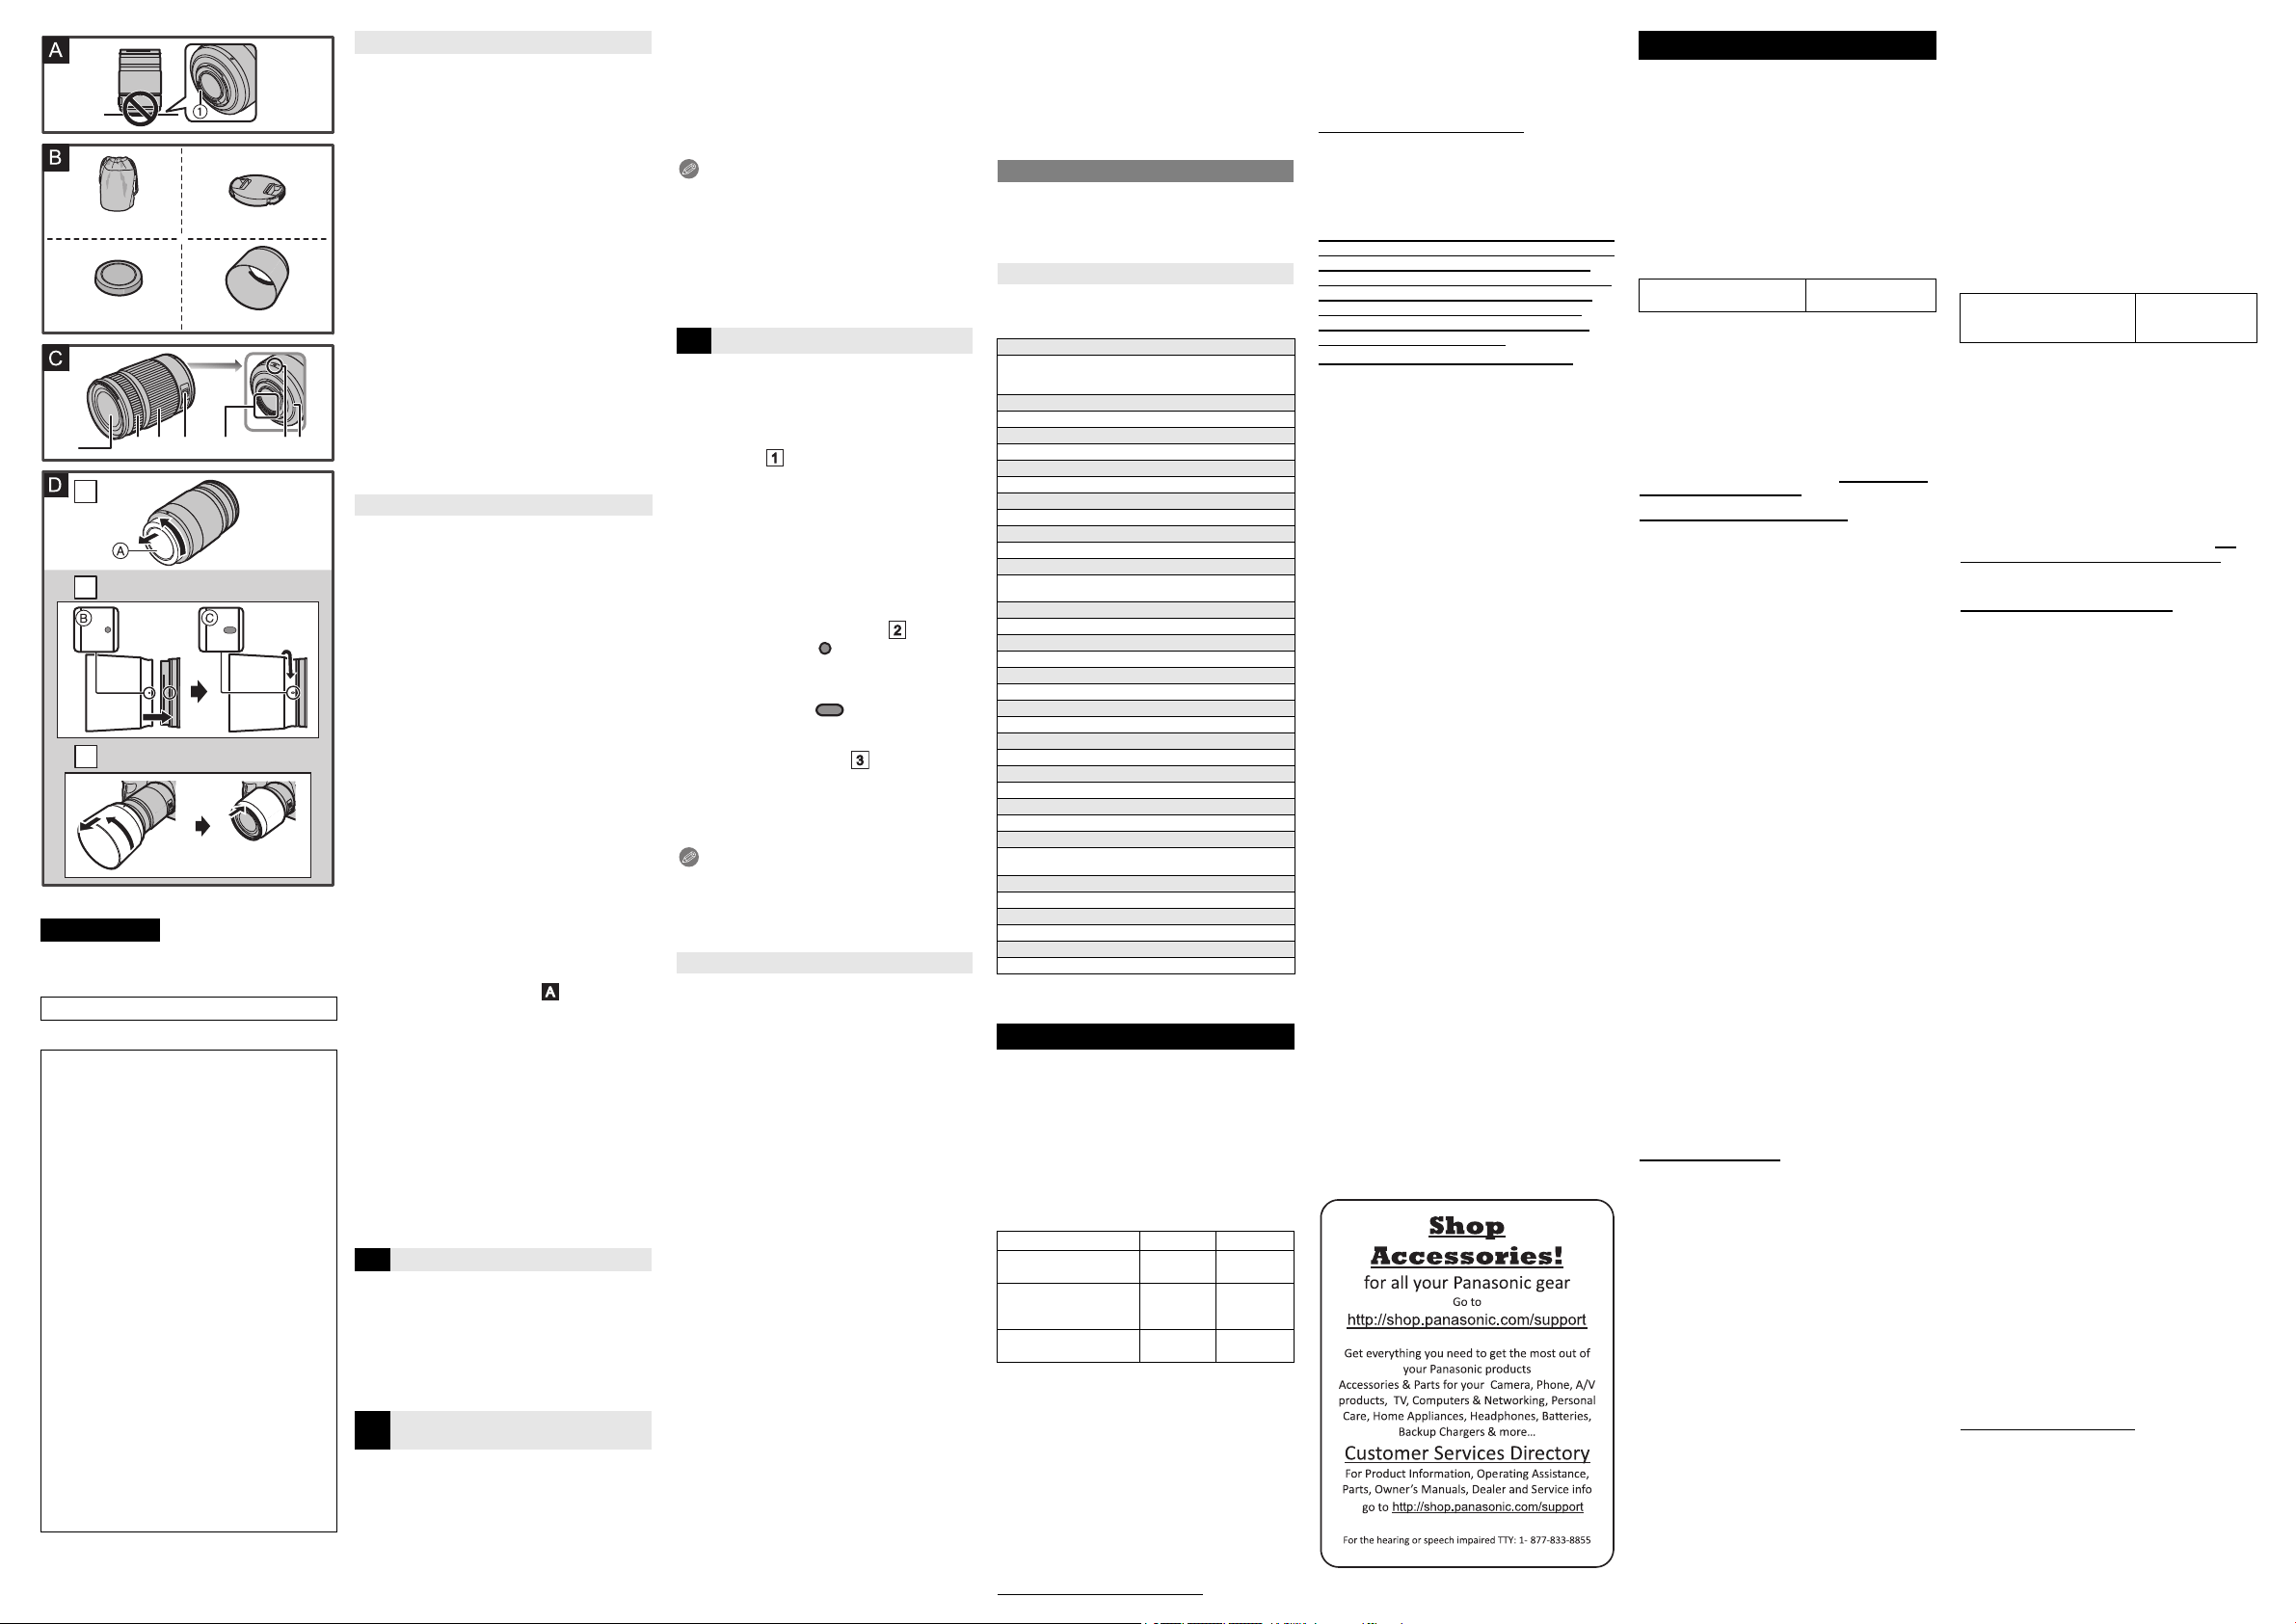
• Toprotectthelenscontactpoints
1
,donotplacethelens
withitsmountsurfacefacingdown.Inaddition,donotallow
thelenscontactpointstobecomedirty.(Seeillustration )
∫
AboutCondensation(FoggingoftheLens)
• Condensationoccurswhentherearedifferencesin
temperatureandhumidityasdescribedbelow.Condensation
cancausethelenstobecomedirtyandleadtomoldand
malfunctioning,soexercisecautioninthefollowingsituations:
– Whenthecameraisbroughtindoorsfromoutside
duringcoldweather
– Whenthecameraisbroughtintoanair-conditionedcar
– Whencoldairfromanairconditionerisdirectlyblown
ontothelens
– Inhumidplaces
• Ifcondensationoccurs,turnthepoweroffandleaveitforabout
twohours.Oncethecameraacclimatizestothesurrounding
temperaturethecondensationwillgoawaynaturally.
ProductnumberscorrectasofJanuary2017.Thesemay
besubjecttochange.
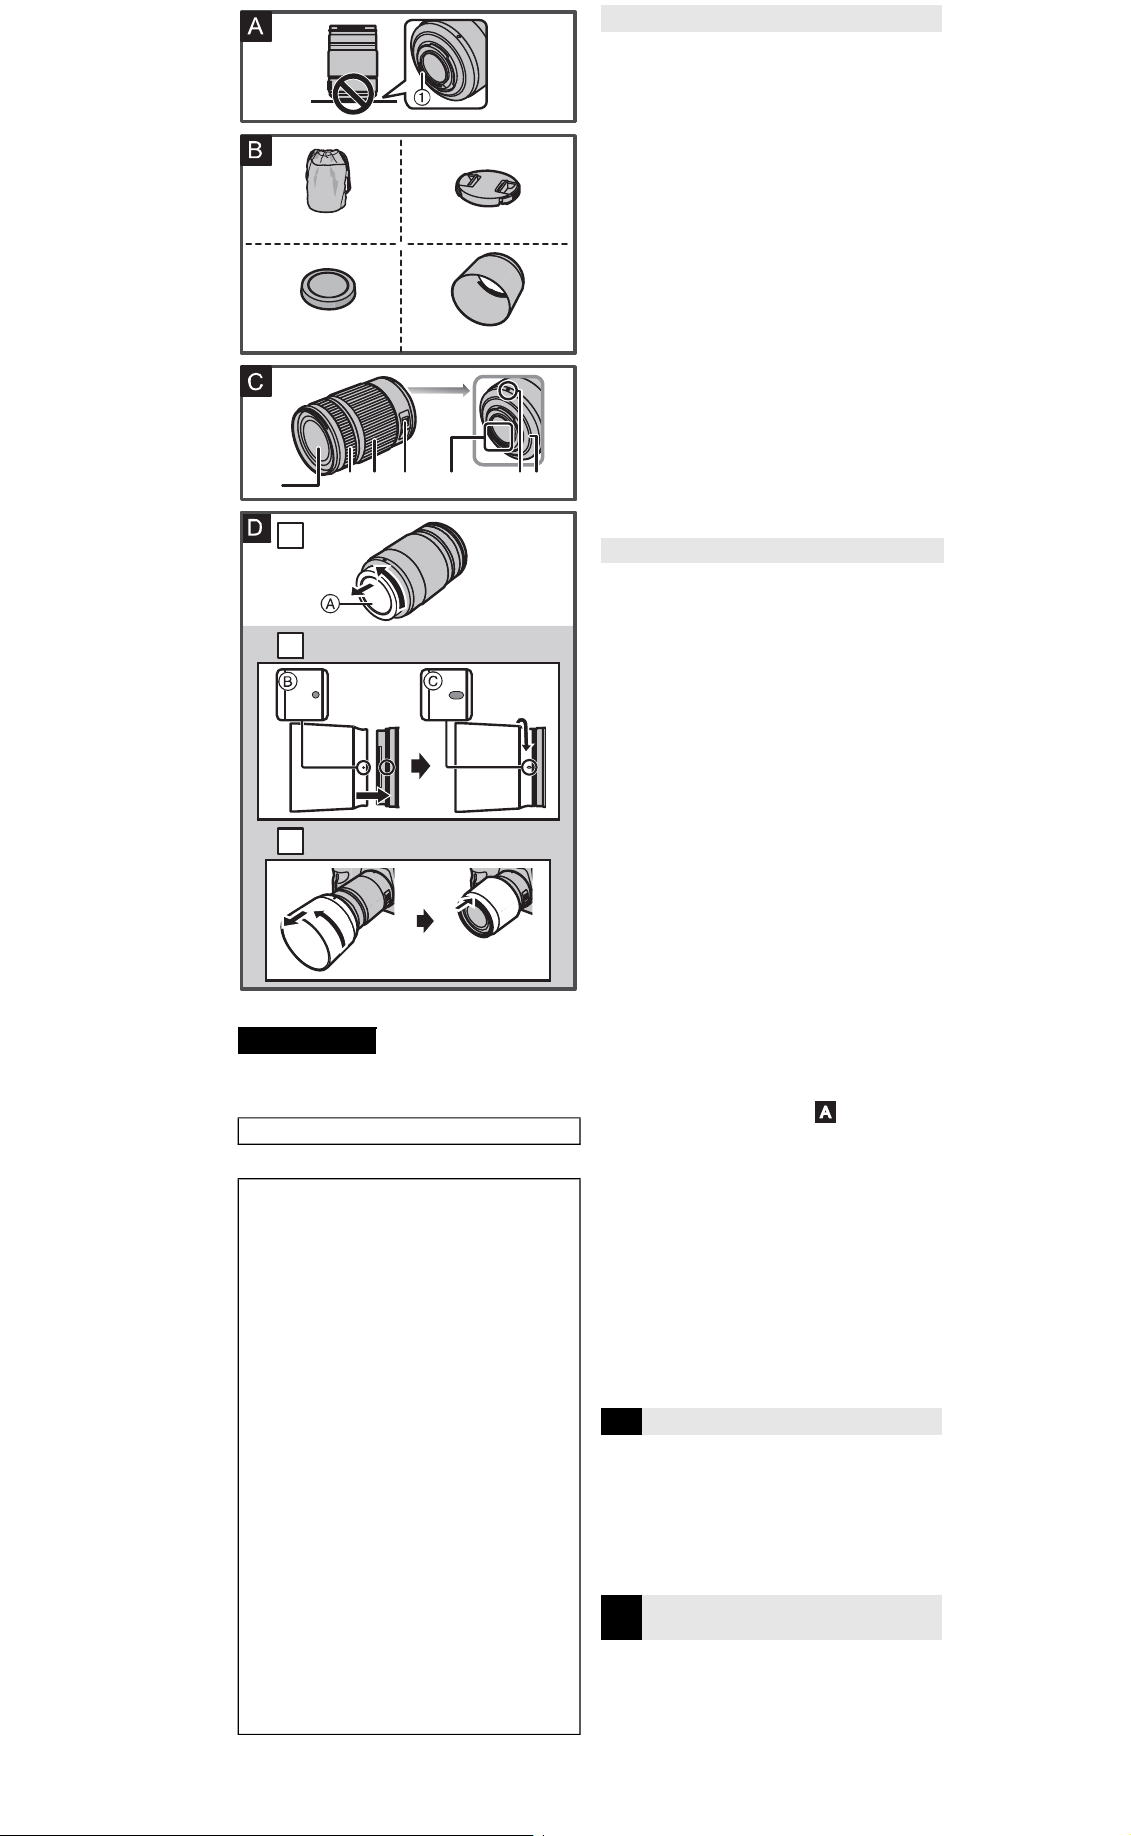
1
LensPouch
2
LensCap
3
LensRearCap
4
LensHood
• Thelensrearcapandlenscapareattachedtothe
interchangeablelensatthetimeofpurchase.
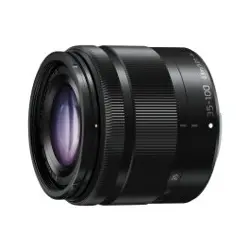
1
Lenssurface
2
Focusring
Rotatetofocuswhentakingpictureswithmanual
focus(MF).
3
Zoomring
Rotatethezoomringwhenyouwishtotakelarge
(tele)orwide(wideangle)pictures.
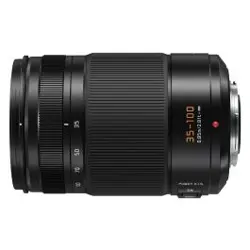
4
[O.I.S.]switch
Whenthelensisattachedtothecamerathestabilizer
functionissettoactivateiftheO.I.S.switchissetto[ON].
• WerecommendsettingtheO.I.S.switchto[OFF]
whenusingatripod.
5
Contactpoints
6
Lensfittingmark
7
Lensmountrubber
Note
• Ifyouzoomafterfocusing,focusingerrorsmayoccur.
Afterzooming,pleaseperformthefocusingagain.
• InveryquietsituationsAutoFocusoperatingsounds
mayberecordedduringmotionpicturerecording.Thisis
notamalfunction.Insuchsituations,switchingto
ManualFocuswillimprovethesituation.
• IfyousettheO.I.S.to[ON]whenrecordingamotion
picture,operatingsoundsmayberecorded.Ifthey
becomebothersome,werecommendsettingtheO.I.S.
switchto[OFF]andmountingthecameraonatripod.
Forinformationonhowtoattachandremovethelens,
refertotheowner’smanualforyourdigitalcamera.
• Beforeattachingordetachingthelens,checkthat
thedigitalcameraisturnedoff.
• Beforeattachingthelenstothedigitalcamera,remove
thelensrearcap
A
byrotatingitinthedirectionofthe
arrow.(Seeillustration )
• Topreventdustandotherparticlesfromaccumulatingon
orenteringthelens,besuretoattachthelenscap/lens
rearcapafterdetachingthelensfromthedigitalcamera.
∫
AttachingFilters
• Vignettingmayoccurifusing2ormorefiltersatthesametime.
• Itispossibletoattachthelenscapwiththefilteralreadyattached.
• Whenusingthelenshoodandafilteratthesametime,
attachthefilterfirst.
• Youcannotattachaconversionlensoradaptortothis
lens.Afiltermaybeused,butattachinganyother
elementmaycausedamagetothelens.
∫
AttachingtheLensHood(SuppliedAccessory)
(Seeillustration )
1
Alignthemark
B
( )onthelenshoodwith
themarkonthetipofthelens.
2
Rotatethelenshoodinthedirectionofthe
arrowuntilitclicksandthenalignthemark
C
( )onthelenshoodwiththemarkon
thetipofthelens.
∫
TemporarilyStoringtheLensHood
(Seeillustration )
1
Turnthelenshoodinthedirectionofthe
arrowtodetachit.
2
Reversethelenshoodandthenattachitin
thesamewayasshownpreviously.
Note
• Whentakingpictureswiththeflashwiththelenshood
attached,thelowerportionofthescreenmayturndark
(vignettingeffect)andthecontroloftheflashmaybe
disabledbecausethephotoflashmaybeobscuredby
thelenshood.Werecommenddetachingthelenshood.
Takecarenottodroporknockthelens.Alsotakecare
nottoputalotofpressureonthelens.
• Takecarenottodropthebagthatyouinsertedthelens
inasitmaystronglyshockthelens.Thecameramay
stopoperatingnormallyandpicturesmaynolongerbe
recorded.Also,thelensmaybedamaged.
• Whencarryingthedigitalcamerawiththelensattached,
holdboththedigitalcameraandthelens.
Whenusingpesticidesandothervolatilesubstancesaround
thecameramakesurethattheydonotgetontothelens.
• Ifsuchsubstancesgetontothelenstheycandamage
theexteriorcaseorcausethepainttopeel.
Donotpointthelensatthesunorotherstronglightsources.
• Thiscouldcausethelenstocollectanexcessiveamount
oflight,resultinginfireandmalfunction.
• Undernocircumstancesshouldtheunitbestoredinany
ofthefollowinglocationssincedoingsomaycause
problemsinoperationormalfunctioning.
– Indirectsunlightoronabeachinsummer
– Inlocationswithhightemperaturesandhumidity
levelsorwherethechangesintemperatureand
humidityareacute
– Inlocationswithhighconcentrationsofsand,dustordirt
– Wherethereisfire
– Nearheaters,airconditionersorhumidifiers
– Wherewatermaymaketheunitwet
– Wherethereisvibration
– Insideavehicle
• Referalsototheowner’smanualofthedigitalcamera.
• Whentheunitisnotgoingtobeusedforaprolonged
period,werecommendstoringwithadesiccant(silica
gel).Failuretodosomayresultinperformancefailure
causedbymold,etc.Itisrecommendedthatyoucheck
theunit’soperationpriortouse.
• Donotleavethelensincontactwithrubberorplastic
productsforextendedperiodsoftime.
• Donottouchthelenscontactpoint.Doingsocancause
failureoftheunit.
• Donotdisassembleoraltertheunit.
Donotusewhiledirectlytouchingthelensatlow
temperaturesforalongperiodoftime.
• Incoldplaces(environmentsbelow0
o
C(32
o
F),suchas
skislopes),prolongeddirectcontactwiththemetalparts
ofthelensmaycauseskininjury.Useglovesorsimilar
whenusingthelensforlongperiods.
Donotusebenzine,thinner,alcoholorothersimilar
cleaningagentstocleanthelensglassorexteriorcabinet.
• Usingsolventscandamagethelensorcausethepainttopeel.
• Wipeoffanydustorfingerprintswithasoft,drycloth.
• Useadry,dustclothtoremovedirtanddustonthelens
mountrubber,zoomring,orfocusring.
• Donotuseahouseholddetergentorachemically
treatedcloth.
Asoundisheardwhenthecameraisturnedonoroff.
Asoundisheardfromthelenswhentakingapicture
ofabrightsubjectsuchaswhenoutdoors.
• Thisisthesoundoflensoraperturemovementandis
notamalfunction.
Specificationsaresubjecttochangewithoutnotice.
INTERCHANGEABLELENSFORDIGITALCAMERA
“LUMIXGXVARIO35-100mm/F2.8
II
/POWERO.I.S.”
B
SuppliedAccessories
C
NamesandFunctionsof
Components
D
Attaching/DetachingtheLens
CautionsforUse
Troubleshooting
Specifications
Focallength
f=35 mmto100 mm
(35 mmfilmcameraequivalent:70 mmto200 mm)
Aperturetype
7 diaphragmblades/circularaperturediaphragm
Maximumaperture
F2.8
Minimumaperturevalue
F22
Lensconstruction
18 elementsin13 groups(2EDlenses,1UEDlens)
Nanosurfacecoating
Yes
Infocusdistance
0.85 m(2.8 feet)to
(fromthefocusdistancereferenceline)
Maximumimagemagnification
0.1
k
(35 mmfilmcameraequivalent:0.2
k
)
Opticalimagestabilizer
Available
[O.I.S.]switch
Available(SwitchingON/OFF)
Mount
“MicroFourThirdsMount”
Angleofview
34
x
(Wide)to12
x
(Tele)
Filterdiameter
58 mm
Max.diameter
Approx.67.4 mm(2.7 inch)
•
Ilestrecommandédelireattentivementcemanuelavant
d’utiliserl’appareiletdeleconserverpourconsultation
ultérieure.
CEQUISUITNES’APPLIQUEQU’AUCANADA.
Évitezd’approcherl’appareildetoutéquipement
magnétisé(fouràmicro-ondes,téléviseur,
équipementdejeuxvidéo,émetteurradio,ligneà
hautetension,etc.).
• N’utilisezpasl’appareilphotoàproximitéd’untéléphone
cellulaire:celapourraitentraînerunbruitnuisibleà
l’imageetauson.
• Advenantlecasoùlefonctionnementdel’appareilserait
dérangéparunchampmagnétique,coupezlecontact,
retirezlabatterieoudébranchezl’adaptateursecteur
pourensuitesoitremettrelabatterieenplace,soit
rebrancherl’adaptateur.Remettezl’appareilenmarche.
L’objectifpeutêtreutilisédepairavecunappareilphoto
numériquecompatibleaveclesystèmedemonture
normalisé“MicroFourThirds
TM
System”(MicroQuatreTiers).
• Ilnepeutpasêtremontésurlesappareilsàmonture
FourThirds
TM
(QuatreTiers).
• L’apparenceetlesspécificationsdesproduitsdécrits
dansleprésentmanuelpeuventdifférerdesproduitsque
vousavezachetésenraisondebonificationsultérieures.
• MicroFourThirds
TM
(MicroQuatreTiers)etlelogoMicro
FourThirdssontdesmarquesdecommerceoudes
marquesdéposéesd’OlympusImagingCorporationau
Japon,auxÉtats-Unis,enUnioneuropéenneetdans
d’autrespays.
• FourThirds
TM
(QuatreTiers)etlelogoFourThirdssont
desmarquesdecommerceoudesmarquesdéposées
d’OlympusImagingCorporationauJapon,auxÉtats-
Unis,enUnioneuropéenneetdansd’autrespays.
• GMICROSYSTEMestunsystèmed’appareilphoto
numériqueàobjectifinterchangeabledeLUMIXbasé
surlanormedusystèmeMicroFourThirds
TM
(Micro
QuatreTiers).
• Lesautresnomsdesystèmesetproduitsmentionnés
danscemanueld’utilisationsonthabituellementdes
marquesdéposéesoudesmarquesdecommercedes
fabricantsquiontdéveloppélesystèmeouleproduit.
∫
Entretiendel’objectif
• Cetobjectifpossèdeundispositifanti-poussièreetanti-
éclaboussure.Lorsquevousl’utilisez,soyezattentifaux
pointssuivants.
Sil’objectifnefonctionnepascorrectement,consultezle
revendeurouvotrecentred’assistanceleplusproche.
– Veuillezinstallerl’objectifsurunappareilphoto
numériqueanti-poussièreetanti-éclaboussure.
– Lorsquevousdétachezl’objectifdel’appareilphoto
numérique,veillezàcequelesable,lapoussière,les
gouttesd’eau,etc.,n’entrentpasencontactavec
l’objectifoulesbornes.
– Cetobjectifn’estpasétancheetnedoitpasêtreutilisé
pourenregistrersousl’eau.Concernantledispositif
anti-éclaboussure,l’objectifestconstruitpourrésister
àl’entréedel’eau.Sidesprojectionsd’eau,etc.,
adhèrentàl’objectif,essuyezaprèsutilisationavecun
chiffondouxetsec.
• Pouraméliorerlaperformanceanti-poussièreetanti-
éclaboussuredecetobjectif,unegarnitureencaoutchouc
estutiliséedanslapartiedemontage.Aprèsavoir
changél’objectifuncertainnombredefois,vouspouvez
constaterquelagarnitureencaoutchoucdel’objectifa
marquélapartiedemontageduboîtierdel’appareilphoto
numérique,cequin’affectepassesperformances.
Pourplusd’informationssurlagarnitureencaoutchouc
del’objectif,contactezvotreserviced’assistance.
• N’appuyezpasavecforcesurl’objectif.
• Lorsqu’iladessalissures(eau,huile,tracesdedoigts,
etc.)surlasurfacedel’objectif,celapeutavoirune
incidencesurl’image.Essuyezlégèrementlasurfacede
l’objectifavecunchiffonsecetdouxavantetaprèsla
prisedephotos.
• Pouréviterquelapoussièreetd'autrescorpsétrangers
s'accumulentoupénètrentàl'intérieurdel'objectif,fixezle
capuchond’objectifarrièrelorsquel'objectifn'estpasutilisé.
• Pourprotégerlespointsdecontactdel'objectif
1
,ne
posezpasl'objectifsurlecôtédesasurfacedemontage.
Faitesensorte,également,quelespointsdecontactnese
salissentpas.(Voirillustration )
∫
Àproposdelacondensation(Objectifembué)
• Ilyaformationdecondensationlorsquelatempératureet
l’humiditéchangentcommesuit.Lacondensationpeut
salirl’objectif,entraînerdelamoisissureetdesproblèmes
defonctionnement.Aussi,est-ilimportantdeprendredes
précautionsdanslescirconstancessuivantes :
– Lorsquel’appareilesttransportédel’extérieurà
l’intérieurpartempsfroid
– Lorsquel’appareilestplacédansunvéhiculeclimatisé
– Lorsquel’airfraisd’unclimatiseurarrivedirectement
surl’objectif
– Lorsquel’appareilestutiliséouplacédansunendroit
humide
• Encasdecondensation,mettezl’appareilphotohors
marcheetlaissez-leainsipendantenviron2 heures.
Lorsquelatempératuredel’appareilphotoserapproche
decelleambiante,labuéedisparaîtnaturellement.
Lescodesduproduitsontcorrectsàcompterdejanvier
2017.Ceux-cisontsusceptiblesd’êtremodifiés.
1
Étuipourobjectif
2
Capuchond’objectif
3
Capuchonarrièred’objectif
4
Parasoleil
• Lecapuchonarrièred’objectifetlecapuchond’objectifsont
fixésàl’objectifinterchangeableaumomentdel’achat.
1
Surfacedel’objectif
2
Baguedemiseaupoint
Faitestournerafindemettreaupointlorsdelaprise
dephotosenmiseaupointmanuelle(MPM).
3
Baguedezoom
Tournezlabaguederéglageduzoompouruneprise
devuerapprochée(téléobjectif)ouàgrand-angle.
4
Commutateur[O.I.S.](S.O.I.)
Lorsquel’objectifestfixéàl’appareilphoto,lafonction
destabilisationoptiquedel’imageestactivéesile
commutateurO.I.S.(S.O.I.)estréglésur[ON](OUI).
• NousvousconseillonsderéglerlecommutateurO.I.S.
(S.O.I.)sur[OFF](NON)lorsquevousutilisezuntrépied.
5
Pointsdecontact
6
Repèrepourlamiseenplacedel’objectif
7
Garnitureencaoutchoucdel’objectif
Nota
• Sivouszoomezaprèsavoirfaitlamiseaupoint,une
erreurdemiseaupointpeutsurvenir.Aprèsavoir
zoomé,veuillezrefairelamiseaupoint.
• Dansunendroittrèssilencieuxlessonsdu
fonctionnementdelamiseaupointautomatiquepeuvent
êtreenregistrésenmêmetempsquelefilm.Ilnes’agit
pasd’undysfonctionnement.Dansdetelscas,passer
enmiseaupointmanuellepeutaméliorerlasituation.
• SivousparamétrezlecommutateurO.I.S.(S.O.I.)sur
[ON](OUI)pourenregistrerunfilm,lessonsde
fonctionnementpeuventêtreenregistrés.S’ils
deviennentgênants,nousvousconseillonsde
paramétrerlecommutateurO.I.S.(S.O.I.)sur[OFF]
(NON)etdemonterl’appareilphotosuruntrépied.
Pourdeplusamplesinformationssurlamanière
d’installeretderetirerl’objectif,consultezlemanuel
d'utilisationdel’appareilphotonumérique.
• Avantd’installerouderetirerl’objectif,vérifiezque
l’appareilphotonumériqueesthorsmarche.
• Avantd’installerl’objectifsurl’appareilphotonumérique,
retirezlecapuchond’objectifarrière
A
enletournant
danslesensdelaflèche.(Voirillustration )
• Pouréviterquelapoussièreetd'autrescorpsétrangers
s'accumulentoupénètrentàl'intérieurdel'objectif,
assurez-vousdefixerlecapuchond’objectif/capuchon
d’objectifarrièreunefoisquel'objectifaétéretiréde
l'appareilphotonumérique.
∫
Fixationdefiltres
• Uneffetdevignettagepeutsurvenirsi2filtresouplus
sontprésentsenmêmetemps.
• Ilestpossibled’installerlecapuchond’objectiffourni
aveclefiltredéjàenplace.
• Pourutiliserleparasoleiletunfiltreenmêmetemps,
installezd'abordlefiltre.
• Vousnepouvezpasinstallerdelentillesd’objectifou
d’adaptateursurcetobjectif.Unfiltrepeutêtreutilisé,
maisinstallerunautreélémentpeutcauserdes
dommagesàl’objectif.
∫
Fixationduparasoleil(Fourni)
(Voirillustration )
1
Alignezlerepère
B
( )présentsurle
parasoleilaveclerepèresituéàl’extrémité
del’objectif.
2
Faitestournerleparasoleildanslesensde
laflèchejusqu’àcequ’ilfasseentendreun
clic,puisalignezlerepère
C
( )présent
surleparasoleilaveclerepèresituéà
l’extrémitédel’objectif.
∫
Rangementtemporaireduparasoleil
(Voirillustration )
1
Tournezleparasoleildanslesensdela
flèchepourleretirer.
2
Retournezleparasoleil,puisfixez-ledela
mêmefaçon,telqu’illustréprécédemment.
Nota
• Lorsquevousprenezdesphotosavecleflashetquele
parasoleilestmonté,lapartieinférieuredel’écranpeut
s’assombrir(effetdevignetage)etlecontrôleduflashpeut
êtreempêchécarl’éclairduflashpeutêtreobscurciparle
parasoleil.Nousvousrecommandonsderetirerleparasoleil.
Prenezsoindenepasfairetombernidecognerl’objectif.
Deplus,nemettezpastropdepressiondessus.
• Attentionànepasfairetomberlesacoùsetrouve
l’objectif,carcelui-cipourraitêtreendommagé.
L’appareilphotopourraitneplusmarchernormalement
etlesimagesneseraientplusenregistrées.
• Lorsquevoustransportezl'appareilphotonumérique
avecl'objectiffixé,tenez-lestouslesdeux.
Sidespesticidesoutouteautresubstancevolatile
sontutilisésprèsdel’appareil,veuillezprotéger
l’objectifcontretouteéclaboussureouvaporisation.
• Sidetellessubstancesatteignentl’objectif,celui-ci
pourraitêtreendommagé,oulapeinturepourraits’écailler.
Nepointezpasl'objectifverslesoleiloud'autres
sourcesintensesdelumière.
• L’objectifpourraitrecueillirunequantitéexcessivede
lumière,causantunfeuetundysfonctionnement.
• Enaucunescirconstancesvousnedevezrangerl’objectif
danslesendroitsindiquésci-dessouscarcelapourraitcauser
desproblèmesd’utilisationoudemauvaisfonctionnement.
– Àlalumièredirectedusoleilousurlaplageenété
– Dansdesendroitsayantdesniveauxdetempératureet
d’humiditéélevésoudansdesendroitsoùles
changementsdetempératureetd’humiditésontprononcés
– Dansdesendroitsayantuneforteconcentrationde
sable,depoussièreoudesaleté
– Oùilyadufeu
– Prèsderadiateurs,climatiseurs,humidificateurs
– Oùl’eaupourraitmouillerl’objectif
– Oùilyadesvibrations
– Àl’intérieurd’unvéhicule
• Reportez-vouségalementaumanueld’utilisationde
l’appareilphoto.
• Sil’appareilnedoitplusêtreutilisépendantunepériode
prolongée,nousvousconseillonsdelerangeravecun
produitdéshydratant(geldesilice).Toutmanquementà
celapourraitprovoquerunepannecauséeparla
moisissure,etc.Nousvousconseillonsdevérifierle
fonctionnementdel’objectifavantdel’utiliser.
• Évitezquel’objectifnesoitencontactavecdesproduitsen
plastiqueouencaoutchoucpendantunelonguepériode.
• Netouchezpaslespointsdecontactdel’objectif.Ceci
pourraitcauserunmauvaisfonctionnementdel’objectif.
• Nedésassemblezninetentezdemodifierl’objectif.
Sousdebassestempératures,nel'utilisezpasentenant,
durantdelongsmoments,l'objectifàmainsnues.
• Danslesendroitsfroids(températureambianteen-dessous
de0
o
C(32
o
F),commesurlespistesdeski),lecontactdirect
etprolongéavecunepiècemétalliquedel'objectifpeut
causerdesblessures.Utilisezdesgantsouquelquechosede
similairepourutiliserl'objectifdurantdelongsmoments.
N’utilisezpasdebenzène,d’alcoolniaucunautre
produitnettoyantsimilairepournettoyerl’appareil.
• L’emploidesolvantspeutendommagerl’objectifoufaire
s’écaillerlapeinture.
• Essuyeztoutepoussièreoutracesdedoigtsavecun
chiffondouxetsec.
• Utilisezunchiffonàpoussièresecpourretirerles
salissuresetlapoussièresurlagarnitureencaoutchoucde
l'objectif,labagueduzoomoulabaguedemiseaupoint.
• N’utilisezpasdedétergentdecuisineoudelingechimique.
Unbruitsefaitentendreàlamiseenmarcheethors
marchedel’appareilphoto.
Unbruitsefaitentendrelorsdelaprisedevued’un
sujetfortementéclairé,commeàl’extérieur.
• Ils’agitdubruitdel’objectifoudumouvementde
l’ouvertureetcen’estpasundéfautdefonctionnement.
Cesspécificationspeuventsubirdeschangementssans
avispréalable.
OBJECTIFINTERCHANGEABLEPOURAPPAREIL
PHOTONUMÉRIQUE
“LUMIXGXVARIO35-100mm/F2.8
II
/S.O.I.PUISSANT”
Overalllength
Approx.99.9 mm(3.9 inch)(fromthetipofthelensto
thebasesideofthelensmount)
Mass(Weight)
Approx.357 g(0.79 lb)
Operatingtemperature
j
10
o
Cto40
o
C(14
o
Fto104
o
F)
Dust-proofandsplash-proof
Available
CANICES-3(B)/NMB-3(B)
Précautionsàprendre
Précautions
FRANÇAIS
B
Accessoiresfournis
C
Nomsetfonctionsdescomposants
D
Fixation/Retraitdel’objectif
Précautionsd’utilisation
Dépannage
Spécifications
Distancefocale
f=35 mmà100 mm
(Équivalentàunfilmde35 mm:70 mmà200 mm)
Typed’ouverture
7 lamellesdediaphragme/diaphragmeàouverturecirculaire
Ouverturemaximale
F2.8
Valeurd’ouvertureminimum
F22
Compositiondel’objectif
18 élémentsen13 groupes
(2 lentillesED,1 lentilleUED)
Nanorevêtement
Oui
Distancedemiseaupoint
0,85 m(2,8 pi)à
(àpartirdelalignederéférencedela
distancedemiseaupoint)
Grossissementmaximumdel’image
0,1
k
(Équivalentàunfilmde35 mm :0,2
k
)
Stabilisateuroptiquedel’image
Disponible
Commutateur[O.I.S.](S.O.I.)
Disponible(CommutationON/OFF)
Monture
“MicroQuatreTiers”(MicroFourThirds)
Angledevue
34
x
(Grand-angle)à12
x
(Téléobjectif)
Diamètredefiltre
58 mm
Diamètremaximum
Environ67,4 mm(2,7 pouces)
Longueurtotale
Environ99,9 mm(3,9 pouces)
(duboutdel’objectifàlabasedemontagedel’objectif)
Poids
Environ357 g(0,79 lb)
Températuredeservice
j
10
o
Cà40
o
C(14
o
Fà104
o
F)
Anti-poussièreetanti-éclaboussure
Oui
Leacuidadosamenteestasinstruccionesantesdeusareste
producto,yguardeestemanualparausarloenelfuturo.
LOSIGUIENTESÓLOINTERESAACANADÁ.
LOSIGUIENTESÓLOSEAPLICAENLOSEE.UU.
CANICES-3(B)/NMB-3(B)
NotasFCC:
Seensayóesteequipoysecomprobóqueestáde
conformidadconloslímitesdeundispositivodigitalde
laclaseB,deacuerdoconlaParte15delasReglas
FCC.
Estoslímitessehanideadoparaproporcionaruna
razonableproteccióncontralasinterferenciasdañinas
enunainstalaciónresidencial.Esteequipogenera,
utilizaypuederadiarenergíadefrecuenciaradioy,por
sinoseinstalayseutilizadeacuerdoconlas
instrucciones,puedeocasionarinterferenciadañinaa
lascomunicacionesradio.Aunquenohaygarantíade
quenopuedatenerlugarinterferenciaenespeciales
instalaciones.Siesteequipocausainterferenciaala
recepciónderadiootelevisiónquepueden
determinarseapagandoyencendiendoelequipo,se
animaalusuariointentarcorregirlainterferencia
tomandounadelasmedidasacontinuación:
• Vuelvaaorientaroacolocarlaantenareceptora.
• Aumentelaseparaciónentreelequipoyelreceptor.
• Conecteelequipoaunatomadeuncircuitodiferente
delqueestáconectadoelreceptor.
• Llamealconcesionarioountécnicoexpertoderadioy
televisiónparaayuda.
Todocambioomodificaciónaesteequiposinautorizar
invalidaráeltítulodelusuarioparahacerfuncionareste
dispositivo.
EstedispositivocumpleconlaParte15delasReglas
FCC.Elfuncionamientoestásujetoalasdos
condicionesacontinuación:(1)Estedispositivopodría
nocausarinterferenciadañinay(2)estedispositivo
tienequeaceptartodalainterferenciarecibida,
incluyendolaquepuedecausarunfuncionamientono
deseado.
Parteresponsable:
PanasonicCorporationofNorthAmerica
TwoRiverfrontPlaza,Newark,NJ07102-5490
Contactoparaatención:
http://shop.panasonic.com/support
1
DVZE1008Z
2
3 4
VYC1085VFC4605
VFC4430
6 71 2 3 4 5
1
2
3
ESPAÑOL
Mantengalaunidadlomáslejosqueseaposiblede
equiposelectromagnéticos(comohornosde
microondas,televisores,vídeojuegos,trasmisores
radio,líneasdealtovoltaje,etc.).
• Noutilicelacámaracercadeteléfonosmóviles,yaque
lodehacerlopuedeproducirruidoqueafectará
negativamentealasimágenesyelsonido.
• Silacámaraquedaafectadanegativamenteporunequipo
electromagnéticoydejadefuncionarcorrectamente,
apaguelacámarayquitelabateríay/oeladaptadordeCA
conectado.Luegovuelvaainsertarlabateríay/ovuelvaa
conectareladaptadordeCAyenciendalacámara.
Elobjetivopuedeusarseconunacámaradigital
compatibleconelestándardemontajedeobjetivosdel
“MicroFourThirds
TM
System”.
• Nosepuedemontarenunacámaraconestándarde
soporteFourThirds
TM
.
• Easpectoylasespecificacionesdelosproductosdescritos
enestemanualpuedendiferirdelosproductosrealesque
ustedhacompradodebidoaaumentossucesivos.
• EllogotipoMicroFourThirds
TM
yMicroFourThirdsson
marcascomercialesomarcascomercialesregistradas
deOlympusImagingCorporation,enJapón,Estados
Unidos,laUniónEuropeayotrospaíses.
• EllogotipoFourThirds
TM
yFourThirdssonmarcas
comercialesomarcascomercialesregistradasde
OlympusImagingCorporation,enJapón,Estados
Unidos,laUniónEuropeayotrospaíses.
• GMICROSYSTEMesunsistemadecámaradigitalcon
objetivointercambiabledeLUMIXbasadoenelestándar
MicroFourThirdsSystem.
• Losnombresdelossistemasyproductosquese
mencionanenestasinstruccionesgeneralmenteson
marcascomercialesregistradasomarcascomerciales
delosfabricantesquedesarrollaronelsistemao
productoencuestión.
∫
Atencióndelobjetivo
• Estalentetieneunaconstrucciónconresistenciaal
polvoylassalpicaduras.Alusarla,tengacuidadoconlo
siguiente.
Silalentenoestáfuncionandocorrectamente,consulte
asudistribuidoroasucentrodeserviciomáscercano.
– Coloquelalenteenunacámaradigitalconresistencia
alpolvoylassalpicaduras.
– Alretirarlalentedelacámaradigital,tengacuidadoy
asegúresedequelaarena,polvo,salpicadurasde
agua,etc.noentrenenlalenteolosterminales.
– Estalentenoesimpermeableynosepuedeusar
paragrabarabajodelagua.Paralaresistenciaa
salpicaduras,lalenteestáconstruidapararesistirla
entradadeagua.Silassalpicadurasdeagua,etc.no
seadhierenalalente,límpieladespuésdeusarlacon
unpañosuaveyseco.
• Paramejorarlafunciónderesistenciaalpolvoyla
salpicaduradeestalente,seusaunagomademontaje
delalenteenlapartedemontaje.Luegodecambiarla
lentevariasveces,puedeencontrarquelagomade
montajedelalentehayamarcadolapartedemontaje
delcuerpodelacámaradigital,loquenoafectasu
rendimiento.
Paraobtenerinformaciónsobrecómocambiarlagoma
demontajedelalente,comuníqueseconelcentrode
serviciomáscercano.
• Noejercedemasiadapresiónenelobjetivo.
• Cuandohaysuciedad(agua,aceite,huellasdactilares,
etc.)enlasuperficiedelobjetivo,laimagenpuedesalir
afectada.Limpieligeramenteconunpañoblandoyseco
antesydespuésdetomarlasimágenes.
• Paraevitarqueseintroduzcanoacumulenpolvoyotras
partículasenlalente,instalelatapatraseradeesta
cuandonolautilice.
• Paraprotegerlospuntosdecontactodelalente
1
,no
lacoloqueconlasuperficiedemontajeorientadahacia
abajo.Eviteademásquelospuntosdecontactodela
lenteseensucien.(Verilustración )
∫
Acercadelacondensación
(Empañamientodelobjetivo)
• Lacondensaciónocurrecuandoseencuentrauna
diferenciaenlatemperaturayhumedadcomose
describeabajo.Lacondensaciónpuedehacerensuciar
elobjetivoyproducirhongosyunfuncionamiento
defectuoso,porlotantopongacuidadoenlas
situacionesacontinuación:
– Cuandollevalacámaraencasadesdeelairelibre
duranteuntiempofrío
– Cuandollevalacámaradentrodeuncocheconaire
acondicionado
– Cuandosoplaenelobjetivoairefríodesdeun
acondicionadordeaire
– Enlugareshúmedos
• Siocurrecondensación,apaguelaalimentaciónyla
dejeasídurantedoshoras.Unavezdequelacámara
sehayaaclimatadoalatemperaturaambienteen
empañamientodesaparecenaturalmente.
Númerosdeproductoscorrectosapartirdeenerode2017.
Puedenestarsujetosacambio.
1
Estuchedelalente
2
Tapadelobjetivo
3
Tapatraseradelobjetivo
4
Viseradelobjetivo
• Latapatraseradelobjetivoy
latapadelobjetivo
intercambiablealmomentodelacompra.
1
Superficiedelobjetivo
2
Anillodelenfoque
Gireparaenfocarcuandotomefotografíasconel
enfoquemanual(MF).
3
Anillodelzoom
Gireelanillodelzoomcuandoquieretomar
imágenesgrandes(teleobjetivo)oanchas
(granangular).
Informaciónparasuseguridad
Prevencióncontralasaverías
B
Accesoriossuministrados
C
Nombresyfuncionesdelos
componentes
4
Interruptor[O.I.S.]
Cuandoalacámaraestáunidoelobjetivo,está
ajustadalafunciónestabilizadoraparaversiel
interruptorO.I.S.estáajustadoen[ON].
• LerecomendamosqueajusteelinterruptorO.I.S.a
[OFF]cuandousauntrípode.
5
Puntodecontacto
6
Marcaparaajustarelobjetivo
7
Gomademontajedelalente
Nota
• Sihacezoomdespuésdehacerenfoque,pueden
ocurrirerroresdeenfoque.Luegodehacerzoom,
realicedenuevoelenfoque.
• Ensituacionesmuytranquilasesposiblequesegrabe
elsonidodefuncionamientodelenfoqueautomático
durantelagrabacióndeunapelícula.Estonosignifica
unmalfuncionamiento.Entalessituaciones,sicambiaa
enfoquemanualmejorarálasituación.
• SiestableceO.I.S.a[ON]cuandograbaunapelícula,es
posiblequesegrabeelruidodefuncionamiento.Sile
molesta,lerecomendamosqueestablezcaelinterruptor
O.I.S.a[OFF]einstalelacámaraenuntrípode.
Paraobtenerinformaciónsobrecómocolocary
retirarlalente,consultelasinstruccionesde
funcionamientodesucámaradigital.
• Antesdecolocaroquitarlalente,compruebequela
cámaradigitalestáapagada.
• Antesdecolocarlalenteenlacámaradigital,quitela
tapatraseradelalente
A
girándolaenelsentidodela
flecha.
(Verilustración )
• Paraevitarqueseintroduzcanoacumulenpolvoyotras
partículasenlalente,noolvideinstalarlatapatraserade
lalenteunavezquelahayaretiradodelacámaradigital.
∫
Unióndelosfiltros
• Sepodríangenerarviñetassiseusan2omásfiltrosalavez.
• Sepuedecolocarlatapadelobjetivoconelfiltroyacolocado.
• Siutilizalaviseradelalenteyunfiltroalmismotiempo,
instaleelfiltroenprimerlugar.
• Noconsigueacoplarunobjetivodeconversióno
adaptadoraesteobjetivo.Puedeusarseunfiltro,pero
acoplarcualquierotroelementopuededañarelobjetivo.
∫
Unióndelaviseradelobjetivo(Accesorio
suministrado)(Verilustración )
1
Alineelamarca
B
( )enlaviseradela
lenteconlamarcaenelextremodelalente.
2
Girelaviseradelalenteenladirecciónde
laflechahastaquehagaclicydespués
alineelamarca
C
( )enlaviseradela
lenteconlamarcaenelextremodelalente.
∫
Almacenamientotemporaldelaviseradel
objetivo(Verilustración )
1
Girelaviseradelalenteenelsentidodela
flechapararetirarla.
2
Vuelquelaviseradelobjetivoy,luego,
únaladelamismamaneraquelamostrada
anteriormente.
Nota
• Cuandotomalasimágenesconelflashytieneunidala
viseradelobjetivo,laporcióninferiordelapantalla
podríaponerseoscura(efectodeviñeteado)yelcontrol
delflashpodríainhabilitarsedebidoaqueéstepodría
seroscurecidoporlamismavisera.Lerecomendamos
quequitedichavisera.
Tengacuidadodenohacercaerelobjetivonile
choquecontra.Asimismotengacuidadodeno
presionarlodemasiado.
• Tengacuidadodenohacercaerlabolsaenlaquecabeel
objetivo.Éstepodríadañarse,lacámarapodríadejarde
funcionarnormalmenteylasimágenesyapodríannograbarse.
• Cuandollevelacámaradigitalconelobjetivomontado,
sostengalacámaradigitalylalentealavez.
Cuandousapesticidasyotrassubstanciasvolátiles
alrededordelacámaratengacuidadodequenoentre
enelobjetivo.
• Sidichassubstanciascaenenelobjetivo,éstaspueden
dañarloohacerdesconcharsubarniz.
Noapunteconelobjetivoalsoluotrasfuentesdeluz
intensa.
• Estopodríahacerqueelobjetivorecogierademasiada
luz,loquepodríaprovocarunincendioyunaavería.
• Deningunamaneralaunidaddebeserusadaoalmacenada
enunodelossiguienteslugaresyaquelodehacerlopodría
perjudicarlaoproducirunfuncionamientodefectuoso.
– Bajolaluzdirectadelsolobienalolargodelacosta
duranteelverano
– Enlugaresdondehayaaltastemperaturasoaltos
nivelesdehumedadobiendondeseanrepentinoslos
cambiosdetemperaturayhumedad
– Enlugaresdondehayaaltasconcentracionesde
arena,polvoosuciedad
– Dondehayallamas
– Cercadecalefactores,acondicionadoresdeaireo
humedecedores
– Dondeelaguapuedehacermojarlaunidad
– Dondehayavibraciones
– Dentrodeunvehículo
• Serefieratambiénalasinstruccionesdefuncionamiento
delacámaradigital.
• Cuandonohadeserusadalaunidadporunperíodo
prolongado,lerecomendamosguardarconundesecante
(silicagel).Elhechodenohacerlopodríaocasionaruna
averíacausadaporelmohoetc.Serecomiendaque
compruebeelfuncionamientodelaunidadantesdeusarla.
• Nodejeelobjetivoencontactoconproductosde
plásticodurantelargosperíodosdetiempo.
• Notoqueloscontactoseléctricosdelaunidad.Lode
hacerlopuedecausaraveríaenlaunidad.
• Nodesmontenimodifiquelaunidad.
Nolautilicesivaatocardirectamentelalenteabajas
temperaturasduranteunperiododetiempoprolongado.
• Enlugaresfríos(entornospordebajode0
o
C(32
o
F),
comolaspistasdeesquí),elcontactodirectoprolongado
conloscomponentesmetálicosdelalentepuedeprovocar
lesionesenlapiel.Utiliceguantesoalgosimilarcuando
utilicelalenteduranteperiodosprolongados.
Noutilicegasolina,diluyente,alcoholuotrosagentes
delimpiezaparecidosparalimpiarlaunidad.
• Elhechodeusardisolventespuededañarelobjetivoy
hacerdesconcharsubarniz.
• Quitecualquierindiciodepolvoohuellasdactilarescon
unpañoblandoyseco.
• Useunpañosecoparasacarlasuciedadyelpolvode
lagomademontajedelalente,elanillodezoomyel
anillodeenfoque.
• Nousedetergentesparacocinaounpañotratadoquímicamente.
Seoyeunsonidocuandoseenciendeoseapagalacámara.
Seescuchaunsonidodesdelalentealtomarlaimagende
unsujetobrillantecomoenexteriores.
• Ésteeselsonidodelobjetivooelmovimientode
aberturaynoesunfuncionamientodefectuoso.
Lasespecificacionesestánsujetasacambiosinprevioaviso.
ÓPTICAINTERCAMBIABLEPARACÁMARADIGITAL
“LUMIXGXVARIO35-100mm/F2.8
II
/POWERO.I.S.”
LimitedWarranty
LimitedWarrantyCoverage(ForUSAOnly)
Ifyourproductdoesnotworkproperlybecauseofa
defectinmaterialsorworkmanship,Panasonic
CorporationofNorthAmerica(referredtoas“the
warrantor”)will,forthelengthoftheperiodindicatedon
thechartbelow,whichstartswiththedateoforiginal
purchase(“warrantyperiod”),atitsoptioneither(a)
repairyourproductwithneworrefurbishedparts,(b)
replaceitwithaneworarefurbishedequivalentvalue
product,or(c)refundyourpurchaseprice.Thedecision
torepair,replaceorrefundwillbemadebythewarrantor.
Duringthe“Labor”warrantyperiodtherewillbe
nochargeforlabor.Duringthe“Parts”warranty
period,therewillbenochargeforparts.This
LimitedWarrantyexcludesbothpartsandlabor
fornon-rechargeablebatteries,antennas,and
cosmeticparts(cabinet).Thiswarrantyonly
appliestoproductspurchasedandservicedinthe
UnitedStates.Thiswarrantyisextendedonlyto
theoriginalpurchaserofanewproductwhichwas
notsold“asis”.
D
Uniryquitarelobjetivo
Precaucionesparaeluso
Búsqueda de averías
Especificaciones
Longitudfocal
f=35 mma100 mm
(Igualaunacámaradepelículade35 mm:de70 mma
200 mm)
Tipodeabertura
7 aspasdediafragma/Diafragmadeaperturacircular
Aperturamáxima
F2.8
Valordeaberturamínimo
F22
Estructuradelobjetivo
18 elementosen13 grupos(2lentesED,1lenteUED)
RevestimientodesuperficieNano
Sí
Enladistanciadelenfoque
0,85 m(2,8 pies)a
(desdelalíneadereferenciadeladistanciadeenfoque)
Máximaampliacióndelaimagen
0,1k(Igualaunacámaradepelículade35 mm:0,2k)
Estabilizadorópticodelaimagen
Disponible
Interruptor[O.I.S.]
Disponible(ENCENDER/APAGAR)
Soporte
“MicroFourThirdsMount”
Ángulovisual
34x(Granangular)a12x(Teleobjetivo)
Diámetrodelfiltro
58 mm
Diámetromáx.
Aprox.67,4 mm(2,7 pulgadas)
Longitudtotal
Aprox.99,9 mm(3,9 pulgadas)(desdelapuntadel
objetivohastalabaselateraldelamonturadelobjetivo)
Peso
Aprox.357 g(0,79 lb)
Temperaturadefuncionamiento
j10 oCa40 oC(14 oFa104 oF)
Resistenciaalpolvoyalassalpicaduras
Sí
ONLYFORU.S.A.
PanasonicProductsLimitedWarranty
Productorpartname
Parts Labor
InterchangeableLens
forDigitalCamera
1Year 1Year
AllincludedAccessories
(ExceptNon-
RechargeableBatteries)
90Days
Not
Applicable
OnlyNon-
RechargeableBatteries
10Days
Not
Applicable
Mail-InService--OnlineRepairRequest
OnlineRepairRequest
Tosubmitanewrepairrequestandforquick
repairstatusvisitourWebSiteat
http://shop.panasonic.com/support.
Whenshippingtheunit,carefullypack,includeall
suppliedaccessorieslistedintheOwner’s
Manual,andsenditprepaid,adequatelyinsured
andpackedwellinacartonbox.Whenshipping
LithiumIonbatteriespleasevisitourWebSiteat
http://shop.panasonic.com/supportasPanasonic
iscommittedtoprovidingthemostuptodate
information.Includealetterdetailingthe
complaint,areturnaddressandprovidea
daytimephonenumberwhereyoucanbe
reached.Avalidregisteredreceiptisrequired
undertheLimitedWarranty.
IFREPAIRISNEEDEDDURINGTHEWARRANTY
PERIOD,THEPURCHASERWILLBEREQUIRED
TOFURNISHASALESRECEIPT/PROOFOF
PURCHASEINDICATINGDATEOFPURCHASE,
AMOUNTPAIDANDPLACEOFPURCHASE.
CUSTOMERWILLBECHARGEDFORTHE
REPAIROFANYUNITRECEIVEDWITHOUT
SUCHPROOFOFPURCHASE.
LimitedWarrantyLimitsandExclusions
ThiswarrantyONLYCOVERSfailuresdueto
defectsinmaterialsorworkmanship,andDOES
NOTCOVERnormalwearandtearorcosmetic
damage.ThewarrantyALSODOESNOT
COVERdamageswhichoccurredinshipment,or
failureswhicharecausedbyproductsnot
suppliedbythewarrantor,orfailureswhichresult
fromaccidents,misuse,abuse,neglect,
mishandling,misapplication,alteration,faulty
installation,set-upadjustments,misadjustmentof
consumercontrols,impropermaintenance,power
linesurge,lightningdamage,modification,
introductionofsand,humidityorliquids,
commercialusesuchashotel,office,restaurant,
orotherbusinessorrentaluseoftheproduct,or
servicebyanyoneotherthanaFactoryService
CenterorotherAuthorizedServicer,ordamage
thatisattributabletoactsofGod.
THEREARENOEXPRESSWARRANTIES
EXCEPTASLISTEDUNDER“LIMITED
WARRANTYCOVERAGE”.
THEWARRANTORISNOTLIABLEFOR
INCIDENTALORCONSEQUENTIAL
DAMAGESRESULTINGFROMTHEUSEOF
THISPRODUCT,ORARISINGOUTOFANY
BREACHOFTHISWARRANTY.
(Asexamples,thisexcludesdamagesforlost
time,traveltoandfromtheservicer,lossofor
damagetomediaorimages,dataorother
memoryorrecordedcontent.Theitemslistedare
notexclusive,butforillustrationonly.)
ALLEXPRESSANDIMPLIEDWARRANTIES,
INCLUDINGTHEWARRANTYOF
MERCHANTABILITY,ARELIMITEDTOTHE
PERIODOFTHELIMITEDWARRANTY.
Somestatesdonotallowtheexclusionor
limitationofincidentalorconsequentialdamages,
orlimitationsonhowlonganimpliedwarranty
lasts,sotheexclusionsmaynotapplytoyou.
Thiswarrantygivesyouspecificlegalrightsand
youmayalsohaveotherrightswhichvaryfrom
statetostate.Ifaproblemwiththisproduct
developsduringorafterthewarrantyperiod,you
maycontactyourdealerorServiceCenter.Ifthe
problemisnothandledtoyoursatisfaction,then
writeto:
ConsumerAffairsDepartment
PanasonicCorporationofNorthAmerica
661IndependencePkwy
Chesapeake,VA23320
PARTSANDSERVICE,WHICHARENOT
COVEREDBYTHISLIMITEDWARRANTY,ARE
YOURRESPONSIBILITY.
AsofJuly2015
PanasonicCanadaInc.
5770AmblerDrive,Mississauga,OntarioL4W2T3
PANASONICPRODUCT–LIMITED
WARRANTY
PanasonicCanadaInc.warrantsthisproductto
befreefromdefectsinmaterialandworkmanship
undernormaluseandforaperiodasstated
belowfromthedateoforiginalpurchaseagrees
to,atitsoptioneither(a)repairyourproductwith
neworrefurbishedparts,(b)replaceitwithanew
orarefurbishedequivalentvalueproduct,or(c)
refundyourpurchaseprice.Thedecisionto
repair,replaceorrefundwillbemadeby
PanasonicCanadaInc.
Thiswarrantyisgivenonlytotheoriginal
purchaser,orthepersonforwhomitwas
purchasedasagift,ofaPanasonicbrandproduct
mentionedabovesoldbyanauthorized
PanasonicdealerinCanadaandpurchasedand
usedinCanada,whichproductwasnotsold“as
is”,andwhichproductwasdeliveredtoyouin
newconditionintheoriginalpackaging.
INORDERTOBEELIGIBLETORECEIVE
WARRANTYSERVICEHEREUNDER,APURCHASE
RECEIPTOROTHERPROOFOFDATEOF
ORIGINALPURCHASE,SHOWINGAMOUNTPAID
ANDPLACEOFPURCHASEISREQUIRED
LIMITATIONSANDEXCLUSIONS
ThiswarrantyONLYCOVERSfailuresdueto
defectsinmaterialsorworkmanship,andDOES
NOTCOVERnormalwearandtearorcosmetic
damage.ThewarrantyALSODOESNOTCOVER
damageswhichoccurredinshipment,orfailures
whicharecausedbyproductsnotsuppliedby
PanasonicCanadaInc.,orfailureswhichresultfrom
accidents,misuse,abuse,neglect,mishandling,
misapplication,alteration,faultyinstallation,set-up
adjustments,misadjustmentofconsumercontrols,
impropermaintenance,improperbatteries,power
linesurge,lightningdamage,modification,
introductionofsand,humidityorliquids,commercial
usesuchashotel,office,restaurant,orother
businessorrentaluseoftheproduct,orserviceby
anyoneotherthanaAuthorizedServicer,ordamage
thatisattributabletoactsofGod
.
Drycellbatteries,printerinkcartridgeandpaperare
alsoexcludedfromcoverageunderthiswarranty.
Rechargeablebatteriesarewarrantedforninety
(90)daysfromdateoforiginalpurchase.
THISEXPRESS,LIMITEDWARRANTYISIN
LIEUOFALLOTHERWARRANTIES,EXPRESS
ORIMPLIED,INCLUDINGANYIMPLIED
WARRANTIESOFMERCHANTABILITYAND
FITNESSFORAPARTICULARPURPOSE.IN
NOEVENTWILLPANASONICCANADAINC.BE
LIABLEFORANYSPECIAL,INDIRECTOR
CONSEQUENTIALDAMAGESRESULTING
FROMTHEUSEOFTHISPRODUCTOR
ARISINGOUTOFANYBREACHOFANY
EXPRESSORIMPLIEDWARRANTY.
(Asexamples,thiswarrantyexcludesdamages
forlosttime,traveltoandfromtheAuthorized
Servicer,lossofordamagetomediaorimages,
dataorothermemoryorrecordedcontent.This
listofitemsisnotexhaustive,butforillustration
only.)
Incertaininstances,somejurisdictionsdonotallowthe
exclusionorlimitationofincidentalorconsequential
damages,ortheexclusionofimpliedwarranties,sothe
abovelimitationsandexclusionsmaynotbeapplicable.
Thiswarrantygivesyouspecificlegalrightsandyou
mayhaveotherrightswhichvarydependingonyour
provinceorterritory.
WARRANTYSERVICE
Forproductoperation,repairsandinformation
assistance,pleasevisitourSupportpage:
www.panasonic.ca/english/support
Garantielimitée
PanasonicCanadaInc.
5770,AmblerDrive,Mississauga(Ontario)L4W2T3
PRODUITPANASONIC–GARANTIELIMITÉE
PanasonicCanadaInc.garantitqueceproduitest
exemptdedéfautsdematériauxetdemain-d’œuvre
dansuncontexted’utilisationnormalependantla
périodeindiquéeci-aprèsàcompterdeladate
d’achatoriginalet,dansl’éventualitéd’une
défectuosité,accepte,àsadiscrétion,de(a)réparer
leproduitavecdespiècesneuvesouremisesà
neuf,(b)remplacerleproduitparunproduitneufou
remisàneufd’unevaleuréquivalenteou(c)
rembourserleprixd’achat.Ladécisionderéparer,
remplacerourembourserappartientàPanasonic
CanadaInc.
Laprésentegarantien’estfourniequ’àl’acheteur
originald’undesproduitsdemarquePanasonic
indiquésplushaut,ouàlapersonnel’ayantreçu
encadeau,venduparundétaillantPanasonic
agrééauCanadaetutiliséauCanada.Leproduit
nedoitpasavoirété“vendutelquel”etdoitavoir
étélivréàl’étatneufdanssonemballage
d’origine.
POURÊTREADMISSIBLEAUXSERVICESAU
TITREDELAPRÉSENTEGARANTIE,LA
PRÉSENTATIOND’UNREÇUD’ACHATOUDE
TOUTEAUTREPIÈCEJUSTIFICATIVEDELA
DATED’ACHATORIGINAL,INDIQUANTLE
MONTANTPAYÉETLELIEUDEL’ACHAT,EST
REQUISE.
RESTRICTIONSETEXCLUSIONS
LaprésentegarantieCOUVRESEULEMENTles
défaillancesattribuablesàundéfautdes
matériauxouàunvicedefabricationetNE
COUVREPASl’usurenormalenilesdommages
esthétiques.LaprésentegarantieNECOUVRE
PASNONPLUSlesdommagessubispendantle
transport,lesdéfaillancescauséespardes
produitsnonfournisparPanasonicCanadaInc.ni
cellesrésultantd’unaccident,d’unusageabusif
ouimpropre,denégligence,d’unemanutention
inadéquate,d’unemauvaiseapplication,d’une
altération,d’uneinstallationouderéglages
impropres,d’unmauvaisréglagedescontrôlesde
l’utilisateur,d’unmauvaisentretien,depiles
inadéquates,d’unesurtensiontemporaire,dela
foudre,d’unemodification,delapénétrationde
sable,deliquidesoud’humidité,d’uneutilisation
commerciale(dansunhôtel,unbureau,un
restaurantoutoutautreusageparaffairesouen
location),d’uneréparationeffectuéeparune
entitéautrequ’uncentredeservicePanasonic
agrééouencored’unecatastrophenaturelle.
Lespilessèches,lescartouchesd’encreetle
papiersontégalementexclusdelaprésente
garantie.
Lespilesrechargeablessontcouvertesparune
garantiedequatre-vingt-dix(90)joursàcompter
deladated’achatoriginal.
CETTEGARANTIELIMITÉEETEXPRESSE
REMPLACETOUTEAUTREGARANTIE,
EXPRESSEOUIMPLICITE,INCLUANTLES
GARANTIESIMPLICITESDUCARACTÈRE
ADÉQUATPOURLACOMMERCIALISATIONET
UNUSAGEPARTICULIER.PANASONIC
CANADAINC.N’AURAD’OBLIGATIONEN
AUCUNECIRCONSTANCEPOURTOUT
DOMMAGEDIRECT,INDIRECTOU
CONSÉCUTIFRÉSULTANTDEL’UTILISATION
DECEPRODUITOUDÉCOULANTDETOUTE
DÉROGATIONÀUNEGARANTIEEXPRESSE
OUIMPLICITE.(Àtitred’exemples,cettegarantie
exclutlesdommagesrelatifsàunepertede
temps,letransportjusqu’àetdepuisuncentrede
serviceagréé,laperteouladétériorationde
supportsoud’images,dedonnéesoudetout
autrecontenuenmémoireouenregistré.Cette
listen’estpasexhaustiveetn’estfourniequ’àdes
finsexplicatives.)
Certainesjuridictionsnereconnaissentpasles
exclusionsoulimitationsdedommagesindirects
ouconsécutifs,oulesexclusionsdegaranties
implicites.Dansdetelscas,leslimitations
stipuléesci-dessuspeuventnepasêtre
applicables.Laprésentegarantievousconfère
desdroitsprécis;vouspourriezaussiavoir
d’autresdroitspouvantvarierselonvotreprovince
outerritoirederésidence.
SERVICESOUSGARANTIE
Pourtoutrenseignementsurlesproduits,
réparationouassistancetechnique,veuillez
visiternotrepageSoutien :
www.panasonic.ca/french/support
ONLYFORCANADA
InterchangeableLens
forDigitalCamera
One(1)year,parts
andlabour
Objectifinterchangeable
pourappareilphoto
numérique
Un(1)an,pièces
etmain-d’œuvre