Loading ...
Loading ...
Loading ...
Step 1. Remove Packaging
-
Ensure all packaging has been removed.
Step 2. Position Machine
-
Ensure the machine is positioned onto a
dry, stable, flat & horizontal benchtop.
Step 3. Wash & Dry Parts
- Wash the parts listed below in warm
water with a mild detergent:
Stainless Steel Milk Jug
Stainless Steel One Cup Filter Basket
Stainless Steel Two Cup Filter Basket
Hardened Stainless Steel Top Burr
Water Reservoir
Group Handle
Bean Hopper
Tamper
- Rinse & allow thorough air drying.
Step 4. Place Accessories
- Accessories Storage Home behind
the Drip Tray for the Cleaning Brush
& Cleaning Pin. On the left is storage
space for nesting the Cleaning Disc,
One & Two Cup Filter Baskets.
- Insert the Grind Bin in the space
provided on the left side of the Drip Tray.
- Place the Tamper in the detail provided
on the Warming Plate.
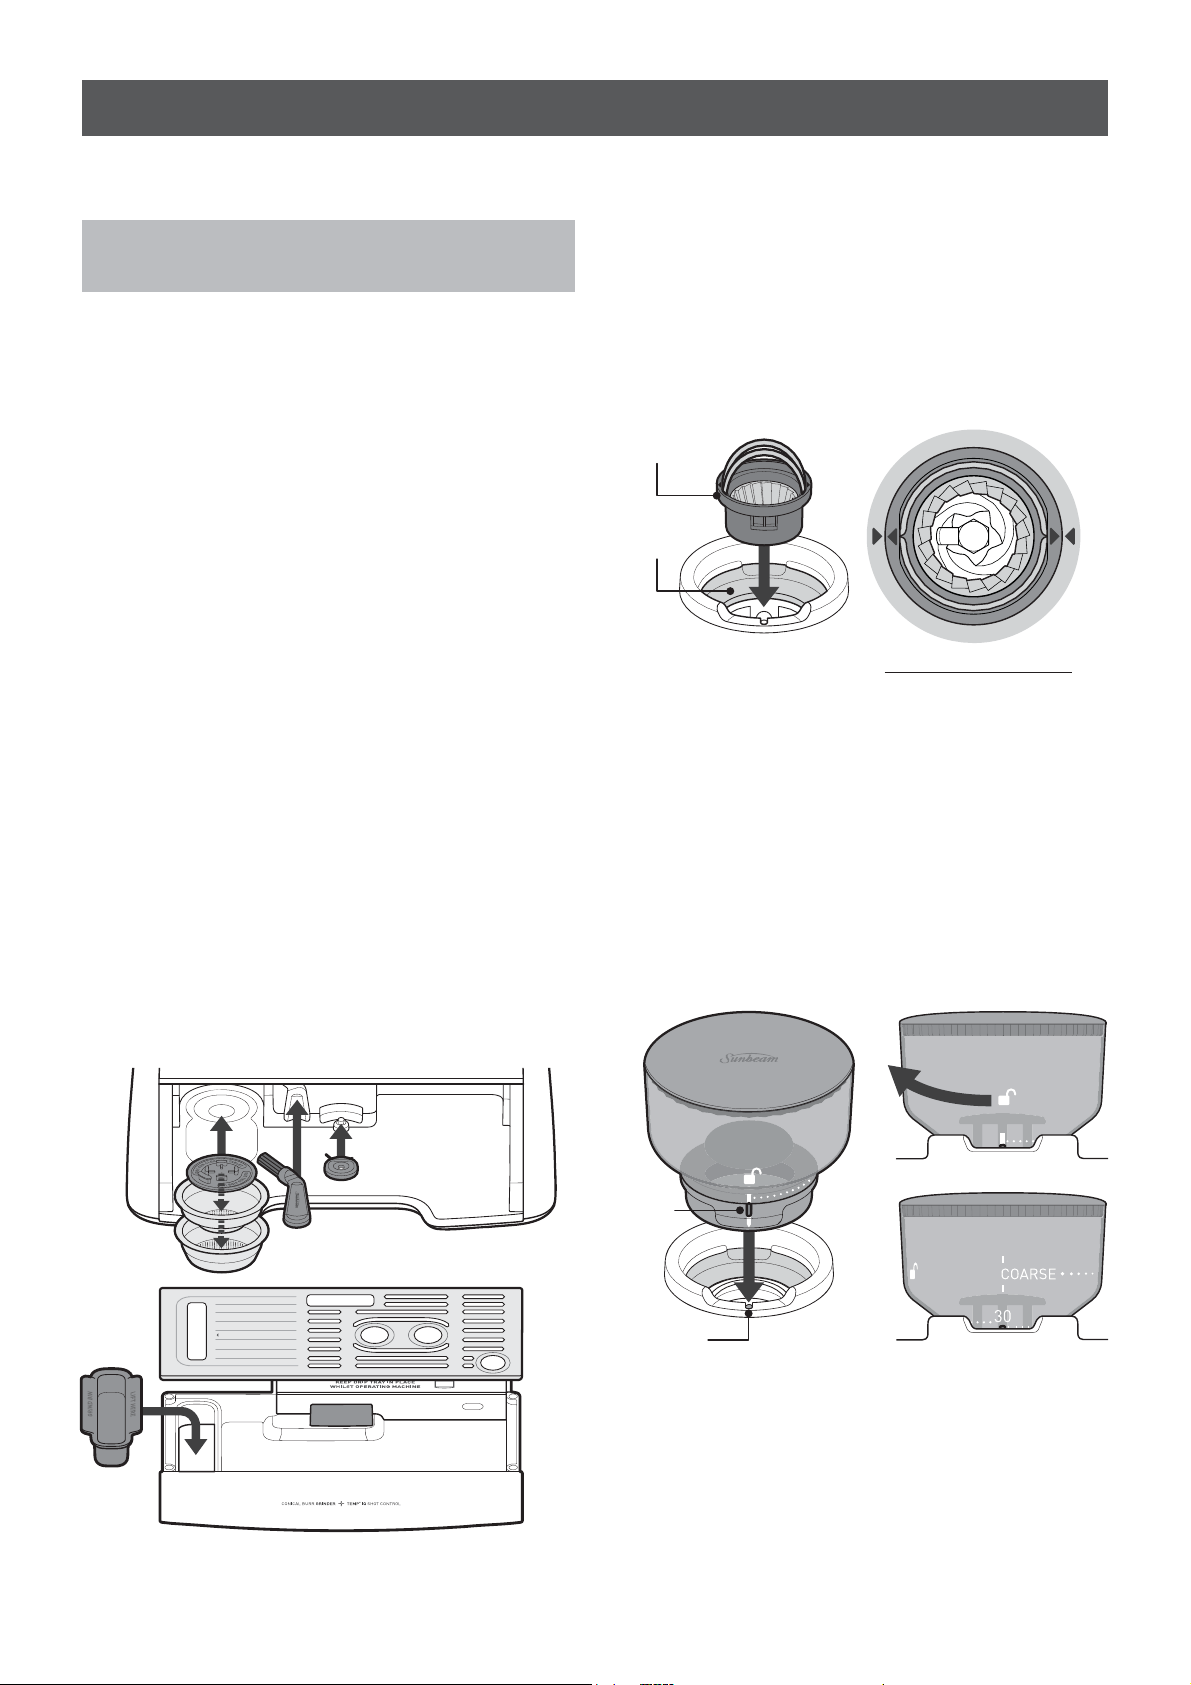
Step 5. Insert Parts into the Grinder
• Removable Top Burr
- Using the two handles insert the
Top Burr into the Grinder Collar.
- The arrows on the Top Burr should align
to arrows on the Grinder Collar.
- When correctly seated, the Top Burr will
be flush with the surface of the
Grinder Collar.
- Place handles down, one on each side.
• Removable Bean Hopper
- Align the Hopper Guide with the red
Grinder Interlock.
-
Insert Bean Hopper into the Grinder Collar.
- Lightly pushing down, turn the Bean
Hopper in a clockwise direction to lock
the Hopper into place.
- This opens the Hopper Gates (to release
coffee beans onto the Burrs). At Grind
Setting 30, Hopper Gates are fully open.
-
Continue to turn the Bean Hopper in a
clockwise direction to set the Grind Setting.
-
As a starting point for espresso extraction
try Grind Setting 20.
(Further Grind Setting adjustment might be
required, see information on pages 14-15).
- Fill the Bean Hopper with freshly roasted
coffee beans.
8
Before First Use of the Barista Max
Important: Remove the red plug found at
the base of the Water Reservoir.
PLEASE EMPTY TRAY
WIPE COFFEE GRINDS
TOP BURR
GRINDER
COLLAR
GRINDER
INTERLOCK
HOPPER
GUIDE
2.TURN
3.HOPPER GATES OPEN
1. ALIGN
& INSERT
Loading ...
Loading ...
Loading ...