Loading ...
Loading ...
Loading ...
16
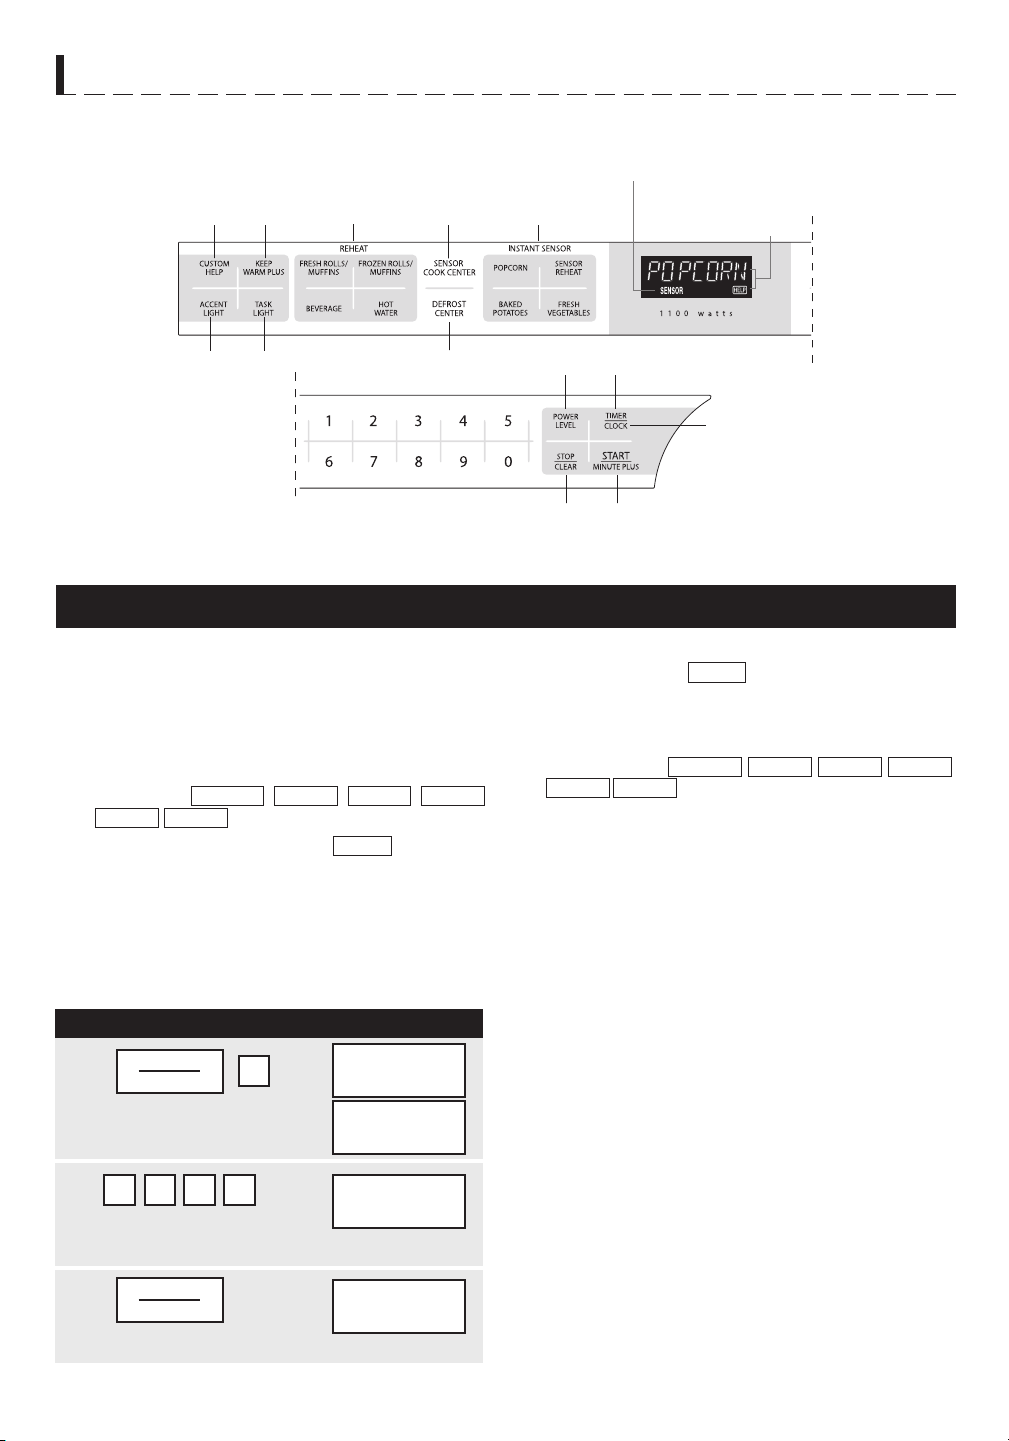
CONTROL PANEL
PART NAMES
Number indicates pages on which there are feature descriptions and usage information.
Words in the lower portion of the display will light to indicate what function is in progress.
Indicators
19
2325 24
17 26
16
22
2626
BEFORE OPERATING
• Before operating your new microwave oven make
sure you read and understand this operation manual
completely.
• Before the oven can be used, follow these proce-
dures:
1. Plug in the oven. Close the door. The oven display
will show
WELCOME
PRESS
CLEAR
AND
PRESS
CLOCK
.
2. Touch the STOP/CLEAR pad.
:
will appear.
3. Set clock.
TO SET THE CLOCK
• Suppose you want to enter the correct time of day
12:30 (A.M. or P.M.).
PROCEDURE DISPLAY
1
2
3
Touch CLOCK pad and
number 2.
Touch CLOCK pad again.
Enter the correct time of
day by touching the numbers in sequence.
TIMER
CLOCK
TIMER
CLOCK
2
1 3 02
ENTER
12:30
12:30
T I ME
20
16
26
This is a 12 hour clock. If you attempt to enter an
incorrect clock time,
ERROR
will appear in the display.
Touch the STOP/CLEAR pad and re-enter the time.
• If the electrical power supply to your microwave
oven should be interrupted, the display will inter-
mittently show
WELCOME
PRESS
CLEAR
AND
PRESS
CLOCK
after the power is reinstated. If this
occurs during cooking, the program will be erased.
The time of day will also be erased. Simply touch
STOP/CLEAR pad and reset the clock for the correct
time of day.
STOP/CLEAR
Touch the STOP/CLEAR pad to:
1. Erase if you make a mistake during programming.
2. Cancel timer.
3. Stop the oven temporarily during cooking.
4. Return the time of day to the display.
5. Cancel a program during cooking, touch twice.
STANDBY MODE
This microwave will go into standby mode after a period
of inactivity. The backlight of the display will automat-
ically dim after 3 minutes if the unit has not been in
operation. If the display is in standby mode, simply touch
the control panel or open/close the door to return the
backlight to maximum brightness.
Loading ...
Loading ...
Loading ...