Loading ...
Loading ...
Loading ...
5
DOOR REVERSAL INSTRUCTIONS
CAUTION: To avoid personal injury to yourself and/or property, we recommend someone assist you
during the door reversal process.
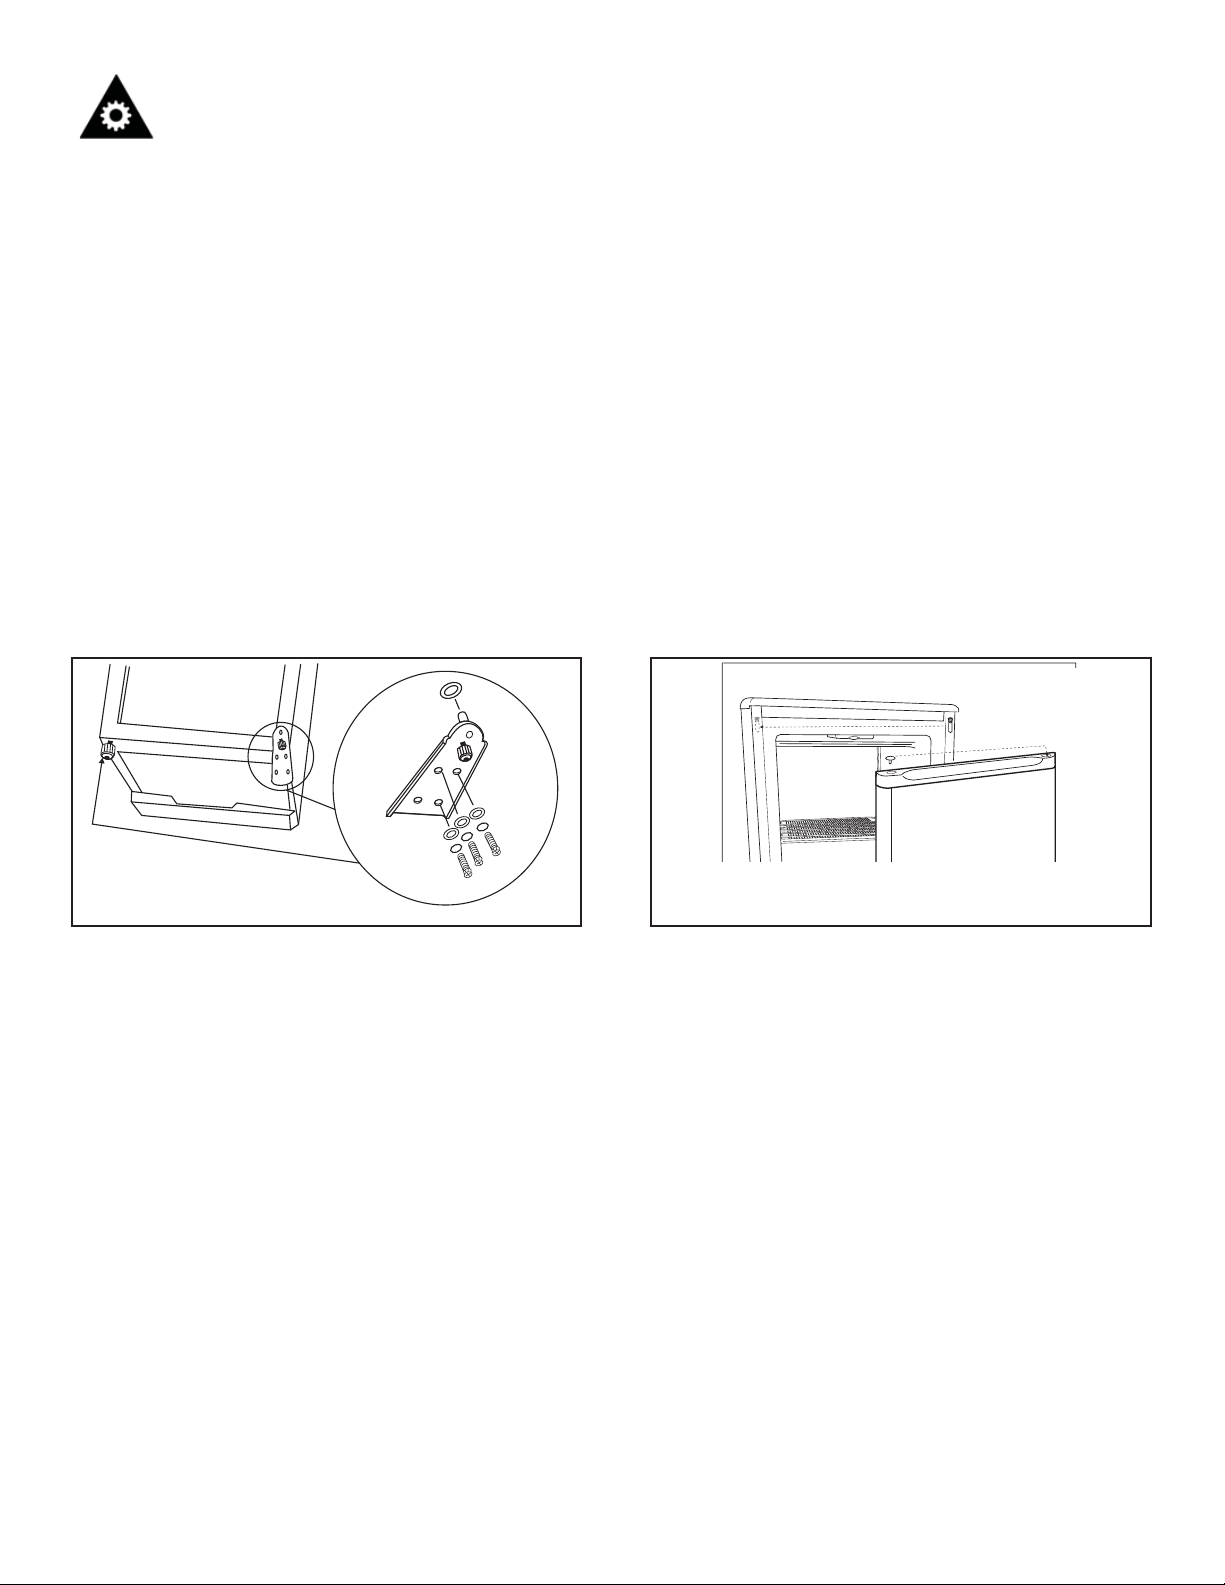
1. To access the lower hinge assembly, tilt back the freezer cabinet (Fig.A)
2. Remove both leveling legs located at the front of the cabinet.
3. Remove the screws holding the lower hinge assembly to the cabinet.
4. Remove the main door assembly from the freezer cabinet (lift door slightly and pull downward).
5. Using a fl at head screwdriver, remove the main door top hinge pin.(Fig.B)
6. Re-install the main door top hinge pin on the opposite side of the cabinet.
7. Remove the door plug and door bushing located on the top of the main door.
8. Interchange their positions (eg.door plug right side, door bushing left side).
9. Re-install main door assembly on cabinet.
10. Remove door bushing (bottom door) and install on opposite side.
11. Re-install the lower hinge assembly on the opposite side.
12. Make sure the door assembly is properly aligned on the cabinet before tightening lower hinge
screws.
13. Re-install both leveling legs. The process is now complete.
Fig. A Fig. B
DEFROSTING INSTRUCTIONS
Defrost and clean your freezer when frost has built up to about 1/4’(6mm) thickness. Complete
defrosting and cleaning should be done at least once a year. In high humidity areas, a freezer may
need more frequent defrosting and cleaning.
IMPORTANT: Do not use an ice pick, knife or other sharp-pointed tool to defrost freezer. Damage can
occur.
1. Turn temperature control to ‘0’(off) and unplug power cord.
2. Remove all frozen food.Wrap frozen food in several layers of newspaper and cover with a blanket:
food will say frozen for several hours. OR Store frozen food in a cooler, additional refrigerator-
freezer or in a cool area.
3. Remove frost.
4. Wipe water from walls and bottom of freezer with a towel or sponge.
5. Wash inside walls.
6. Rinse and dry thoroughly.
7. Replace all frozen food.
8. Plug in power cord and refer to “Operation.”
Operating Instructions
Loading ...
Loading ...
Loading ...