Loading ...
Loading ...
Loading ...
7
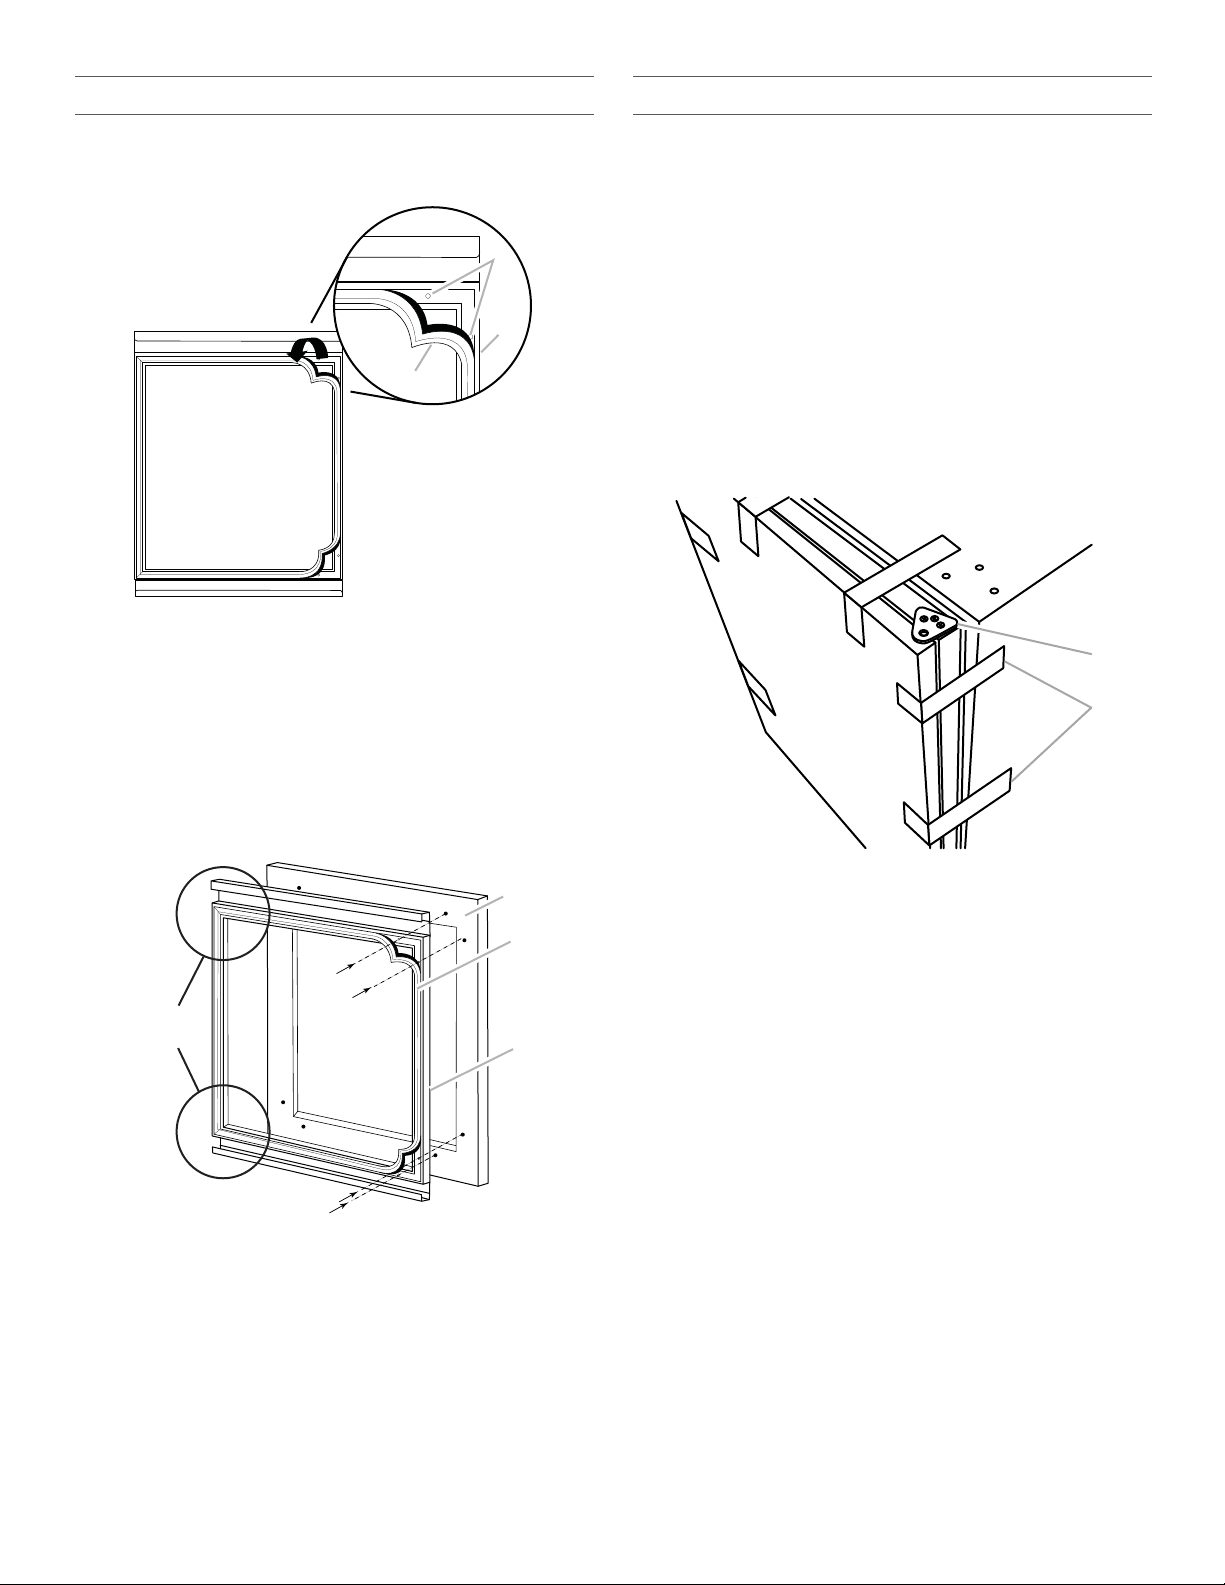
Attach the Overlay Panel
1. Gently pull back the gasket from all four corners. Pull back far
enough that two screws are visible in each corner (eight total
screws). Remove all eight screws.
2. Position the overlay panel so that the holes in the panel align
with the holes in the door liner.
NOTE: C-clamps are recommended to keep the overlay panel
and door liner aligned and to limit movement of the pieces.
3. Once all holes are aligned, fasten the custom panel to the
door using the screws provided as shown.
NOTE: The screws for this step are in a small plastic bag, located
in the interior of the refrigerator.
Install the Door
IMPORTANT: To ensure proper operation, be sure to grease the
top hinge, top spacer and washer with petroleum jelly.
1. Using petroleum jelly, grease the bottom spacer hole and the
bottom hinge pin. Align the washer with the bottom spacer
hole.
2. Install the door by inserting the bottom hinge pin into the
bottom space hole. Be sure the washer stays in place. Slowly
lower the door straight down and evenly onto the bottom
hinge pin.
3. Close the door and check that it is properly aligned to the
cabinet.
NOTE: Provide additional support for the door when moving the
hinges. Do not depend on the door magnets to hold the door in
place while you are working.
4. Using masking tape, secure the door to the cabinet before
installing the spacer, as shown.
5. Place the washer on the top spacer and align the holes.
Grease the top hinge pin, top spacer and washer with
petroleum jelly. Insert the top hinge pin into the washer and
top spacer.
A. Hinge plate
B. Screws
C. Door
D. Gasket
A. Custom panel
B. Gasket
C. Door panel
A
B
C
D
A
B
C
Repeat on
this side
A. Top spacer
B. Masking tape
A
B
Loading ...
Loading ...
Loading ...