Loading ...
Loading ...
Loading ...
Attaching the NexStar to the Tripod
The Celestron NexStar tripod is a sturdy, heavy duty mount on which to place your NexStar 6/8" telescope. This tripod can go anywhere,
from your backyard to a remote observing site. The tripod comes completely assembled and only needs to have the center leg brace /
accessory tray put in place.
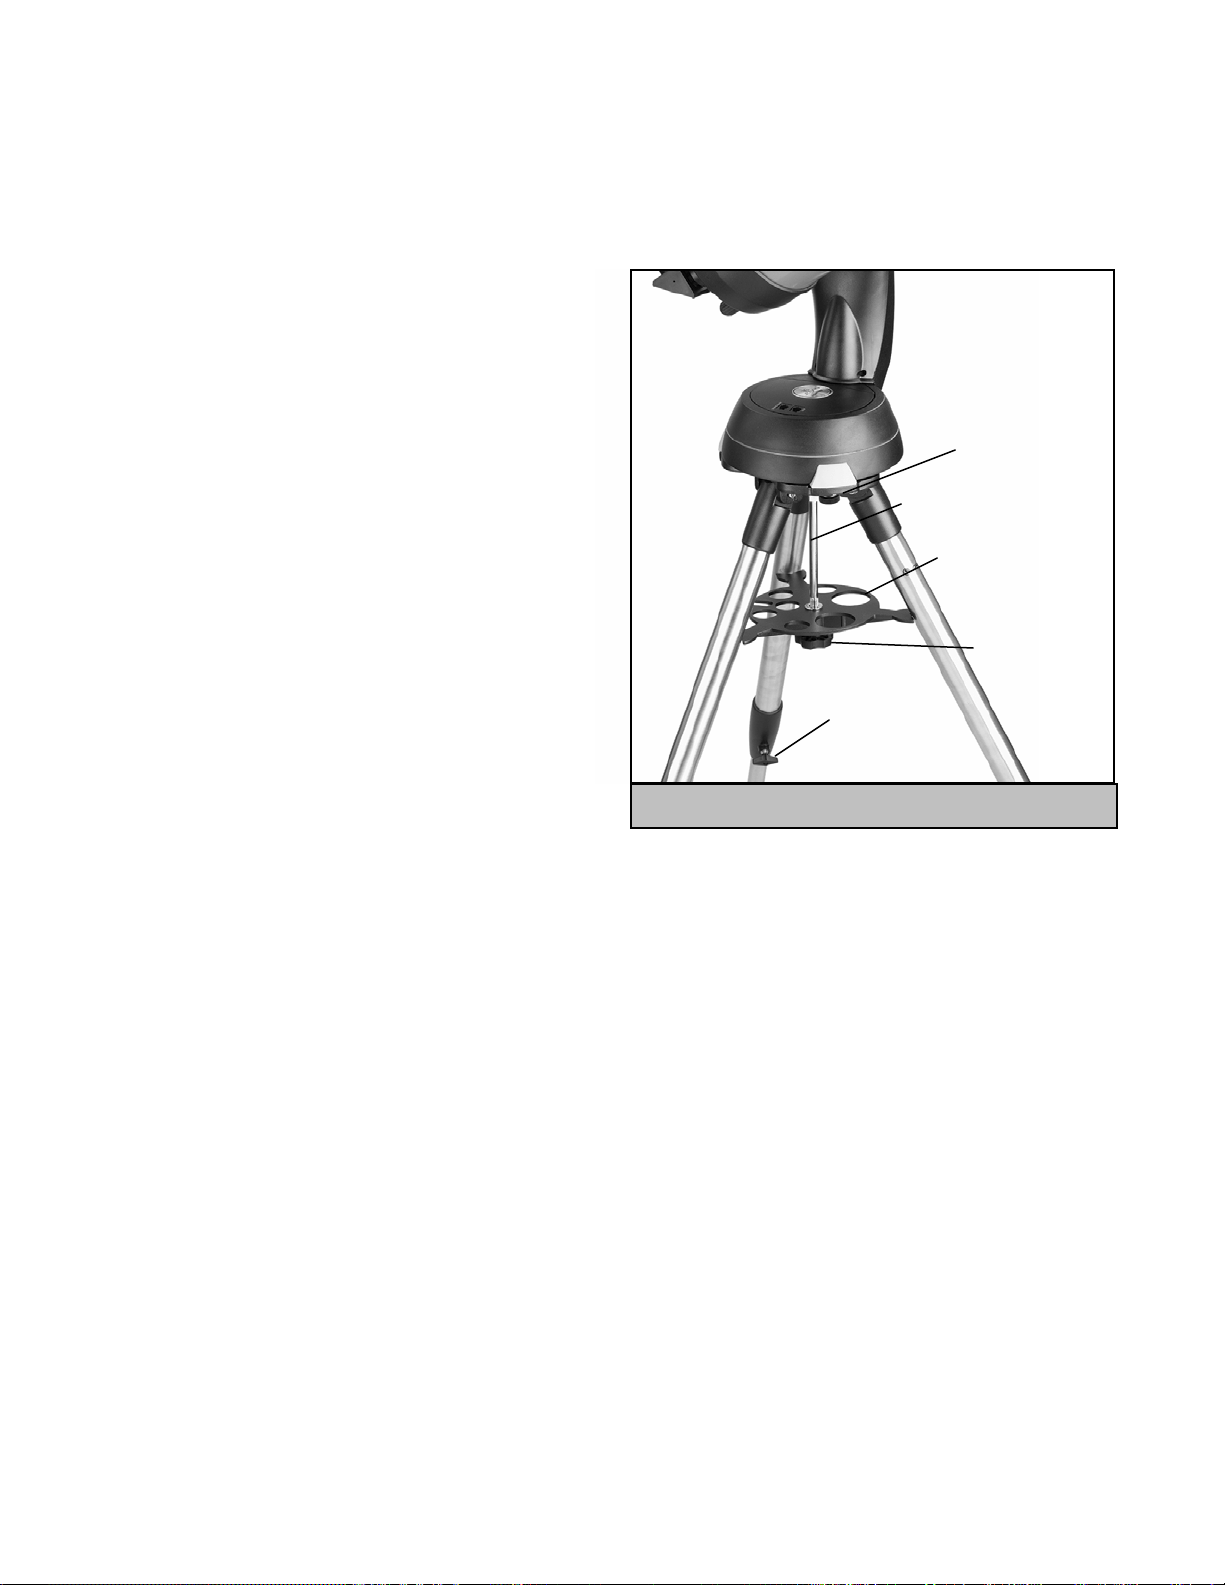
Center Support
Rod
Center Leg
Brace /
Accessory Tray
Leg Brace
Locking Knob
Telescope
Mounting Bolts
Tripod Leg
Locking Screw
Figure 3-5
To set up the tripod:
1. Hold the tripod with the head up, away from the ground.
2. Pull the legs apart until the legs are fully extended and press it
down flat against the ground.
3. Place the center leg brace over the center support rod.
4. Tighten with the leg brace locking knob until the leg brace
firmly presses out against each leg.
5. The tripod will now stand by itself.
Your tripod has height adjustable legs for proper leveling on all
types of surfaces. The tripod also comes with detached bubble
level to assist in accurate leveling. To adjust the height and level
the tripod:
1. Place the bubble level on the top of the tripod mounting plate.
2. Locate the tightening screw on the bottom of each tripod leg.
3. Rotate the knob counterclockwise until the inside portion of the
tripod leg slides out.
4. Extend the center portion of the tripod leg to the desired height
making sure that the bubble in the bubble level is centered.
5. Tighten the knob to hold the tripod leg in place.
To mount the telescope on the tripod:
1. Set the base of the telescope on the tripod mounting plate so that the hole in the center of the base goes over the positioning pin on top of
the tilt plate.
2. Rotate the base so the holes under each rubber foot line up with the mounting bolts attached to the tilt plate.
3. Thread in the mounting bolts into each hole of the telescope base.
Your NexStar is now securely attached to the tripod and ready for use.
9
Loading ...
Loading ...
Loading ...