Loading ...
Loading ...
Loading ...
s t one of these stars (perhaps it is behind a tree
o ui
ble stars.
nment object and carefully center it in the fi
8. Then, center the object in the eyepiece and press ALIGN.
9. Once you press the ALIGN button the telescope will automaticall
gnment.
lignment stars it is best to choose stars that, a) have a large separation in
zimuth and b) both are either positive or negative in declination. Following
ill result in a more accurate EQ Two-Star alignment.
lign operates much the same way as EQ Two-Star Align
owever it only relies on the alignment of one star to align the telescope. To
e EQ One-Star Align follow steps 1 through 7 under the EQ Two-Star
This alignment method allows you use only one solar system object to
gn your telescope
e EQ Two-Star Align section.
I
I
m
mp
lew the telescope to the displayed star. If for some reason you do not wish to selec
r b lding), you can either:
• Press the UNDO button to display the next most suitable star for alignment.
• Use the UP and DOWN scroll buttons to manually select any star you wish from the entire list of availa
7. The telescope then asks you to center in the eyepiece the alignment object you selected. Use the direction arrow buttons to slew
the telescope to the alig
nderscope. Press ENTER when centered.
y slew to a second alignment star. Repeat steps 6 and 7 to
complete ali
EQ Two-Star Align
The EQ Two-Star Align follows most of the same steps as the Alt-Az Two-
Star Align. This alignment method does not require the user to align the
altitude index markers or point towards the Meridian, but it does require the
user to locate and align the telescope on two bright stars. When selecting
a
a
these two guidelines w
EQ One-Star Align
EQ One-Star A
h
us
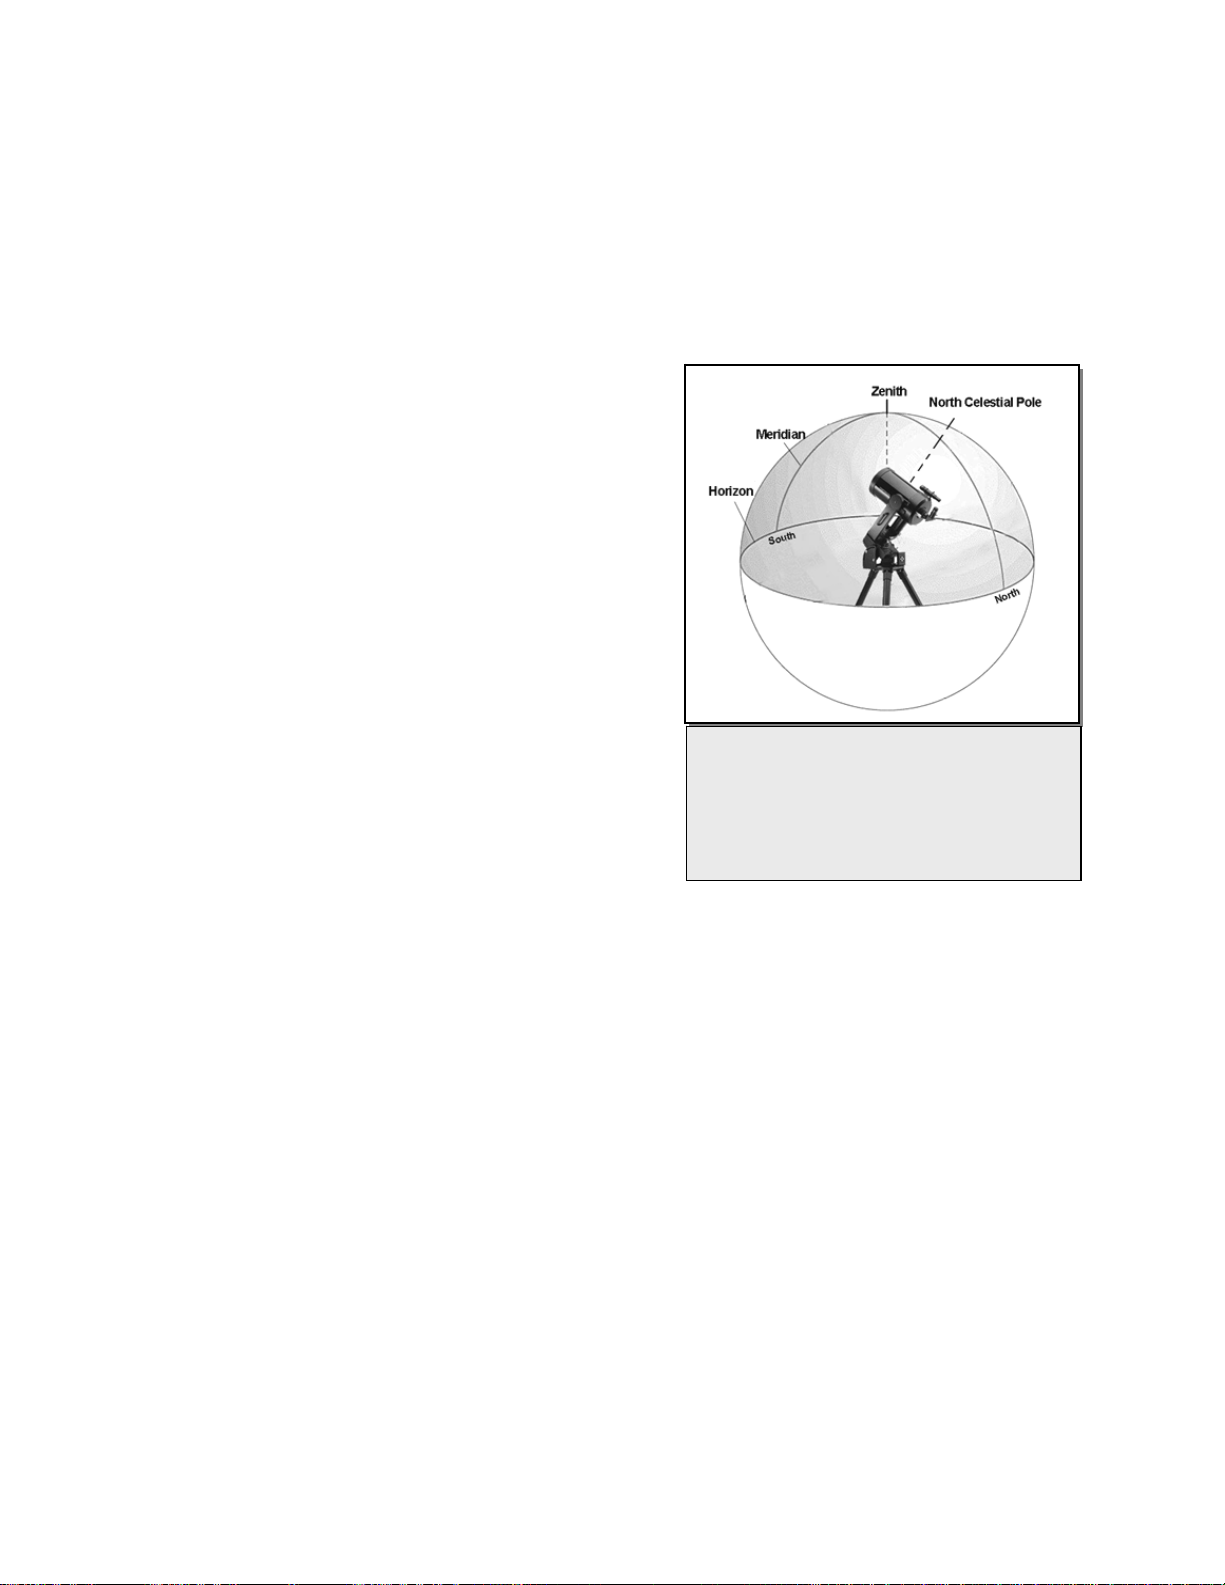
Figure 4-3
The Meridian is an imaginary line in the sky that
starts at the North celestial pole and ends at
the South celestial pole and passes through the
you are facing South, the meridian
your Southern horizon and passes
directly overhead to the North celestial pole.
Align section.
EQ Solar System Align
zenith. If
starts from
equatorially align the telescope for daytime use. To ali
using a solar system object follow steps 1 through 7 under th
pr
r
o
o
v
v
i
i
n
n
g
g
P
P
o
o
i
i
n
n
t
t
i
i
n
n
g
g
A
A
c
c
c
c
u
u
r
r
a
a
c
c
y
y
s several options that allow you to improve the pointing accuracy of your mount in a variety of ways.
nt stars with a new star or celestial object. This will improve the pointing
ccuracy of your telescope without having to re-enter addition information.
To r c
3.
4. elect the Alignment Stars option and press ENTER.
place. Use the UP and Down scroll keys to select the alignment
r closest to the new object. This will space out your
alignment stars across the sky.
6. Align the star in the center of the finderscope and press ENTER.
arefully center the object in the center of the eyepiece and press ALIGN
The NexStar SE telescope ha
Alignment Stars:
Alignment stars allows you to replace any of the original alignme
a
epla e an existing alignment star with a new alignment star:
1. Select the desired star (or object) from the database and slew to it.
2. Once centered, press the UNDO button until you are at the main menu.
With NexStar SE displayed, press the ALIGN key on the hand control.
Use the Up/Down buttons and s
5. The display will then ask you which alignment star you want to re
star to be replaced and press ENTER. It is usually best to replace the sta
7. C
16
Loading ...
Loading ...
Loading ...