USER’S MANUAL for Vacuum Cleaner
GROUNDING INSTRUCTIONS
This appliance must be grounded. If it should malfunction or breakdown, grounding provides a path of least resistance for electric current to reduce the risk of electric shock. This appliance is equipped with a cord having an equipment-grounding conductor (C) and grounding plug (A). The plug must be inserted into an appropriate outlet (B) that is properly installed and grounded in accordance with all local codes and ordinances.
WARNING: Improper connection of the equipment-grounding conductor can result in the risk of electric shock. Check with a qualified electrician or service person if you are in doubt as to whether the outlet is properly grounded. Do not modify the plug provided with the appliance - if it will not fit the outlet, have a proper outlet installed by a qualified electrician. This appliance is for use on a nominal 120-volt circuit and has a grounding plug that looks like the plug (A) illustrated in Fig. 1. A temporary adapter (D) may be used to connect this plug to a 2-pole receptacle (E) if a properly grounded outlet is not available (Fig. 2). The temporary adapter should be used only until a properly grounded outlet (B) can be installed by a qualified electrician (Fig. 1). The green colored rigid ear, lug, or the like (F) extending from the adapter must be connected to a permanent ground (G) such as a properly grounded outlet box cover (Fig. 2). Whenever the adapter is used, it must be held in place by a metal screw.
NOTE: In Canada, the use of a temporary adapter is not permitted by the Canadian Electrical Code.

EXTENSION CORD GUIDELINE
• Do not use appliance with damaged cords or plugs. When servicing, refer to a qualified electrician or service person only. Use only identical replacement parts.
• Make sure your extension cord is in good condition and is the correct size for your appliance. Table (A) shows the correct size to use depending on cord length and nameplate ampere rating. If in doubt, use the next heavier gauge. The smaller the gauge number, the heavier the cord. An undersized extension cord will cause a drop in line voltage resulting in loss of power and overheating.
• TABLE A •
MINIMUM GAUGE EXTENSION CORDS

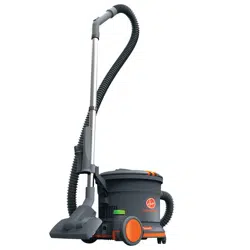
VACUUM ASSEMBLY
CARTON CONTENTS

A. Bagged vacuum cleaner
B. Combination floor tool
C. Dusting brush
D. Crevice tool
E. 2 metal extension tubes
F. Hose
G. Cloth pre-motor filter
H. Foam pre-motor filter
I. Filter bag
J. Power cord
ASSEMBLING YOUR VACUUM CLEANER

Unclip the locking clips and remove lid.

Remove accessories and dust bag.

Slide dust bag opening over hose inlet and ensure it is secure.

Replace lid by aligning handle with rear cord hook and hose outlet. Check to ensure pressure relief valve is on the hose inlet side.

To lock lid in place, ensure clips are pressed down fully and flush with surface.

Align hose and turn clockwise until secure.
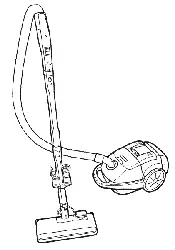
CONNECTING EXTENSION WAND
 Push together the two metal extension tubes and attach the hose and floor tool.
ATTACHING THE CORD


Form a loop in the cable and slide into retaining clip.

Pull down to secure.


After use, loop power cord in hand and store on rear hook

To store, hook the floor tool into the cord hook.
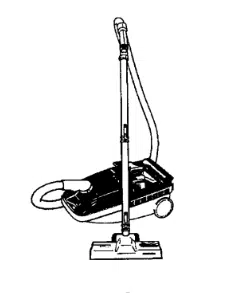
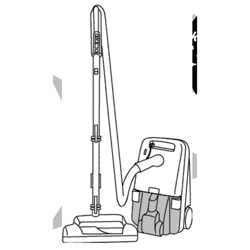
HOW TO USE
VACUUM DESCRIPTION

1. Extension tubes
2. Crevice tool
3. Dusting brush
4. Wand storage hanger
5. Lid retaining clips
6. Combination floor tool
7. Rear wheels
8. 360° rotating castor wheels
9. Wand storage holder
10. Rear cord hook
11. Eco/Hush™ Mode Switch
12. Power cord inlet
13. Post motor exhaust
14. On/off power switch
15. Flexible hose
16. Carry handle
17. Pressure relief valve
18. Cloth pre-motor filter
19. Foam pre-motor filter
20. Filter bag
21. Suction control valve
FOR DRY USE ONLY

ON-OFF SWITCH

Press power button once to turn on machine. Machine will start in high power.

Press eco button to switch between high power and Hush™ modes.
FLOOR SURFACE SELECTOR

To clean carpets push the carpet switch backwards.

To clean hard floors push the switch backwards.
Tools allow for cleaning surfaces above the floor and for reaching hard to clean areas.
The vacuum is ready for tool use when handle is in upright position.
SELECT PROPER TOOL
(Tools may vary per model)

A. Combination Floor tool allows for cleaning of both carpeted and bare floors.
B. Dusting Brush may be used on table tops, books, lighting fixtures, and blinds. (Tool varies per model)
C. Crevice Tool may be used in tight spaces, corners and along edges in such places as dresser drawers, upholstered furniture, stairs and baseboards.
REMOVING HOSE

Turn counter-clockwise and pull.

Connect desired tool to end of wand.
MAINTENANCE
Any other servicing should be done by an authorized service representative.
If appliance is not working as it should, has been dropped, damaged, left outdoors, or dropped into water, take it to a service center prior to continuing use.
NOTICE
A Thermal Protector has been designed into your cleaner to protect it from overheating. When the thermal protector activates the cleaner will stop running.
If this happens proceed as follows:
1. Turn cleaner OFF and unplug it from the electrical outlet.
2. Empty dirt cup.
3. Inspect the hose, hose inlet, foam filter and cloth filter for any obstructions. Clear obstructions if present.
4. When cleaner is unplugged and motor cools for 30 minutes, the thermal protector will deactivate and cleaning may continue.
If the thermal protector continues to activate after following the above steps, your cleaner needs servicing.
FILTER BAG
When to Replace
CAUTION
Very fine materials, such as face powder or cornstarch may seal the filter bag and cause it to burst even though it is only partially full of dirt. When using the cleaner to remove material of this nature, change the bag often.
What to Buy: Filter bag
Use only genuine HOOVER ® bags with your vacuum. When purchasing a new bag, ask for HOOVER ® HEPA Type CC1 Bag, Allergen Type CC1 Bag, or Standard Type CC1 Bag.
How to Replace

Unclip the locking clips and remove lid.

Slide dust bag over hose inlet and ensure it is secure.

To lock lid in place, ensure clips are pressed down fully and flush with surface.
WARNING
To reduce the risk of personal injury - Unplug before cleaning or servicing. Do not use cleaner without filter bag in place.
CLEANING THE CLOTH PRE-MOTOR FILTER

Raise the locking clips and lift lid.


For a deeper clean remove the filter and use the dusting brush to clean both sides.

Align arrows to secure filter back into lid.
CAUTION
Do not wash the filter as this will damage the medium.
WARNING
To reduce the risk of personal injury - Unplug before cleaning or servicing.
LUBRICATION
The motor is equipped with bearings which contain sufficient lubrication for its lifetime. The addition of lubricant could cause damage. Do not add lubricant to motor.
CLEANING THE FOAM PRE-MOTOR FILTER

Remove the pre-motor filter.

Rinse under cold water.

Allow filter to dry for 24 hours
WARNING
Avoid direct heat sources as these will damage the filter.
CLEANING THE HOSE
WARNING
To reduce the risk of personal injury - Unplug before cleaning or servicing.
Low suction or pick up may be due to a blockage in the system. Refer to the following steps to check for blockages, continuing with each step until the blockage is found.
CAUTION
Do not use sharp objects to clean out hose as they can cause damage.

Turn counter-clockwise and pull. Remove any blockages found then reconnect the hose securely.
CLEANING THE COMBINATION FLOOR TOOL
To maintain optimum performance, regularly inspect and clean the combination floor tool. To do this, place the floor tool in hard floor mode and remove any hair or fibers from the bristles.
CHECKING CASTORS AND WHEELS
To help maintain the smooth movement of the machine, regularly check the front castors and rear wheels and remove any hair or fibers.
TROUBLESHOOTING
WARNING
To reduce the risk of personal injury - Unplug before cleaning or servicing.
| PROBLEM |
POSSIBLE REASON |
POSSIBLE SOLUTION |
| Cleaner won’t run |
1. Power cord not firmly plugged into outlet. |
1. Plug unit firmly into wall outlet |
| 2. Blown fuse or tripped breaker. |
2. Check fuse or breaker in building. Replace fuse/reset breaker in building. |
| 3. Thermal protector activated. |
3. Turn the cleaner off and disconnect it from the electrical outlet. Then allow cleaner to cool for 30 minutes. If the thermal protector continues to activate see. |
| 4. Needs service. |
4. Take to service center. To find nearest location, visit our website at hoover.com or call 1-800-944-9200. Monday through Friday 8am - 7pm EST |
| Dust escaping from cleaner |
1. Filter bag is full. |
1. Replace filter bag - Pg. 10. |
| 2. Filter bag not installed correctly. |
2. Review filter bag removal and replacement - Pg. 10. |
| Cleaner won’t pick up or low suction |
1. Filter bag not installed correctly. |
1. Review filter bag removal and replacement - Pg.10. |
| 2. FIlter bag is full. |
2. Replace filter bag - Pg.10. |