Loading ...
Loading ...
Loading ...
9
ENGLISH
Using the Blender
Before Use
NOTE: While the Blender is on or the
PULSE
mode indicator light is blinking:
- Do not interfere with blade movement.
- Do not remove pitcher lid.
Operating the Blender
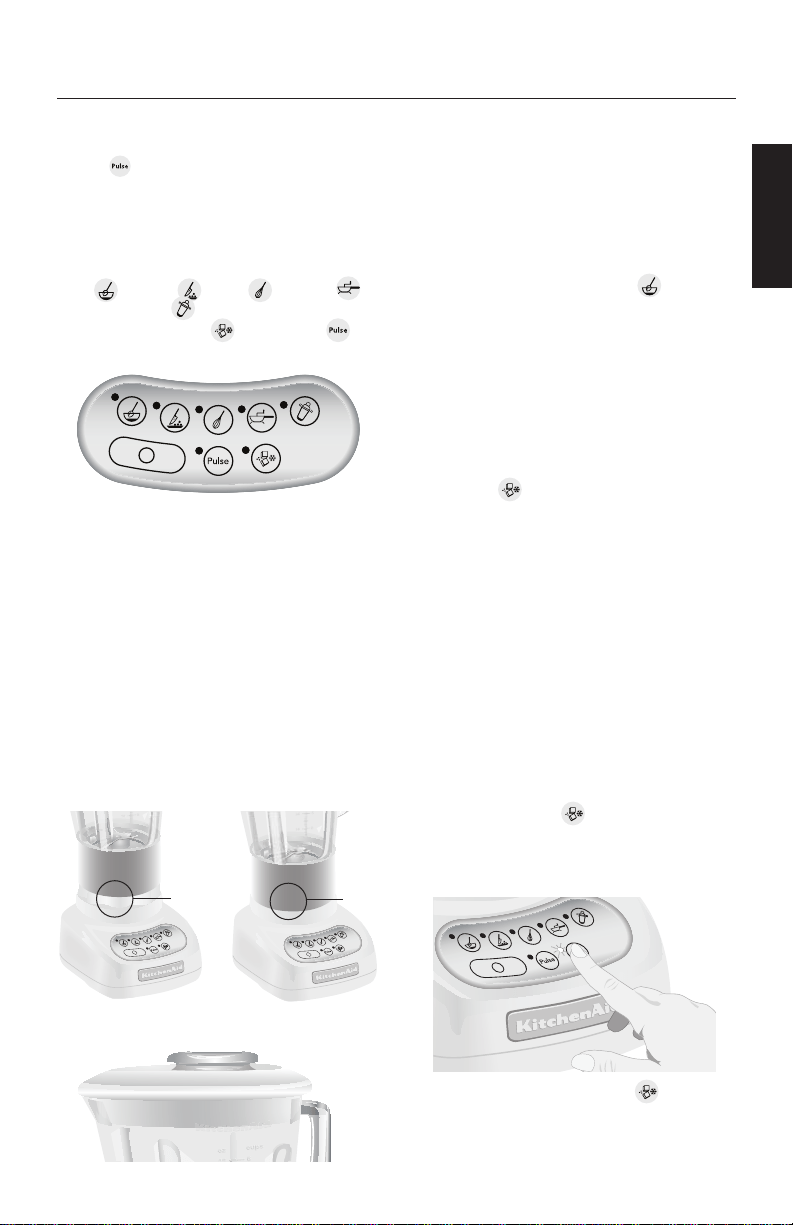
The KitchenAid™ Blender has five speeds:
STIR
, CHOP , MIX , PUREE
, and LIQUEFY
. In addition, it also
features CRUSH ICE
and PULSE
mode.
1. With convenient one-step operation,
this unit will operate only when a speed
selection button is pressed.
2. Before operating the Blender, make
sure the pitcher is properly secured
in the locking collar and assembly is
positioned on the Blender base.
NOTE: If a gap exists between the locking
collar and the base, the pitcher might not
be locked into the locking collar (glass
pitcher models only) or the assembly is
not positioned properly on the Blender
base. See "Blender Assembly" for further
instructions.
3. Put ingredients in pitcher and firmly
attach lid.
4. Press the desired speed button for
continuous operation at that speed.
The green indicator light by the selected
speed will stay lit. You may change
settings without stopping the unit by
pressing a new speed button.
IMPORTANT: If blending hot foods or
liquids, remove the center ingredient
cap. Operate only on STIR
speed.
5. To turn off the Blender, press O (Off).
The O (Off) button will stop any speed
and deactivate the Blender at the same
time.
6. Before removing the pitcher assembly,
unplug the power cord.
CRUSH ICE
Your KitchenAid™ Blender offers a
CRUSH ICE
feature. When selected,
the Blender will automatically pulse at
staggered intervals at the optimal speed
for crushing ice or other ingredients.
1. Before operating the Blender, make
sure the pitcher assembly is properly
positioned on the Blender base.
NOTE: If a gap exists between the locking
collar and the base, the pitcher might not
be locked into the locking collar or the
collar is not positioned properly on the
Blender base. See "Blender Assembly" for
further instructions.
2. Put ingredients into the pitcher and
firmly attach lid.
3. Press CRUSH ICE
. The indicator
light will stay lit. The Blender will
automatically pulse at staggered
intervals.
4. To turn off the CRUSH ICE
feature,
press “O”. The Blender is now ready for
continuous operation.
5. Before removing the pitcher assembly,
unplug the power cord.
Gap
No
Gap
Loading ...
Loading ...
Loading ...