Loading ...
Loading ...
Loading ...
12
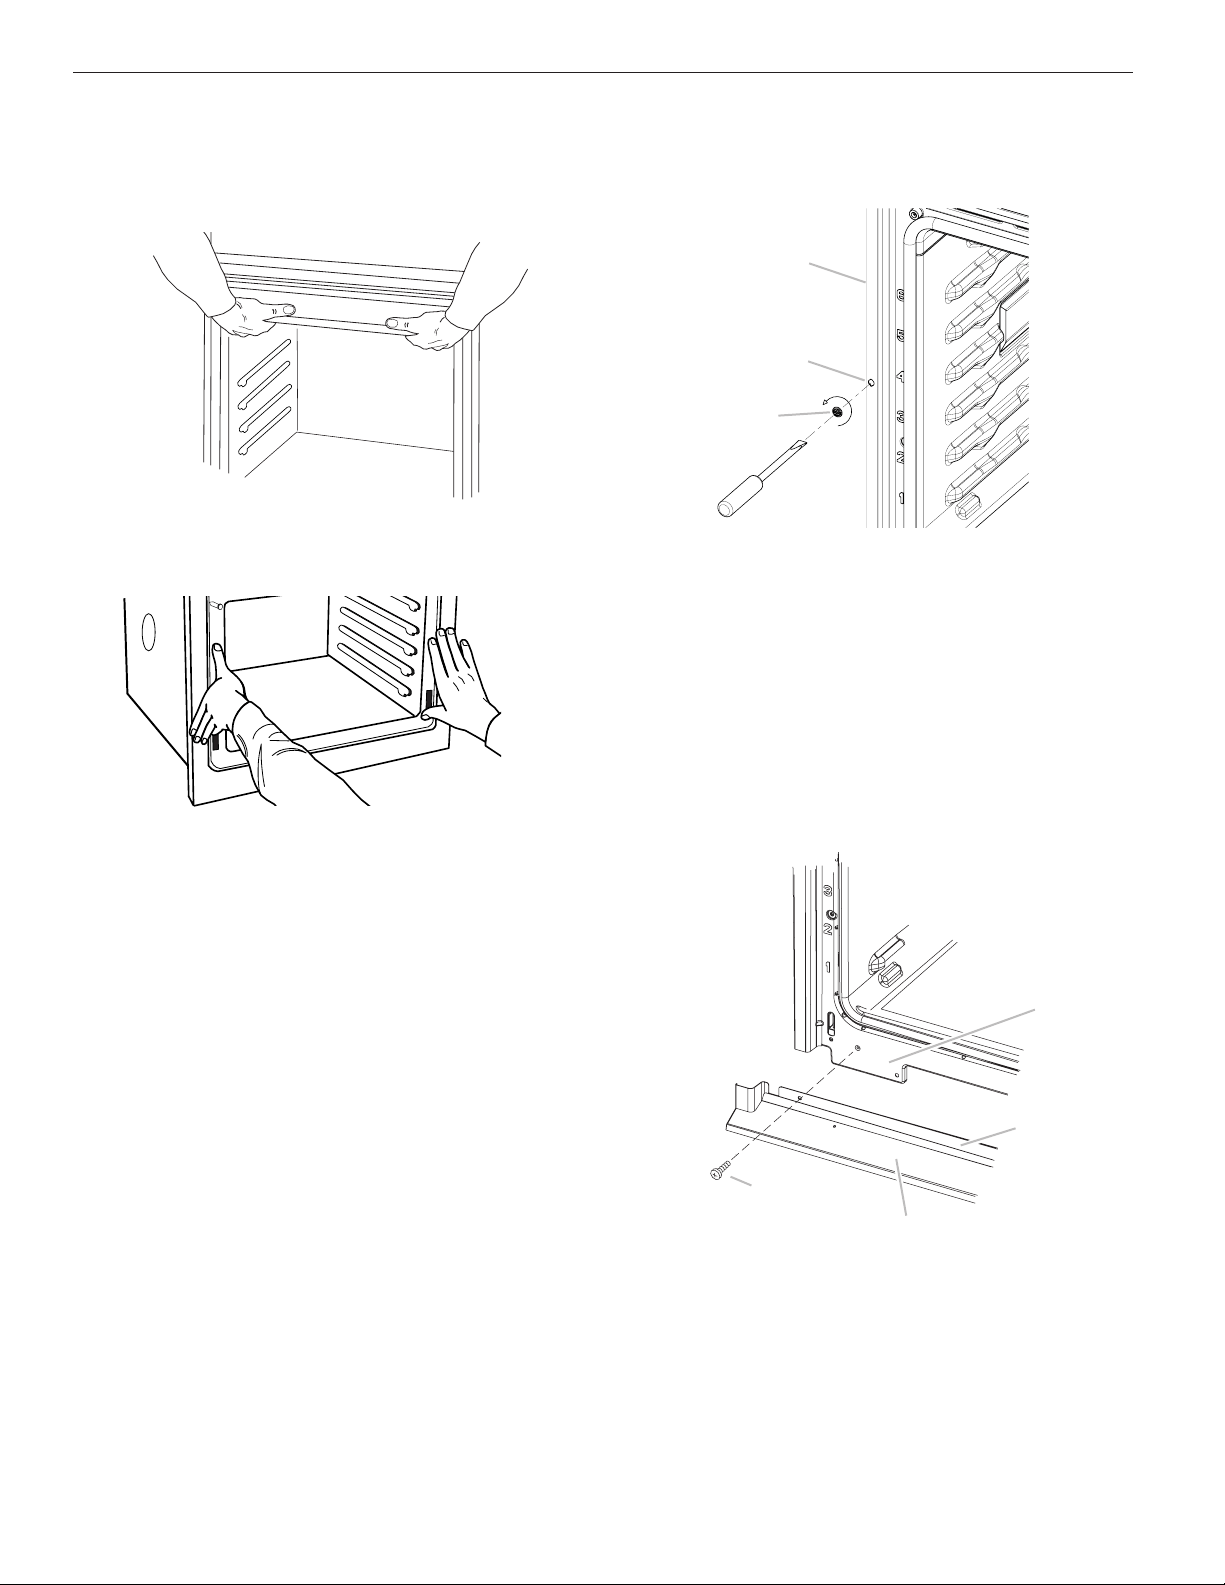
Install Oven
2. Push against the seal area of the front frame to push the
oven into the cabinet until the back surface of the front
frame touches the front wall of the cabinet.
3. Push oven completely into the cabinet and center the oven
into the cabinet cutout.
NOTE: If you have model KEBK171B, KEBK101B,
KEBK276B, KEBK206B, KEBS179B, KEBS109B,
KEBS277B, KEBS279B, KEBS207B, KEBS209B,
KEBU109B or KEBU209B, proceed to Step 5.
1. Using 2 or more people, lift the oven partially into the cabinet
cutout. Use the oven opening as an area to grip.
NOTE: Push against seal area of the oven front frame when
pushing the oven into the cabinet. Do not push against the
outside edges.
A. Shipping foot
A. Mounting rail
B. Mounting rail hole
C. Grommet
5. Securely fasten oven to cabinet using the # 8–14 x 1" screws
provided. Insert the screws through hole in the grommet.
Do not overtighten screws.
6. On models with the foot positioned with the long side of
the foot facing toward the top of the oven, the oven vent is
taped to the side of the oven. See the following instructions
to install.
■ Align vent tab (B) with oven frame (A) as shown.
■ Using one #8-18 x ³⁄8" screw (D) on each side of the vent
tab (B), fasten the vent securely to the oven.
A. Oven frame
B. Vent tab
C. Oven vent
D. #8–18 x ³⁄8" screws
4. Insert the grommet into the mounting rail hole using
a flat-blade screwdriver. Insert the screwdriver into the
grommet and turn ¹⁄4 turn counterclockwise. Make sure
the grommet stays in position.
A
B
C
A
C
D
B
Loading ...
Loading ...
Loading ...