User Guide
MFL67940201 (1.0)
ENGLISH
www.lg.com
Guía del usuario
ESPAÑOL
Printed in China
User Guide
ENGLISH
t
Screen displays and illustrations may differ
from those you see on actual phone.
t
Some of the contents of this guide may not
apply to your phone, depending on the software
and your service provider. All information in this
document is subject to change without notice.
t
This handset is not suitable for people who
have a visual impairment due to the touch
screen keyboard.
t
Copyright ©2013 LG Electronics, Inc. All rights
reserved. LG and the LG logo are registered
trademarks of LG Group and its related entities.
All other trademarks are the property of their
respective owners.
t
Google™, Google Maps™, Gmail™,
YouTube™, Hangouts™ and Play Store™ are
trademarks of Google, Inc.

Table of contents
2
Important notice ................................... 5
Getting to know your phone ............... 12
Phone overview ................................. 12
Installing the battery .......................... 15
Charging the phone ........................... 17
Using the memory card...................... 18
Locking and unlocking the screen ...... 18
Your Home screen ............................... 20
Touch screen tips .............................. 20
Home screen ..................................... 21
Customizing the Home screen .......... 22
Returning to recently-used
applications ....................................... 23
Accessing notifications ..................... 24
Quick Settings ................................. 24
Notification icons on the Status Bar ... 25
On-screen keyboard .......................... 27
Entering special characters .............. 27
Google account setup ......................... 28
Connecting to Networks and Devices 30
Wi-Fi ................................................. 30
Connecting to Wi-Fi networks ........... 30
Turning Wi-Fi on and connecting to a
Wi-Fi network .................................. 30
Bluetooth ........................................... 31
Connecting to Virtual Private Networks 33
PC connections with a USB cable ....... 33
Calls .................................................... 35
Making a call ..................................... 35
Calling your contacts ......................... 35
Answering and rejecting a call ........... 35
When the screen is locked ............... 35
When the screen is unlocked ............ 35
Adjusting the in-call volume ............... 36
Making a second call ......................... 36
Viewing your call logs ........................ 37
Call settings ....................................... 37
Contacts .............................................. 38
Searching for a contact ...................... 38
Adding a new contact ........................ 38
Favorite contacts ............................... 38
Creating a group ................................ 39
Messaging ........................................... 40
Sending a message ........................... 40
View mode ....................................... 41
Changing your message settings ....... 41

3
E-mail .................................................. 42
Managing an email account ............... 42
Working with account folders ............. 42
Composing and sending email ........... 43
Camera ................................................ 44
Getting to know the viewfinder .......... 44
Using the advanced settings .............. 45
Taking a quick photo ......................... 47
Once you've taken a photo................. 47
Viewing your saved photos ................ 48
Video camera ...................................... 49
Getting to know the viewfinder .......... 49
Using the advanced settings .............. 50
Recording a quick video ..................... 51
After recording a video....................... 51
Watching your saved videos .............. 52
Adjusting the volume when viewing a
video ................................................. 52
LG Unique Function............................. 53
QuickMemo ....................................... 53
Using the QuickMemo options .......... 54
Viewing the saved QuickMemo ........ 55
Multimedia .......................................... 56
Gallery ............................................... 56
Viewing pictures .............................. 56
Playing videos ................................. 57
Editing photos/videos ....................... 57
Deleting images ............................... 57
Setting a photo as the wallpaper ....... 57
Videos ............................................... 57
Playing a video ................................ 58
Music ................................................ 59
Playing a song ................................. 59
Utilities ................................................ 61
Setting your alarm ............................. 61
Using your calculator ......................... 61
Adding an event to your calendar ....... 62
Voice Recorder .................................. 62
Recording a sound or voice .............. 62
Polaris Viewer 4 ................................. 63
Google+ ............................................ 63
Voice Search...................................... 64
Downloads ........................................ 64
The Web .............................................. 65
Browser ............................................. 65
Using the Browser toolbar ................ 65

Table of contents
4
Viewing webpages ........................... 65
Opening a page ............................... 66
Searching the web by voice .............. 66
Bookmarks ...................................... 66
History ............................................ 66
Chrome ............................................. 67
Viewing webpages ........................... 67
Opening a page ............................... 67
Searching the web by voice .............. 67
Syncing with other devices ............... 67
Access bookmarks ........................... 67
Settings ............................................... 68
Access the Settings menu ................. 68
WIRELESS & NETWORKS ................... 68
DEVICE .............................................. 70
PERSONAL ......................................... 73
SYSTEM ............................................. 77
Phone software update ...................... 82
DivX Mobile ....................................... 84
Accessories ......................................... 85
FAQ ...................................................... 86

5
Important notice
Please read this before you start using your phone!
Please check to see whether any problems you encountered with your phone are
described in this section before taking the phone in for service or calling a service
representative.
1. Phone memory
When there is less than 10% of space available in your phone memory, your phone
cannot receive new messages. You need to check your phone memory and delete
some data, such as applications or messages, to make more memory available.
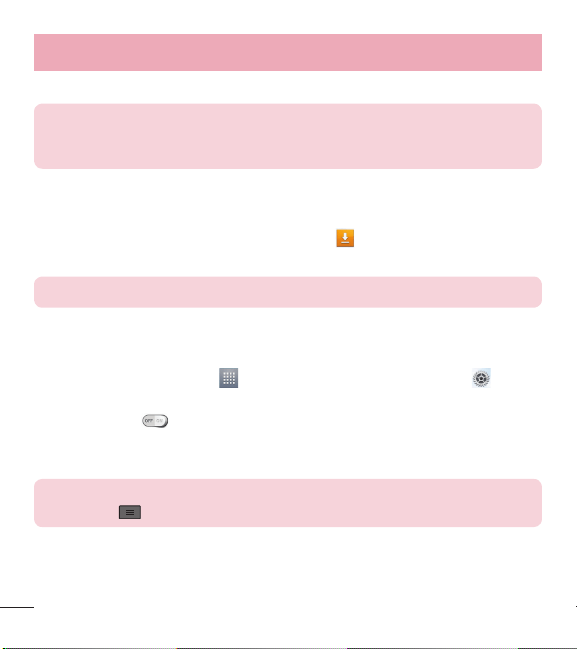
To uninstall applications:
1 From the Home screen, tap
> Apps tab (if necessary) > Settings >
Apps.
2 Once all applications appear, scroll to and select the application you want to
uninstall.
3 Tap Uninstall, then tap OK to confirm.
2. Optimizing battery life
Extend your battery's life between charges by turning off features that you don't need
to have running constantly in the background. You can monitor how applications and
system resources consume battery power.
Extending your phone's battery life:
t
Turn off radio communications when you're not using. If you are not using Wi-Fi,
Bluetooth or GPS, turn them off.
6
Important notice
t
Reduce screen brightness and set a shorter screen timeout.
t
Turn off automatic syncing for Gmail, Calendar, Contacts and other applications.
t
Some applications you have downloaded may reduce battery power.
To check the battery power level:
t
From the Home screen, tap > Apps tab (if necessary) > Settings >
About phone > Battery.
The battery status (charging or discharging) and battery level (percentage charged) is
displayed at the top of the screen.
To monitor and control how battery power is being used:
t
From the Home screen, tap > Apps tab (if necessary) > Settings >
About phone > Battery > Battery use.
Battery usage time is displayed on the screen. It tells you how long it has been since
you last connected your phone to a power source or, if currently connected, how long
the phone was last running on battery power. The screen shows the applications or
services using battery power, listed in order from the greatest to smallest amount
used.

7
3. Before installing an open source application and
operating system (OS)
WARNING
If you install and use an OS other than the one provided by the
manufacturer it may cause your phone to malfunction. In addition, your
phone will no longer be covered by the warranty.
WARNING
To protect your phone and personal data, only download applications
from trusted sources, such as Play Store. If there are improperly installed
applications on your phone, the phone may not work normally or a serious
error may occur. You must uninstall those applications and all associated
data and settings from the phone.
4. Using a screen lock
Set an unlock pattern to secure your and prevent unauthorized use. From the Home
screen, tap
> Apps tab (if necessary) > Settings > Lock screen > Select
screen lock > Pattern. This opens a screen that will guide you through how to
draw a screen lock pattern. You will be prompted to create a Backup PIN as a safety
measure in case you forget your screen lock.
Caution: Create a Google account before setting a screen lock and remember
the Backup PIN you created when creating your screen lock.
8
Important notice
WARNING
Precautions to take when using a pattern lock.
It is very important to remember the pattern lock you set. You will not be
able to access your phone if you use an incorrect pattern 5 times. You
have 5 opportunities to enter your pattern lock, PIN or password. If you
have used all 5 opportunities, you can try again after 30 seconds.
When you can't recall your unlock Pattern, PIN or Password:
< If you have forgotten your pattern >
If you logged in to your Google account on the phone but failed to enter the correct
pattern 5 times, tap the Forgot pattern? button at the bottom of the screen. You
are then required to log in with your Google Account or enter the Backup PIN you
created.
If you have not logged into a Google account on the phone or you forgot your Backup
PIN, you have to perform a hard reset.
< If you have forgotten your PIN or Password >
If you forget your PIN or Password, you will need to perform a hard reset.
Caution: If you perform a hard reset, all user applications and user data will be
deleted.
NOTE: If you have not logged into your Google Account and have
forgotten your Unlock Pattern, you will need to enter your Backup PIN.

9
5. Using the Hard Reset (Factory reset)
If your phone does not restore to its original condition after an error or you forgot your
screen lock, use a Hard Reset (Factory Reset) to initialize it.
1 Turn the power off.
2 Press and hold the Power/Lock Key
+ Volume Down Key .
3 When the Factory Hard Reset welcome screen appears, release all of the keys.
4 Press the Power/Lock Key
to continue or any other key to cancel.
5 Press the Power/Lock Key
once more to confirm or any other key to cancel.
6 Your phone will perform a factory reset.
WARNING
If you perform a Hard Reset, all user applications, user data and DRM
licenses will be deleted. Please remember to backup any important data
before performing a Hard Reset.
6. Opening and switching applications
Multi-tasking is easy with Android because you can keep more than one application
running at the same time. There is no need to quit an application before opening
another one. Use and switch between several open applications. Android manages
each application, stopping and starting them as needed to ensure that idle
applications don't consume resources unnecessarily.
To stop applications:
10
Important notice
1 From the Home screen, tap > Apps tab (if necessary) > Settings >
Apps > RUNNING.
2 Tap the desired application and tap Stop to stop it.
NOTE: To multi-task, tap the Recent Apps Key and select the
desired app from the list. This does not stop the previous app running in
the background on the device. Make sure to tap the Back Key
to exit
an app after using it.
7. Transferring music, photos and videos using Media
sync (MTP)
1 Connect the phone to your PC using the USB cable provided with your phone.
2 A USB connection type list will appear on your phone screen. Tap the Media sync
(MTP) option.
3 Select the Open device to view files option on your PC. You can then view media
contents on your PC and transfer the files.
4 Copy the files from your PC to the drive folder or vice versa.
5 Drag the Status Bar down and tap USB connected > Charge only.
6 Disconnect the USB cable from your phone.

11
8. Hold your phone upright
Hold your cell phone vertically, as you would a regular phone. Your phone has an
internal antenna. Be careful not to scratch or damage the back of the phone, as this
may affect performance.
When making/receiving calls or sending/receiving data, avoid holding the lower part
of the phone where the antenna is located. Doing so may affect call quality.
9. When the screen freezes
If the screen freezes or the phone does not respond when you try to operate it:
Press and hold the Power/Lock Key
for 10 seconds to turn your phone off.
If it still does not work, please contact the service center.
12
Getting to know your phone
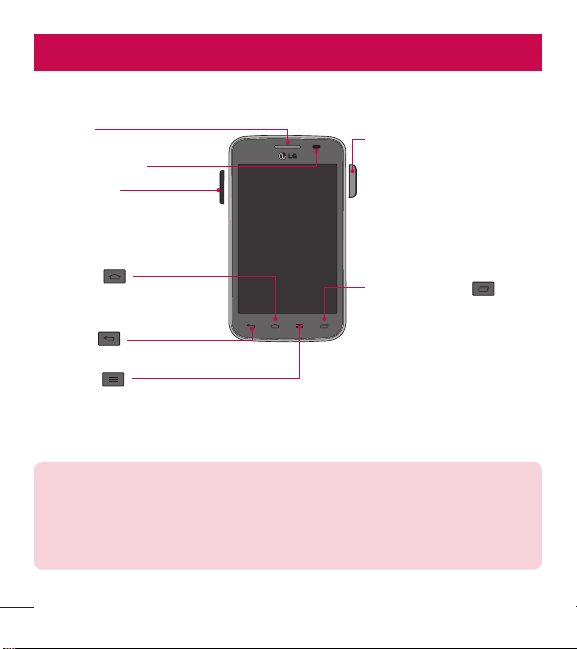
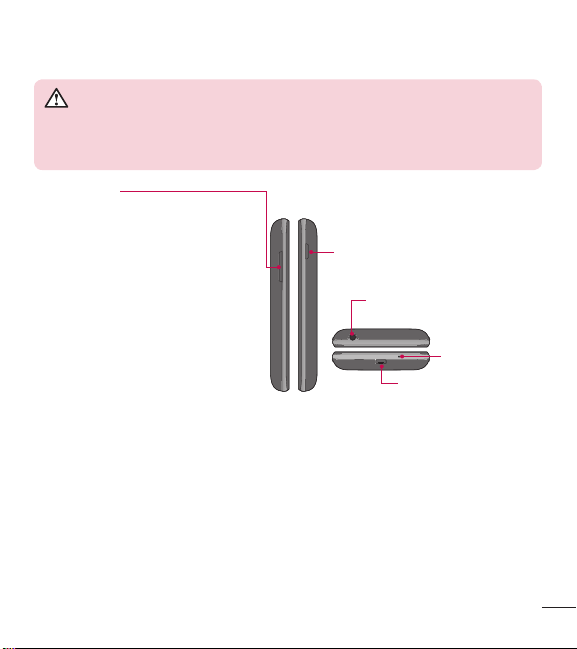
Phone overview
Proximity Sensor
Earpiece
Recent app key
View a list of recently-used
applications.
Home Key
Return to the Home screen
from any screen.
Volume Keys
Allow you to adjust the ringer,
media volume, or the volume
during a call.
Back Key
Return to the previous screen.
Menu Key
Display the available options.
Power/Lock Key
Turn your phone on/off,
restart, lock/unlock the
screen, turn airplane mode
on or off, and change the
ringer type.
NOTE: Proximity sensor
When receiving and making calls, the proximity sensor automatically
turns the backlight off and locks the touch screen by sensing when the
phone is near your ear. This extends battery life and prevents you from
unintentionally activating the touch screen during calls.
13
WARNING
Placing a heavy object on the phone or sitting on it can damage the LCD
and touch screen functions. Do not cover the LCD proximity sensor with
protective film. This could cause the sensor to malfunction.
Charger/USB Port
Microphone
3.5mm Headset Jack
Power/Lock Key
Volume Keys
t
On the Home screen: Control
ringer volume.
t
During a call: Control your
earpiece volume.
t
When playing audio/video:
Control volume continuously.
14
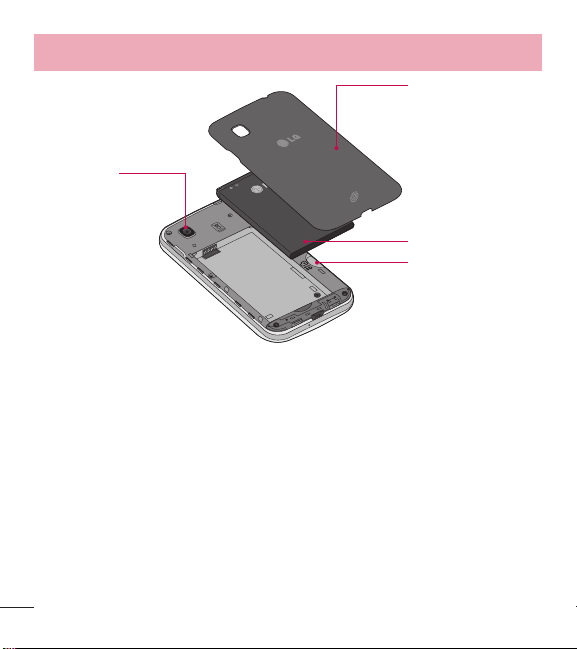
Getting to know your phone
Back cover
Battery
microSD Card slot
Camera Lens
15
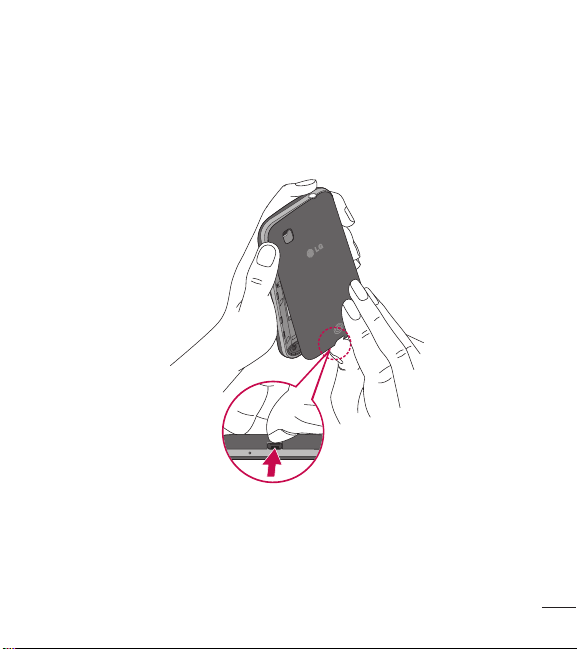
Installing the battery
Before you can start exploring your new phone, you'll need to set it up.
1 To remove the back cover, hold the phone firmly in one hand. With your other
hand, lift off the back cover with your thumbnail as shown in figure below.
16
Getting to know your phone
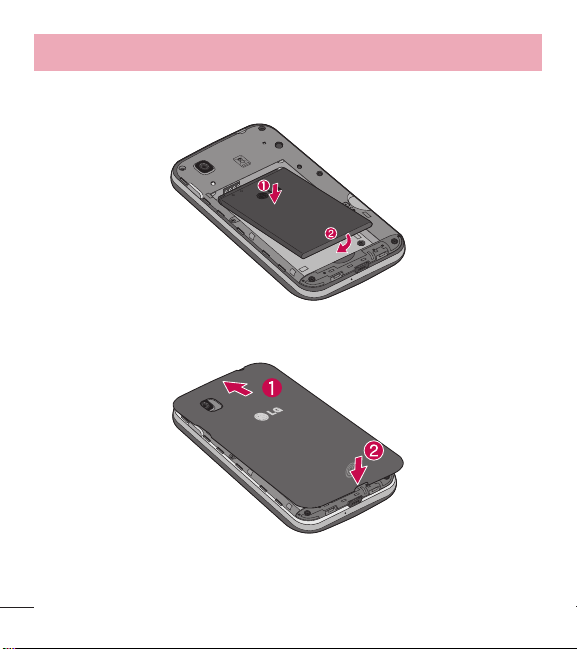
2 Insert the battery into place by aligning the gold contacts on the phone and the
battery (1) and pressing it down until it clicks into place (2).
3 Align the back cover over the battery compartment (1) and press it down until it
clicks into place (2).
17
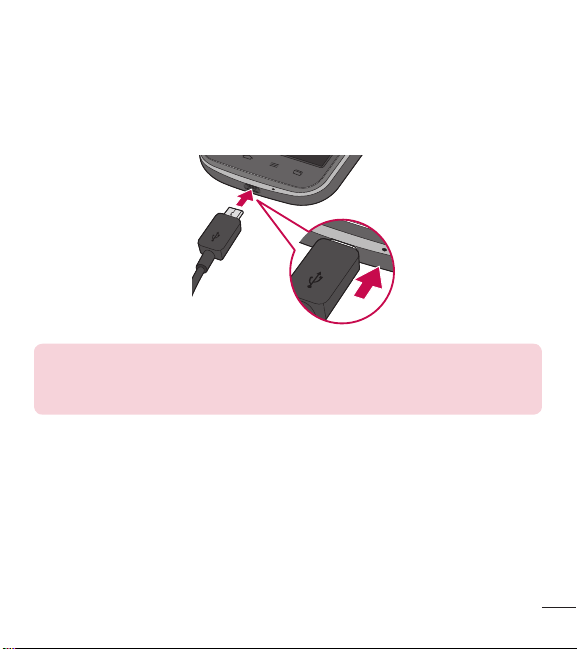
Charging the phone
The Charger/USB Port is at the bottom of the phone. Insert one end of the charging
cable into the phone and plug the other end into an electrical outlet.
NOTE:
t
The battery must be fully charged initially to improve battery lifetime.
t
Do not open the back cover while your phone is charging.
18
Getting to know your phone
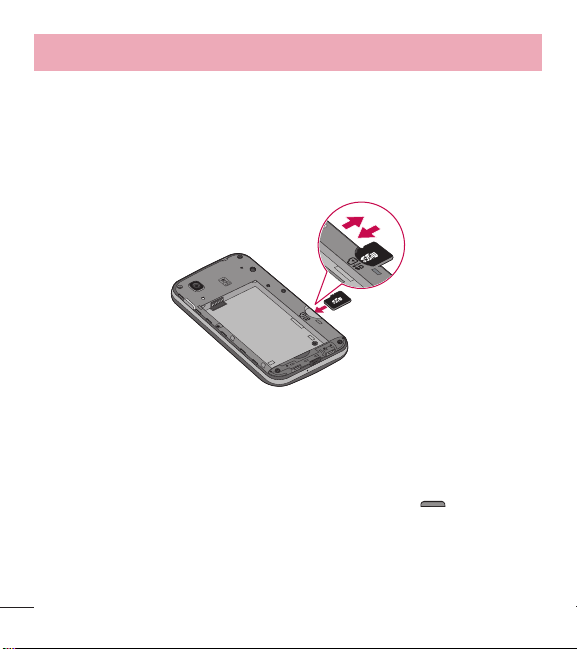
Using the memory card
Make sure to unmount the SD card in the Storage menu before removing it.
1 Remove the back cover.
2 Insert the memory card into the slot. Make sure the gold contact area is facing
downwards.
Locking and unlocking the screen
If you do not use the phone for a while, the screen will be automatically turned off
and locked. This helps to prevent accidental taps and saves battery power.
When you are not using your phone, press the Power/Lock Key
to lock your
phone.
If there are any programs running when you lock your screen, they may be still
running in Lock mode. It is recommended that you exit all programs before entering

19
Lock mode to avoid unnecessary charges (e.g. phone calls, web access and data
communications).
To wake up your phone, press the Power/Lock Key
. The Lock screen will
appear. Touch and slide the Lock screen in any direction to unlock the screen. The
last screen you viewed will open.

20
Your Home screen
Touch screen tips
Here are some tips on how to navigate on your phone.
Touch or tap – A single finger tap selects items, links, shortcuts and letters on the
on-screen keyboard.
Touch and hold – Touch and hold an item on the screen by touching it and not lifting
your finger until an action occurs. For example, to open a contact's available options,
touch and hold the contact in the Contacts list until the context menu opens.
Drag – Touch and hold an item for a moment and then, without lifting your finger,
move your finger on the screen until you reach the target position. You can drag
items on the Home screen to reposition them.
Swipe or slide – To swipe or slide, quickly move your finger across the surface
of the screen, without pausing when you first touch it (so you don't drag an item
instead). For example, you can slide the screen up or down to scroll through a list
or browse through the different Home screens by swiping from left to right (and vice
versa).
Double-tap – Double-tap to zoom on a webpage or a map. For example, quickly
double-tap a section of a webpage to adjust that section to fit the width of the
screen. You can also double-tap to zoom in and out when viewing a picture and when
using Maps.
Pinch-to-Zoom – Use your index finger and thumb in a pinching or spreading
motion to zoom in or out when using the browser, Maps or when viewing pictures.
Rotate the screen – From many applications and menus, the orientation of the
screen adjusts to the device's physical orientation.

21
NOTE:
t
To select an item, tap the center of the icon.
t
Do not press too hard; the touch screen is sensitive enough to pick up a
light, yet firm tap.
t
Use the tip of your finger to tap the option you want. Be careful not to tap
any other keys.
Home screen
Simply swipe your finger to the left or right to view the Home screen panels. You
can customize each panel with pre-loaded and downloaded apps, widgets, and
wallpapers.
The Quick Keys are available at the bottom of the Home screen. Quick Keys provide
easy and one-tap access to the functions you use the most.
Tap the Phone icon to bring up the touch screen dialpad to make a call.
Tap the Contacts icon to open your contacts.
Tap the Messaging icon to access the messaging menu. This is where you can
create a new message.
Tap the Apps icon at the bottom of the screen. This displays all of your installed
applications. To open any application, simply tap the icon in the applications list.
NOTE: To add an icon, drag it to the Quick Keys bar and release it. To
remove an icon, drag it out of the Quick Keys bar.

22
Your Home screen
Customizing the Home screen
You can customize your Home screen by adding apps, downloads, widgets or
wallpapers. For more convenience using your phone, add your favorite apps and
widgets to the Home screen.
To add items on your Home screen:
1 Touch and hold the empty part of the Home screen.
2 Tap the desired tab. Choose from Apps, Downloads, or Widgets.
3 Drag the desired app icon to the preferred location and lift your finger.
To remove an item from the Home screen:
t
Touch and hold the icon you want to remove, then drag it to and release it.
TIP! To add an application icon to the Home screen from the Apps screen,
touch and hold the application you want to add and drag it to the desired
location.
TIP! Using folders
You can combine several app icons in a folder to help keep you organized.
Drop one app icon over another one on a Home screen and a folder will be
created with both icons in it.
23
Returning to recently-used applications
1 Tap the Recent Apps Key . A list containing the icons of applications you used
recently will be displayed.
2 Tap an icon to open the application. Or tap the Back Key
to return to your
previous screen.
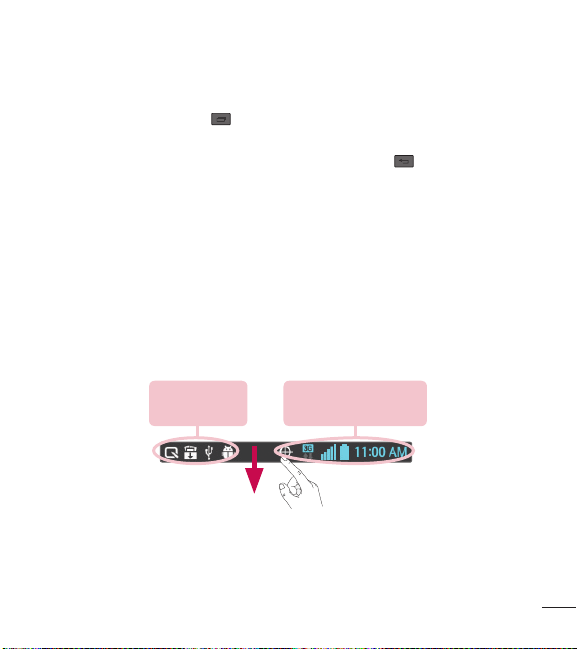
Notifications
Notifications alert you to the arrival of new messages, calendar events, and alarms,
as well as to ongoing events, such as video downloads.
From the Notifications Panel, you can view your phone's current status and pending
notifications.
When a notification arrives, its icon appears at the top of the screen. Icons for
pending notifications appear on the left and system icons, such as Wi-Fi or bat tery
strength, on the right.
Pending
notifications
System notifications
24
Your Home screen
Accessing notifications
Swipe the Status Bar downwards to open the Notifications Panel. To close the
Notifications Panel, swipe the bar that is at the bottom of the screen upwards.
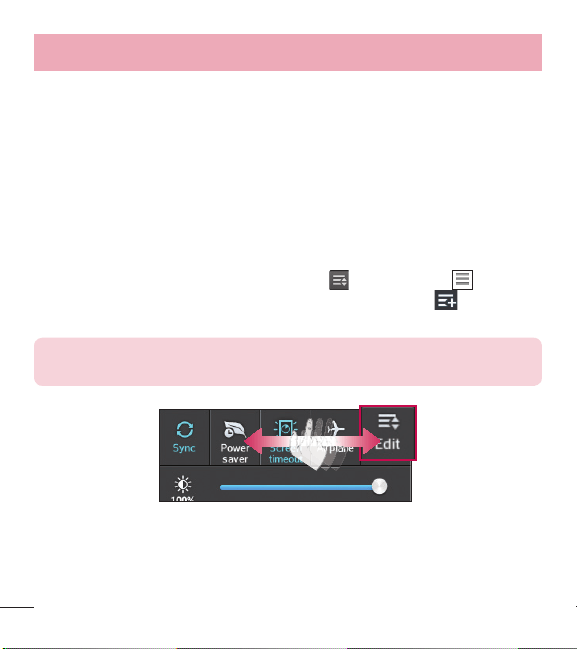
Quick Settings
Use Quick Settings to easily toggle function settings like Wi-Fi, manage display
brightness and more. To access the Quick Set tings, open the Notifications Panel. The
Quick Settings bar is located at the top of the Notifications Panel.
To rearrange Quick Setting items on the Notification Panel
Swipe the Quick Settings bar to the right and tap
. Touch and hold next to
the items you want to move and drag it to the desired location. Tap
to add more
items to the Quick Settings bar.
NOTE: Touch and hold an icon on the Quick Settings bar to directly
access its settings menu.
25
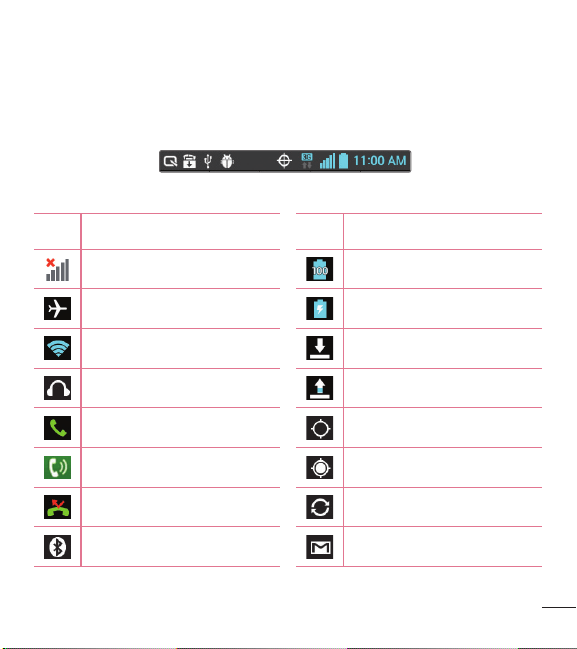
Notification icons on the Status Bar
Notification icons appear on the Status Bar at the top of the screen to report missed
calls, new messages, calendar events, device status and more.
The icons listed in the table below are some of the most common ones.
Icon Description Icon Description
No signal Battery fully charged
Airplane mode Battery is charging
Connected to a Wi-Fi network Downloading data
Wired headset Uploading data
Call in progress GPS is acquiring
Speakerphone Receiving location data from GPS
Missed call Data is syncing
Bluetooth is on New Gmail message
26
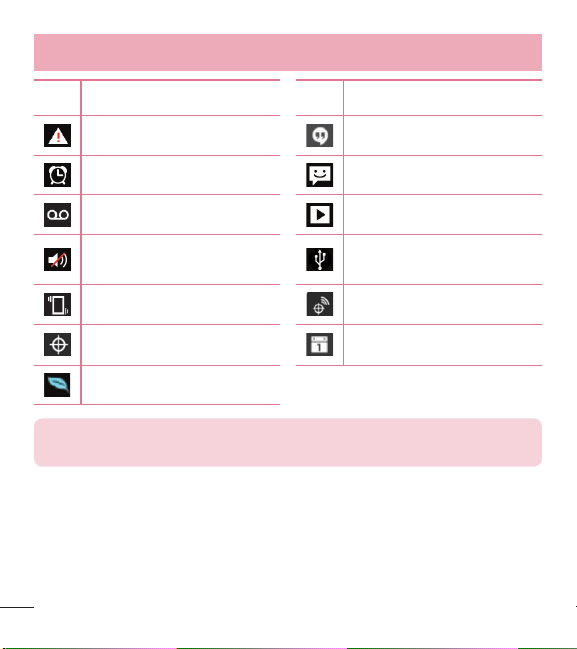
Your Home screen
Icon Description Icon Description
System warning New Hangouts message
Alarm is set New text or multimedia message
New voicemail Song is playing
Ringer is silenced
Phone is connected to PC via
USB cable
Vibrate mode Location service is on
Location service is off Calendar event notification
Power saver is on
NOTE: The icon locations in the Status Bar may differ depending on the
functions, features, and apps being used.
27
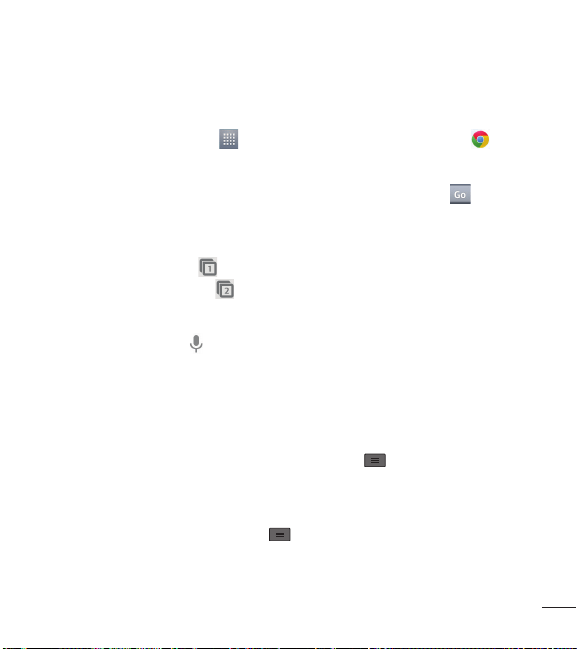
On-screen keyboard
You can enter text using the on-screen keyboard. The on-screen keyboard appears
automatically on the screen when you need to enter text. To manually display the
keyboard, simply tap a text field where you want to enter text.
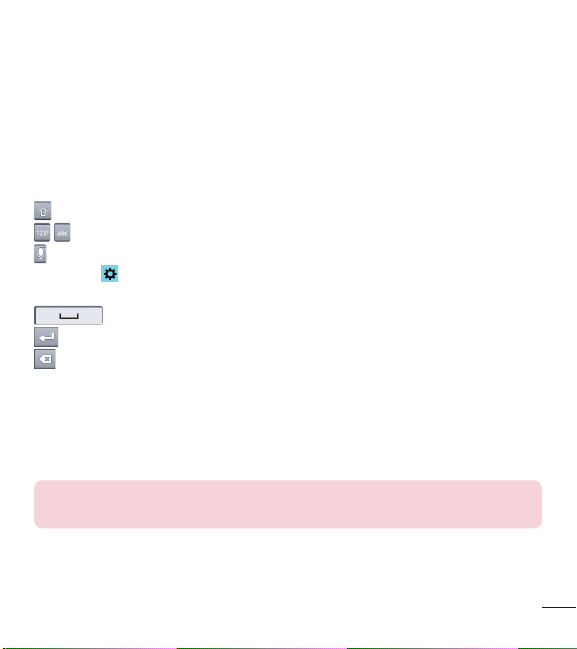
Using the keypad & entering text
Tap once to capitalize the next letter you type. Double-tap for all caps.
Tap to switch to the numbers and symbols keyboard.
Tap this key to enter text using your voice. Touch and hold this key and drag your
finger over
and release it to access the LG Keyboard settings. This key changes
depending on which option was used last.
Tap to enter a space.
Tap to create a new line in the message field.
Tap to delete the previous character.
Entering special characters
The LG Keyboard allows you to enter special characters (e.g. “á”) when entering text.
For example, to enter “á”, touch and hold the “a” key until the additional characters
are displayed. Then select the special character you want to enter.
NOTE: A symbol at the top right corner of a key indicates that additional
characters are available for that key.

28
Google account setup
The first time you open a Google application on your phone, you will be required to
sign in with your existing Google account. If you do not have a Google account, you
will be prompted to create one.
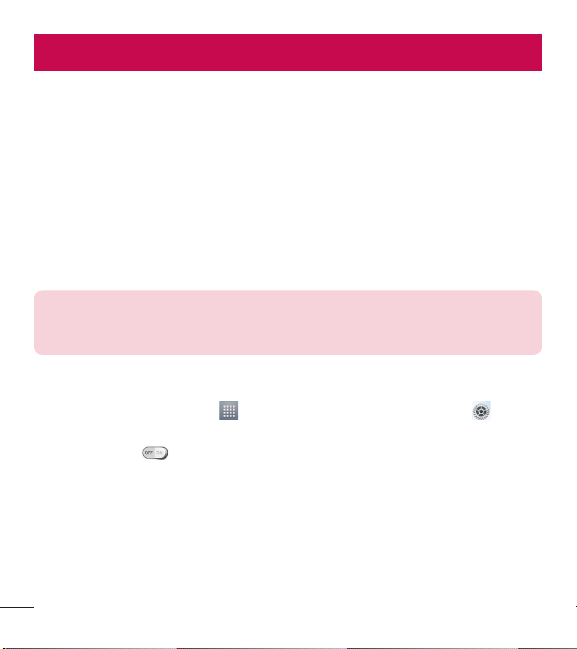
Creating your Google account
1 From the Home screen, tap to open the applications screen.
2 Tap Settings
> Accounts & sync > ADD ACCOUNT > Google > New to
start the Gmail set up wizard.
3 Tap a text field to open the keyboard and enter your name and username for your
Google account. When entering text, you can move to the next text field by tapping
Next on the keyboard.
4 When you have finished entering your name and username, tap
. Your phone
then communicates with Google servers and checks for username availability.
5 Enter and re-enter your password. Then follow the instructions and enter the
required and optional information about the account. Wait while the server creates
your account.
Signing in to your Google account
1 On the Google Account setup screen, tap Existing, enter your e-mail address and
password, then tap
.
2 After signing in, you can use Gmail and take advantages of Google
3 Once you have set up your Google account on your phone, it will be automatically
synchronized with your Google account on the web (depending on your
synchronization settings).

29
After signing in, you can use Gmail, Google Calendar, and Play Store; back up your
settings to Google servers; and take advantage of other Google services on your
phone.
30
Connecting to Networks and DevicesConnecting to Networks and Devices
Wi-Fi
With Wi-Fi, you can use high-speed Internet access within the coverage of the
wireless access point (AP). Enjoy wireless Internet using Wi-Fi, without extra charges.
Connecting to Wi-Fi networks
To use Wi-Fi on your phone, you need to access a wireless access point or 'hotspot'.
Some access points are open and you can simply connect to them. Others are
hidden or use security features, you must configure your phone to be able to connect
to them.
Turn off Wi-Fi when you're not using it to extend the life of your battery.
NOTE: If you are out of the Wi-Fi zone or have set Wi-Fi to off, additional
charges may be applied by your mobile service provider for mobile data
use.
Turning Wi-Fi on and connecting to a Wi-Fi network
1 From the Home screen, tap > Apps tab (if necessary) > Settings >
Wi-Fi.
2 Tap the switch
to turn Wi-Fi on and start scanning for available Wi-Fi
networks.
t
Secured networks are indicated by a lock icon.
3 Tap a network to connect to it.
t
If the network is secured, you are prompted to enter a password or other
credentials. (Ask your network administrator for details)
4 The Status Bar displays icons that indicate Wi-Fi status.

31
Bluetooth
Bluetooth allows you to share data with other Bluetooth-enabled devices and connect
to Bluetooth headsets.
NOTE:
t
LG is not responsible for the loss, interception or misuse of data sent or
received via the Bluetooth wireless feature.
t
Always ensure that you share and receive data with devices that are
trusted and properly secured. If there are obstacles between the devices,
the operating distance may be reduced.
t
Some devices, especially those that are not tested or approved by
Bluetooth SIG, may be incompatible with your device.
Turning on Bluetooth and pairing up your phone with a Bluetooth device
You must pair your phone with another device before you connect to it.
1 From the Home screen, tap
> Apps tab (if necessary) > Settings >
Bluetooth.
2 Tap the switch
to turn Bluetooth on.
3 Tap the check box next to your phone's name to make your phone visible to other
Bluetooth devices.
4 A list of available devices will be displayed. Choose the device you want to pair
with from the list.
32
Connecting to Networks and Devices
Once the paring is successful, your device will connect to the other device.
NOTE: Some devices, especially headsets or hands-free car kits, may
have a fixed Bluetooth PIN, such as 0000. If the other device has a PIN,
you will be asked to enter it.
Send data using the Bluetooth wireless feature
1 Select a file or item, such as a contact, calendar event or media file, from an
appropriate application or from the Downloads
app.
2 Select the option for sending data via Bluetooth.
NOTE: The method for selecting an option may vary by data type.
3 Search for and pair with a Bluetooth-enabled device.
Receive data using the Bluetooth wireless feature
1 From the Home screen, tap
> Apps tab (if necessary) > Settings >
Bluetooth.
2 Tap the switch
to turn Bluetooth on.
3 Tap the check box next to your phone's name to make your phone visible to other
Bluetooth devices.
NOTE: To select the length of time that your device will be visible, tap the
Menu Key > Visibility timeout.
4 Tap Accept to confirm that you are willing to receive data from the device.

33
Connecting to Virtual Private Networks
Virtual private networks (VPNs) allows you to connect to resources inside a secure
local network, from outside that network.
To add a VPN
1 From the Home screen, tap the Menu Key
> System settings > More... >
VPN.
2 Tap Add VPN network.
3 Tap the type of VPN you want to add.
4 In the screen that opens, follow the instructions from your network administrator to
configure each component of the VPN settings.
5 Tap Save. The VPN will be added to the list on the VPN settings screen.
PC connections with a USB cable
Learn to connect your device to a PC with a USB cable using the different USB
connection modes.
Transferring music, photos and videos using Media sync (MTP)
1 Connect your phone to a PC using the USB cable provided with your phone.
2 A USB connection type list will appear on your phone screen. You can also go to
System settings > PC connection > USB connection type > Media sync
(MTP).
3 You can now view media contents on your PC and transfer the files.
Synchronize with Windows Media Player
Ensure that Windows Media Player is installed on your PC.

34
Connecting to Networks and Devices
1 Use the USB cable to connect the phone to a PC on which Windows Media Player
has been installed.
2 Select the Media sync (MTP) option. When connected, a pop-up window will
appear on the PC.
3 Open Windows Media Player to synchronize music files.
4 Edit or enter your device's name in the pop-up window (if necessary).
5 Select and drag the music files you want to the sync list.
6 Start synchronization.
t
The following requirements must be satisfied to synchronize with Windows Media
Player.
Items Requirement
OS Microsoft Windows XP SP2, Vista or higher
Window Media Player version Windows Media Player 10 or higher
t
If the Windows Media Player version is lower than 10, install version 10 or higher.
35
CallsCalls
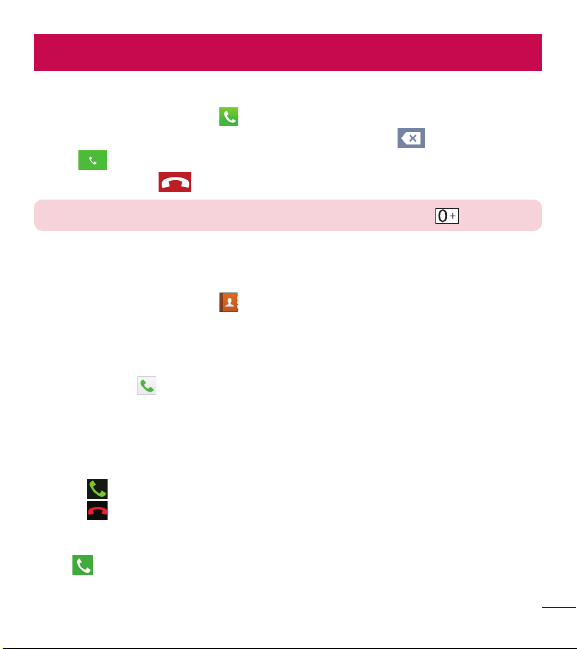
Making a call
1 From the Home screen, tap to open the dial pad.
2 Enter the number using the dial pad. To delete a digit, tap
.
3 Tap
to make a call.
4 To end a call, tap
.
TIP! To enter “+” to make international calls, touch and hold .
Calling your contacts
1 From the Home screen, tap to open your contact list.
2 Scroll through the contact list or tap the Search contacts box and enter the
contacts name. You can also scroll the alphabet bar along the right side of the
screen.
3 In the list, tap
next to the desired contact to make the call.
Answering and rejecting a call
When the screen is locked
t
Swipe in any direction to answer the incoming call.
t
Swipe in any direction to decline an incoming call.
When the screen is unlocked
t
Tap to answer the incoming call.
36
Calls
t
Tap to decline the incoming call.
TIP! Decline with message
You can send a message quickly using this function. This is useful if you
need to reject a call with message during a meeting.
Adjusting the in-call volume
To adjust the in-call volume during a call, use the Volume Up and Volume Down Keys
on the left-hand side of the phone.
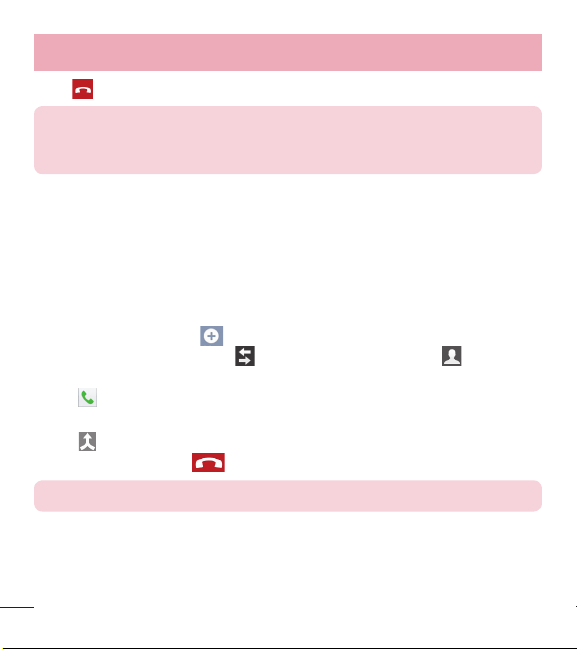
Making a second call
1 During your first call, tap and dial the number. You can also go to the recently
dialed numbers list by tapping
or search contacts by tapping and
selecting the contact you want to call.
2 Tap
to make the call.
3 Your initial call is placed on hold.
4 Tap
if you want to start a conference call.
5 To end active calls, tap
.
NOTE: You are charged for each call you make.
37
Viewing your call logs
From the Home screen, tap and choose the Call logs tab . A complete list of
all dialed, received and missed calls is displayed.
TIP!
t
Tap any call log entry to view the date, time and duration of the call.
t
Tap the Menu Key , then tap Delete all to delete all the recorded
items or tap Delete to delete individual items.
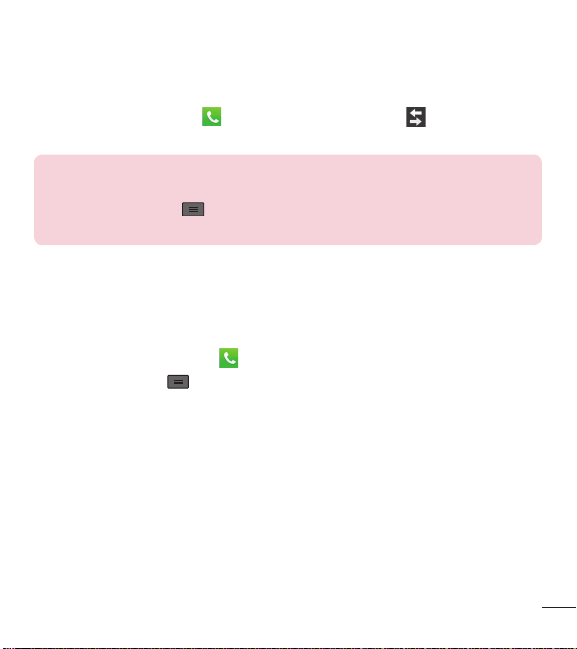
Call settings
You can configure phone call settings such as call forwarding, as well as other
special features offered by your carrier.
1 From the Home screen, tap
.
2 Tap the Menu Key
.
3 Tap Call settings and choose the options that you wish to adjust.
38
ContactsContacts
Add contacts to your phone and synchronize them with the contacts in your Google
account or other accounts that support contact syncing.
Searching for a contact
1 From the Home screen, tap to open your contact list.
2 Tap the Search contacts box and enter the contacts name. You can also scroll
the alphabet bar along the right side of the screen.
Adding a new contact
1 From the Home screen, tap and enter the new contact's number.
2 Tap the Menu Key
> Add to Contacts > Create new contact.
3 If you want to add a picture to the new contact, tap
. Choose from Take photo
or Select from Gallery.
4 Tap
at the top of the screen and select the account you want to save the
contact to.
5 Tap a category of contact information and enter the details about your contact.
6 Tap Save.
Favorite contacts
You can classify frequently called contacts as favorites.
Adding a contact to your favorites
1 From the Home screen, tap
to open your contact list.
2 Tap a contact to view its details.
39
3 Tap the star to the right of the contact's name. The star will turn yellow color.
Removing a contact from your favorites list
1 From the Home screen, tap
to open your contact list.
2 Tap the
tab and choose a contact to view its details.
3 Tap the yellow color star to the right of the contact's name. The star turns grey
color and the contact is removed from your favorites.
Creating a group
1 From the Home screen, tap to open your contact list.
2 Tap the Groups tab, then tap the Menu Key
> New group.
3 Enter a name for the new group. You can also set a ringtone for the newly created
group.
4 Tap Save to save the group.
NOTE: If you delete a group, the contacts assigned to that group will not
be lost. They will remain in your contacts.
40
MessagingMessaging
Your phone combines text and multimedia messages into one intuitive, easy-to-use
menu.
Sending a message
1 Tap on the Home screen and tap to compose a new message.
2 Enter a contact name or contact number in the To field. As you enter the contact
name, matching contacts will appear. You can tap a suggested recipient. You can
add more than one contact.
NOTE: You will be charged for a text message for every person you send
the message to.
3 Tap the text field and begin composing your message.
4 Tap the Menu Key
to open the Options menu. Choose from Add to Contacts,
Add subject, Insert smiley, Discard, Set priority and Change skin.
TIP! You can tap the icon to attach a file you want to share.
41
5 Tap Send (or Send MMS) to send your message.
WARNING
t
The 160-character limit may vary from country to country, depending on
the language and how the text message is coded.
t
If an image, video or audio file is added to an text message, it is
automatically converted into a multimedia message and you are charged
accordingly.
View mode
Unread messages are located at the top. Other messages exchanged with another
party are displayed in chronological order so that you can conveniently see an
overview of your conversation.
Changing your message settings
Your phone message settings are pre-defined, so you can send messages
immediately. You can change the settings according to your preferences.
t
Open the Messaging app and tap the Menu Key > Settings.

42
E-mailE-mail
You can use the Email application to read emails from services like Gmail. The Email
application supports the following account types: POP3, IMAP and Exchange.
Your service provider or system administrator can provide you with the account
settings you need.
Managing an email account
The first time you open the Email application, a set-up wizard opens to help you to
set up an email account.
After the initial set-up, the Email application displays the contents of your inbox. If you
have added more than one account, you can switch among accounts.
To add another email account:
t
Open the Email application and tap the Menu Key > Accounts > Menu Key
> Add account.
To change an email account's settings:
t
Open the Email application and tap the Menu Key > Accounts > Menu Key
> Entire settings. Then tap the account that you want to configure.
To delete an email account:
t
Open the Email application and tap the Menu Key > Accounts > Menu Key
> Remove account > tap an account > Remove > Yes.
Working with account folders
Open the Email application and tap the Menu Key > Folders.

43
Each account has an Inbox, Outbox, Sent and Drafts folder. Depending on the
features supported by your account's service provider, you may have additional
folders.
Composing and sending email
To compose and send a message
1 While in the Email application, tap
.
2 Enter an address for the message's intended recipient. As you enter text, matching
addresses will be proposed from your Contacts. Separate multiple addresses using
semicolons.
3 Tap the Cc/Bcc field to copy recipients. Tap
to attach files, if needed.
4 Tap the message field and enter your message.
5 Tap
to send the email.
If you aren't connected to a network, for example, if you're working in airplane
mode, the messages that you send will be stored in your Outbox folder until you
connect to a network again. If it contains any pending messages, the Outbox will
be displayed on the Accounts screen.
TIP! When a new email arrives in your Inbox, you will be notified by a
sound or vibration (depending on your sound and vibration settings).
44
CameraCamera
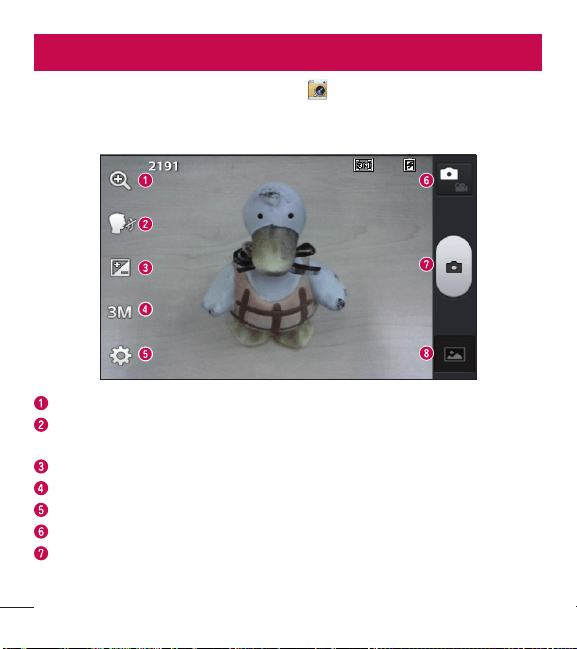
To open the Camera application, tap Camera on the Home screen.
Getting to know the viewfinder
Zoom - Zoom in or out.
Cheese shutter – This enables you to take a picture by saying a voice command.
Say Cheese, Kimchi, Smile, LG, or Whiskey to take a photo.
Brightness – This defines and controls the amount of sunlight entering the image.
Image size – Tap to set the size (in pixels) of the picture you take.
Settings – Tap to open the Settings menu.
Video mode – Tap to switch to video mode.
Capture – Takes a photo.
45
Gallery – Tap to view the last photo you captured. This enables you to access
your Gallery and view saved photos within camera mode.
NOTE: The memory capacity may differ depending on the configured
camera settings.
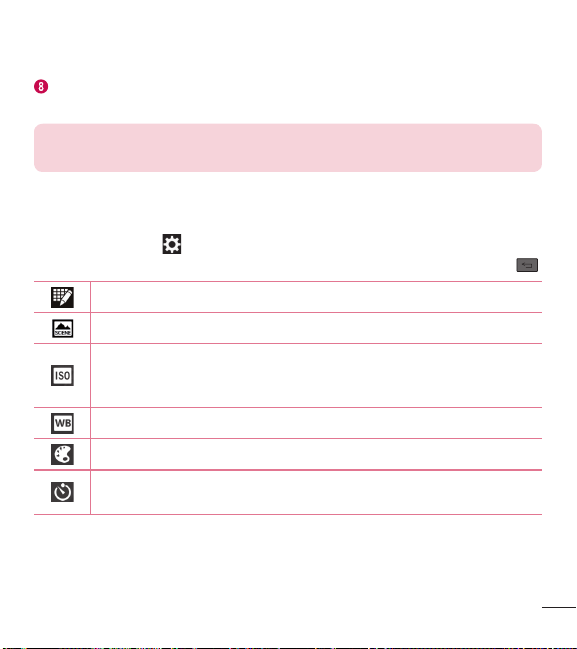
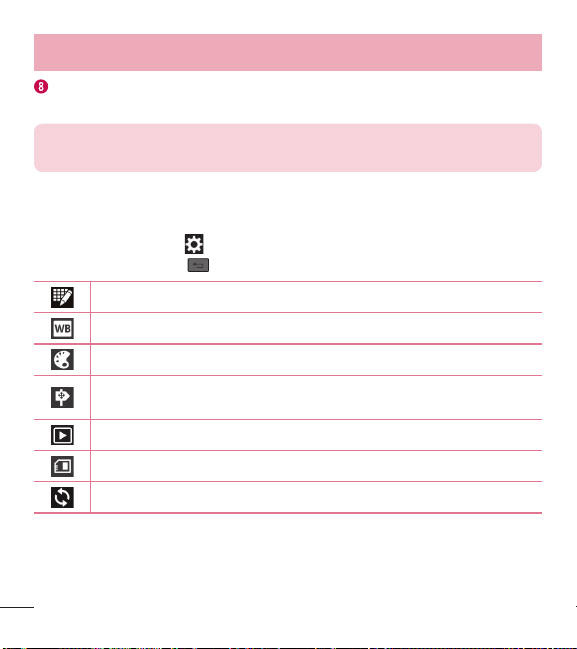
Using the advanced settings
In the viewfinder, tap to open the advanced options. You can change the camera
settings by scrolling through the list. After selecting the option, tap the Back Key
.
Tap if you want to change the viewfinder menu.
Allows you to set the scene mode for the current environment.
The ISO rating determines the sensitivity of the camera's light sensor. The
higher the ISO, the more sensitive the camera. This is useful in darker
conditions when you cannot use the flash.
Improves white balance in various lighting conditions.
Applies color effects to your pictures.
Sets a delay after the Capture button is pressed. This is ideal if you want
to be in the photo.

46
CameraCamera
Activate this to use your phone's location-based services. Take pictures
wherever you are and tag them with the location. If you upload tagged
pictures to a blog that supports geo-tagging, you can see the pictures
displayed on a map.
NOTE: This function is only available when the GPS function is
active.
Selects a shutter sound.
Automatically displays you the picture after taking it.
Select the location where you want to save your images.
Restore all camera settings back to default.
Tap this whenever you want to know how a function works. This icon will
provide you with a quick guide.
TIP!
t
When you exit the camera, some settings return to their defaults, such as
white balance, color effect, timer and scene mode. Check these before
you take your next photo.
t
The setting menu is superimposed over the viewfinder, so when you
change photo color or quality elements, you will see a preview of the
changed image behind the Settings menu.
47
Taking a quick photo
1 Open the Camera application.
2 Holding the phone horizontally, point the lens towards the subject you want to
photograph.
3 Tap
to capture the photo.
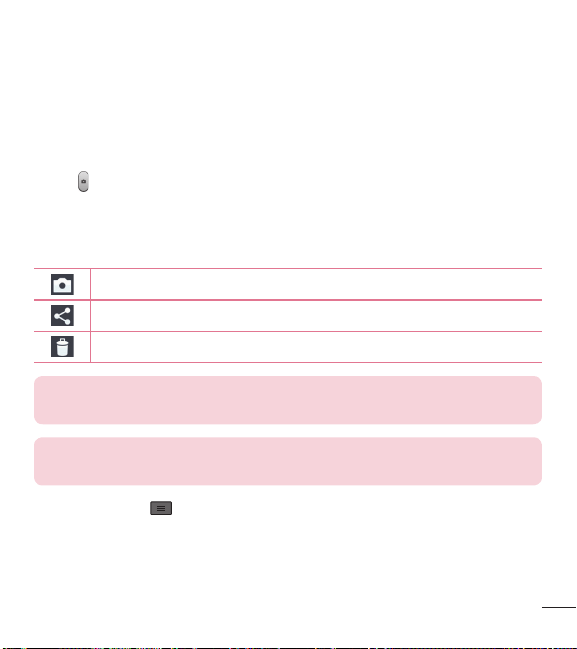
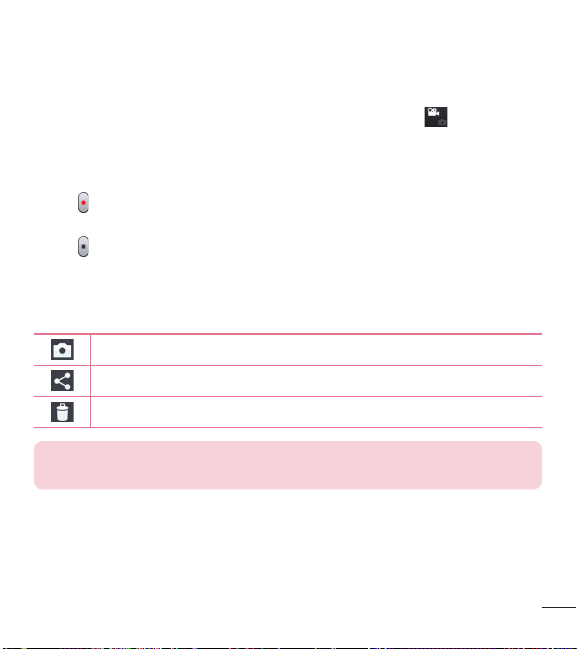
Once you've taken a photo
Tap the image preview at the bottom to view the last photo you captured.
Tap to take another photo immediately.
Tap to send your photo to others or share it via social network services.
Tap to delete the photo.
TIP! If you have an social networking account set up on your phone, you
can share your photo with your social networking community.
NOTE: Additional charges may apply when multimedia messages are
downloaded while roaming.
Tap the Menu Key to open the following advanced options.
Set image as – Tap to use the photo as a Contact photo, Home screen wallpaper
or Lock screen wallpaper.
Move – Tap to move the photo to another album.

48
Camera
Copy – Tap to copy the selected photo and save it to another album.
Rename – Tap to edit the name of the selected photo.
Rotate left/right – Tap to rotate the picture to the left or right.
Crop – Tap to crop your photo.
Edit – Tap to edit the photo.
Adjusts light and shade to your photo.
Applies artistic effects to your photos.
Improve color quality in various lighting conditions.
Applies additional options to your photos.
Slideshow – Displays a slideshow using all of your photos.
Details – Displays information about the photo.
Viewing your saved photos
You can access your saved photos when in camera mode. Just tap the image
preview at the bottom and your Gallery will be displayed.
t
To view more photos, scroll left or right.
t
To zoom in or out, double-tap the screen or place two fingers and spread them
apart (move your fingers closer together to zoom out).
49
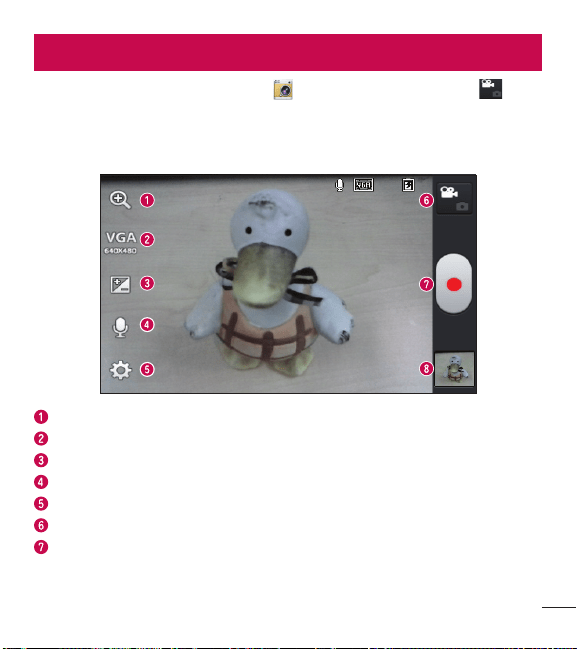
Video cameraVideo camera
To open the video camera, tap Camera on the Home screen, then tap to
switch to video mode.
Getting to know the viewfinder
Zoom – Zoom in or zoom out.
Video size – Tap to set the size (in pixels) of the video you are recording.
Brightness – This defines and controls the amount of sunlight entering the video.
Audio recording – Allows you to record a video with or without sound.
Settings – Tap to open the settings menu.
Camera mode – Tap to switch to camera mode.
Record – Starts recording.
50
Video camera
Gallery – Tap to view the last video you recorded. This enables you to access your
Gallery and view your saved videos from within video mode.
NOTE: While recording a video, place two fingers on the screen and pinch
to use the Zoom function.
Using the advanced settings
Using the viewfinder, tap to open the advanced options. After selecting the
option, tap the Back Key
.
Tap if you want to change the viewfinder menu.
Improves white balance in various lighting conditions.
Choose a color effect to use for your video.
Activate this to use your phone's location-based services for geo-tagging
purposes.
Auto review automatically shows you the video you just recorded.
Select the location where you want to save your videos.
Restore all video camera settings back to default.
51
Recording a quick video
1 Open the Camera application and tap the Video mode button .
2 The video camera viewfinder appears on the screen.
3 Hold your phone, point the lens towards the subject you wish to capture in your
video.
4 Tap
once to start recording.
5 A timer showing the length of the video is displayed.
6 Tap
to stop recording.
After recording a video
Tap the image preview at the bottom to view the last video you recorded.
Tap to record another video immediately.
Tap to send your video to others or share it via social network services.
Tap to delete the video.
NOTE: Additional charges may apply when multimedia messages are
downloaded while roaming.

52
Video camera
Watching your saved videos
1 In the viewfinder, tap the image preview at the bottom.
2 Your Gallery will appear on the screen.
3 Tap a video to play it automatically.
Adjusting the volume when viewing a video
To adjust the volume of a video while it is playing, use the Volume Keys on the left
side of the phone.
53
LG Unique FunctionLG Unique Function
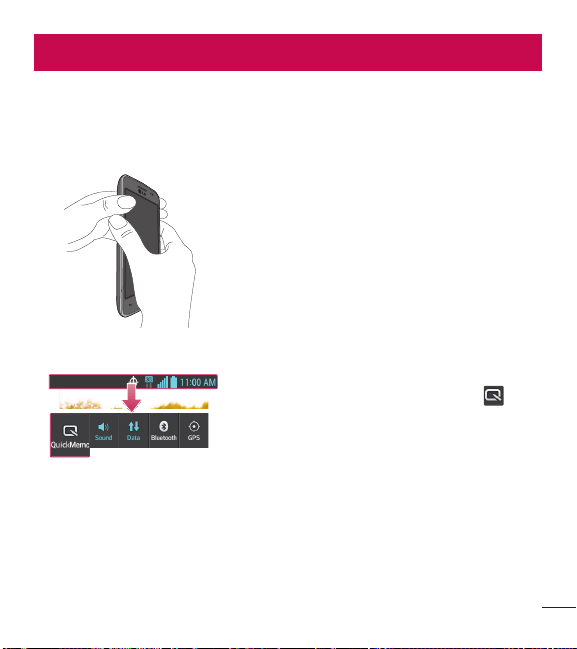
QuickMemo
The QuickMemo feature allows you to create memos and capture screen shots.
You can use QuickMemo to easily and efficiently create memos during a call, with a
saved picture or on the current phone screen.
1 Access the QuickMemo feature by pressing
both Volume Keys for one second on the screen
you want to capture.
OR OR
Drag the Status Bar down and and tap on
the Quick Settings Bar
54
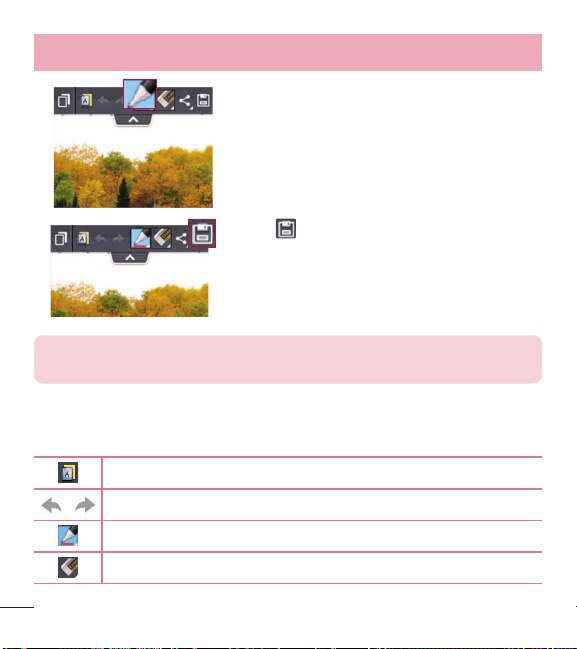
LG Unique Function
2 Select the desired menu option from Pen type,
Color, and Eraser. Then create a memo.
3 Tap in the Edit menu to save the memo to
the QuickMemo album in your Gallery.
NOTE: Please use a fingertip while using the QuickMemo function. Do not
use your fingernail.
Using the QuickMemo options
The following options are available when using QuickMemo.
Allows you to use the current background or a notepad image.
Undo or redo previous actions.
Selects the pen type and the color.
Erases the memo that you created.
55
Tap to send your memo to others or share it via social network services.
Saves the memo in the Gallery.
Viewing the saved QuickMemo
Open the Gallery and select the QuickMemo album.
56
MultimediaMultimedia
Gallery
You can store multimedia files in the internal and external memory for easy access
to all your multimedia files. Use this application to view multimedia files like pictures
and videos.
t
From the Home screen, tap > Apps tab (if necessary) > Gallery .
NOTE:
t
Some file formats are not supported, depending on the software installed
on the device.
t
Some files may not play properly, depending on how they are encoded.
Viewing pictures
Open the Gallery to display your available albums. When another application, such
as Email, saves a picture, the download folder is automatically created to contain
the picture. Likewise, capturing a screenshot automatically creates the Screenshots
folder. Select a folder to open it.
Pictures are displayed by creation date in a folder. Select a picture to view it full
screen. Scroll left or right to view the next or previous image.
Zooming in and out
Use one of the following methods to zoom in on an image:
t
Double-tap anywhere to zoom in.
t
Spread two fingers apart on any place to zoom in. Pinch to zoom out, or double-tap
to return.
57
Playing videos
Video files show the icon in the preview. Select a video to watch it and tap .
NOTE:
t
Some file formats are not supported, depending on the device software.
t
If the file size exceeds the available memory, an error can occur when you
open files.
Editing photos/videos
When viewing an photo/video, tap the Menu Key and use the advanced editing
options.
Deleting images
Use one of the following methods:
t
In an album, tap and select photos/videos by tapping them, then tap Delete.
t
When viewing a photo/video, tap .
Setting a photo as the wallpaper
When viewing a photo, tap the Menu Key and select Set image as to set the
image as the Home screen or Lock screen wallpaper.
Videos
Your phone has a video player that lets you play all of your favorite videos. To access
the video player, from the Home screen, tap
> Apps tab (if necessary) > Videos
.
58
Multimedia
Playing a video
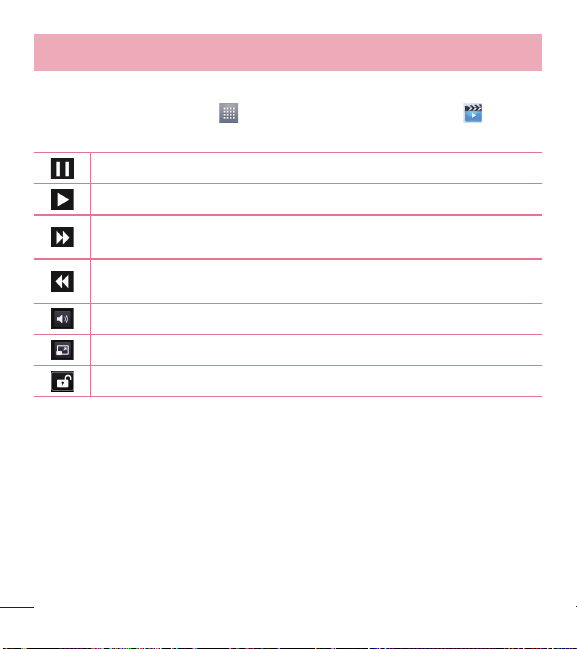
1 From the Home screen, tap > Apps tab (if necessary) > Videos .
2 Select the video you want to play.
Tap to pause video playback.
Tap to resume video playback.
Touch and hold to fast-forward in 3 second increments. Tap once to fast-
forward 10 seconds.
Touch and hold to rewind in 3 second increments. Tap once to rewind 10
seconds.
Tap to manage the video volume.
Tap to change the ratio of the video screen.
Tap to lock a video screen.
To change the volume while watching a video, press the Volume Keys on the left side
of the phone.
Touch and hold a video in the list. The Share, Delete and Details options will be
displayed.
59
Music
Your phone has a music player that lets you play all your favorite tracks. To access
the music player, from the Home screen, tap
> Apps tab (if necessary) > Music
.
Playing a song
1 From the Home screen, tap > Apps tab (if necessary) > Music .
2 Tap the Songs tab.
3 Select the song you want to play.
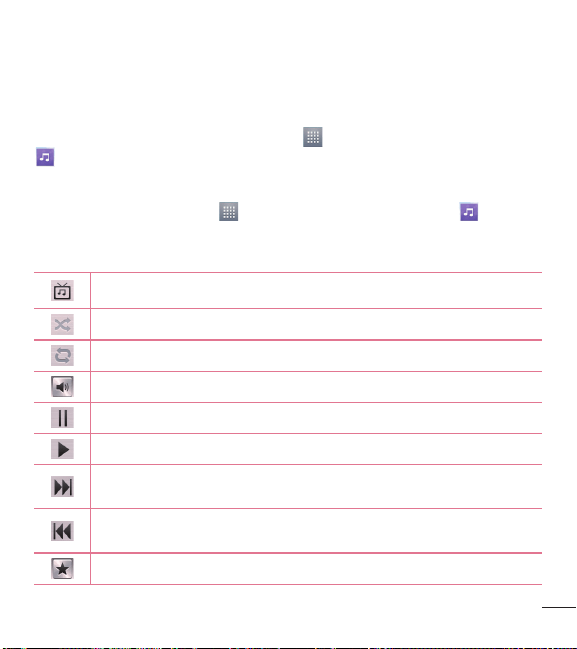
Tap to find the the song on YouTube.
Tap to set shuffle mode.
Tap to set repeat mode.
Tap to manage the music volume.
Tap to pause playback.
Tap to resume playback.
Tap to skip to the next track on the album or in the playlist. Touch and
hold to fast-forward in 3 second increments.
Tap to go back to the beginning of the song. Tap twice to return to the
previous song. Touch and hold to rewind in 3 second increments.
Tap to add the song to your Favorites playlist.
60
Multimedia
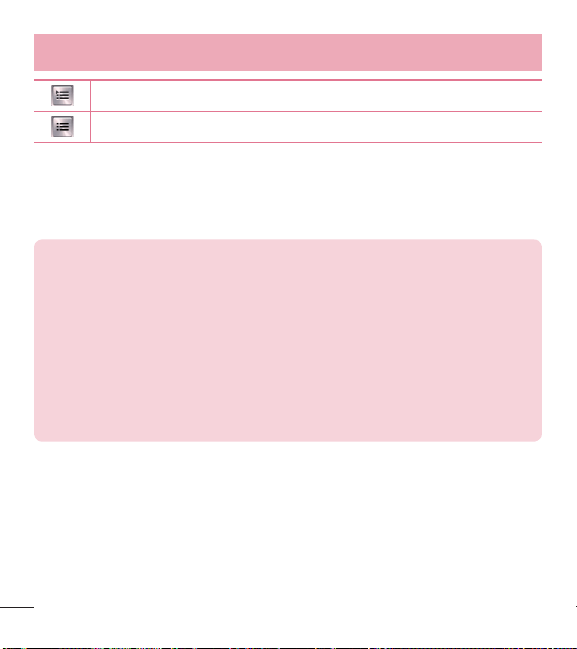
Tap to see the current playlist.
Tap to return to the music library.
To change the volume while listening to music, press the Volume Keys on the left side
of the phone.
Touch and hold any song in the list. The Play, Add to playlist, Share, Set as
ringtone, Delete, Details and Search options will be displayed.
NOTE:
t
Some file formats are not supported, depending on the device software.
t
If the file size exceeds the available memory, an error can occur when you
open files.
t
Music file copyrights may be protected by international treaties and
national copyright laws. Therefore, it may be necessary to obtain
permission or a licence to reproduce or copy music.
In some countries, national laws prohibit private copying of copyrighted
material. Before downloading or copying the file, check the national laws
of the relevant country concerning the use of such material.
61
UtilitiesUtilities
Setting your alarm
1 From the Home screen, tap > Apps tab (if necessary) > Alarm/Clock >
.
2 Set the time and select AM or PM.
3 Set Repeat, Snooze duration, Vibration, Alarm sound, Alarm volume, Auto
app starter, Puzzle lock and Memo.
4 Tap Save to save the alarm.
NOTE: To change alarm settings, tap the Menu Key on the Alarms
screen and select Settings.
Using your calculator
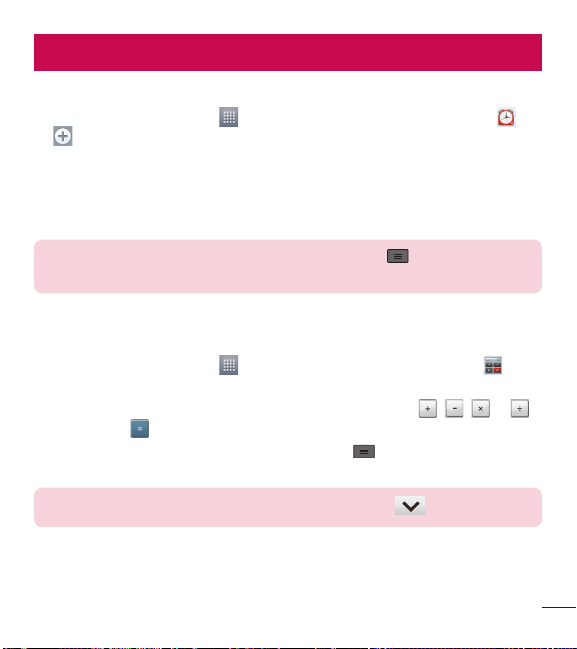
1 From the Home screen, tap > Apps tab (if necessary) > Calculator .
2 Tap the number keys to enter numbers.
3 For simple calculations, tap the function you want to perform (
, , or
) followed by .
4 For more complex calculations, tap the Menu Key
, select Advanced panel,
then choose the desired functions.
NOTE: To check your previous calculation history, tap .
62
Utilities
Adding an event to your calendar
1 From the Home screen, tap > Apps tab (if necessary) > Calendar .
2 Tap
and choose from Day, Week, Month, or Agenda to change the month
view.
3 Tap the date for which you wish to add an event and tap
.
4 Tap the Event name field and enter the event name.
5 Tap the Location field and enter the location. Check the date and enter the time
you wish your event to start and finish.
6 If you wish to add a note to your event, tap the Description field and enter the
details.
7 If you wish to repeat the alarm, set REPEAT and set REMINDERS, if necessary.
8 Tap Save to save the event in the calendar.
Voice Recorder
Use the voice recorder to record voice memos or other audio files.
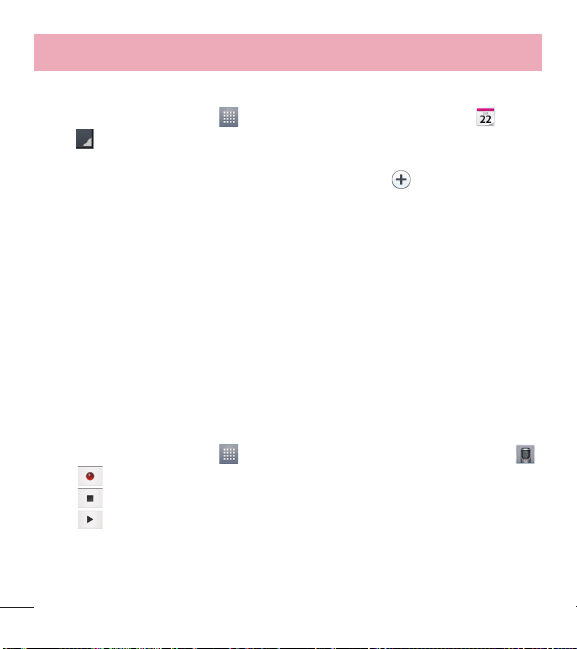
Recording a sound or voice
1 From the Home screen, tap > Apps tab (if necessary) > Voice Recorder .
2 Tap
to begin recording.
3 Tap
to end the recording.
4 Tap
to listen to the recording.
63
NOTE: Tap to access the list of recordings. You can listen to the saved
recording. The available recording time may differ from actual recording
time.
Polaris Viewer 4
Polaris Viewer 4 let you view various types of electronic documents such as MS
Office, PDF, Text, and more.
t
From the Home screen, tap > Apps tab (if necessary) > Polaris Viewer 4 .
Google+
Use this application to stay connected with people via Google’s social network
service.
t
From the Home screen, tap > Apps tab (if necessary) > Google+ .
NOTE: This application may not be available depending on the region or
service provider.
64
Utilities
Voice Search
Use this application to search webpages using voice.
1 From the Home screen, tap
> Apps tab (if necessary) > Voice Search .
2 Say a keyword or phrase when Speak now appears on the screen. Select one of
the suggested keywords that appear.
NOTE: This application may not be available depending on the region or
service provider.
Downloads
Use this application to see what files have been downloaded through the applications.
t
From the Home screen, tap > Apps tab (if necessary) > Downloads .
65
The WebThe Web
Browser
Use this application to browse the Internet. The Browser gives you a fast, full-color
world of games, music, news, sports, entertainment and much more, right on your
mobile phone wherever you are and whatever you enjoy.
NOTE: Additional charges apply when connecting to these services and
downloading content. Check data charges with your network provider.
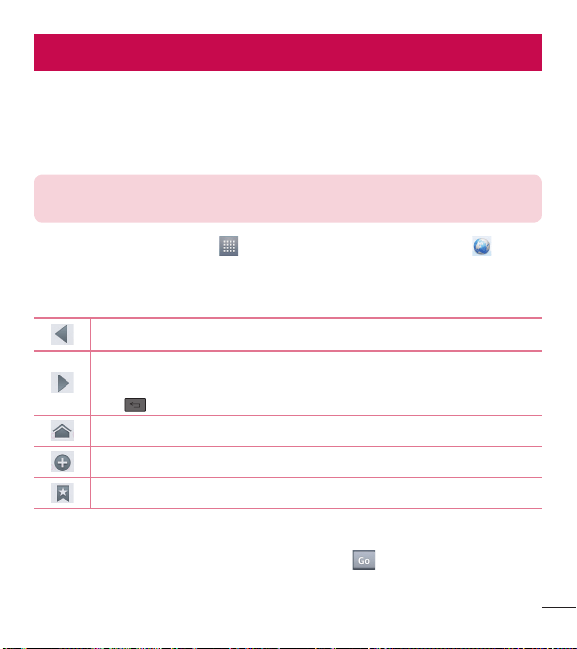
1 From the Home screen, tap > Apps tab (if necessary) > Browser .
Using the Browser toolbar
Touch and hold the Browser toolbar and slide it upwards with your finger to open it.
Tap to go back one page.
Tap to go forward one page, to the page you connected to after the
current one. This is the opposite of what happens when you tap the Back
Key
, which takes you to the previous page.
Tap to go to the Home page.
Tap to add a new window.
Tap to access bookmarks.
Viewing webpages
Tap the address field, enter the web address and tap on the keyboard.
66
The Web
Opening a page
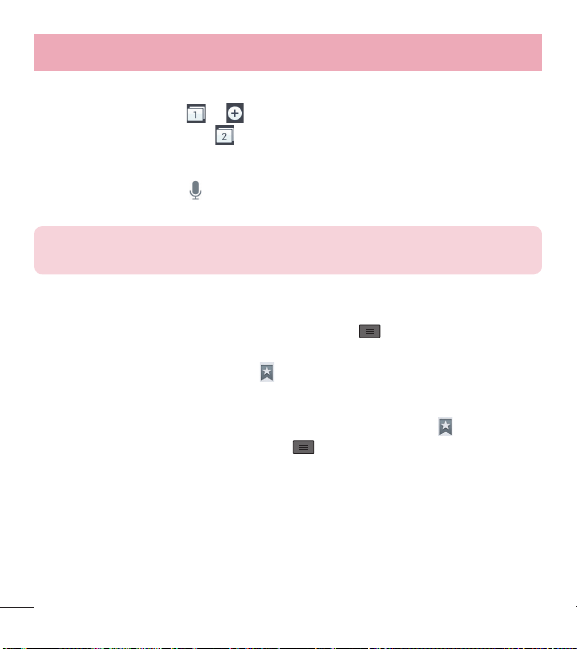
To open a new page, tap > .
To go to to an open page, tap
, scroll up or down, and tap the page to select it.
Searching the web by voice
Tap the address field, tap , speak a keyword, and then select one of the suggested
keywords that appear.
NOTE: This feature may not be available depending on the region or
service provider.
Bookmarks
To bookmark the current webpage, tap the Menu Key > Save to bookmarks
> OK.
To open a bookmarked webpage, tap
and select the desired bookmark.
History
To open a web page from the list of recently visited web pages, tap > History
tab. To clear the history, tap the Menu Key
> Clear all history.
67
Chrome
Use Chrome to search for information and browse webpages.
1 From the Home screen, tap
> Apps tab (if necessary) > Chrome .
Viewing webpages
Tap the address field, enter a web address or search criteria, and tap on the
keyboard.
Opening a page
To open a a new page, tab > + New tab.
To go to to an open page, tap
, scroll up or down and tap the page to select it.
Searching the web by voice
Tap the address field, tap , speak a keyword and select one of the suggested
keywords that appear.
Syncing with other devices
Sync open tabs and bookmarks to use with Chrome from other devices when you are
logged in with the same Google account.
To view open tabs on other devices, tap the Menu Key
> Other devices. Select
a webpage to open.
Access bookmarks
To view bookmarks, tap the Menu Key > Favorites.

68
SettingsSettings
Access the Settings menu
1 From the Home screen, tap > Apps tab (if necessary) > Settings .
OR
From the Home screen, tap the Menu Key
> System settings.
2 Select a setting category and configure the desired settings.
WIRELESS & NETWORKS
< Airplane mode >
Airplane mode – Activating airplane mode disables all wireless connections.
< Wi-Fi >
Wi-Fi – Turns on Wi-Fi to connect to available Wi-Fi networks.
TIP! How to obtain the MAC address
To set up a connection in some wireless networks with MAC filters, you
may need to enter the MAC address of your phone in the router.
You can find the MAC address in the following user interface: Access the
Wi-Fi settings and tap the Menu Key
> Advanced > MAC address.
< Bluetooth >
Turn the Bluetooth wireless feature on or off to use Bluetooth.
< Mobile data >
Displays the data usage and set mobile data usage limit.
< Call >

69
Save unknown numbers – Add unknown numbers to your contact list after a call.
Voicemail – Allows you to select your carrier’s voicemail service.
Incoming call pop-up – If you select this function, the incoming call pop-up will be
displayed when using the Camera and Videos applications.
Decline with message – When you want to reject a call, you can send a quick
message using this function. This is useful if you need to reject a call during a
meeting.
Privacy keeper – Hides the caller name and number for an incoming call.
Power button ends call – Allows you to press the Power/Lock Key to end the call.
Auto retry – Sets the amount of time to wait before automatically redialing a call that
failed to connect. Choose from Off, 10 seconds, 30 seconds, or 60 seconds.
TTY mode – Sets the TTY mode to communicate with other TTY devices.
Hearing aids – Checkmark to turn on hearing aid compatibility.
DTMF tones – Sets the length of the DTMF tones. Choose Normal or Long.
Auto answer – Allows you to enable or disable Auto answer with handsfree.
Call duration – View the duration of calls including Last call, All calls, Outgoing calls
and Incoming calls.
Voice privacy – Checkmark to enable enhanced privacy mode.
< More ... >
VPN – Displays the list of Virtual Private Networks (VPNs) that you've previously
configured. Allows you to add different types of VPNs.
NOTE: You must set a lock screen PIN or password before you can use
credential storage.

70
Settings
Mobile networks – Turn Data enabled or the Data roaming on or off.
DEVICE
< Sound >
Sound profile – Set the sound profile to Sound, Vibrate only, or Silent.
Volumes – Manage the volume for Phone ringtone, Notification sound, Touch
feedback & system, and Music, video, games and other media.
Quiet time – Set times to turn off all sounds except alarm and media.
Ringtone with vibration – Vibration feedback for calls.
Phone ringtone – Allows you to set your incoming call ringtone.
Notification sound – Allows you to set your notification sound.
Incoming call vibration – Allows you to set your incoming call vibration.
Dial pad touch tones – Allows you to set the phone to play tones when using the
dialpad to dial numbers.
Touch sounds – Allows you to set your phone to play a sound when you tap buttons,
icons and other on-screen items that react to your tap.
Screen lock sound – Allows you to set your phone to play a sound when locking
and unlocking the screen.
Emergency tone – Sets the device’s behavior when an emergency call is placed.
< Display >
Brightness – Adjust the screen brightness.
Screen timeout – Set the amount of time before the screen times out.

71
Auto-rotate screen – Set to switch orientation automatically when you rotate the
phone.
Font type – Change the type of display font.
Font size – Change the size of the display font.
< Home screen >
Theme – Sets the screen theme for your device. Choose from Optimus, Biz,
Cozywall, and Marshmallow.
Screen swipe effect – Sets the effect when you swipe to change screens. Choose
from Basic, Breeze, Accordion, Panorama, Carousel, Layer, and Domino.
Wallpaper – Sets the wallpaper to use on your Home screen. Select it from Gallery,
Live Wallpapers, or Wallpaper gallery.
Scroll screens circularly – Checkmark to set the screens to scroll continuously,
eliminating the need to scroll back in the opposite direction when you reach either
end.
Home backup & restore – Backup and restore the app, widget, and theme
configurations.
< Lock screen >
Select screen lock – Set a screen lock type to secure your phone. Set None,
Swipe, Pattern, PIN or Password.
Wallpaper – Select the wallpaper for your lock screen from Gallery or Wallpaper
gallery.
Clocks & shortcuts – Customize the clock and shortcuts on the lock screen.
Owner info – Show owner info on the lock screen.
Lock timer – Set the lock time after the screen times out.

72
Settings
Power button instantly locks – Set the screen lock when the Power/Lock Key is
pressed.
< Storage >
INTERNAL STORAGE – View the internal storage usage.
SD CARD – Check total available SD card space. Tap Unmount SD card for safe
removal. If no SD card is mounted, tap Mount SD card. Tap Erase SD card if you
want to delete all data from the SD card.
< Battery >
BATTERY INFORMATION
The Battery charge information is displayed on a battery graphic along with the
percentage of the remaining charge and its status. Tap the Battery charge icon to
display the Battery use screen to see battery usage level and battery use details. It
displays which components and applications are using the most battery power. Tap
one of the entries to see more detailed information.
Battery percentage – Checkmark to display the battery level percentage on the
Status Bar next to the battery icon.
POWER SAVER
Tap the switch
to toggle between On and Off. Tap Power saver to access the
following settings:
Turn Power saver on – Sets the battery charge percent level to automatically turn
on Power saver.
POWER SAVING ITEMS
Auto-sync – Checkmark to turn off Auto-sync when Power saver is activated.

73
Wi-Fi – Checkmark to turn Wi-Fi off when data is not being used while Power saver
is activated.
Bluetooth – Checkmark to turn Bluetooth off when not connected while Power saver
is activated.
Brightness – Checkmark to set the screen brightness when Power saver is
activated. Tap the Settings icon
to change the setting.
Screen timeout – Checkmark to set the screen timeout when Power saver is
activated. Tap the Settings icon
to change the setting.
< Apps >
Use the Apps menu to view details about the applications installed on your phone,
manage their data, and force them to stop.
Swipe left and right to select one of the three tabs across the top of the screen to
view detailed information for DOWNLOADED, RUNNING, and ALL applications.
Tap an entry to view more information, tap Stop (or Force stop), then OK to stop it
from running.
PERSONAL
< Accounts & sync >
Permits applications to synchronize data in the background, whether or not you are
actively working in them. Deselecting the Auto-sync data setting can save battery
power and lower (but not eliminate) data usage.

74
Settings
< Location access >
Access to my location – If you select Google's location service, your phone
determines your approximate location using Wi-Fi and mobile networks. When you
select this option, you're asked whether you consent to allowing Google to use your
location when providing these services.
GPS satellites – If you select GPS satellites, your phone determines your location to
street-level accuracy.
Wi-Fi & mobile network location – Let apps use Google's location service to
estimate your location faster. Anonymous location data will be collected and sent to
Google.
< Security >
Encrypt phone – Allows you to encrypt the phone to keep it secure. After encryption,
a PIN or password needs to be entered each time you power the phone on.
Password typing visible – Show the last character of the hidden password as you
type.
Phone administrators – View or deactivate phone administrators.
Unknown sources – Default setting to install non-Play Store applications.
Trusted credentials – Display trusted CA certificates.
Install from storage – Choose to install encrypted certificates.
Clear credentials – Remove all certificates.
< Language & input >
Language – Sets the language to use on your device.
Personal dictionary – Displays a list of the personal words that you’ve added that
are not in the standard dictionaries.

75
KEYBOARD & INPUT METHODS
Default – Sets the default on-screen keyboard to use when entering text.
Google voice typing – Checkmark to select Google voice typing to enter data. Tap
the Settings icon
to change the Google voice typing settings.
Choose input languages – Sets the languages supported with Google voice
typing.
Block offensive words – Checkmark to hide recognized offensive text.
LG Keyboard – Checkmark to select the LG Keyboard to enter data. Tap the
Settings icon
to change the following settings:
Input language and type – Sets the keyboard language and type of keyboard.
COMMON SETTINGS
Word suggestion – Sets word prediction and auto word correction.
Auto capitalize – Checkmark to automatically capitalize the first letter of each
sentence.
Auto punctuation – Checkmark to insert a period when the space key is double-
tapped.
Voice typing key - Select to display the voice typing key on the keyboard.
Touch feedback – Sets Key preview and Sound feedback when typing.
ADVANCED SETTINGS
Hide keyboard – Checkmark to allow the on-screen keyboard to be hidden by
swiping it downward.
CHINESE
Fuzzy pinyin – Checkmark to automatically correct common pinyin mistakes. Tap
the Settings icon
to view common mistakes.

76
Settings
ABOUT
Software version – Displays the LG Keyboard software version.
SPEECH
Voice Search – Sets voice search options.
Language – Sets the Google search by voice language.
Speech output – Sets when to use speech output. Choose from Always,
Informative only, or Hands-free only. To turn on speech output only when you’ve
got a headset attached to your phone, select Hands-free only.
Block offensive words – Checkmark to hide offensive voice results.
Hotword detection – Checkmark to allow you to say “Google” when viewing the
Google search screen rather than taping the Microphone icon to initiate a voice
search or action.
Bluetooth headset – Checkmark to record audio through your bluetooth headset,
if available.
Text-to-speech output – Sets the preferred speech engine and speech rate (slow
vs. fast). Also plays a short demonstration of speech synthesis.
MOUSE/TRACKPAD
Pointer speed – Sets the pointer speed using a slide bar to select it.
< Backup & reset >
Change the settings for managing your settings and data.
Backup my data – Set to back up your settings and application data to the Google
server.
Backup account – Set which account you want to backup your information to.

77
Automatic restore – Set to restore your settings and application data when the
applications are reinstalled on your device.
Factory data reset – Reset your settings to the factory default values and delete all
your data.
SYSTEM
< Date & time >
Use 24-hour format – Checkmark to display the time using the 24-hour time format
(for example, 13:00 instead of 1:00 pm).
Select date format – Sets the format for displaying dates.
< Accessibility >
Use the Accessibility settings to configure accessibility plug-ins you have installed
on your phone.
SERVICES
TalkBack – Allows you to set up the TalkBack function which assists people with
impaired vision by providing verbal feedback. Tap the switch
at the top right
corner of the screen to turn it on. Tap SETTINGS at the bottom of the screen to
adjust the TalkBack settings.
VISION
Install web scripts – Allows you to enable (or disable) installation of web scripts.
Large text – Checkmark to increase the size of the text.
Shades – Sets the screen to a darker contrast (a darker shade).
PHYSICAL AND MOTOR
78
Settings
Tap & hold delay – Sets the touch and hold delay. Choose from Short, Medium,
or Long.
Universal touch – Tap the switch
to toggle it On or Off. Turn this feature on
to replace the hardware keys with a Universal touch button
. Tap the button to
access Volume down, Volume up, Power, Home, and Pinch. Draw a "C" on the
screen when the Universal touch panel is displayed to automatically display the Dial
tab. Draw an "M" on the board to automatically display the Messaging application.
Draw a "W" on the board to automatically launch the default browser application.
SYSTEM
Auto-rotate screen – Checkmark to allow the device to rotate the screen
depending on the device orientation (portrait or landscape).
Speak passwords – Checkmark so that you can say your log in passwords (instead
of typing your passwords).
Power button ends call – Checkmark so that you can end voice calls by pressing
the Power/Lock Key.
Easy access – Sets quick, easy access to selected features when you triple-
tap the Home Key
. Choose Off, Show all, TalkBack, Universal touch, or
Accessibility settings.
Text-to-speech output – Sets the text-to-speech preferred engine and speech rate
setting. Also plays a short demonstration of speech synthesis. Text-to-speech output
provides an audible readout of text, for example, the contents of text messages, and
the Caller ID for incoming calls.
NOTE: Requires additional plug-ins to become selectable.

79
< PC connection >
USB connection type – Set the default mode used when connecting the phone to
a PC via a USB cable. Choose from Charge only, Media sync (MTP), or Camera
(PTP).
Ask on connection – Checkmark to confirm the USB connection type when you
connect to a PC.
Help – Displays connection settings information.
< Developer options >
Keep in mind that turning on these developer settings may result in irregular device
behavior. The developer options are recommended only for advanced users.
Take bug report – This will collect information about your current device state, to
send as an email message.
Desktop backup password – Sets a password to back up the desktop.
Stay awake – Checkmark to set the screen to never timeout while charging.
Protect SD card – Checkmark to protect the microSD card. When the microSD card
is protected, applications must request permission to read data from external storage.
DEBUGGING
USB debugging – Checkmark to turn on debug mode when USB is connected.
Allow mock locations – Checkmark to set the device to a mock location.
Select debug app – Allows you to select the debugging application.
Wait for debugger – Checkmark to wait for debugger. Debugged application waits
for debugger to attach before executing.

80
Settings
INPUT
Show touches - Checkmark to show visual feedback when the screen is touched.
Show touch data - Checkmark to make touch data visible on the screen.
DRAWING
Show layout bounds – Checkmark to show clip bounds, margins, etc.
Show GPU view updates – Checkmark to flash views inside windows when drawn
with the GPU.
Show screen updates – Checkmark to flash areas of the screen when they are
updated.
Window animation scale – Allows you to set the window animation scale.
Transition animation scale – Allows you to set the transition animation scale.
Animator duration scale – Allows you to set the animator duration scale.
Disable HW overlays – Checkmark to use the GPU for screen compositing.
Force GPU rendering – Checkmark to use the 2D hardware acceleration in
applications.
MONITORING
Enable strict mode – Checkmark to flash the screen when applications operate for
a long period of time on the main thread.
Show CPU usage – Checkmark to overlay the current CPU usage on the screen.
Profile GPU rendering – Checkmark to measure rendering time in adb shell
dumpsys gfxinfo.
Enable traces – Allows you to select enabled traces.

81
APPS
Don't keep activities – Checkmark to force stop every activity as soon as the user
leaves it.
Background process limit – Allows you to set the background process limit.
Show all ANRs – Checkmark to show a dialog box when applications running in the
background are not responding.
< About phone >
This menu allows you to manage your software updates and view various information
relating to your device.
Software Update – Allows you to check for Android system software updates and
other current information.
Network – Allow you to view your network, network type and strength, service state,
roaming status, mobile network state, and IP address.
Phone identity – Allow you to view your phone number, MIN, PRL version, ESN,
MEID HEX, MEID DEC, up time, lifetime calls, warranty date code, and model number.
Battery – Allows you to view the battery status, battery level, and battery use
information.
Hardware information – Allows you to view the Wi-Fi MAC address and Bluetooth
address.
Software information – Allows you to view the Android version, baseband version,
kernel version, build number, and software version.
Legal information – Allow you to view open source licenses and Google legal information.
Patent information – Display LG patent information.

82
Phone software updatePhone software update
Update your smart phone without a PC (FOTA)
This feature allows you to conveniently update your phone's software to a newer
version via Firmware Over-the-Air (FOTA), without connecting with to a USB cable.
1 From the Home screen, tap the Menu Key
> System settings > About
phone > Software Update.
2 Select the desired option.
Check now for update – You can check the new software update and conduct the
update (Wi-Fi mode is enabled for a download of more than 50MB).
Last update – Displays the date of the last software update.
SET AUTOMATIC CHECK
Check automatically - When checked, you will be notified of the new update when
it becomes available.
Next check for updates - Displays the date when the next check for software
update will occur.

83
NOTE
- If no connection to the data network has previously been made since
purchase, the timeline for the next update cannot be identified since the
interval for the automated update will not be created.
- You will not be charged for data for software updates.
- Available software will be checked automatically.
- Make sure to check if the battery is charged before update.
- After download, you can install the software immediately or select a later
time for the installation.
- Each software version is updated sequentially. Even after the update is
completed, check if there is any newer version available.
- Some features and service may vary by area, phone, carrier, plan and
software version.
- LG reserves the right to make firmware updates available only for selected
models at its own discretion and does not guarantee the availability of the
newer version of the firmware for all handset models.

84
DivX Mobile
ABOUT DIVX VIDEO: DivX
®
is a digital video format created by DivX, LLC, a
subsidiary of Rovi Corporation. This is an official DivX Certified
®
device that plays DivX
video. Visit divx.com for more information and software tools to convert your files into
DivX videos.
ABOUT DIVX VIDEO-ON-DEMAND: This DivX Certified
®
device must be registered
in order to play purchased DivX Video-on-Demand (VOD) movies. To obtain your
registration code, locate the DivX VOD section in your device setup menu. Go to vod.
divx.com for more information on how to complete your registration.
DivX Certified
®
to play DivX
®
video up to 320x240.
DivX
®
, DivX Certified
®
and associated logos are trademarks of Rovi Corporation
or its subsidiaries and are used under licence.
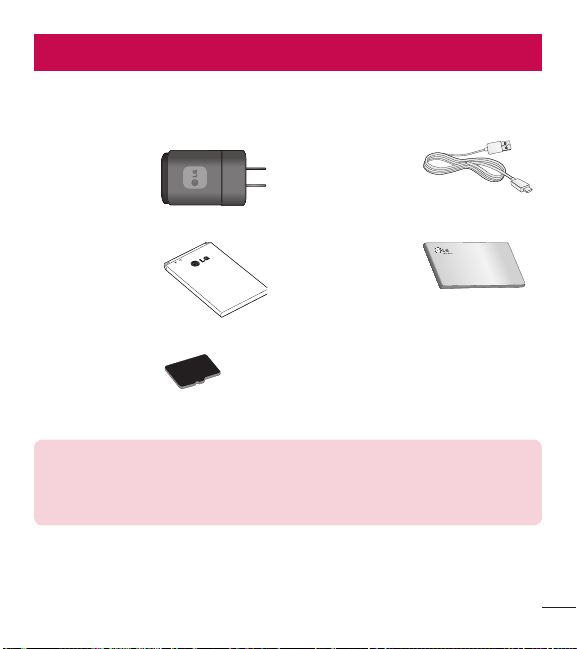
85
Accessories
These accessories are available for use with your phone. (Items described below
may be optional and sold separately.)
Charger
USB cable
Connect your phone
and PC.
Battery User Guide
Learn more about
your phone.
SD card (supports
up to 32 GB)
NOTE:
t
Always use genuine LG accessories. Failure to do this may void your
warranty.
t
Accessories may vary in different regions.
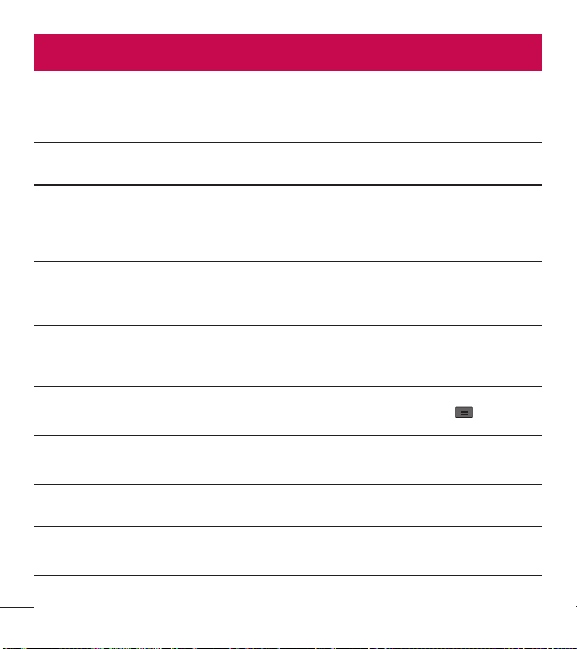
86
FAQ
Please check to see if any problems you have encountered with your phone are
described in this section before taking the phone in for service or calling a service
representative.
Category
Sub-Category
Question Answer
Bluetooth
Bluetooth
Devices
What are the functions
available via Bluetooth?
You can connect Bluetooth audio device such as Stereo/
Mono headset, Car Kit and share pictures, videos,
contacts, etc via Gallery/Contacts menu. Also when FTP
server is connected to a compatible device, you can
share contents stored in the microSD card.
Data
Contacts
Backup
How can I back up
Contacts?
The Contacts data can be synchronized between your
phone and Gmail
TM
.
Data
Synchronization
Is it possible to set up
one-way sync with Gmail?
Only two-way synchronization is available.
Data
Synchronization
Is it possible to
synchronize all the Email
folders?
The Inbox is automatically synchronized. You can view
other folders by taping the Menu Key
and tap
Folders to choose a folder.
Google
TM
Service
Gmail Log-In
Should I have to log into
Gmail whenever I want to
access Gmail?
Once you log into Gmail, you don’t need to log in Gmail
again.
Google Service
Google Account
Is it possible to filter
emails?
No, email filtering is not supported via the phone.
Phone Function
YouTube
TM
Is it possible to play
YouTube videos?
Yes, YouTube videos are supported but may have to be
viewed through the YouTube application (and not the
browser).

87
Category
Sub-Category
Question Answer
Phone Function
Email
What happens when
I execute another
application while writing
an email?
Your email will automatically be saved as a draft.
Phone Function
Ringtone
Is there a file size
limitation for when I want
to use a MP3 file as a
ringtone?
There is no file size limitation.
Phone Function
Message Time
My phone does not display
the time of receipt for
messages older than 24
hrs. How can I change this?
1. Open the message thread that contains the message
you want to check.
2. Touch and hold the message. In the context menu, tap
View message details.
Phone Function
microSD Card
What is the maximum
supported size for a
memory card?
32 GB memory cards are compatible.
Phone Function
Navigation
Is it possible to install
another navigation
application on my phone?
Any application that is available on Play Store and is
compatible with the hardware can be installed and used.
Phone Function
Synchronization
Is it possible to
synchronize my contacts
from all my email
accounts?
Only Gmail and MS Exchange server(Company Email
Server) contacts can be synchronized.
Phone Function
Wait and Pause
Is it possible to save a
contact with Wait and
Pause in the numbers?
If you transferred a contact with the wait and pause
functions saved into the number, you will not be able
to use those features. You will need to re-save each
number.
How to save with Wait and Pause:
1. From the Home screen, tap the Phone Key
.
2. Enter the number, then tap the Menu Key
.
3. Tap Add 2-sec pause or Add wait.
88
FAQ
Category
Sub-Category
Question Answer
Phone Function
Security
What are the phone’s
security functions?
You are able to set the phone to require the entry of a
screen lock (Pattern, PIN, Password) before the phone
can be accessed or used.
Phone Function
Unlock
Pattern
What should I do if I
forget my the Unlock
Pattern?
After attempting the Unlock Pattern 5 times, you can tap
the Forget Pattern? option and use your Google account
information or backup PIN to unlock your phone.
Phone Function
Unlock
Pattern
What should I do if I
forgot the Unlock Pattern
and I didn’t create the
Google account on the
phone?
Without entering the Unlock Pattern, you will not be able
to access your phone.
Caution: If you perform a factory reset, all user
applications and user data will be deleted. Please
remember to back up any important data before
performing a factory reset.
How to perform a factory reset:
1. Turn the power off.
2. Press and hold the Power/Lock Key
+
Volume Down Key
.
3. When the Factory Hard Reset welcome screen
appears release all of the keys.
4. Press the Power/Lock Key
to continue or any
other key to cancel.
5. Press the Power/Lock Key
once more to
confirm or any other key to cancel.
6. Your phone will perform a factory reset.
Phone Function
Unlock
Pattern
How do I create the
Unlock Pattern?
1. From the Home screen, tap the Menu Key
.
2. Tap System settings > Lock screen.
3. Tap Select screen lock > Pattern. The first time
you do this, a short tutorial about creating an Pattern
appears.
4. Set up by drawing your pattern once, then again for
confirmation.

89
Category
Sub-Category
Question Answer
Phone Function
Memory
Will I know when my
memory is full?
Yes, you will receive a notification.
Phone Function
Language Support
Is it possible to change
the language?
The phone has bilingual capabilities.
To change the language:
1. From the Home screen, tap the Menu Key
and
tap System settings.
2. Tap Language & input > Language.
3. Tap the desired language.
Phone Function
VPN
How do I set up a VPN?
VPN access configuration is different according to each
company. To configure VPN access from your phone, you
must obtain the details from your company’s network
administrator.
Phone Function
Screen time out
My screen turns off after
only 15 seconds. How
can I change the amount
of time for the backlight
to turn off?
1. From the Home screen, tap the Menu Key
.
2. Tap System settings > Display.
3. Tap Screen timeout.
4. Tap the preferred screen backlight timeout time.
Phone Function
Audible tap tones
When I dial a number, the
phone plays tones. How
do I turn this off?
1. From the Home screen, tap the Menu Key
.
2. Tap System settings > Sound.
3. Tap Dial pad touch tones to remove the checkmark
and disable the function.
Phone Function
Wi-Fi & 3G
When Wi-Fi and 3G are
both available, which
service will my phone
use?
When using data, your phone may default to the Wi-Fi
connection (if Wi-Fi connectivity on your phone is set
to On). However, there will be no notification when your
phone switches from one to the other.
To know which data connection is being used, view the
3G or Wi-Fi icon at the top of your screen.
90
FAQ
Category
Sub-Category
Question Answer
Phone Function
Home screen
Is it possible to remove
an application from the
Home screen?
Yes. Just touch and hold the icon until the trash can icon
appears at the top of the screen. Then, without lifting
your finger, drag the icon to the trash can.
Phone Function
Application
I downloaded an
application and it causes
a lot of errors. How do I
remove it?
1. From the Home screen, tap the Menu Key
.
2. Tap System settings > Apps.
3. Tap a tab at the top of the screen and the application.
4. Then tap Uninstall and OK to confirm.
Phone Function
Charger
Is it possible to charge
my phone by USB cable
without installing the
necessary USB driver?
Yes, the phone will get charged by the USB cable
irrespective of whether the necessary drivers are
installed or not.
Phone Function
Ringtones
Can I use music files for
my ringtone?
Yes. After saving a music file you can use it for your
ringtone.
t
Touch and hold a song in a library list. In the menu
that opens, tap Set as ringtone.
Phone Function
Alarm
Will my alarm be audible
or will it go off if the
phone is turned off?
No, this is not supported.
Phone Function
Alarm
If my Ringer Volume is
set to Off or Vibrate, will I
hear my Alarm?
Your Alarm is programmed to be audible even in these
scenarios.
Phone Spec
Band
Which wireless bands are
supported by the phone?
Your phone is able to operate on the 800Mhz and
1900MHz bands.
91
Category
Sub-Category
Question Answer
Recovery Solution
Factory Reset
How do I perform a
factory reset?
1. From the Home screen, tap the Menu Key
.
2. Tap System settings > Backup & reset > Factory
data reset.
3. Read the warning and tap Reset phone.
4. Tap Erase everything and OK to confirm.
Attention:
If a factory reset is performed, all installed
application and user data will be erased. Please
remember to back up any important data before
performing a factory reset.

92
For your safetyFor your safety
The highest SAR value for this model phone when tested for use at the ear is
1.18 W/kg and when worn on the body, as described in this user guide, is
1.20 W/kg (body-worn measurements differ among phone models, depending upon
available accessories and FCC requirements).
While there may be differences between SAR levels of various phones and at various
positions, they all meet the government requirement for safe exposure.
The FCC has granted an Equipment Authorization for this model phone with all
reported SAR levels evaluated as in compliance with the FCC RF emission guidelines.
SAR information on this model phone is on file with the FCC and can be found under
the Display Grant section of http://www. fcc.gov/oet/ea/fccid/ after searching on FCC
ID ZNFL39C.
t
To reduce risk of fire or burns, do not expose to temperature above 60°C (140°F),
or dispose of in fire.
t
To reduce risk of fire or burns, do not dispose of in fire or water.
t
To reduce risk of fire or burns, do not dispose of in fire or water.
t
Do not disassemble or open crush, bend or deform, puncture or shred.
t
There is a danger of explosion if battery is incorrectly replaced. To reduce risk of
fire or burns, do not disassemble, crush, puncture, short external contacts, expose
to temperature above 60°C (140°F), or dispose of in fire or water. Keep this
product away from excessive moisture and extreme temperatures. Keep the battery
or device dry and away from water or any liquid as it may cause a short circuit.
t
Avoid using your phone near strong electromagnetic sources, such as microwave
ovens, sound speakers, TV and radio.
t
Use only original manufacturer-approved accessories, or accessories that do not
contain any metal. Please only use an approved charging accessory to charge your

93
LG phone. Improper handling of the Accessory/Charger Port, as well as the use of
an incompatible charger, may cause damage to your phone and void the warranty.
t
Only use the approved battery charger. Otherwise, you may cause serious damage
to your phone.


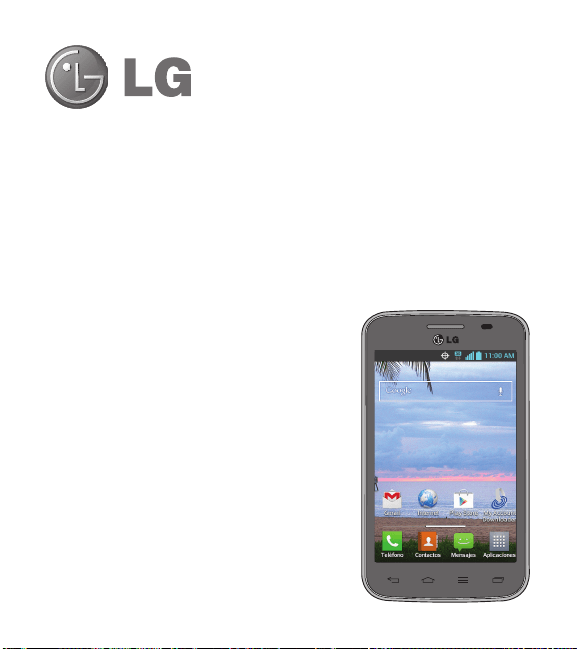
Guía del usuario
ESPAÑOL
t
Las imagenes e ilustraciones de la pantalla
pueden variar de las del teléfono.
t
Es posible que parte del contenido de esta guía
no plique al teléfono, dependiendo de la función
del software o del proveedor de servicios. Toda
la información de este documento está sujeta a
cambios sin previo aviso.
t
Este teléfono no es adecuado para personas
con alguna discapacidad visual ya que cuenta
con un teclado en pantalla táctil.
t
Copyright ©2013 LG Electronics, Inc. Todos
los derechos reservados. LG y el logotipo de
LG son marcas registradas de LG Group y
sus entidades relacionadas. Todas las demás
marcas son propiedad de sus respectivos
titulares.
t
Google™, Google Maps™, Gmail™,
YouTube™, Hangouts™ y Play Store™ son
marcas registradas de Google, Inc.

Tabla de contenido
2
Aviso importante ................................... 5
Características del teléfono ................ 13
Descripción general del teléfono ......... 13
Instalación de la batería ...................... 16
Carga del teléfono .............................. 18
Uso de la tarjeta de memoria .............. 19
Bloquear y desbloquear la pantalla ..... 19
La pantalla principal ............................ 21
Sugerencias sobre la pantalla táctil..... 21
Pantalla principal ................................ 22
Personalizar la pantalla principal ........ 23
Volver a las aplicaciones usadas
recientemente .................................... 24
Notificaciones ..................................... 24
Acceso a las notificaciones ................ 25
Ajustes Rápidos ................................ 25
Iconos de notificación de la Barra de
estado.............................................. 26
Teclado en pantalla ............................. 28
Introducción de caracteres especiales 28
Configuración de la cuenta de Google 29
Conectarse a redes y dispositivos ...... 31
Wi-Fi .................................................. 31
Conectarse a redes de Wi-Fi .............. 31
Activar Wi-Fi y conectarse a una red
Wi-Fi ................................................ 31
Bluetooth ............................................ 32
Conectarse a redes privadas virtuales . 34
Conexiones de PC con un cable USB ... 35
Llamadas.............................................. 37
Realizar una llamada .......................... 37
Llamar a los contactos ........................ 37
Responder y rechazar una llamada ..... 37
Cuando la pantalla está bloqueada..... 37
Cuando la pantalla está desbloqueada 38
Ajuste del volumen durante la llamada 38
Hacer una segunda llamada ............... 38
Ver los registros de llamadas .............. 39
Configuración de llamada ................... 39
Contactos ............................................. 40
Buscar un contacto ............................. 40
Agregar un nuevo contacto ................. 40
Contactos favoritos ............................. 40
Crear un grupo ................................... 41
Mensajes .............................................. 42
Enviar un mensaje .............................. 42

3
Modo de vista .................................... 43
Cambiar la configuración de su
mensaje ............................................. 43
Correo electrónico ............................... 44
Administración de una cuenta de correo
electrónico.......................................... 44
Usar las carpetas de las cuentas ......... 44
Redactar y enviar correos electrónicos 45
Cámara ................................................. 46
Uso del visor ....................................... 46
Opciones de configuración avanzada .. 47
Tomar una foto rápida ........................ 49
Después de que haya tomado la foto .. 49
Ver las fotos guardadas ...................... 50
Videocámara ........................................ 51
Uso del visor ....................................... 51
Opciones de configuración avanzada .. 52
Grabar un video .................................. 53
Después de grabar un video ............... 53
Ver los videos guardados .................... 54
Ajustar el volumen al ver un video ...... 54
Función exclusiva de LG ...................... 55
QuickMemo ........................................ 55
Uso de las opciones de QuickMemo ... 56
Ver un QuickMemo guardado ............ 57
Multimedia ........................................... 58
Galería ................................................ 58
Ver las fotos ..................................... 58
Reproducción de videos .................... 59
Edición de fotos y videos ................... 59
Borrado de imágenes ........................ 59
Establecer una foto como fondo de
pantalla ............................................ 60
Videos ................................................ 60
Reproducir un video .......................... 60
Música ............................................... 61
Reproducir una canción .................... 61
Utilidades ............................................. 64
Configurar una alarma ........................ 64
Usar la calculadora ............................. 64
Agregar un evento al calendario .......... 65
Grabador de voz ................................. 65
Grabar un sonido o una voz ............... 65
Polaris Viewer 4 .................................. 66
Google+ ............................................. 66
Búsqueda por voz ............................... 67
Descargas .......................................... 67

Tabla de contenido
4
La Web.................................................. 68
Navegador .......................................... 68
Utilizar la barra de herramientas del
navegador ........................................ 68
Viendo páginas en la web .................. 69
Abra una página ............................... 69
Búsqueda por voz en la web .............. 69
Favoritos .......................................... 69
Historial............................................ 70
Chrome .............................................. 70
Viendo páginas en la web .................. 70
Abra una página ............................... 70
Búsqueda por voz en la web .............. 70
Sincronización con otros dispositivos.. 70
Accede a los marcadores .................. 71
Ajustes ................................................. 72
Acceso al menú de configuración ....... 72
REDES INALÁMBRICAS ....................... 72
DISPOSITIVO ....................................... 74
PERSONAL .......................................... 79
SISTEMA............................................. 83
Actualización del software
del teléfono .......................................... 89
DivX Mobile ........................................ 91
Accesorios ........................................... 92
Preguntas frecuentes .......................... 93
Por su seguridad ................................ 100

5
Aviso importante
Por favor, lea esto antes de comenzar a usar su
teléfono.
Antes de llevar el teléfono a reparación o llamar a un representante del servicio
técnico, compruebe si alguno de los problemas que presenta el teléfono se describe
en esta sección.
1. Memoria del teléfono
Cuando hay menos de un 10% de espacio disponible en la memoria del teléfono,
el teléfono no puede recibir nuevos mensajes. Deberá comprobar la memoria del
teléfono y borrar algunos datos, como aplicaciones o mensajes, para contar con más
espacio en la memoria.
Para desinstalar aplicaciones:
1 En la pantalla principal, toque > ficha Aplicaciones (si es necesario) >
Ajustes
> Aplicaciones.
2 Cuando aparezcan todas las aplicaciones, desplácese y seleccione la aplicación
que desee desinstalar.
3 Toque Desinstalar y a continuación toque OK para confirmar.
2. Optimizar la vida útil de la batería
Prolongue la vida útil de la batería entre cargas apagando las funciones que no
necesite ejecutar constantemente en segundo plano. Puede controlar la forma en
que las aplicaciones y los recursos consumen la energía de la batería.
6
Aviso importante
Extensión de la vida útil de la batería:
t
Desactive las comunicaciones de radio que no use. Si no usa Wi-Fi, Bluetooth o
GPS, desactívelos.
t
Disminuya el brillo de la pantalla y fije un límite de tiempo de pantalla más corto.
t
Desactive la sincronización automática de Gmail, Calendario, Contactos y otras
aplicaciones.
t
Algunas de las aplicaciones descargadas pueden reducir la energía de la batería.
Para comprobar el nivel de energía de la batería:
t
En la pantalla principal, toque > ficha Aplicaciones (si es necesario) >
Ajustes
> Acerca del teléfono > Batería.
El estado (cargando o descargando) y el nivel (porcentaje cargado) de la batería
aparecen en la parte superior de la pantalla.
Para monitorear y controlar cómo se está usando la energía de la batería:
t
En la pantalla principal, toque > ficha Aplicaciones (si es necesario) >
Ajustes
> Acerca del teléfono > Batería > Uso de la batería.
El tiempo de uso de la batería aparece en la pantalla. Le indica cuánto tiempo ha
pasado desde la última vez que conectó el teléfono a una fuente de alimentación
o, si está conectado, cuánto tiempo el teléfono estuvo por última vez utilizando la
batería. La pantalla muestra las aplicaciones o los servicios que usan la energía de la
batería, ordenados desde los que usan más a los que usan menos.
7
3. Antes de instalar una aplicación y un sistema
operativo (SO)
ADVERTENCIA
Si instala y usa un sistema operativo (SO) distinto al proporcionado por
el fabricante podría provocar que el teléfono no funcione correctamente.
Además, el teléfono ya no estará cubierto por la garantía.
ADVERTENCIA
Para proteger el teléfono y los datos personales, sólo descargue aplicaciones
provenientes de fuentes de confianza, como Play Store. Si existen
aplicaciones mal instaladas en el teléfono, es posible que no funcione
normalmente o que se produzca un error grave. Debe desinstalar esas
aplicaciones y todos los datos y ajustes asociados del teléfono.
4. Uso del bloqueo de la pantalla
Establezca un patrón de desbloqueo por su seguridad y para evitar usos no
autorizados. En la pantalla principal, toque
> ficha Aplicaciones (si es necesario)
> Ajustes
> Bloqueo pantalla > Seleccionar bloqueo de pantalla > Patrón.
Esto abre una pantalla que le guiará a través del método para dibujar un patrón de
bloqueo de pantalla. A partir de ahora podrá crear un PIN de seguridad como medida
de seguridad en el caso de que olvide bloquear su pantalla.

8
Aviso importante
Precaución: Cree una cuenta Google antes de establecer un bloqueo de
pantalla y no olvide el PIN de seguridad que ha creado, al momento de
establecer el bloqueo de pantalla.
ADVERTENCIA
Precauciones que debe tomar cuando utiliza un patrón de bloqueo.
Es muy importante que recuerde el patrón de bloqueo que ha establecido.
Si usa un patrón incorrecto 5 veces, no podrá acceder al teléfono. Tiene
5 oportunidades para introducir su patrón de bloqueo, PIN o contraseña.
Si usa las 5 oportunidades, puede volver a intentarlo después de 30
segundos.
Si no recuerda el patrón PIN o la contraseña:
< Si olvidó el patrón de desbloqueo >
Si ha iniciado sesión en su cuenta de Google en el teléfono, pero no puede introducir
el patrón correcto ninguna de las 5 veces, toque ¿Ha olvidado el patrón? en la
parte inferior de la pantalla. A continuación se le pedirá que inicie sesión en su
cuenta de Google o introduzca el PIN de copia de seguridad que ha creado. Si no
ha iniciado sesión en una cuenta de Google en el teléfono o, si olvidó su PIN de
seguridad, debe realizar un restablecimiento completo.
< Si olvidó su PIN o contraseña >
Si olvida su PIN o contraseña, necesitará realizar un reinicio completo.
Precaución: Si realiza un reinicio completo, se eliminarán todas las
aplicaciones y los datos de usuario.

9
NOTA: Si no inició sesión en su cuenta Google y olvidó su patrón de
desbloqueo, deberá ingresar su PIN de seguridad.
5. Uso de la función de reinicio completo
(restablecer valores de fábrica)
Si su teléfono no realiza la restauración a su estado original después de un error o si
olvidó su bloqueo de pantalla, utilice un restablecimiento completo (Restablecimiento
de fábrica) para iniciarlo.
1 Apague el teléfono.
2 Toque y mantenga presionadas la Tecla Encender/Bloquear
+ Tecla de
Volumen Inferior
.
3 Cuando aparece la pantalla de bienvenida de Factory Hard Reset (Reinicio
completo), suelte todas las teclas.
4 Presione la Tecla Encender/Bloquear
para continuar o cualquier otra tecla
para cancelar.
5 Presione la Tecla Encender/Bloquear
una vez más para continuar o
cualquier otra tecla para cancelar.
6 Su teléfono realizará una restauración a los ajustes predeterminados de fábrica.
10
Aviso importante
ADVERTENCIA
Si ejecuta un reinicio completo, se eliminarán todas las aplicaciones, los
datos del usuario y las licencias de DRM. Recuerde que debe hacer una
copia de seguridad de todos los datos importantes antes de ejecutar el
reinicio completo.
6. Abrir y alternar aplicaciones
Es fácil realizar varias tareas con Android porque puede mantener más de una
aplicación en ejecución al mismo tiempo. No es necesario salir de una aplicación
antes de abrir otra. Use y alterne entre varias aplicaciones abiertas. Android
administra cada aplicación, deteniéndolas e iniciándolas según sea necesario, para
garantizar que las aplicaciones inactivas no consuman recursos innecesariamente.
Para detener las aplicaciones:
1 En la pantalla principal, toque
> ficha Aplicaciones (si es necesario) >
Ajustes
> Aplicaciones > EN EJECUCIÓN.
2 Toque la aplicación que desee y toque Parar para detenerla.
NOTA: Para realizar varias tareas, toque la Tecla Aplicaciones Recientes
y seleccione la aplicación que desee de la lista. Esto no hace que la otra
aplicación deje de funcionar en segundo plano en el teléfono. Asegúrese de
tocar la Tecla Atrás para salir de una aplicación después de usarla.

11
7. Transferir música, fotos y videos usando la
sincronización multimedia (MTP)
1 Conecte el teléfono a su PC utilizando el cable USB suministrado con el teléfono.
2 En la pantalla del teléfono aparecerá una lista de tipos de conexiones USB. Toque
la opción Sincronización multimedia (MTP).
3 Seleccione la opción Open device to view files (Abrir el dispositivo para ver
archivos). A continuación, podrá ver el contenido multimedia en su PC y transferir
los archivos.
4 Copie los archivos desde la PC a la carpeta de la unidad o viceversa.
5 Arrastre la Barra de estado hacia abajo y toque USB conectado > Solo cargar.
6 Desconecte el cable USB de su teléfono.
8. Sostener el teléfono en posición vertical
Sostenga el teléfono en posición vertical como lo haría con un teléfono normal. El
teléfono cuenta con una antena interna. Tenga cuidado de no rayar o dañar la parte
posterior del teléfono, ya que eso podría afectar su rendimiento.
Mientras haga o reciba llamadas o mientras envíe o reciba datos, evite colocar la
mano sobre la parte inferior del teléfono, donde se encuentra la antena. Esto podría
afectar la calidad de la llamada.

12
Aviso importante
9. Cuando la pantalla se congela
Si la pantalla se congela o el teléfono no responde al intentar utilizarlo:
Mantenga presionada la Tecla Encender/Bloquear
durante 10 segundos para
apagar el teléfono.
Si no funciona, comuníquese con el centro de servicios.
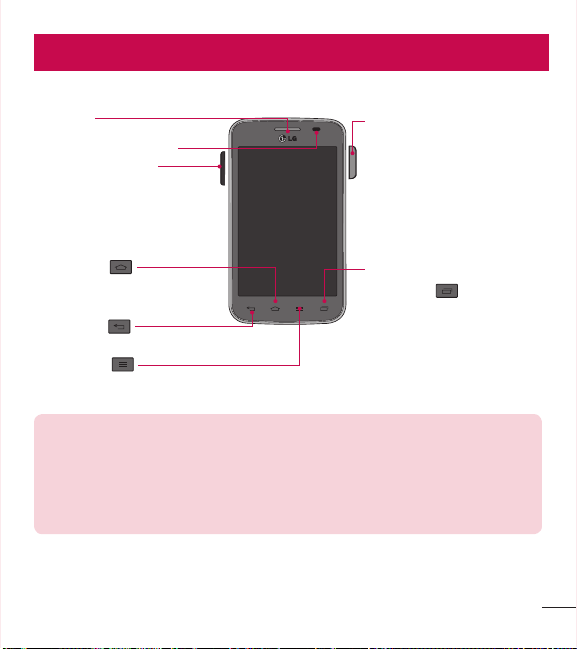
13
Important noticeCaracterísticas del teléfono
Descripción general del teléfono
Sensor de proximidad
Auricular
Tecla Aplicaciones
Recientes
Muestra una lista de las
aplicaciones utilizadas
recientemente.
Tecla Inicio
Vuelve a la pantalla principal
desde cualquier pantalla.
Teclas de Volumen
Le permiten ajustar el volumen
del tono de timbre, volumen de
medios o el volumen durante
una llamada.
Tecla Atrás
Vuelve a la pantalla anterior.
Tecla Menú
Muestra las opciones disponibles.
Tecla Encender/Bloquear
Apague/encienda y reinicie
el teléfono, bloquee/
desbloquee la pantalla,
active o desactive el modo
avión y cambie el tipo de
tono de llamada.
NOTA: Sensor de proximidad
Cuando reciba o realice llamadas, el sensor de proximidad apagará
automáticamente la luz de fondo y bloqueará la pantalla táctil al detectar
cuando el teléfono está cerca del oído. Esto aumenta la vida útil de la
batería y evita que active accidentalmente la pantalla táctil durante las
llamadas.
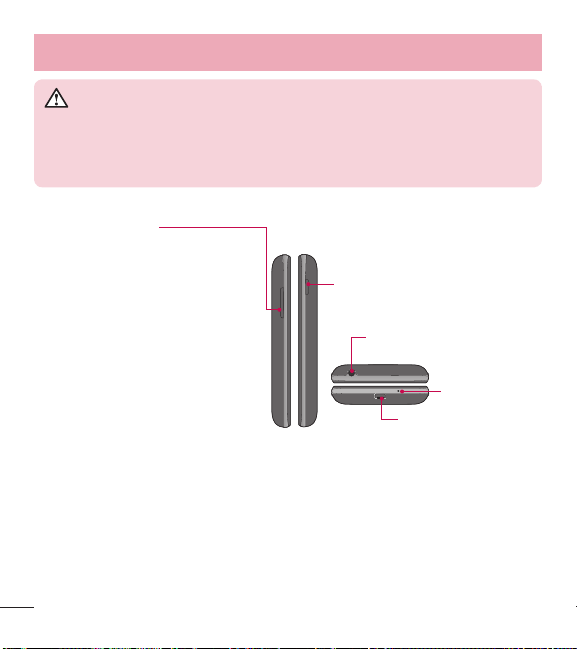
14
Características del teléfono
ADVERTENCIA
Si coloca un objeto pesado sobre el teléfono o se sienta sobre él, se
pueden dañar la pantalla LCD y las funciones de la pantalla táctil. No
cubra el sensor de proximidad de la pantalla LCD con una cobertura
protectora. Eso puede hacer que el sensor funcione mal.
Puerto para
Cargador/USB
Micrófono
Toma de 3.5 mm para
auriculares
Tecla Encender/Bloquear
Teclas de Volumen
t
En la pantalla principal:
Controlan el volumen del timbre.
t
Durante una llamada: Controlan
el volumen del auricular.
t
Durante la reproducción de
audio/video: Controlan el volumen
continuamente.
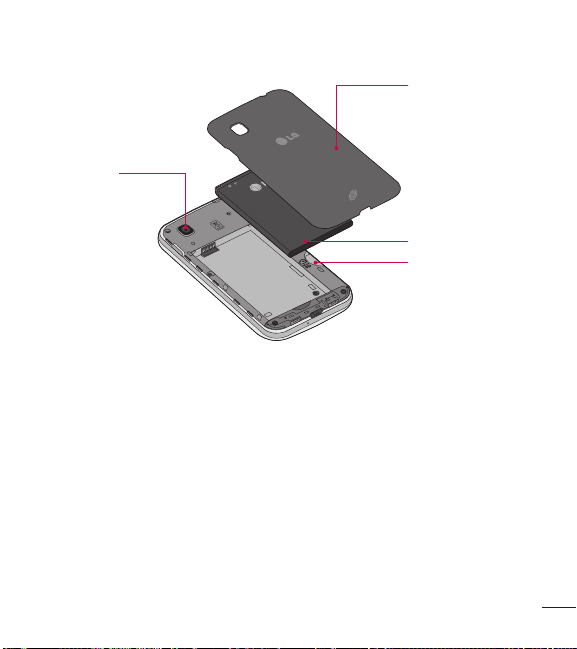
15
Tapa
posterior
Batería
Ranura para la
tarjeta microSD
Lente de la
cámara
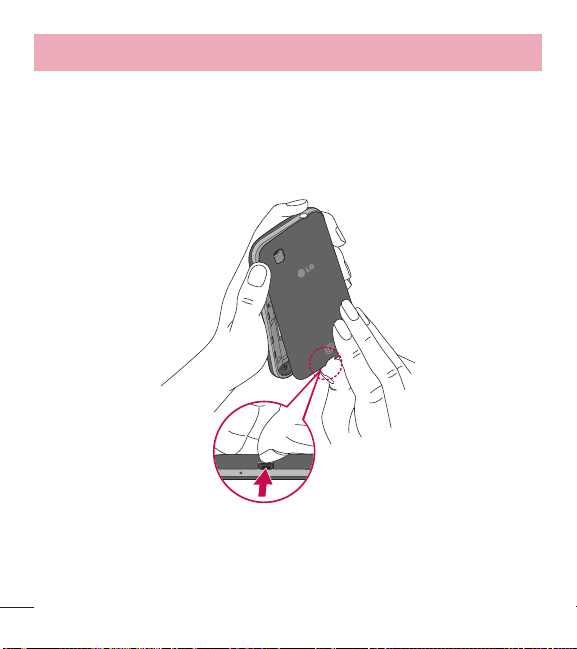
16
Características del teléfono
Instalación de la batería
Antes de explorar su nuevo teléfono, necesitará configurarlo.
1 Para retirar la tapa posterior, sostenga el teléfono con firmeza en una mano. Con
la otra mano, levante la tapa posterior con la uña del pulgar como se muestra en
la siguiente figura.
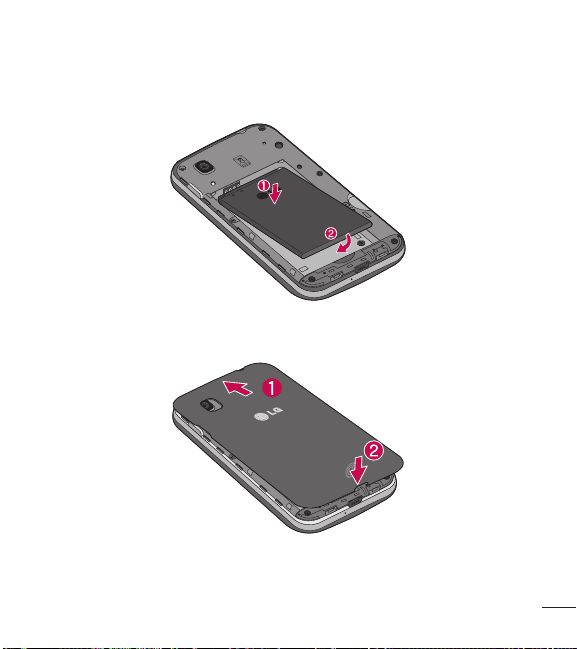
17
2 Inserte la batería en su lugar alineando los contactos dorados del teléfono y la
batería (1) y presione la batería hacia abajo hasta escuchar un clic (2).
3 Alinee la tapa sobre el compartimiento de la batería (1) y presione hacia abajo
hasta que encaje en su lugar (2).
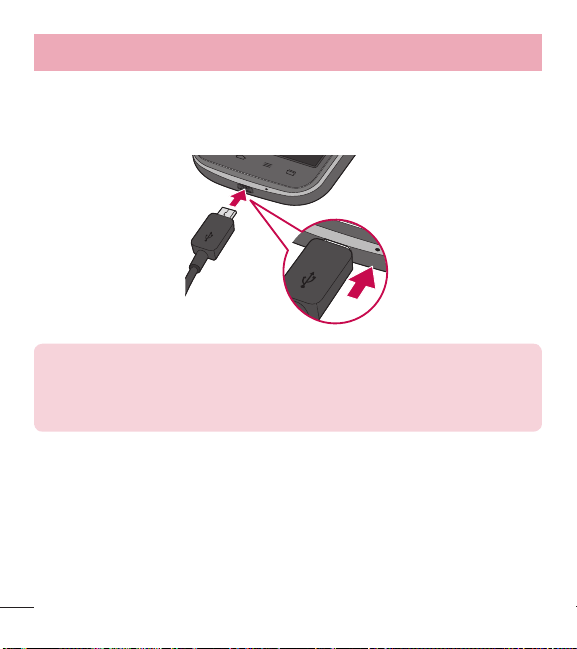
18
Características del teléfono
Carga del teléfono
El Puerto para Cargador/USB está en la parte inferior del teléfono. Inserte un extremo
del cable de carga en el teléfono y conecte el otro extremo en un tomacorriente.
NOTA:
t
La batería debe cargarse completamente antes de usar el teléfono por
primera vez para prolongar su vida útil.
t
No abra la tapa posterior mientras el teléfono se está cargando.
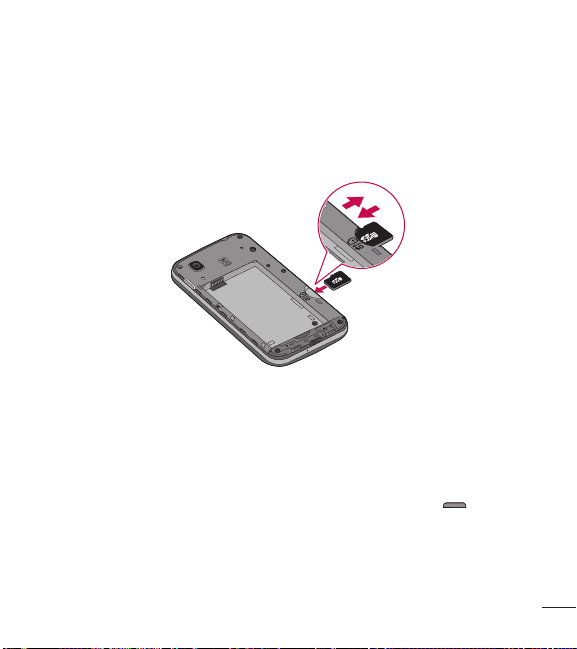
19
Uso de la tarjeta de memoria
Asegúrese de desmontar la tarjeta SD en el menú Almacenamiento antes de quitarla.
1 Retire la tapa posterior.
2 Asegúrese de que la área de contacto dorada quede hacia abajo.
Bloquear y desbloquear la pantalla
Si no usa el teléfono durante un tiempo, la pantalla se apaga y bloquea
automáticamente. Esto ayuda a evitar que toque de manera accidental y ahorra
energía de la batería.
Cuando no utilice el teléfono, presione la Tecla Encender/Bloquear
para
bloquearlo.
Si hay programas ejecutándose cuando bloquea la pantalla, es posible que sigan
ejecutándose en modo de bloqueo. Se recomienda que salga de todos los programas

20
Características del teléfono
antes de ingresar en el modo de bloqueo para evitar cargos innecesarios (como
llamadas, acceso a la Web y comunicaciones de datos).
Para reactivar el teléfono, presione la Tecla Encender/Bloquear
. Aparecerá la
pantalla de bloqueo. Toque y deslice la pantalla de bloqueo en cualquier dirección
para desbloquear la pantalla. Se abrirá la última pantalla visualizada.

21
La pantalla principal
Sugerencias sobre la pantalla táctil
A continuación, se incluyen algunos consejos sobre cómo navegar por el teléfono.
Tocar: Un único toque con el dedo selecciona elementos, enlaces, accesos directos y
letras del teclado en pantalla.
Tocar y mantener – Toque y mantenga un elemento de la pantalla, no levante
el dedo hasta que se produzca una acción. Por ejemplo, para abrir las opciones
disponibles de un contacto, toque y mantenga el contacto en la lista de contactos
hasta que se abra el menú contextual.
Arrastrar: Toque y mantenga presionado un elemento por un momento y, a
continuación, sin levantar el dedo, muévalo por la pantalla hasta encontrar la
ubicación de destino que desea usar. Puede arrastrar elementos en la pantalla
principal para reubicarlos.
Desplazar o deslizar: Para desplazar o deslizar, mueva con rapidez el dedo por la
superficie de la pantalla, sin detenerse cuando toque la pantalla por primera vez (de
lo contrario, arrastrará el elemento en vez de desplazarlo o deslizarlo). Por ejemplo,
puede deslizar la pantalla hacia arriba o abajo para desplazarse por una lista, o
examinar a través de las diferentes pantallas principales al desplazarse de izquierda
a derecha (y viceversa).
Tocar dos veces: Toque dos veces para acercar una página web o un mapa. Por
ejemplo, toque dos veces rápidamente una sección de una página web para ajustar
esa sección de forma que se ajuste al ancho de la pantalla. También puede tocar dos
veces para acercar y alejar al visualizar una imagen y cuando utilice Maps.
Zoom táctil: Junte el dedo índice y el pulgar o sepárelos para acercar o alejar
cuando use el navegador, Maps o cuando vea fotografías.

22
La pantalla principal
Rotar la pantalla: Desde muchas aplicaciones y menús, la orientación de la pantalla
se ajusta a la orientación física del teléfono.
NOTA:
t
Para seleccionar un elemento, toque el centro del icono.
t
No ejerza demasiada presión; la pantalla táctil es lo suficientemente
sensible para detectar un toque suave, pero firme.
t
Utilice la punta del dedo para tocar la opción que desee. Tenga cuidado
de no tocar otras teclas.
Pantalla principal
Simplemente deslice el dedo hacia la izquierda o derecha para ver los paneles de la
pantalla principal. Puede personalizar cada panel con aplicaciones, widgets y fondos
de pantalla precargados y descargados. Las Teclas Rápidas están disponibles en la
parte inferior de la pantalla principal. Las Teclas Rápidas proporcionan acceso fácil y
con un solo toque a las funciones que más utiliza.
Toque el icono Teléfono para que aparezca el teclado de marcación y realizar
una llamada.
Toque el icono Contactos para abrir los contactos.
Toque el icono Mensajes para acceder al menú de mensajería. Aquí puede
crear un nuevo mensaje.
Toque el icono Aplicaciones en la parte inferior de la pantalla. Esto muestra
todas las aplicaciones instaladas. Para abrir cualquier aplicación, simplemente
toque el icono en la lista de aplicaciones.

23
NOTA: Para añadir un icono, arrástrelo y suéltelo en la barra de Teclas
Rápidas. Para eliminar un icono, arrástrelo fuera de la barra de Teclas
Rápidas.
Personalizar la pantalla principal
Puede personalizar la pantalla principal agregando aplicaciones, descargas, widgets
o fondos de pantalla. Para utilizar el teléfono con mayor comodidad, agregue sus
widgets favoritos a la pantalla principal.
Para agregar elementos de la pantalla principal:
1 Toque y mantenga presionada una parte vacía de la pantalla principal.
2 Toque la ficha deseada. Elija entre Aplicaciones, Descargas o Widgets.
3 Arrastre el icono de la aplicación que desee hacia la ubicación preferida y levante
el dedo.
Para eliminar un elemento de la pantalla principal:
t
Toque y mantenga el icono que desea eliminar y, a continuación, arrástrelo a
y suéltelo.
SUGERENCIA Para añadir un icono de aplicación a la pantalla principal
desde la pantalla de aplicaciones, toque y mantenga la aplicación que
desee agregar y arrástrela a la ubicación deseada.

24
La pantalla principal
SUGERENCIA Usando carpetas
Se pueden combinar varios iconos de aplicaciones en una carpeta para
ayudarle a estar organizado. Suelte un icono de la aplicación sobre otro en
la pantalla principal y se creará una carpeta para contener los dos iconos.
Volver a las aplicaciones usadas recientemente
1 Toque la Tecla Aplicaciones Recientes . Se mostrará una lista con los iconos
de las aplicaciones que ha utilizado recientemente.
2 Toque un icono para abrir la aplicación. O toque la Tecla Atrás para volver a
la pantalla anterior.
Notificaciones
Las notificaciones le alertan sobre la llegada de nuevos mensajes, eventos del
calendario y alarmas, así como también sobre eventos en curso, como descargas de
video.
Desde el Panel de notificaciones, puede ver el estado actual de su teléfono y las
notificaciones pendientes.
Cuando reciba una notificación, su icono aparecerá en la parte superior de la
pantalla. Los iconos de notificaciones pendientes aparecen a la izquierda y los iconos
del sistema, como Wi-Fi o la duración de la batería, a la derecha.
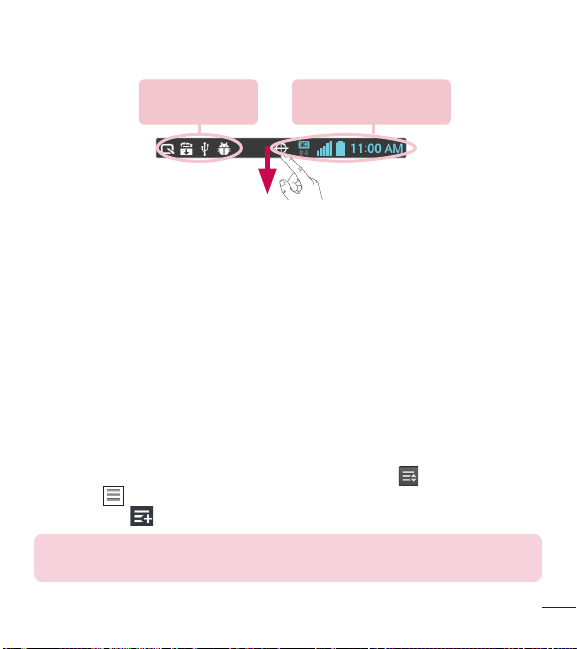
25
Notificaciones
pendientes
Notificaciones del
sistema
Acceso a las notificaciones
Deslice la Barra de estado hacia abajo para abrir el Panel de notificaciones. Para
cerrar el Panel de notificaciones, deslice hacia arriba la barra que se encuentra en la
parte inferior de la pantalla.
Ajustes Rápidos
Use los Ajustes Rápidos para alternar con rapidez los ajustes de función como Wi-Fi,
manejar la luminosidad de la pantalla y más. Para acceder a los Ajustes Rápidos,
abra el Panel de notificaciones. La barra de Ajustes Rápidos se encuentra en la parte
superior del Panel de notificaciones.
Para reorganizar los elementos de Ajustes Rápidos en el Panel de
notificaciones
Deslice la barra de Ajustes Rápidos hacia la derecha y toque
. Toque y mantenga
presionado
junto a los elementos que desea mover y arrástrelos a la ubicación
deseada. Toque
para añadir más elementos a la barra de Ajustes Rápidos.
NOTA: Toque y mantenga un icono en la barra de Ajustes Rápidos para
acceder directamente a su menú de ajustes.
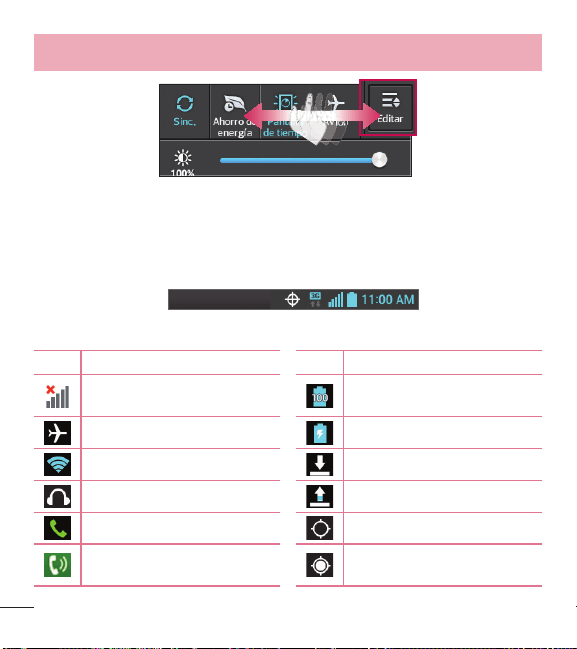
26
La pantalla principal
Iconos de notificación de la Barra de estado
Los iconos de notificaciones aparecen en la Barra de estado de la parte superior
de la pantalla para informar sobre las llamadas perdidas, los mensajes nuevos, los
eventos de calendario, el estado del teléfono y más.
Los iconos que aparecen en la tabla siguiente son algunos de los más comunes.
Icono Descripción Icono Descripción
Sin señal
Batería completamente
cargada
Modo avión Se está cargando la batería
Conectado a la red Wi-Fi Descargando datos
Auricular conectado Cargando datos
Llamada en curso El GPS se está conectando
Altavoz
Recibiendo datos de ubicación
de GPS
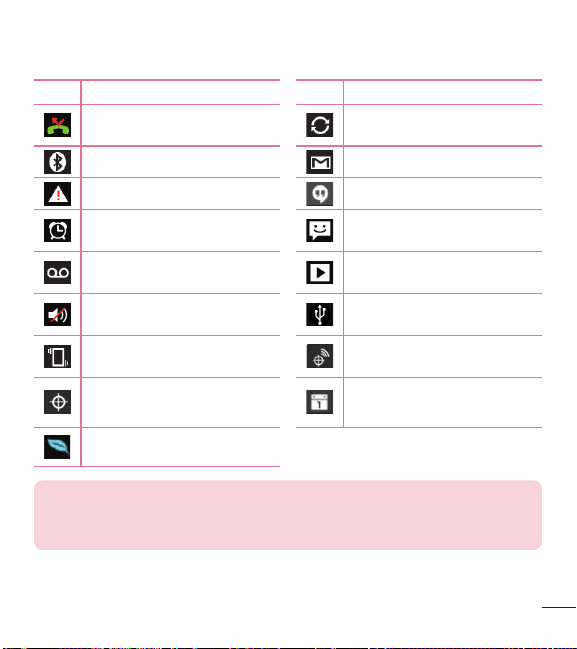
27
Icono Descripción Icono Descripción
Llamada perdida
Se están sincronizando los
datos
Bluetooth activado
Nuevo mensaje de Gmail
Advertencia del sistema Nuevo mensaje de Hangouts
Alarma establecida
Nuevo mensaje de texto o
multimedia
Nuevo correo de voz
Se está reproduciendo una
canción
Timbre silenciado
El teléfono está conectado a la
PC mediante el cable USB
Modo de vibración
Servicio de ubicación activado
Servicio de ubicación apagado
Notificación de eventos del
calendario
Ahorro de energía encendido
NOTA: Las ubicaciones de los iconos de la barra de estado pueden ser
diferentes dependiendo de las funciones, características y aplicaciones que
se utilizan.
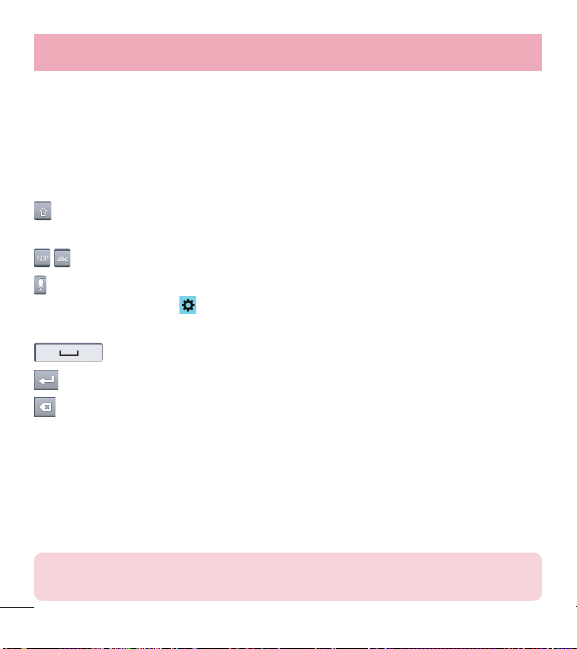
28
La pantalla principal
Teclado en pantalla
Puede introducir texto mediante el teclado en pantalla. El teclado en pantalla aparece
automáticamente en la pantalla cuando se necesita introducir texto. Para mostrarlo
en forma manual, toque el campo de texto en donde desea introducir texto.
Usar el teclado e introducir texto
Toque esta tecla una vez para poner en mayúscula la próxima letra que escriba.
Tóquela dos veces para que todas las letras se pongan en mayúscula.
Toque esta tecla para cambiar al teclado de números y símbolos.
Toque esta tecla para introducir texto con la voz. Mantenga presionada esta tecla
y arrastre el dedo sobre
y suelte para acceder a los ajustes del teclado LG. Esta
tecla cambia dependiendo de la opción que se utilizó por última vez.
Toque esta tecla para introducir un espacio.
Toque esta tecla para crear una nueva línea en el campo del mensaje.
Toque esta tecla para borrar el carácter anterior.
Introducción de caracteres especiales
El teclado de LG le permite introducir caracteres especiales (por ejemplo, "á") cuando
escribe. Por ejemplo, para introducir "á", toque y mantenga la tecla "a" hasta que
aparezcan los caracteres adicionales. A continuación seleccione el carácter especial
que desea introducir.
NOTA: Un símbolo en la esquina superior derecha de la tecla indica que
los caracteres adicionales están disponibles para esa tecla.

29
Configuración de la cuenta de Google
La primera vez que abra una aplicación de Google en el teléfono, se le solicitará que
inicie sesión en su cuenta de Google existente. Si no tiene una cuenta de Google, se
le pedirá que cree una.
Crear una cuenta de Google
1 En la pantalla principal, toque para abrir la pantalla de aplicaciones.
2 Toque Ajustes
> Cuentas y sincronización > AGREGAR CUENTA > Google
> Nueva para iniciar el asistente de configuración de Gmail.
3 Toque un campo de texto para abrir el teclado táctil e introduzca su nombre y un
nombre de usuario para su cuenta de Google. Al introducir texto, puede tocar la
Tecla Sig. en el teclado para ir al siguiente campo de texto.
4 Cuando haya introducido su nombre y nombre de usuario, toque
. Su teléfono
se comunica con los servidores de Google y revisa la disponibilidad del nombre
de usuario.
5 Introduzca su contraseña (dos veces). Luego siga las instrucciones e introduzca
la información obligatoria y opcional sobre la cuenta. Espere mientras el servidor
crea su cuenta.
Iniciar sesión en la cuenta de Google
1 En la pantalla de configuración de cuenta de Google, toque Existente, introduzca
la dirección de correo electrónico y la contraseña y luego toque
.
2 Después de iniciar sesión, puede usar Gmail y aprovechar los servicios de Google
en su teléfono.

30
Configuración de la cuenta de Google
3 Una vez configurada la cuenta de Google en el teléfono, se sincronizará
automáticamente con la cuenta web de Google (según la configuración de
sincronización).
Después de iniciar sesión, puede usar Gmail, Calendario de Google y Play Store; y
aprovechar otros servicios de Google en el teléfono.

31
Conectarse a redes y dispositivos
Wi-Fi
Con Wi-Fi, puede utilizar el acceso a Internet de alta velocidad dentro de la cobertura
del punto de acceso (AP) inalámbrico. Disfrute de la conexión inalámbrica a Internet
por Wi-Fi sin cargos extras.
Conectarse a redes de Wi-Fi
Para usar Wi-Fi en el teléfono, necesita acceder al punto de acceso inalámbrico o
"hotspot". Algunos puntos de acceso están abiertos y simplemente debe conectarse
a ellos. Otros están ocultos o usan otras funciones de seguridad; por lo que debe
configurar el teléfono para poder conectarse a ellos.
Desactive Wi-Fi cuando no la use para prolongar la vida útil de la batería.
NOTA: Si se encuentra fuera de una zona de Wi-Fi o ha configurado Wi-Fi
para estar desactivado, puede que su proveedor de servicio móvil para el
uso de datos móviles aplique cargos adicionales.
Activar Wi-Fi y conectarse a una red Wi-Fi
1 En la pantalla principal, toque > ficha Aplicaciones (si es necesario) >
Ajustes
> Wi-Fi.
2 Toque el botón
para encender Wi -Fi y comenzará a escanear en busca de
redes Wi-Fi disponibles.
t
Las redes seguras se indican con un icono de bloqueo.
3 Toque una red para conectarse a ella.
t
Si la red está protegida, se le pedirá que introduzca una contraseña u otras
credenciales. (Consulte con su administrador de red para obtener más detalles).

32
Conectarse a redes y dispositivos
4 La Barra de estado muestra iconos que indican el estado de Wi-Fi.
Bluetooth
Bluetooth permite compartir datos con otros dispositivos compatibles con Bluetooth y
se conecta a los auriculares Bluetooth.
NOTA:
t
LG no se responsabiliza por la pérdida, la intercepción o el uso incorrecto
de los datos enviados o recibidos a través de la función inalámbrica de
Bluetooth.
t
Siempre asegúrese de recibir y compartir datos con dispositivos que
sean confiables y estén protegidos en forma adecuada. Si existen
obstáculos entre los dispositivos, la distancia operativa puede reducirse.
t
Algunos dispositivos, especialmente los que no han sido probados
ni aprobados por Bluetooth SIG, pueden ser incompatibles con su
dispositivo.
Activación de Bluetooth y vinculación del teléfono con un dispositivo Bluetooth
Debe vincular el dispositivo con otro dispositivo antes de conectarlo a este.
1 En la pantalla principal, toque
> ficha Aplicaciones (si es necesario) >
Ajustes
> Bluetooth.
2 Toque el botón
para activar Bluetooth.
3 Toque la casilla de verificación situada junto al nombre de su teléfono para que el
teléfono sea visible a otros dispositivos Bluetooth.
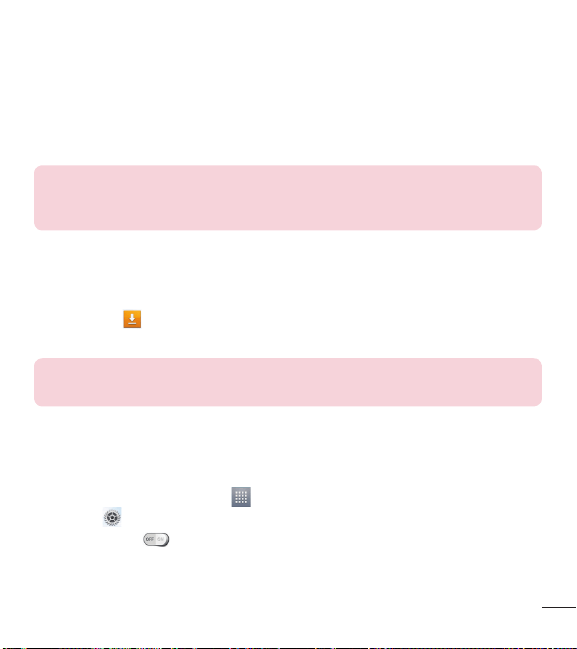
33
4 Se mostrará una lista de los dispositivos disponibles. Seleccione el dispositivo de
la lista con el que se desea asociar.
Una vez que se complete la vinculación, su dispositivo se conectará con el otro
dispositivo.
NOTA: Algunos dispositivos, especialmente los auriculares o manos libres
para autos, pueden tener un PIN de Bluetooth fijo, por ejemplo, 0000. Si el
otro dispositivo tiene un PIN, se le pedirá que lo ingrese.
Envíe datos mediante la función inalámbrica Bluetooth
1 Seleccione un archivo o un elemento, como un contacto, un evento del calendario
o un archivo multimedia, desde una aplicación adecuada o desde la aplicación
Descargas
.
2 Seleccione la opción para enviar datos a través de Bluetooth.
NOTA: El método para seleccionar una opción puede variar según el tipo
de datos.
3 Busque un dispositivo habilitado con Bluetooth y cuando lo encuentre, vincule su
dispositivo con él.
Recibir datos mediante la función inalámbrica Bluetooth
1 En la pantalla principal, toque
> ficha Aplicaciones (si es necesario) >
Ajustes
> Bluetooth.
2 Toque el botón
para activar Bluetooth.
3 Toque la casilla de verificación situada junto al nombre de su teléfono para que el
teléfono sea visible a otros dispositivos Bluetooth.
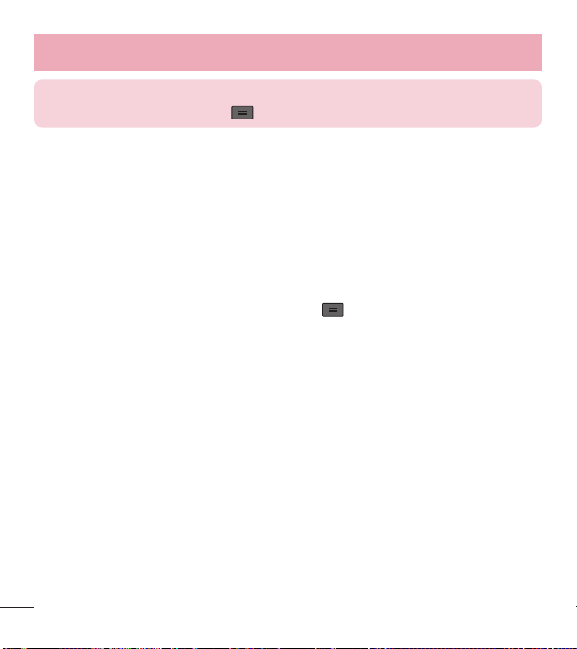
34
Conectarse a redes y dispositivos
NOTA: Para seleccionar la cantidad de tiempo que el dispositivo será
visible, toque la Tecla Menú > Tiempo visible.
4 Toque Aceptar para confirmar que está dispuesto a recibir datos desde el
dispositivo.
Conectarse a redes privadas virtuales
Las redes privadas virtuales (VPN) le permiten conectarse a los recursos dentro de
una red local segura, desde fuera de esa red.
Para agregar una VPN
1 En la pantalla principal, toque la Tecla Menú
> Ajustes del sistema >
Más...> VPN.
2 Toque Agregar red VPN.
3 Toque el tipo de VPN que desea añadir.
4 En la pantalla que se abre, siga las instrucciones del administrador de red para
configurar cada componente de la configuración de la VPN.
5 Toque Guardar. La VPN se agregará a la lista en la pantalla de configuración de
VPN.

35
Conexiones de PC con un cable USB
Aprenda a conectar su dispositivo a un PC con un cable USB utilizando los diferentes
modos de conexión USB.
Transferir música, fotos y videos usando la sincronización multimedia (MTP)
1 Conecte el teléfono a su PC utilizando el cable USB suministrado con el teléfono.
2 En la pantalla del teléfono aparecerá una lista de tipos de conexiones USB.
También puede ir a Ajustes del sistema > Conexión de PC > Tipo de conexión
USB > Sincronización multimedia (MTP).
3 Ahora puede ver el contenido multimedia en la PC y transferir los archivos.
Sincronización con Windows Media Player
Asegúrese de que Windows Media Player esté instalado en la PC.
1 Use el cable USB para conectar el teléfono a una PC en la que Windows Media
Player esté instalado.
2 Seleccione la opción Sincronización multimedia (MTP). Una vez conectado,
aparecerá una ventana emergente en la PC.
3 Abra Windows Media Player para sincronizar los archivos de música.
4 Edite o introduzca el nombre de su dispositivo en la ventana emergente (de ser
necesario).
5 Seleccione y arrastre los archivos de música que desee a la lista de
sincronización.
6 Comience la sincronización.

36
Conectarse a redes y dispositivos
t
Deben cumplirse los siguientes requisitos para sincronizar con Windows Media
Player.
Elementos Requisitos
Sistema operativo Microsoft Windows XP SP2, Vista o superior
Versión de Windows Media
Player
Windows Media Player 10 o superior
t
Si la versión de Windows Media Player es inferior a 10, instale la versión 10 o
superior.

37
Llamadas
Realizar una llamada
1 En la pantalla principal, toque para abrir el teclado de marcación.
2 Introduzca el número utilizando el teclado de marcación. Para borrar un dígito,
toque
.
3 Toque
para realizar una llamada.
4 Para finalizar una llamada, toque
.
SUGERENCIA Para introducir "+" para realizar llamadas internacionales,
toque y mantenga .
Llamar a los contactos
1 En la pantalla principal, toque para abrir su lista de contactos.
2 Desplácese por la lista de contactos o toque el campo Buscar contactos y
escriba el nombre del contacto. También puede desplazarse por la barra alfabética
de la parte derecha de la pantalla.
3 En la lista, toque
junto al contacto que desee llamar.
Responder y rechazar una llamada
Cuando la pantalla está bloqueada
t
Deslice en cualquier dirección para responder a la llamada entrante.
t
Deslice en cualquier dirección para rechazar la llamada entrante.

38
Llamadas
Cuando la pantalla está desbloqueada
t
Toque para responder a la llamada entrante.
t
Toque para rechazar la llamada entrante.
¡SUGERENCIA! Rechazar con mensaje
Con esta función puede enviar un mensaje rápidamente. Esto es útil si
tiene que rechazar una llamada con un mensaje durante una reunión.
Ajuste del volumen durante la llamada
Para ajustar el volumen durante una llamada, utilice las Teclas de Volumen en el lado
izquierdo del teléfono.
Hacer una segunda llamada
1 Durante su primera llamada, toque y marque el número. También puede ir
a la lista de números marcados recientemente tocando
o buscar contactos
tocando
y seleccionando el contacto al que desea llamar.
2 Toque
para realizar la llamada.
3 La llamada inicial es puesta en espera.
4 Toque
si desea iniciar una conferencia.
5 Para finalizar la llamada activa, toque
.
NOTA: Se le cobrará cada llamada que realice.
39
Ver los registros de llamadas
En la pantalla principal, toque y seleccione la ficha Registros . Se muestra
una lista completa de todas las llamadas realizadas, recibidas y perdidas.
SUGERENCIA
t
Toque cualquier entrada del registro de llamadas para ver la fecha, la
hora y la duración de la llamada.
t
Toque la Tecla Menú y, a continuación toque Borrar todo para
borrar todos los elementos registrados o toque Borrar para eliminar
elementos individuales.
Configuración de llamada
Puede configurar las opciones de llamada del teléfono, como desvío de llamadas y
otras funciones especiales ofrecidas por su proveedor.
1 En la pantalla principal, toque
.
2 Toque la Tecla Menú
.
3 Toque Ajustes de llamada y elija las opciones que desee ajustar.
40
Contactos
Puede agregar contactos al teléfono y sincronizarlos con los contactos de la cuenta
de Google u otras cuentas que admitan la sincronización de contactos.
Buscar un contacto
1 En la pantalla principal, toque para abrir su lista de contactos.
1 Toque el campo Buscar contactos y escriba el nombre del contacto. También
puede desplazarse por la barra alfabética de la parte derecha de la pantalla.
Agregar un nuevo contacto
1 En la pantalla principal, toque y escriba el número del nuevo contacto.
1 Toque la Tecla Menú
> Agregar a Contactos > Crear nuevo contacto.
2 Si desea añadir una imagen al nuevo contacto, toque
. Elija entre Tomar una
foto o Seleccionar desde la Galería.
3 Toque
en la parte superior de la pantalla y seleccione la cuenta en la que
quiere guardar el contacto.
4 Toque una categoría de información de contacto e introduzca los detalles de su
contacto.
5 Toque Guardar.
Contactos favoritos
Puede clasificar contactos frecuentemente llamados como favoritos.
Cómo agregar un contacto a los favoritos
1 En la pantalla principal, toque
para abrir su lista de contactos.
41
2 Toque un contacto para ver sus detalles.
3 Toque la estrella que aparece a la derecha del nombre del contacto. La estrella se
volverá de color amarillo.
Eliminar un contacto de la lista de favoritos
1 En la pantalla principal, toque
para abrir su lista de contactos.
2 Toque la ficha
y elija un contacto para ver sus detalles.
3 Toque la estrella amarilla que aparece a la derecha del nombre del contacto. La
estrella se pondrá gris y se eliminará el contacto de los favoritos.
Crear un grupo
1 En la pantalla principal, toque para abrir su lista de contactos.
2 Toque la ficha Grupos, a continuación, toque la Tecla Menú
> Nuevo grupo.
3 Ingrese un nombre para el nuevo grupo. También puede establecer un tono para
el grupo creado.
4 Toque Guardar para guardar el grupo.
NOTA: Si borra un grupo, los contactos asignados a ese grupo no se
perderán. Por el contrario, permanecerán en la lista de contactos.
42
Mensajes
El teléfono combina mensajes de texto y multimedia en un único menú intuitivo y
fácil de usar.
Enviar un mensaje
1 Toque en la pantalla principal y toque para redactar un un mensaje
nuevo.
2 Ingrese el nombre de un contacto o un número de contacto en el campo Para.
Alintroducir el nombre del contacto, aparecerán los contactos coincidentes. Puede
tocar el destinatario sugerido. Puede agregar más de un contacto.
NOTA: Se le cobrará un mensaje de texto por cada persona a la que le
envíe el mensaje.
3 Toque el campo text y comience a componer el mensaje.
4 Toque la Tecla Menú
para abrir el menú Opciones. Elija entre Agregar a
Contactos, Agregar asunto, Insertar emoticono, Descartar, Fijar prioridad, y
Cambiar el tema.
SUGERENCIA Puede tocar el icono para adjuntar un archivo que
quiera compartir.
5 Toque Enviar (o Enviar MMS) para enviar el mensaje.
43
ADVERTENCIA
t
El límite de 160 caracteres puede variar de un país a otro según el idioma
y la forma en que esté codificado el mensaje de texto.
t
Si se agrega un archivo de imagen, vídeo o audio a un mensaje de
texto, se convertirá automáticamente en un mensaje multimedia y se le
cobrarán los cargos correspondientes.
Modo de vista
Los mensajes no leídos se encuentran en la parte superior. Otros mensajes
intercambiados con otras personas se muestran en orden cronológico para que
pueda ver su conversación cómodamente.
Cambiar la configuración de su mensaje
Su teléfono está preconfigurado para el envío de mensajes. Esto le permite enviar
mensajes de inmediato. Puede cambiar los ajustes según sus preferencias.
t
Abra la aplicación Mensajes y toque la Tecla Menú > Ajustes.

44
Correo electrónico
Puede usar la aplicación E-mail para leer el correo electrónico de servicios como
Gmail. La aplicación E-mail admite los siguientes tipos de cuentas: POP3, IMAP y
Exchange.
El proveedor de servicios o el administrador del sistema pueden proporcionarle los
datos de configuración de las cuentas que necesita.
Administración de una cuenta de correo electrónico
La primera vez que abra la aplicación E-mail, se abrirá un asistente de configuración
que lo guiará para configurar una cuenta de email.
Luego de la configuración inicial, E-mail muestra los contenidos de su Buzón de
entrada. Si agrega más de una cuenta, puede alternar entre una cuenta y otra.
Para agregar una cuenta de correo electrónico:
t
Abra la aplicación E-mail y toque la Tecla Menú > Cuentas > Tecla Menú
> Agregar cuenta.
Para cambiar la configuración de una cuenta de correo electrónico:
t
Abra la aplicación E-mail y toque la Tecla Menú > Cuentas > Tecla Menú
> Todos los ajustes. A continuación toque la cuenta que desea configurar.
Para borrar una cuenta de correo electrónico:
t
Abra la aplicación E-mail y toque la Tecla Menú > Cuentas > Tecla Menú
> Remover cuenta > toque una cuenta > Borrar > Sí.
Usar las carpetas de las cuentas
Abra la aplicación E-mail y toque la Tecla Menú > Carpetas.
45
Cada cuenta contiene las carpetas Buzón de entrada, Buzón de salida, Enviados y
Borradores. Según las funciones que admita el proveedor de servicios de la cuenta,
puede contar con carpetas adicionales.
Redactar y enviar correos electrónicos
Para redactar y enviar un mensaje
1 Mientras está en la aplicación E-mail, toque
.
2 Ingrese una dirección para el destinatario del mensaje. Al escribir el texto, se
sugieren direcciones que coinciden con los contactos. Separe las diversas
direcciones con punto y coma.
3 Toque el campo Cc/CCO para copiar los destinatarios. Toque
para adjuntar
archivos, si es necesario.
4 Toque el campo del mensaje y escriba el mensaje.
5 Toque
para enviar el correo electrónico.
Si no está conectado a una red, por ejemplo, si está trabajando en el modo de
avión, los mensajes que envía se almacenan en el Buzón de salida hasta que
se vuelva a conectar a una red. Si el Buzón de salida contiene algún mensaje
pendiente, este aparece en la pantalla Cuentas.
SUGERENCIA Cuando llega un nuevo correo electrónico a su Buzón de
entrada, se le notificará mediante un sonido o vibración (dependiendo de
su sonido y ajustes de la vibración).
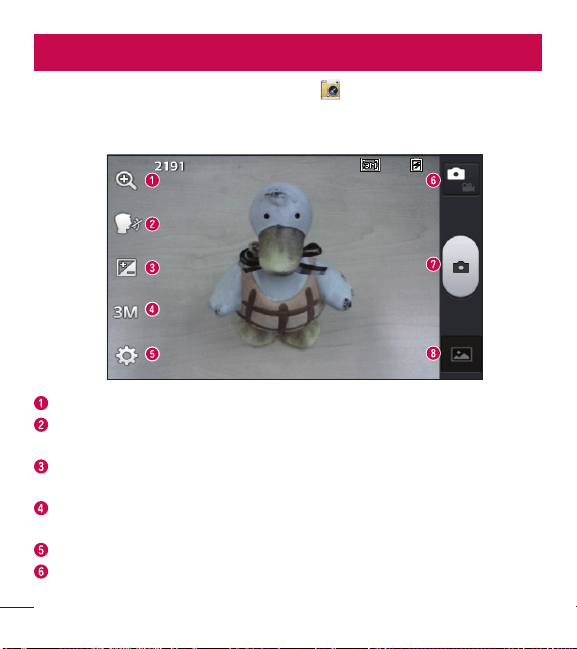
46
Cámara
Para abrir la aplicación Cámara, toque Cámara en la pantalla principal.
Uso del visor
Zoom: Permite acercar o alejar la imagen.
Disparo Cheese: Esto le permite tomar una fotografía mediante un comando
vocal. Diga Cheese, Kimchi, Smile, LG o Whisky para tomar una foto.
Brillo: Esta opción define y controla la cantidad de luz solar que debe ingresar a
la imagen.
Tamaño de imagen: Toque para establecer el tamaño (en píxeles) de la foto que
tome.
Ajustes: Toque para abrir el menú Ajustes.
Modo de video: Toque para cambiar al modo de video.
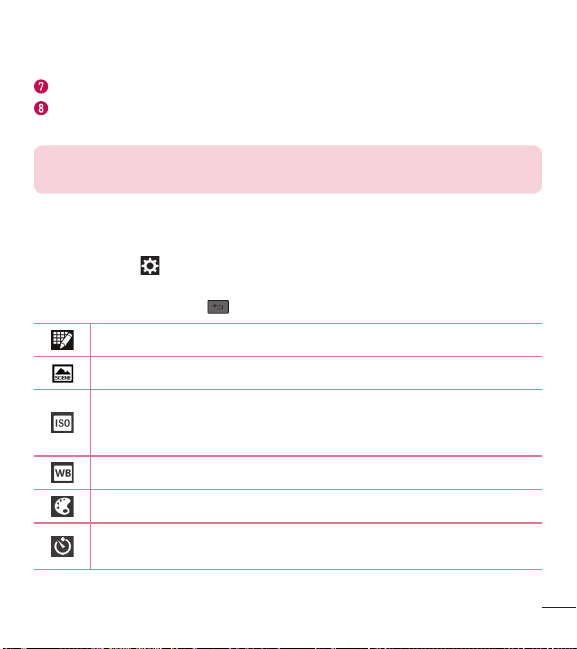
47
Capturar: Le permite tomar una foto.
Galería: Toque esta opción para ver la última foto que tomó. Esta opción también
le permite acceder a la Galería y ver las fotos guardadas en el modo de cámara.
NOTA: La capacidad de la memoria puede variar dependiendo de la
configuración de ajustes de la cámara.
Opciones de configuración avanzada
En el visor, toque para abrir las opciones avanzadas. Puede cambiar la
configuración de la cámara si se desplaza por la lista. Después de seleccionar la
opción, toque la Tecla Atrás
.
Toque si desea cambiar el menú del visor.
Le permite establecer el modo de escena para el entorno actual.
La clasificación ISO determina la sensibilidad del sensor de luz de la
cámara. Cuanto más alto sea el valor ISO, más sensible será la cámara.
Esmuy útil en condiciones de poca luz cuando no puede usarse el flash.
Mejora el balance de blancos en diferentes condiciones de iluminación.
Aplica efectos de color a sus imágenes.
Establece una tiempo de espera una cuando toca el botón Capturar. Esto
es ideal si quiere estar en la foto.
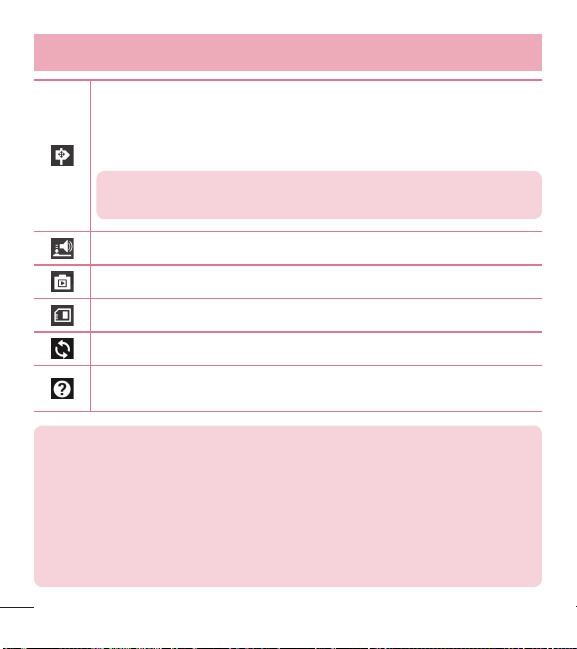
48
Cámara
Esta opción le permite usar los servicios basados en la ubicación del
teléfono. Le permite tomar fotos dondequiera que esté y etiquetarlas con
la ubicación. Si sube imágenes etiquetadas a un blog compatible con
etiquetas geográficas, podrá ver las fotos en un mapa.
NOTA: Esta función sólo está disponible cuando la función GPS
está activada.
Selecciona un sonido para el disparador.
Muestra automáticamente la imagen después de tomarla.
Seleccione la ubicación donde quiere guardar las imágenes.
Restaurar todos los ajustes de la cámara a los ajustes predeterminados.
Toque aquí cuando quiera saber cómo funciona una característica.
Esteicono fue diseñado para proporcionarle una guía rápida.
SUGERENCIA
t
Al salir de la cámara, algunas opciones de ajustes vuelven a los valores
predeterminados, como el balance de blancos, los efectos de color el
temporizador y el modo de escena. Antes de tomar otra foto, compruebe
estos parámetros.
t
El menú de configuración está superpuesto sobre el visor, así que
cuando cambie el color de la foto o los elementos de calidad, verá una
vista previa de la imagen cambiada detrás del menú Ajustes.
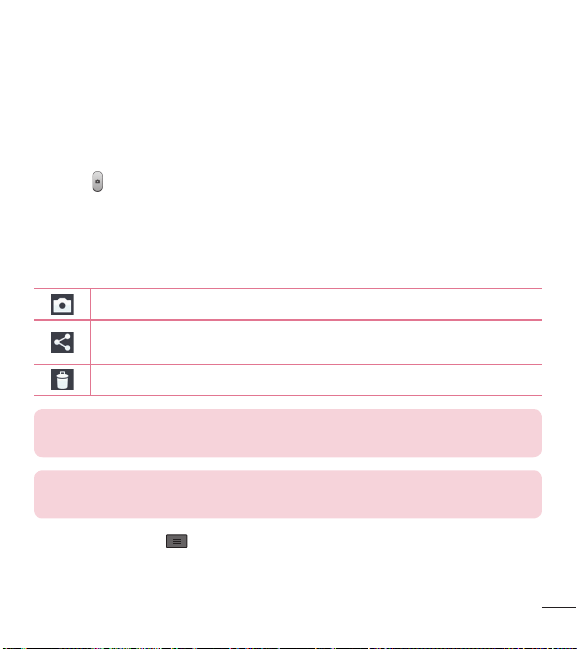
49
Tomar una foto rápida
1 Abra la aplicación Cámara.
2 Mantenga el teléfono en posición horizontal y apunte la lente hacia la persona o el
objeto que desea fotografiar.
3 Toque
para tomar la foto.
Después de que haya tomado la foto
Toque la vista previa de la imagen en la parte inferior para ver la última foto que ha
capturado.
Toque esta opción para tomar otra foto inmediatamente.
Toque para enviar su foto a otras personas o para compartir mediante
servicios de redes sociales.
Toque esta opción para borrar la foto.
SUGERENCIA Si tiene una cuenta de red social configurada en su
teléfono, puede compartir sus fotos con su comunidad de la red social.
NOTA: Es posible que se apliquen cargos adicionales al descargar
mensajes multimedia mientras se encuentra en roaming.
Toque la Tecla Menú para abrir las siguientes opciones.
Fijar imagen como – Toque para usar la imagen como Fondo de la pantalla
principal, Foto de contacto o Pantalla de bloqueo.
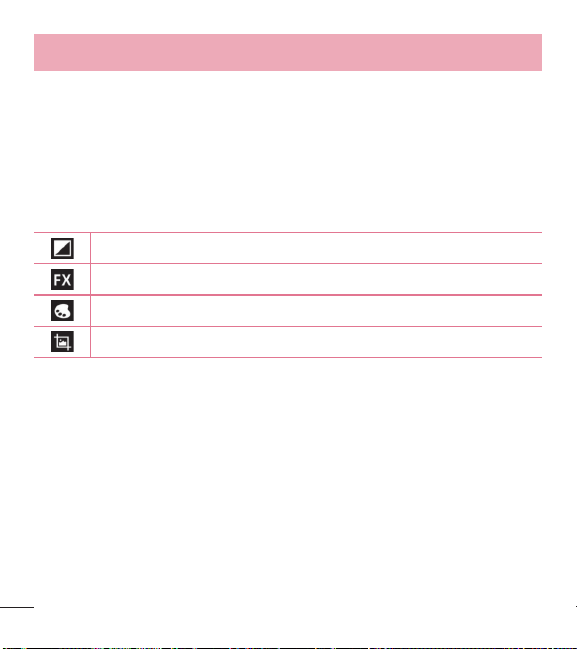
50
Cámara
Mover – Toque para mover la foto a otro álbum.
Copiar – Toque para copiar la foto seleccionada y guardarla en otro álbum.
Renombrar – Toque esta opción para editar el nombre de la imagen seleccionada.
Girar a la izquierda/Girar a la derecha – Toque para girar la imagen hacia la
izquierda o la derecha.
Recortar – Toque para recortar la foto.
Editar – Tap to edit the photo.
Ajusta las luces y sombras para la foto.
Aplica efectos artísticos a imágenes.
Mejora la calidad del color en distintas condiciones de luz.
Aplica opciones adicionales a sus fotos.
Presentación – Muestra una presentación de diapositivas con todas sus fotos.
Detalles – Muestra información sobre la foto.
Ver las fotos guardadas
Puede acceder a las fotos guardadas cuando esté en modo cámara. Sólo tiene que
tocar la vista previa de la imagen en la parte inferior y se mostrará su Galería.
t
Para ver más fotos, desplácese hacia la izquierda o hacia la derecha.
t
Para alejar o acercar, toque dos veces la pantalla o toque la pantalla con dos dedos
y sepárelos (junte los dedos para alejar).
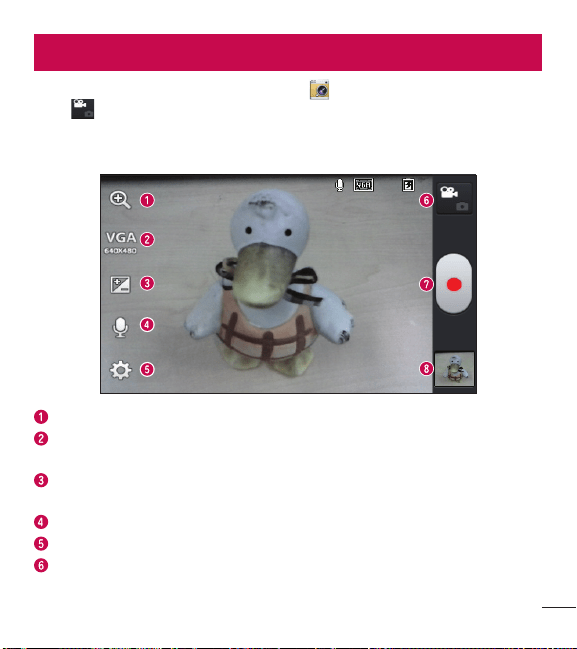
51
VideocámaraVideocámara
Para abrir la cámara de video, toque Cámara en la pantalla principal, después
toque
para cambiar a modo video.
Uso del visor
Zoom: Permite acercar o alejar la imagen.
Tamaño del video: Toque para establecer el tamaño del video (en pixeles) que
está grabando.
Brillo: Esta opción define y controla la cantidad de luz solar que debe ingresar al
video.
Voz: Le permite grabar un video con o sin sonido.
Configuración: Toque para abrir el menú Ajustes.
Modo cámara: Toque para alternar al modo de cámara.
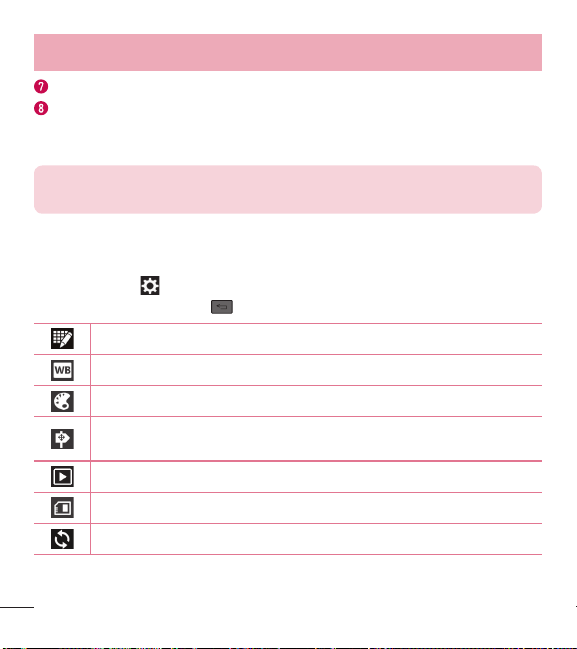
52
Videocámara
Grabar: Inicia la grabación.
Galería: Toque esta opción para ver el último video grabado. Esta opción también
le permite acceder a la Galería y ver los videos guardados desde el modo de
video.
NOTA: Mientras graba un video, coloque dos dedos sobre la pantalla y
júntelos o sepárelos para usar la función de Zoom.
Opciones de configuración avanzada
En el visor, toque para abrir las opciones avanzadas. Después de seleccionar la
opción, toque la Tecla Atrás
.
Toque si desea cambiar el menú del visor.
Mejora el balance de blancos en diferentes condiciones de iluminación.
Seleccione un efecto de color para utilizar en su video.
Active esta opción para utilizar los servicios basados en la ubicación de
su teléfono para fines de etiquetas geográficas.
La Revisión automática muestra el video que acaba de grabar.
Seleccione la ubicación donde quiere guardar sus videos.
Restaure todos los ajustes de la cámara a los ajustes predeterminados.
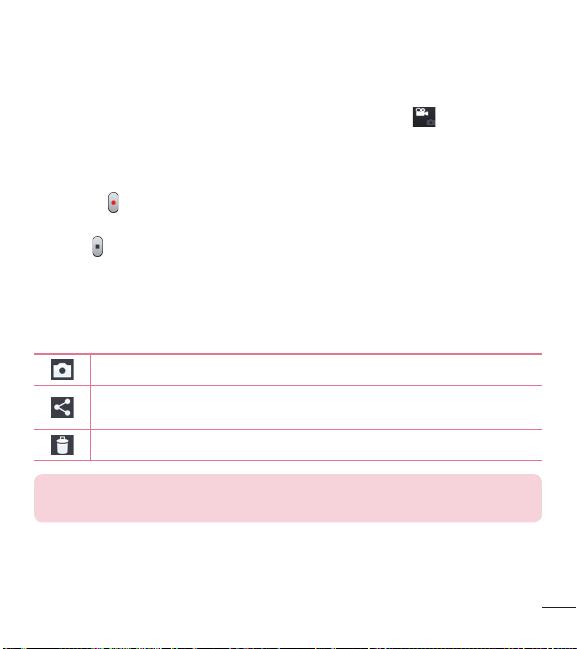
53
Grabar un video
1 Abra la aplicación Cámara y toque el botón Modo de video .
2 El visor de la cámara de video aparecerá en la pantalla.
3 Con el teléfono en la mano, apunte la lente hacia el objetivo que desea capturar
en el video.
4 Presione
una vez para iniciar la grabación.
5 Se muestra un temporizador que indica la duración del video.
6 Toque
para detener la grabación.
Después de grabar un video
Toque la vista previa de la imagen en la parte inferior para ver el último video que ha
grabado.
Toque esta opción para grabar otro video inmediatamente.
Toque para enviar su video a otras personas o para compartir mediante
servicios de redes sociales.
Permite borrar el video.
NOTA: Es posible que se apliquen cargos adicionales al descargar
mensajes multimedia mientras se encuentra en roaming.

54
Videocámara
Ver los videos guardados
1 En el visor, toque la vista previa de la imagen de la parte inferior.
2 La Galería aparecerá en la pantalla.
3 Toque un video para reproducirlo automáticamente.
Ajustar el volumen al ver un video
Para ajustar el volumen de un vídeo mientras se está reproduciendo, use las Teclas
de Volumen del lado izquierdo del teléfono.
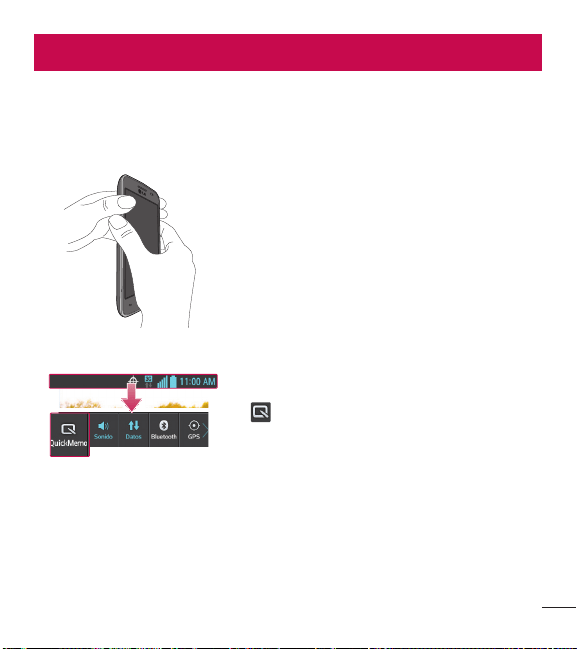
55
Función exclusiva de LGFunción exclusiva de LG
QuickMemo
La función QuickMemo le permite crear notas y capturar imágenes de pantalla.
Puede utilizar QuickMemo para notas crear de manera fácil y eficiente durante una
llamada, con una imagen guardada o en la pantalla del teléfono actual.
1 Para acceder a la función QuickMemo, presione
ambas Teclas de Volumen durante un segundo
en la pantalla que desee capturar.
O bien O
Arrastre la Barra de estado hacia abajo y toque
en la barra de Ajustes Rápidos
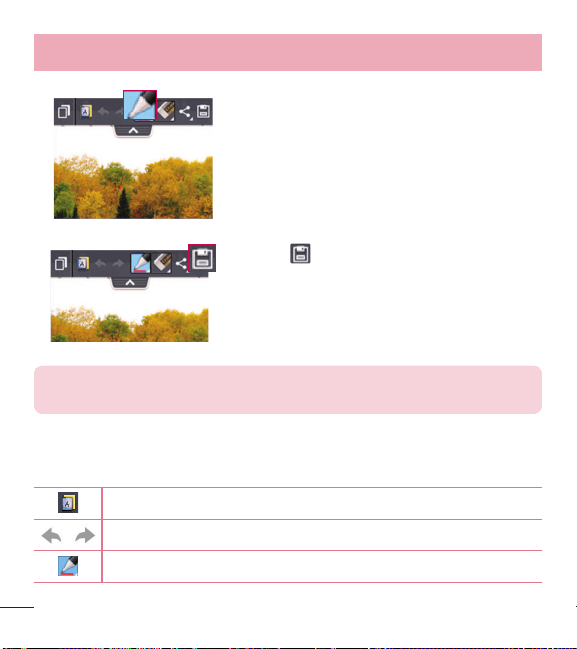
56
Función exclusiva de LG
2 Seleccione la opción de menú deseado entre
Tipo de bolígrafo, Color y Borrador. A
continuación, cree una nota.
3 Toque en el menú Editar para guardar la
nota al álbum QuickMemo de su Galería.
NOTA: Al usar la función QuickMemo, use la punta de su dedo. No use
sus uñas.
Uso de las opciones de QuickMemo
Las siguientes opciones están disponibles cuando se utiliza QuickMemo.
Le permite utilizar el fondo actual o una imagen del cuaderno de notas.
Deshacer y rehacer las acciones anteriores.
Selecciona el tipo de bolígrafo y el color.
57
Borra la nota que creó.
Toque para enviar su nota a otras personas o para compartir mediante
servicios de redes sociales.
Guarda la nota con la pantalla actual en Galería.
Ver un QuickMemo guardado
Abra la Galería y seleccione el álbum QuickMemo.
58
MultimediaMultimedia
Galería
Puede almacenar archivos multimedia en la memoria interna y externa para facilitar
el acceso a todos sus archivos multimedia. Utilice esta aplicación para ver archivos
multimedia como fotos y vídeos.
t
En la pantalla principal, toque > ficha Aplicaciones (si es necesario) >
Galería
.
NOTA:
t
No se admiten algunos formatos de archivo según el software instalado
en el teléfono.
t
Algunos archivos pueden no reproducirse adecuadamente, según cómo
estén codificados.
Ver las fotos
Abra la Galería para mostrar sus álbumes disponibles. Cuando otra aplicación,
como el correo electrónico, guarda una foto, la carpeta de descargas se crea
automáticamente para contener la fotografía. De la misma manera, tomar una
captura de pantalla crea automáticamente la carpeta Screenshots (capturas de
pantalla). Seleccione una carpeta y ábrala.
Las fotos se muestran por fecha de creación en una carpeta. Seleccione una foto
para verla en pantalla completa. Deslícese hacia la izquierda o derecha para ver la
imagen anterior o siguiente.
Cómo acercar o alejar una imagen
Use uno de los métodos siguientes para acercar una imagen:
59
t
Toque dos veces en cualquier lugar para acercar.
t
Coloque dos dedos sobre la pantalla y sepárelos para acercar la imagen. Junte los
dedos para alejar la imagen, o toque dos veces para regresar.
Reproducción de videos
Los archivos de video muestran el icono en la vista previa. Seleccione un video
para mirar y toque
.
NOTA:
t
No se admiten algunos formatos de archivo según el software del
teléfono.
t
Si el tamaño del archivo excede el espacio de memoria disponible, es
posible que ocurra un error al abrir los archivos.
Edición de fotos y videos
Mientras ve una foto o video, toque la Tecla Menú y use las opciones de edición
avanzada.
Borrado de imágenes
Use uno de los siguientes métodos:
t
En un álbum, toque toque para seleccionar fotos/videos y a continuación,
toque Borrar.
t
Cuando vea una foto/video, toque .

60
Multimedia
Establecer una foto como fondo de pantalla
Cuando vea una fotografía, toque la Tecla Menú y seleccione Fijar imagen
como para establecer la imagen como la pantalla de fondo para la pantalla principal
o pantalla de bloqueo.
Videos
El teléfono cuenta con un reproductor de video que le permite reproducir todos sus
vídeos favoritos. Para acceder al reproductor de video, en la pantalla principal, toque
> ficha Aplicaciones (si es necesario ) > Videos .
Reproducir un video
1 En la pantalla principal, toque > ficha Aplicaciones (si es necesario) >
Videos
.
2 Seleccione el video que desea reproducir.
Toque esta opción para pausar el video.
Toque esta opción para reanudar la reproducción del video.
Toque y mantenga presionada para avanzar rápidamente a intervalos de
3 segundos. Toque una vez para avanzar rápidamente 10 segundos.
Toque y mantenga presionada para retroceder a intervalos de 3
segundos. Toque una vez para rebobinar 10 segundos.
Toque para controlar el volumen del video.
Toque para cambiar el radio de la pantalla de video.
61
Toque para bloquear una pantalla de video.
Para ajustar el volumen de un video mientras se está reproduciendo, use las Teclas
de Volumen del lado izquierdo del teléfono
Toque y mantenga presionado un video de la lista. Se mostrarán las opciones
Compartir, Borrar y Detalles.
Música
El teléfono cuenta con un reproductor de música que le permite reproducir todos
sus temas favoritos. Para acceder al reproductor de música, en la pantalla principal,
toque
> ficha Aplicaciones (si es necesario ) > Música .
Reproducir una canción
1 En la pantalla principal, toque > ficha Aplicaciones (si es necesario) >
Música
.
2 Toque la ficha de las Canciones
3 Seleccione la canción que desea reproducir.
Toque para encontrar la canción en YouTube.
Toque esta opción para ajustar el modo aleatorio.
Toque esta opción para ajustar el modo de repetición.
Toque esta opción para controlar el volumen de la música.
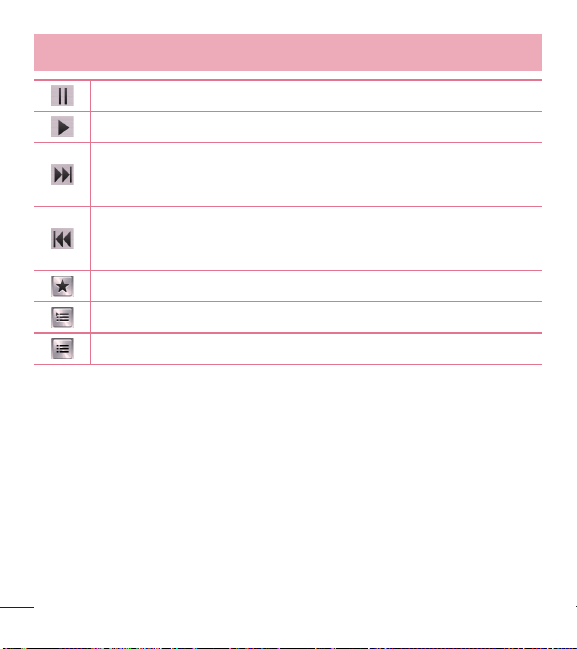
62
Multimedia
Toque esta opción para pausar la reproducción.
Toque esta opción para reanudar la reproducción.
Toque para saltar a la siguiente canción del álbum o a la lista de
reproducción. Toque y mantenga presionada para avanzar rápidamente a
intervalos de 3 segundos.
Toque para volver al principio de la canción. Toque dos veces para volver
a la canción anterior. Toque y mantenga presionada para retroceder a
intervalos de 3 segundos.
Toque para añadir la canción a su lista de reproducción de Favoritos.
Toque esta opción para ver la lista de reproducción actual.
Toque para volver a la biblioteca de música.
Para ajustar el volumen de un vídeo mientras se está reproduciendo, use las Teclas
de Volumen del lado izquierdo del teléfono.
Toque y mantenga una canción de la lista. Aparecerán las opciones Reproducir,
Agregar a la lista de reproducción, Compartir, Fijar como tono de timbre,
Borrar, Detalles y Buscar.

63
NOTA:
t
No se admiten algunos formatos de archivo según el software del
dispositivo.
t
Si el tamaño del archivo excede el espacio de memoria disponible, es
posible que ocurra un error al abrir los archivos.
t
Es probable que los archivos de música estén protegidos por leyes de
derecho de autor nacionales y tratados internacionales.
t
Por lo tanto, es posible que sea necesario obtener un permiso o una
licencia para reproducir la música o copiarla. En algunos países, las leyes
nacionales prohíben la realización de copias de material protegido por
derechos de autor. Antes de descargar o copiar el archivo, compruebe
las leyes nacionales del país pertinente respecto del uso de ese tipo de
material.
64
Utilidades
Configurar una alarma
1 En la pantalla principal, toque > ficha Aplicaciones (si es necesario) >
Alarma/Reloj
> .
2 Establezca la hora y seleccione AM o PM.
3 Establezca Repetir, Posponer por, Vibración, Tono de alarma, Volumen de
alarma, Aplicación de ejecución autom., Bloqueo de rompecabezas y Notas.
4 Toque Guardar para guardar la alarma.
NOTA: Para cambiar los ajustes de la alarma, toque la Tecla Menú de
la pantalla de Alarmas y seleccione Ajustes.
Usar la calculadora
1 En la pantalla principal, toque > ficha Aplicaciones (si es necesario) >
Calculadora
.
2 Toque las teclas numéricas para introducir los números.
3 Para cálculos sencillos, toque la función que desea realizar (
, , o )
seguido de
.
4 Para cálculos más complejos, toque la Tecla Menú
, seleccione Panel
avanzado y seleccione las funciones que desee.
NOTA: Para comprobar los cálculos anteriores, toque .
65
Agregar un evento al calendario
1 En la pantalla principal, toque > ficha Aplicaciones (si es necesario) >
Agenda
.
2 Toque
y elija de entre Día, Semana, Mes o Agenda para cambiar la vista del
mes.
3 Toque la fecha en la que desea añadir un evento y toque
.
4 Toque el campo Nombre del evento e introduzca el nombre.
5 Toque el campo Ubicación e introduzca la ubicación. Compruebe la fecha e
introduzca la hora de inicio y fin deseada.
6 Si desea agregar una nota al evento, toque el campo Descripción y escriba los
detalles.
7 Si desea repetir la alarma, configure REPETIR y RECORDATORIOS, si es
necesario.
8 Toque Guardar para guardar el evento en el calendario.
Grabador de voz
Utilice el grabador de voz para grabar notas de voz u otros archivos de audio.
Grabar un sonido o una voz
1 En la pantalla principal, toque > ficha Aplicaciones (si es necesario) >
Grabador de voz
.
2 Toque
para comenzar a grabar.
3 Toque
para finalizar la grabación.
4 Toque
para escuchar la grabación.
66
Utilidades
NOTA: Toque para acceder a la lista de grabaciones. Podrá escuchar
la grabación guardada. El tiempo disponible de grabación puede variar del
tiempo real de grabación.
Polaris Viewer 4
Polaris Viewer 4 le permite ver los distintos tipos de documentos electrónicos tales
como MS Office, PDF, Texto, y mucho más.
t
En la pantalla principal, toque >ficha Aplicaciones (si es necesario) > Visor
Polaris 4
.
Google+
Use esta aplicación para permanecer conectado con personas mediante el servicio
de red social de Google.
t
En la pantalla principal, toque > ficha Aplicaciones (si es necesario) >
Google+
.
NOTA: Esta aplicación puede no estar disponible, según la región o el
proveedor de servicio.
67
Búsqueda por voz
Use esta aplicación para buscar en páginas web mediante el uso de voz.
1 En la pantalla principal, toque
> ficha Aplicaciones (si es necesario) >
Búsqueda por voz
.
2 Diga una palabra o frase clave cuando aparezca Habla ahora en la pantalla.
Seleccione una de las palabras clave sugeridas que aparecen.
NOTA: Esta aplicación puede no estar disponible, según la región o el
proveedor de servicio.
Descargas
Use esta aplicación para ver qué archivos se han descargado a través de las
aplicaciones.
t
En la pantalla principal, toque > ficha Aplicaciones (si es necesario) >
Descargas
.
68
La Web
Navegador
Use esta aplicación para navegar por Internet. El navegador le ofrece un rápido y
colorido mundo de juegos, música, noticias, deportes, entretenimiento y mucho más,
al que puede acceder directamente desde el teléfono celular donde quiera que se
encuentre.
NOTA: Incurrirá en gastos adicionales cuando se conecte a estos servicios
y descargue contenido. Consulte con el proveedor de red cuáles son los
gastos por transferencia de datos.
t
En la pantalla principal, toque > ficha Aplicaciones (si es necesario) >
Navegador
.
Utilizar la barra de herramientas del navegador
Toque y mantenga la barra de herramientas del navegador y deslícela hacia arriba
con el dedo para abrirla.
Toque para volver una página.
Toque para avanzar una página, hasta la página a la que se conectó
después de la página actual. Esto es lo contrario a lo que sucede si toca
la Tecla Atrás
, que pasa a la página a la cual se conectó antes de
la actual.
Toque para ir a la página de inicio.
Toque para agregar una nueva ventana.
69
Toque para acceder a los favoritos.
Viendo páginas en la web
Toque el campo de dirección, ingrese la dirección web y toque en el teclado.
Abra una página
Para abrir una nueva página, toque > .
Para ir a una página abierta, toque
, deslícese hacia arriba o abajo y toque la
página para seleccionarla.
Búsqueda por voz en la web
Toque el campo de dirección, toque , diga en voz alta una palabra clave y luego
seleccione una d las palabras clave sugeridas.
NOTA: Esta característica puede no estar disponible, según la región o el
proveedor de servicio.
Favoritos
Para marcar la página web actual como favorita, toque la Tecla Menú >
Guardar en Favoritos > OK.
Para abrir una página web marcada, toque
y seleccione el favorito deseado.
70
La Web
Historial
Para abrir una página web de la lista de páginas web visitadas recientemente, toque
> Último(s) acceso(s). Para borrar el historial, toque la Tecla Menú >
Borrar el historial.
Chrome
Use Chrome para buscar información y buscar páginas web.
1 En la pantalla principal, toque
> ficha Aplicaciones (si es necesario) >
Cronómetro
.
Viendo páginas en la web
Toque el campo de la dirección, escriba una dirección Web o criterios de búsqueda y
toque
en el teclado.
Abra una página
Para abrir una página nueva, toque > Pestaña.
Para ir a una página abierta, toque
, deslícese hacia arriba o abajo y toque la
página para seleccionarla.
Búsqueda por voz en la web
Toque el campo de dirección, toque , diga en voz alta una palabra clave y luego
seleccione una de las palabras clave sugeridas.
Sincronización con otros dispositivos
Sincronice las pestañas abiertas y los marcadores para usar con Chrome desde otros
dispositivos cuando ha iniciado la sesión con la misma cuenta de Google.

71
Para ver fichas abiertas en otros dispositivos, toque la Tecla Menú > Otros
dispositivos. Seleccione una página web para abrir.
Accede a los marcadores
Para ver los marcadores, toque la Tecla Menú > Marcadores.

72
AjustesAjustes
Acceso al menú de configuración
1 En la pantalla principal, toque > ficha Aplicaciones (si es necesario) >
Ajustes
.
O
En la pantalla principal, toque la Tecla Menú
> Ajustes del sistema.
2 Seleccione una categoría de ajuste y configure los ajustes deseados.
REDES INALÁMBRICAS
< Modo avión >
Modo avión – Activando el modo avión desactiva todas las conexiones inalámbricas.
< Wi-Fi >
Wi-Fi – Active Wi-Fi para conectarse a las redes de Wi-Fi disponibles.
SUGERENCIA Cómo obtener la dirección MAC
Para configurar una conexión en algunas redes inalámbricas con filtros
MAC, es posible que deba introducir la dirección MAC de su teléfono en
el router.
Puede encontrar la dirección MAC en la siguiente interfaz de usuario:
Acceda a la configuración Wi-Fi y toque la Tecla Menú
> Avanzado >
Dirección MAC.
< Bluetooth >
Encienda o apague la función Bluetooth inalámbrico para usar Bluetooth.

73
< Datos móviles >
Muestra el uso de datos y establece límites de uso de datos móviles.
< Llamadas >
Guardar números desconocidos – Añada números desconocidos a su lista de
contactos después de una llamada.
Buzón de voz – Le permite seleccionar el servicio de correo de voz de su proveedor.
Mensaje de alerta de llamada recibida – Si selecciona esta función, se mostrará
la llamada entrante de manera emergente cuando utilice las aplicaciones Cámara y
Videos.
Rechazar con mensaje – Cuando desea rechazar una llamada, puede enviar
rápidamente un mensaje usando esta función. Es útil si necesita rechazar una
llamada durante una reunión
Protector de privacidad – Oculta el nombre y número de teléfono de la persona
que llama durante una llamada entrante.
Finaliz. llamada con botón Encender/Apagar – Le permite presionar la Tecla
Encender/Bloquear para finalizar la llamada.
Reintento automático – Establece el lapso que se debe esperar antes de volver a
marcar automáticamente una llamada que no se pudo conectar. Seleccione entre
Desactivar, 10 segundos, 30 segundos o 60 segundos.
Modo TTY – Permite establecer el modo TTY.
Audífonos – Seleccione para activar la compatibilidad con audífonos.
Tonos DTMF – Establecer la longitud de los tonos DTMF
Mensaje de respuesta automática – Permite habilitar o inhabilitar la respuesta
automática con manos libres.

74
Ajustes
Duración de llamadas – Ver la duración de las llamadas, incluidas la Última
llamada, Todas las llamadas, las Llamadas realizadas y Llamadas recibidas.
Privacidad de voz – Seleccione está opción para habilitar el modo de privacidad
mejorada.
< Más ... >
VPN – Muestra la lista de redes privadas virtuales (VPN) que ha configurado
anteriormente. Le permite agregar diferentes tipos de VPN.
NOTA: Debe configurar un PIN o una contraseña para bloqueo de pantalla
antes de que pueda usar el almacenamiento de credenciales.
Redes móviles – Activa o desactiva los datos habilitados o el roaming de datos.
DISPOSITIVO
< Sonido >
Perfil de sonido – Establecer el perfil de sonido en Sonido, Solamente vibrar o
Silencioso.
Volúmenes – Administrar el volumen del Tono de llamada, Sonido de
notificaciones, Tono de respuesta del teléfono y la Música, videos, juegos y
otros medios.
Período en silencio – Permite configurar horarios en los que se apagarán todos los
sonidos, excepto la alarma y los medios.
Tono de timbre con vibración – Vibra al recibir llamadas.

75
Tono de llamada – Le permite establecer el tono de timbre predeterminado para las
llamadas entrantes.
Sonido de notificaciones – Permite establecer el tono de timbre predeterminado
para las notificaciones.
Vibración p/ llam. recibida – Le permite establecer la vibración predeterminada
para llamadas entrantes.
Teclado numérico con sonido – Le permite configurar el teléfono para que
reproduzca tonos cuando utilice el teclado para marcar los números.
Toque con sonido – Le permite configurar el teléfono para que reproduzca un
sonido al tocar los botones, iconos y otros elementos que aparecen en pantalla que
reaccionan al ser tocados.
Bloqueo y desbloqueo con sonido – Le permite configurar el teléfono para que
reproduzca un sonido al bloquear y desbloquear la pantalla.
Sonido de bloqueo de pantalla – le permite establecer el teléfono para que
reproduzca un sonido al bloquear y desbloquear el teléfono.
Tono de emergencia – Establece el comportamiento del teléfono al realizar una
llamada de emergencia.
< Pantalla >
Brillo – Permite ajustar el brillo de la pantalla.
Límite de tiempo de pantalla – Establece la cantidad de tiempo que pasará antes
de que se oscurezca la pantalla.
Pantalla giratoria – Active para rotar la orientación de la pantalla cuando gire el
teléfono.
Tipo de fuente – Cambia el tipo de fuente de la pantalla.

76
Ajustes
Tamaño de fuente – Cambia el tamaño de la fuente en la pantalla.
< Pantalla principal >
Tema – Establece el tema de la pantalla del teléfono. Elija entre Optimus, Biz,
Cozywall, y Marshmallow.
Efectos de la pantalla – Establece el efecto al deslizar para cambiar pantallas. Elija
entre Básico, Brisa, Acordeón, Panorama, Carrusel, Capa, y Dominó.
Fondo de pantalla – Establece el fondo de pantalla de la pantalla principal.
Seleccione entre Fondos animados, Galería, o Galería de fondos de pantalla.
Desplazar pantallas circularmente – Seleccione para que las pantallas se
desplacen de manera continua, eliminando la necesidad de volver a desplazarlas en
el sentido opuesto una vez que haya llegado al final.
Copia de respaldo y restauración de pantalla – Copia de seguridad y restauración
de la aplicación, widget y configuraciones temáticas.
< Bloqueo de pantalla >
Seleccionar bluqueo de pantalla – Establezca un tipo de bloqueo de pantalla para
asegurar su teléfono. Establezca Ninguno, Deslizar, Patrón, PIN o Contraseña.
Fondo de pantalla – Seleccione el fondo de pantalla para su bloqueo de pantalla de
la Galería o la Galería de fondos de pantalla.
Reloj y atajos – Personalizar el reloj y los accesos directos de la pantalla de
bloqueo.
Info. del propietario – Muestra información del propietario en la pantalla de
bloqueo.

77
Temporizador de bloqueo – Ajuste el tiempo de bloqueo tras el tiempo de espera
de pantalla.
El botón Encender/Apagar bloquea inmediatamente – Ajuste el bloqueo de la
pantalla cuando se presiona la Tecla Encender/Bloquear.
< Almacenamiento >
ALMACENAMIENTO INTERNO – Permite ver el uso del almacenamiento interno.
MICROSD – Verifique el espacio total disponible en tarjeta SD. Toque Desactivar la
MicroSD para una extracción segura. Si no hay ninguna tarjeta SD montada, toque
Activar MicroSD. Toque Formatear la MicroSD si desea eliminar todos los datos de
la tarjeta SD.
< Batería >
INFORMACIÓN SOBRE LA BATERÍA
La información de carga de la batería se muestra en una gráfica de la batería junto
con el porcentaje de la carga restante y su estado. Toque el icono de carga de
batería para mostrar la pantalla para ver el nivel de uso de la batería y los detalles
del uso. Muestra los componentes y las aplicaciones que están utilizando la mayor
cantidad de energía de la batería. Toque una de las entradas para ver información
más detallada
Porcentaje de batería – Seleccione para mostrar el porcentaje del nivel de batería
en la Barra de estado que está junto al icono de la batería.
AHORRO DE ENERGÍA
Toque el botón
para encender y apagar la función. Toque Ahorro de energía
para acceder a los siguientes ajustes.

78
Ajustes
Activar Ahorro de energía – Establece el nivel de porcentaje de carga de la batería
para que la función de ahorro de energía se encienda automáticamente.
ELEMENTOS DE AHORRO DE ENERGÍA
Sincronización automática – Seleccione para desactivar la sincronización
automática cuando el ahorro de energía está activado.
Wi-Fi – Seleccione para apagar el Wi-Fi cuando no se está utilizando el servicio de
datos y el ahorro de energía está activado.
Bluetooth – Seleccione para apagar el Bluetooth cuando no está conectado y el
ahorro de energía está activado.
Brillo – Seleccione para establecer el brillo de pantalla cuando el ahorro de energía
está activado. Toque el icono Ajustes
para cambiarlos.
Límite de tiempo de pantalla – Seleccione para establecer el tiempo de espera de
pantalla cuando el ahorro de energía está activado. Toque el icono Ajustes
para
cambiarlos.
< Aplicaciones >
Utilice el menú Aplicaciones para ver los detalles de las aplicaciones instaladas en
el teléfono, administrar la información y forzar su detención.
Deslice hacia la izquierda y la derecha para seleccionar una de las tres fichas de
la parte superior de la pantalla para ver la información detallada para aplicaciones
DESCARGADAS, EN EJECUCIÓN, y TODAS.
Toque una entrada para ver más información, toque Detener (o Forzar detención) y
luego toque OK para detener la ejecución.

79
PERSONAL
< Cuentas y sincronización >
Esta opción permite que las aplicaciones sincronicen datos en segundo plano, ya
sea que el usuario está trabajando activamente en ellos o no. Anulando la opción
Sincronización automática de datos puede ahorrar energía de la batería y reducir
(aunque no eliminar) el uso de datos.
< Acceso a la ubicación >
Acceder a mi ubicación – Si selecciona Servicios de localización de Google, el
teléfono determinará su ubicación aproximada al usar las redes Wi-Fi y móviles. Al
marcar esta opción, se le pregunta si desea permitir que Google utilice su ubicación
al proporcionar estos servicios.
Satélites GPS – Si selecciona Satélites GPS, el teléfono determinará su ubicación de
manera precisa en el nivel de calle.
Wi-Fi y localización de red móvil – Permite a las aplicaciones usar el servicio de
ubicación de Google para calcular su ubicación más rápidamente. Se recopilarán los
datos anónimos de ubicación y se enviarán a Google.
< Seguridad >
¿Encriptar el dispositivo? – Le permite encriptar el teléfono para mantenerlo
seguro. Una vez efectuado el cifrado, se debe ingresar un PIN o contraseña cada vez
que encienda el teléfono.
Hacer visible la contraseña – Muestra el último carácter de la contraseña oculta a
medida que escribe.
Administradores de dispositivos – Vea o desactive los administradores del
teléfono.

80
Ajustes
Orígenes desconocidos – Ajuste predeterminado para instalar aplicaciones que no
pertenecen al Play Store.
Credenciales de confianza – Muestra los certificados de CA confiables.
Instalar desde el almacenamiento – Escoja instalar certificados cifrados.
Borrar credenciales – Permite eliminar todos los certificados.
< Idioma y teclado >
Idioma – Establece el idioma del teléfono.
Diccionario personal – Muestra una lista de las palabras personales que usted
agregó y que no figuran en el diccionario común.
TECLADO Y MÉTODOS DE ENTRADA
Predeterminado – Establece el teclado predeterminado en pantalla para usar al
introducir texto.
Dictado por voz de Google – Seleccione para elegir Dictado por voz de Google para
ingresar datos. Toque el icono Ajustes
para cambiar la configuración de Dictado
por voz de Google.
Elegir idiomas de entrada – Establece los idiomas compatibles con Dictado por
voz de Google.
Bloquear pal. ofensivas – Seleccione para ocultar las palabras que se reconozcan
como ofensivas.
Teclado LG – Seleccione para elegir el Teclado LG para introducir datos. Toque el
icono Ajustes
para cambiar los siguientes ajustes:
Idioma y Tipo de teclado – Establece el idioma y el tipo de teclado.
CONFIGURACIÓN COMÚN
Sugerencias de palabras – Establece el texto predictivo y la corrección automática.

81
Mayúsculas automáticas – Seleccione esta opción para poner automáticamente en
mayúscula la primera letra de una oración.
Puntuación automática – Seleccione está opción para insertar un punto cuando se
toca dos veces la tecla espacio.
Tecla de escritura por voz – Seleccione esta opción para mostrar la tecla de
escritura vocal en el teclado.
Respuesta táctil – Establece la vista previa de las teclas y las respuestas de sonido
al escribir.
AJUSTES AVANZADOS
Ocultar el teclado – Seleccione para ocultar el teclado en pantalla desplazándolo
hacia abajo.
CHINO
Pinyin difuso – Seleccione para corregir automáticamente errores comunes del
sistema Pinyin. Toque el icono Ajustes
para ver los errores comunes.
ACERCA DE
Versión de SW – Muestra la versión del software del Teclado LG.
VOZ
Búsqueda por voz – Establece las opciones de búsqueda por voz.
Idioma – Establece el idioma de búsqueda por voz de Google.
Salida de voz – Establece cuándo usar la salida de voz. Elija entre Siempre, Solo
informativo o Solo con manos libres. Para activar la salida de voz sólo cuando
tenga unos auriculares conectados al teléfono, seleccionar la opción Manos libres
solamente.

82
Ajustes
Bloquear pal. ofensivas – Seleccione para ocultar resultados con palabras
ofensivas.
Reconocimiento personalizado – Mejora la precisión de reconocimiento de voz.
Auriculares Bluetooth – Seleccione para grabar audio a través de su audífono
Bluetooth, si está disponible esta opción.
Salida de síntesis de voz – Establece el motor preferido de voz y la velocidad
(despacio vs. rápido). Además, reproduce una breve demostración de síntesis de
voz.
RATÓN/PANEL TÁCTIL
Velocidad del puntero – Establece la velocidad del cursor, la cual se selecciona
con una barra deslizante.
< Copia de respaldo y restauración >
Cambie los ajustes para administrar sus ajustes y datos.
Copia de respaldo de datos – Permite configurarlo para hacer una copia de
seguridad de sus ajustes y datos de aplicaciones en el servidor de Google.
Cuenta de copia de respaldo – Establezca de qué cuenta desea hacer copias de
seguridad de su información.
Restauración automática – Permite configurarlo para restaurar sus ajustes y datos
de aplicaciones cuando reinstale las aplicaciones en el teléfono.
Restaurar datos de fábrica – Permite restablecer sus ajustes a los valores
predeterminados de fábrica y eliminar todos sus datos.

83
SISTEMA
< Fecha y hora >
Usar formato de 24 horas – Seleccione para mostrar la hora con formato de 24
horas (por ejemplo, 13:00 en lugar de 1:00 p. m.).
Seleccionar formato de fecha – Establece el formato para mostrar las fechas.
< Accesibilidad >
Los ajustes de Accesibilidad se usan para configurar cualquier complemento de
accesibilidad que haya instalado en el teléfono.
SERVICIOS
TalkBack – Le permite configurar la función TalkBack que sirve de ayuda para
las personas con dificultades de la visión ya que provee interacción verbal con el
teléfono. Toque el botón
en la esquina superior derecha de la pantalla para
activarlo. Toque AJUSTES en la parte inferior de la pantalla para configurar los
ajustes de TalkBack.
VISIÓN
Instalar scripts de Web – Le permite habilitar (o deshabilitar) la instalación de
scripts web.
Texto grande – Seleccione para aumentar el tamaño del texto.
Sombras – Establece la pantalla con un contraste más oscuro (sombra más
oscura).
FÍSICO Y MOTOR
Toque prolongado – Establece el retraso al tocar y mantener. Elija entre Corto,
Medio o Largo.
84
Ajustes
Universal touch – Toque el botón para alternar entre activado o desactivado.
Encienda esta función para reemplazar las teclas de hardware con un botón de toque
universal
. Toque el botón para poder acceder a Bajar volumen, Subir volumen,
Estado, Inicio y Pinzar. Dibuje una "C" en la pantalla cuando se muestre el panel
táctil universal para mostrar automáticamente la ficha Marcar.
Dibuje una "M" para mostrar automáticamente la aplicación Mensajes. Dibuje una
"W" para iniciar automáticamente la aplicación del navegador predeterminado.
SISTEMA
Pantalla giratoria – Marque para permitir que el teléfono gire la pantalla
dependiendo de la orientación del mismo (horizontal o vertical).
Decir las contraseñas – Seleccione esta opción para introducir sus contraseñas en
voz alta (en lugar de escribirlas).
Finaliz. llamada con botón Encender/Apagar – Marque para que poder terminar
las llamadas presionando la Tecla Encender/Bloquear.
Acceso fácil – Establece el acceso rápido y fácil a las características cuando
toca tres veces la Tecla Inicio
. Elija Desactivar, Mostrar todos, TalkBack,
Universal touch y Ajustes de accesibilidad.
Salida de síntesis de voz – Establece el motor preferido de salida de síntesis de
voz y los ajustes de velocidad de voz. Además, reproduce una breve demostración
de síntesis de voz. La salida de síntesis de voz permite la lectura audible de un
texto, por ejemplo, del contenido de mensajes de texto y la identificación de las
llamadas entrantes.
Nota: Necesita plug-ins adicionales para ser seleccionable.

85
< Conexión de PC >
Tipo de conexión USB – Establezca el modo predeterminado que se utiliza para
conectar el teléfono a un PC mediante un cable USB. Elija entre Solo cargar,
Sincronización multimedia (MTP) o Cámara (PTP).
Preguntar al conectarse – Seleccione para confirmar el tipo de conexión USB cada
vez que conecte el teléfono a la computadora.
Ayuda: Muestra la información de los ajustes de conexión.
< Opciones del desarrollador >
Recuerde que activar estas configuraciones del desarrollador puede producir
un funcionamiento irregular del dispositivo. Las opciones del desarrollador se
recomiendan solo para usuarios avanzados.
Realizar informe de problemas – Esto recopilará información sobre el estado
actual de su dispositivo y la enviará en un mensaje de correo electrónico.
Contraseña de copia de respaldo del área de trabajo – Establece una contraseña
para hacer una copia de seguridad del escritorio.
Permanecer activo – Seleccione para que la pantalla nunca se oscurezca mientras
el teléfono se está cargando.
Proteger tarjeta MicroSD – Seleccione para proteger la tarjeta microSD. Cuando
la tarjeta microSD está protegida, las aplicaciones deben solicitar permisos para leer
datos de un dispositivo de almacenamiento externo.
DEPURACIÓN
Depuración de USB – Seleccione para activar el modo de depuración cuando esté
conectado el dispositivo USB.

86
Ajustes
Permitir ubicaciones simuladas – Seleccione para establecer una ubicación
simulada para el dispositivo.
Seleccione la aplicación de depuración – Le permite seleccionar la aplicación de
depuración.
Esperar por el depurador – Seleccione para esperar el depurador. La aplicación
depurada espera a que el depurador se acople antes de ejecutar la acción.
INGRESAR
Mostrar toques – Seleccione para mostrar una respuesta visual al tocar la pantalla.
Ubicación del puntero – Seleccione para que los datos táctiles se visualicen en la
pantalla.
DIBUJO
Mostrar límites del formato – Seleccione para mostrar los límites del clip,
márgenes, etc.
Exhibir actualizaciones GPU – Seleccione para que las vistas dentro de las
ventanas que se han extraído con la GPU parpadeen.
Mostrar actualizaciones de pantalla – Seleccione para que las áreas de la
pantalla que se han actualizado parpadeen.
Escala de animación de la pantalla – Le permite establecer la escala de
animación de ventana.
Escala durante la animación – Le permite establecer la escala de transición de la
animación.
Escala de duración de la animación – Le permite establecer la escala de
duración de la animación.

87
Desactivar superposiciones de HW – Seleccione para utilizar la GPU para la
composición de pantalla.
Forzar el renderizado GPU – Seleccione para usar la aceleración de hardware 2D
en las aplicaciones.
ADMINISTRACIÓN
Habilitar respuesta visual – Seleccione para que la pantalla parpadee cuando las
aplicaciones se ejecuten durante mucho tiempo.
Mostrar uso de la CPU – Seleccione para mostrar el uso actual de la CPU en
pantalla.
Renderización del perfil GPU – Seleccione para medir el tiempo de aceleración en
"adb shell dumpsys gfxinfo".
Trazados activados – Le permite seleccionar la activación de trazados.
APLICACIONES
No mantener las actividades – Seleccione esta opción para forzar la detención de
las actividades cuando el usuario deja de usarlas.
Límite de proceso en segundo plano – Le permite configurar el límite de
procesos en segundo plano.
Mostrar todos los ANR – Seleccione esta opción para mostrar un cuadro de
diálogo cuando las aplicaciones que se ejecutan en segundo plano no estén
respondiendo.
< Acerca del teléfono >
Este menú le permite administrar las actualizaciones del software y ver distinta
información relacionada con su teléfono.

88
Ajustes
Actualización del software – Le permite comprobar si hay actualizaciones de
software del sistema Android yotra información actual.
Red – Le permite ver su red, el tipo de red y la intensidad de la señal, el estado del
servicio, el estado del roaming, el estado de la red móvil y la dirección IP.
Identidad del teléfono – Le permite ver su número de teléfono, MIN, la versión PRL,
ESN, MEID HEX, MEID DEC, tiempo activo, la duración de las llamadas, el código de
fecha de garantía y el número de modelo.
Batería – Le permite ver información sobre el estado, el nivel y el uso de la batería.
Información del hardware – Le permite ver las direcciones MAC de Wi-Fi y
Bluetooth.
Información de software – Le permite ver las versiones de Android, de la banda
base, del kernel, del número de compilación y del software.
Información legal – Le permite ver las licencias de código abierto y la información
legal de Google.
Información de patentes – Muestra la información de las patentes de LG.

89
Actualización del software del teléfono
Actualice su teléfono inteligente sin una PC (FOTA)
Esta función permite actualizar con comodidad a la nueva versión del software de su
teléfono a través de Firmware Over-the-Air (FOTA) sin conectarse con un cable de
USB.
1 En la pantalla principal, toque la Tecla Menú
> Ajustes del sistema >
Acerca del teléfono > Actualización de software.
2 Seleccione la opción deseada.
Comprobar ahora para actualizar – Puede comprobar si hay una nueva
actualización de software y realizar la actualización (el modo Wi-Fi está habilitado
para descargas superiores a 50 MB).
Última actualización – Muestra la fecha de la última actualización de software.
ESTABLECER REVISIÓN AUTOMÁTICA
Verificar automáticamente – Si selecciona esta opción, recibirá notificaciones
cuando haya nuevas actualizaciones disponibles.
Ver próx. actualización – Muestra la fecha de la próxima comprobación de
actualizaciones de software.

90
Actualización del software del teléfono
NOTA
- Si no se ha conectado a la red de datos desde la compra, no se puede
identificar la fecha de la próxima actualización porque no se ha creado el
intervalo de actualizaciones automáticas.
- La actualización de software no genera cargos de datos.
- La comprobación del software disponible es automática.
- Asegúrese de que la batería esté cargada antes de la actualización.
- Después de la descarga, puede instalar el software inmediatamente o
seleccionar otro momento para la instalación.
- Cada versión del software se actualiza de forma secuencial. Incluso
después de completar la actualización, compruebe si hay una versión más
reciente disponible.
- Algunas funciones y servicios pueden variar según el área, el teléfono, el
proveedor, el plan y la versión del software.
- LG se reserva el derecho de poner a disposición las actualizaciones del
firmware solo para modelos seleccionados según su propio criterio y no
garantiza la disponibilidad de la versión más reciente del firmware para
todos los modelos de teléfonos.

91
DivX Mobile
SOBRE DIVX VIDEO: DivX
®
es un formato digital de video creado por DivX, LLC, una
compañía subsidiaria de Rovi Corporation. Este es un dispositivo con certificación
oficial DivX Certified
®
que permite reproducir el formato video DivX. Visite www.divx.
com si desea obtener más información y herramientas de software para convertir sus
archivos en videos DivX.
ACERCA DE LA FUNCIÓN DE VIDEO A PEDIDO DIVX: este dispositivo con la
certificación DivX Certified
®
debe registrarse para reproducir películas de video a
pedido DivX que se hayan adquirido. Para obtener su código de registro, busque la
sección DivX VOD en el menú de ajustes del dispositivo. Vaya a vod.divx.com para
obtener más información sobre cómo realizar el registro.
Certificado por DivX Certified
®
para reproducir videos DivX
®
de hasta 320 x
240.
DivX
®
, DivX Certified
®
y sus logotipos asociados son marcas registradas de
Rovi Corporation o sus subsidiarios y su uso está protegido bajo licencia.
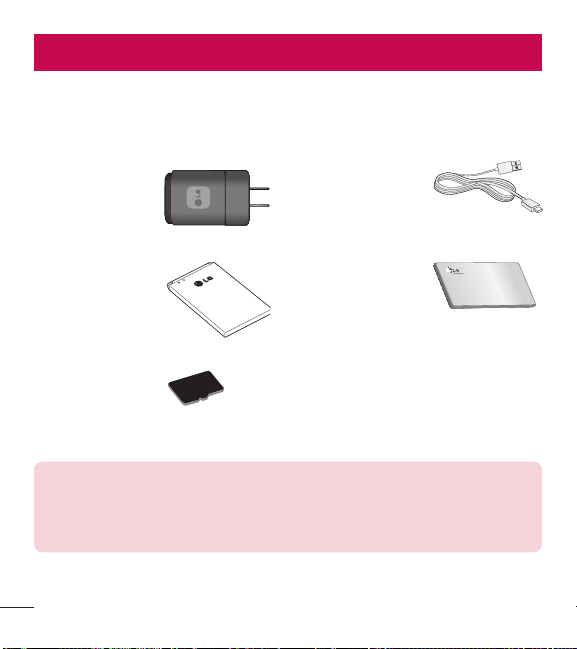
92
AccesoriosAccesorios
Estos accesorios están disponibles para usarlos con el teléfono.
(Los artículos descritos a continuación pueden ser opcionales y vendidos por
separado.)
Cargador
Cable de datos
Conecta el teléfono
y la PC.
Batería Guía del usuario
Obtenga más
información acerca
del teléfono.
Tarjeta SD (soporta
hasta 32 GB)
NOTA:
t
Utilice siempre accesorios LG originales. Si no lo hace, la garantía puede
quedar anulada
t
Los accesorios pueden variar de acuerdo con la región.
93
Preguntas frecuentesPreguntas frecuentes
Antes de llevar el teléfono a reparación o llamar a un representante del servicio
técnico, compruebe si alguno de los problemas que presenta el teléfono se describen
en esta sección.
Categoría
Subcategoría
Pregunta Respuesta
Bluetooth
Dispositivos
Bluetooth
¿Cuáles son las funciones
disponibles mediante
Bluetooth?
Puede conectar un dispositivo de audio Bluetooth,
como un auricular estereofónico o monoaural, un
kit para el automóvil, y compartir imágenes, videos,
contactos y otros elementos a través del menú
Galería/Contactos. Además, cuando el servidor FTP
se encuentra conectado a un dispositivo compatible,
puede compartir el contenido almacenado en la tarjeta
microSD.
Datos
Copia de seguridad de
contactos
¿Cómo puedo hacer una
copia de seguridad de los
contactos?
Los datos de los contactos se pueden sincronizar entre
el teléfono y Gmail™.
Datos
Sincronización
¿Se puede configurar una
sincronización en una sola
dirección con Gmail?
Sólo está disponible la sincronización de dos
direcciones.
Datos
Sincronización
¿Se pueden sincronizar
todas las carpetas de
correo electrónico?
La bandeja de entrada está sincronizada
automáticamente. Puede verotras carpetas tocando
la Tecla Menú
y toque Carpetas para elegir una
carpeta.
Servicio de Google™
Inicio de sesión en Gmail
¿Debo iniciar sesión en
Gmail cuando desee
acceder a Gmail?
Una vez que inicie sesión en Gmail, no necesita volver
a hacerlo.
Servicio de Google
Cuenta de Google
¿Se pueden filtrar los
correos electrónicos?
No. El teléfono no admite el filtro de correos
electrónicos.
94
Preguntas frecuentes
Categoría
Subcategoría
Pregunta Respuesta
Función del teléfono
YouTube
TM
¿Se pueden reproducir
videos de YouTube?
Sí. El teléfono admite los videos de YouTube, pero se
deben mirar utilizando la aplicación YouTube (no el
navegador).
Función del teléfono
Correo electrónico
¿Qué sucede si ejecuto
otra aplicación mientras
escribo un correo
electrónico?
Su correo electrónico se guardará como borrador
automáticamente.
Función del teléfono
Tono de timbre
¿Hay algún límite para
el tamaño de archivo si
quiero usar un archivo
.MP3 como tono de
timbre?
No hay límites para el tamaño de archivo.
Función del teléfono
Hora del mensaje
Mi teléfono no muestra la
hora de los mensajes que
se recibieron hace más de
24 horas. ¿Cómo puedo
cambiar esto?
1. Abra la conversación que contiene el mensaje que
desea comprobar.
2. Toque y mantenga el mensaje. En el menú
contextual , toque Ver detalles del mensaje.
Función del teléfono
Tarjeta microSD
¿Cuál es el tamaño
máximo que admite una
tarjeta de memoria?
Las tarjetas de memoria de 32 GB son compatibles.
Función del teléfono
Navegación
¿Es posible instalar otra
aplicación de navegación
en mi teléfono?
Se puede instalar y usar cualquier aplicación que esté
disponible en Play Store y que sea compatible con el
hardware.
Función del teléfono
Sincronización
¿Puedo sincronizar mis
contactos desde todas
mis cuentas de correo
electrónico?
Se pueden sincronizar sólo los contactos de Gmail y
MS Exchange Server (servidor de correos electrónicos
de la empresa).
95
Categoría
Subcategoría
Pregunta Respuesta
Función del teléfono
Esperar y Pausar
¿Es posible guardar un
contacto con las funciones
Esperar y Pausar en los
números?
Si llegara a transferir un contacto con las funciones
Esperar y Pausar habilitadas en el número, no podrá
usar dichas funciones. Deberá guardar nuevamente
cada número.
Cómo guardar con Esperar y Pausar:
1. En la pantalla principal, toque la Tecla Teléfono
.
2. Introduzca el número y toque la Tecla Menú
.
3. Toque Agregar pausa de 2 seg. o Agregar espera.
Función del teléfono
Seguridad
¿Cuáles son las funciones
de seguridad del teléfono?
Puede configurar el teléfono para requerir el ingreso de
unbloqueo de pantalla (Patrón, PIN, contraseña) antes
de que se pueda acceder al teléfonoo ser usado.
Función del teléfono
Patrón de desbloqueo
¿Qué debo hacer si olvido
mi patrón de desbloqueo?
Después de intentar introducir el patrón de desbloqueo
5 veces, toque la opción ¿Ha olvidado el patrón? y
utilice la información de su cuenta de Google o el PIN
de copia de seguridad para desbloquear el teléfono.
96
Preguntas frecuentes
Categoría
Subcategoría
Pregunta Respuesta
Función del teléfono
Patrón de desbloqueo
¿Qué debo hacer si olvidé
mi patrón de desbloqueo
y no creé la cuenta de
Google en el teléfono?
Si no introduce el patrón de desbloqueo, no podrá
acceder al teléfono.
Precaución: Si realiza un restablecimiento a
los valores de fábrica, se eliminarán todas las
aplicaciones y los datos de usuario. Antes de
realizar ese tipo de restablecimiento, recuerde que
debe hacer una copia de seguridad de todos los
datos que sean importantes.
1. Apague el teléfono.
2. Toque y mantenga presionadas la Tecla Encender/
Bloquear
+ Tecla de Volumen Inferior .
3. Cuando aparece la pantalla de bienvenida de
Factory Hard Reset (Reinicio completo), suelte todas
las teclas.
4. Presione la Tecla Encender/Bloquear
para
continuar o cualquier otra tecla para cancelar.
5. Presione la Tecla Encender/Bloquear
una
vez más para continuar o cualquier otra tecla para
cancelar.
6. Su teléfono realizará una restauración a los ajustes
predeterminados de fábrica.
Función del teléfono
Patrón de desbloqueo
¿Cómo puedo crear el
patrón de desbloqueo?
1. En la pantalla principal, toque la Tecla Menú
.
2. Toque Ajustes del sistema > Bloqueo de pantalla.
3. Toque Seleccionar bloqueo de pantalla > Patrón.
La primera vez que hace esto, aparecerá un breve
tutorial sobre cómo crear un patrón.
4. Para configurar, dibuje su patrón una vez, luego
repítalo para confirmarlo.
Función del teléfono
Memoria
¿Sabré cuando la memoria
esté llena?
Sí. Recibirá una notificación.
97
Categoría
Subcategoría
Pregunta Respuesta
Función del teléfono
Idiomas compatibles
¿Se puede cambiar el
idioma?
El teléfono incluye recursos bilingües.
Para cambiar el idioma:
1. En la pantalla principal, toque la Tecla Menú
y
toque Ajustes del sistema.
2. Toque Idioma y teclado > Idioma.
3. Toque el idioma deseado.
Función del teléfono
VPN
¿Cómo configuro una
VPN?
La configuración de acceso a una VPN varía según
cada empresa. Para configurar el acceso a una VPN en
el teléfono, deberá contactar al administrador de red de
su empresa para obtener detalles.
Función del teléfono
Tiempo de espera de la
pantalla
Mi pantalla se apaga
después de 15 segundos.
¿Cómo puedo cambiar el
tiempo de apagado de la
luz de fondo?
1. En la pantalla principal, toque la Tecla Menú
.
2. Toque Ajustes del sistema > Pantalla.
3. Toque Límite de tiempo de pantalla
4. Toque el tiempo de espera de la luz de fondo de la
pantalla que desea utilizar.
Función del teléfono
Tonos táctiles audibles
Cuando marco un número,
el teléfono vibra. ¿Cómo
apago esta función?
1. En la pantalla principal, toque la Tecla Menú
.
2. Toque Ajustes del sistema > Sonido.
3. Toque Teclado numérico con sonido para eliminar
la marca de verificación y desactivar la función.
Función del teléfono
Wi-Fi y 3G
¿Qué servicio utilizará
mi teléfono si Wi-Fi y 3G
están disponibles?
Cuando utilice datos, es posible que el teléfono use
la conexión Wi-Fi en forma predeterminada (si la
conectividad Wi-Fi está activada en el teléfono). Sin
embargo, no recibirá ninguna notificación cuando el
teléfono pase de una conexión a otra.
Para saber qué conexión de datos se está utilizando,
vea el icono de 3G o Wi-Fi que se encuentra en la
parte superior de la pantalla.
98
Preguntas frecuentes
Categoría
Subcategoría
Pregunta Respuesta
Phone Function
Pantalla principal
¿Se puede quitar una
aplicación de la pantalla
principal?
Sí. Simplemente toque y mantenga el icono hasta que
el icono de la papelera aparezca en la parte superior de
la pantalla. A continuación, sin levantar el dedo arrastre
el icono a la papelera.
Función del teléfono
Aplicación
Descargué una aplicación
y ocasiona muchos
errores. ¿Cómo la quito?
1. En la pantalla principal, toque la Tecla Menu
.
2. Toque Ajustes del sistema > Aplicaciones.
3. Pulse en una ficha en la parte superior de la pantalla
y la aplicación.
4. Toque Desinstalar > OK para desinstalar la
aplicacion.
Función del teléfono
Cargador
¿Es posible cargar mi
teléfono mediante el
cable USB sin instalar
el controlador USB
requerido?
SÍ, el teléfono se cargará con el cable USB aunque no
tenga el controlador USB instalado.
Función del teléfono
Tonos de timbre
¿Puedo usar archivos de
música como tono de
timbre?
Sí. Después de guardar un archivo de música es
posible utilizarlo como tono de timbre.
t
Toque y mantenga una canción de la lista de la
biblioteca. En el menú que se abre, toque Fijar
como tono de timbre.
Función del teléfono
Alarma
Si apago el teléfono, ¿la
alarma suena o no?
No. Esto no se admite.
Función del teléfono
Alarma
Si se establece el volumen
del timbre en Desactivado
o Vibrar, ¿se escuchará la
alarma?
La alarma está programada para sonar aún en estas
condiciones.
99
Categoría
Subcategoría
Pregunta Respuesta
Especificaciones del
teléfono
Banda
¿Cuáles son las bandas
inalámbricas que admite el
teléfono?
El teléfono puede funcionar en bandas de 800 Mhz
y 1900 Mhz.
Solución de recuperación
Restablecimiento a los
valores de fábrica
¿Cómo realizo un
restablecimiento a los
valores de fábrica?
1. En la pantalla principal, toque la Tecla Menú
.
2. Toque Ajustes del sistema > Copia de respaldo y
restauración > Restaurar datos de fábrica.
3. Lea la advertencia y toque Restaurar teléfono.
4. Toque Borrar todo y Aceptar para confirmar.
Atención:
Si realiza un restablecimiento a los valores
de fábrica, se borrarán todas las aplicaciones
instaladas y los datos de usuario. Antes de realizar
ese tipo de restablecimiento, recuerde que debe
hacer una copia de seguridad de todos los datos
que sean importantes.

100
Por su seguridadPor su seguridad
El valor más elevado de la SAR para este modelo de teléfono cuando se lo probó
para usarse en el oído es de 1.18 W/kg y cuando se lo usa sobre el cuerpo, según
lo descrito en esta guía del usuario, es de 1.20 W/kg. (Las mediciones del uso
en el cuerpo varían en función de los modelos de los teléfonos y dependen de
los accesorios disponibles y los requisitos de la FCC). Aun cuando puede haber
diferencias entre los niveles de SAR de varios teléfonos y en varias posiciones, todos
ellos cumplen el requisito gubernamental para una exposición segura.
La FCC ha otorgado una Autorización de equipo para este modelo de teléfono con
todos los niveles de SAR reportados y evaluados en cumplimiento de los lineamientos
de emisión de RF de la FCC. La información de la SAR sobre este modelo de teléfono
está archivada en la FCC y puede encontrarse en la sección Display Grant de http://
www.fcc. gov/oet/ea/fccid/ después de buscar FCC ID ZNFL39C.
t
Para reducir el riesgo de incendios o quemaduras, no exponga el teléfono a una
temperatura mayor que 60 °C (140 °F) ni lo deseche en el fuego.
t
Para reducir el riesgo de incendios o quemaduras, no deseche el teléfono el fuego
o en el agua.
t
Para reducir el riesgo de incendios o quemaduras, no deseche el teléfono el fuego
o en el agua.
t
No desarme, abra, aplaste, doble, deforme, perfore ni raye el teléfono.
t
Existe peligro de explosión si se reemplaza la batería en forma inadecuada. Para
reducir el riesgo de incendios o quemaduras, no desarme, aplaste, perfore, cause
cortocircuito a los contactos externos, exponga a una temperatura mayor que
60 °C (140 °F) o deseche en fuego o agua. Mantenga este producto alejado
de la humedad excesiva y de temperaturas extremas. Mantenga la batería o el

101
dispositivo secos y alejados del agua o cualquier líquido, dado que puede ocasionar
un cortocircuito.
t
Evite usar el teléfono cerca de fuentes electromagnéticas intensas como hornos
microondas, altoparlantes, televisores y radios.
t
Use solo accesorios originales aprobados por el fabricante o accesorios que no
contengan metales. Utilice solamente accesorios de carga aprobados para cargar
el teléfono LG. La manipulación inadecuada del puerto de carga/accesorio y el uso
de un cargador no compatible pueden ocasionarle daños al teléfono y anular la
garantía.
t
Use sólo el cargador de batería aprobado. De lo contrario, podría ocasionar un daño
grave en su teléfono.