Loading ...
Loading ...
Loading ...
9
Controls and Features
Bar Refrigerator with Icemaker
Automatic
icemaker
The icemaker will produce seven cubes
SHUF\FOH³DSSUR[LPDWHO\²
cubes in a 24-hour period, depending on
freezer compartment temperature, room
temperature, number of door openings and
other use conditions.
If the bar refrigerator with icemaker is
operated before the water connection is
made to the water valve, set the icemaker
power switch to O (off).
When the unit has been connected to
the water supply, set the icemaker power
switch to I (on). The green light will come on.
The icemaker will fill with water when it
cools to 15°F (–10°C). A newly installed bar
refrigerator with icemaker may take 12 to
24 hours to begin making ice cubes.
You will hear a buzzing sound each time the
icemaker fills with water.
Throw away the first few batches of ice to
allow the water line to clear.
Be sure nothing interferes with the sweep of
the feeler arm.
When the bin fills to the level of the feeler
arm, the icemaker will stop producing ice.
It is normal for several cubes to be joined
together.
If ice is not used frequently, old ice cubes
will become cloudy, taste stale and shrink.
If ice cubes get stuck in the icemaker, the
green power light will blink. To correct this,
set the icemaker
power switch to O
(off) and remove
the cubes. Set the
icemaker power
switch to I (on)
to restart the
icemaker.
After the icemaker
has been turned
on again, there will be a delay of about
45 minutes before the icemaker resumes
operations.
NOTE: In homes with lower-than-
average water pressure, you may hear
the icemaker cycle multiple times when
making one batch of ice.
CAUTION
Avoid contact with the
moving parts of the ejector mechanism, or
with the heating element that releases the
cubes. Do not place fingers or hands on the
automatic ice making mechanism while the
refrigerator is plugged in.
ATTENTION
Évitez le contact avec
les pièces mobiles du mécanisme éjecteur,
ou avec l’élément chauffant qui libère les
glaçons. Ne posez pas les doigts ou les mains
sur le mécanisme de la machine à glaçons
automatique pendant que le réfrigérateur est
branché.
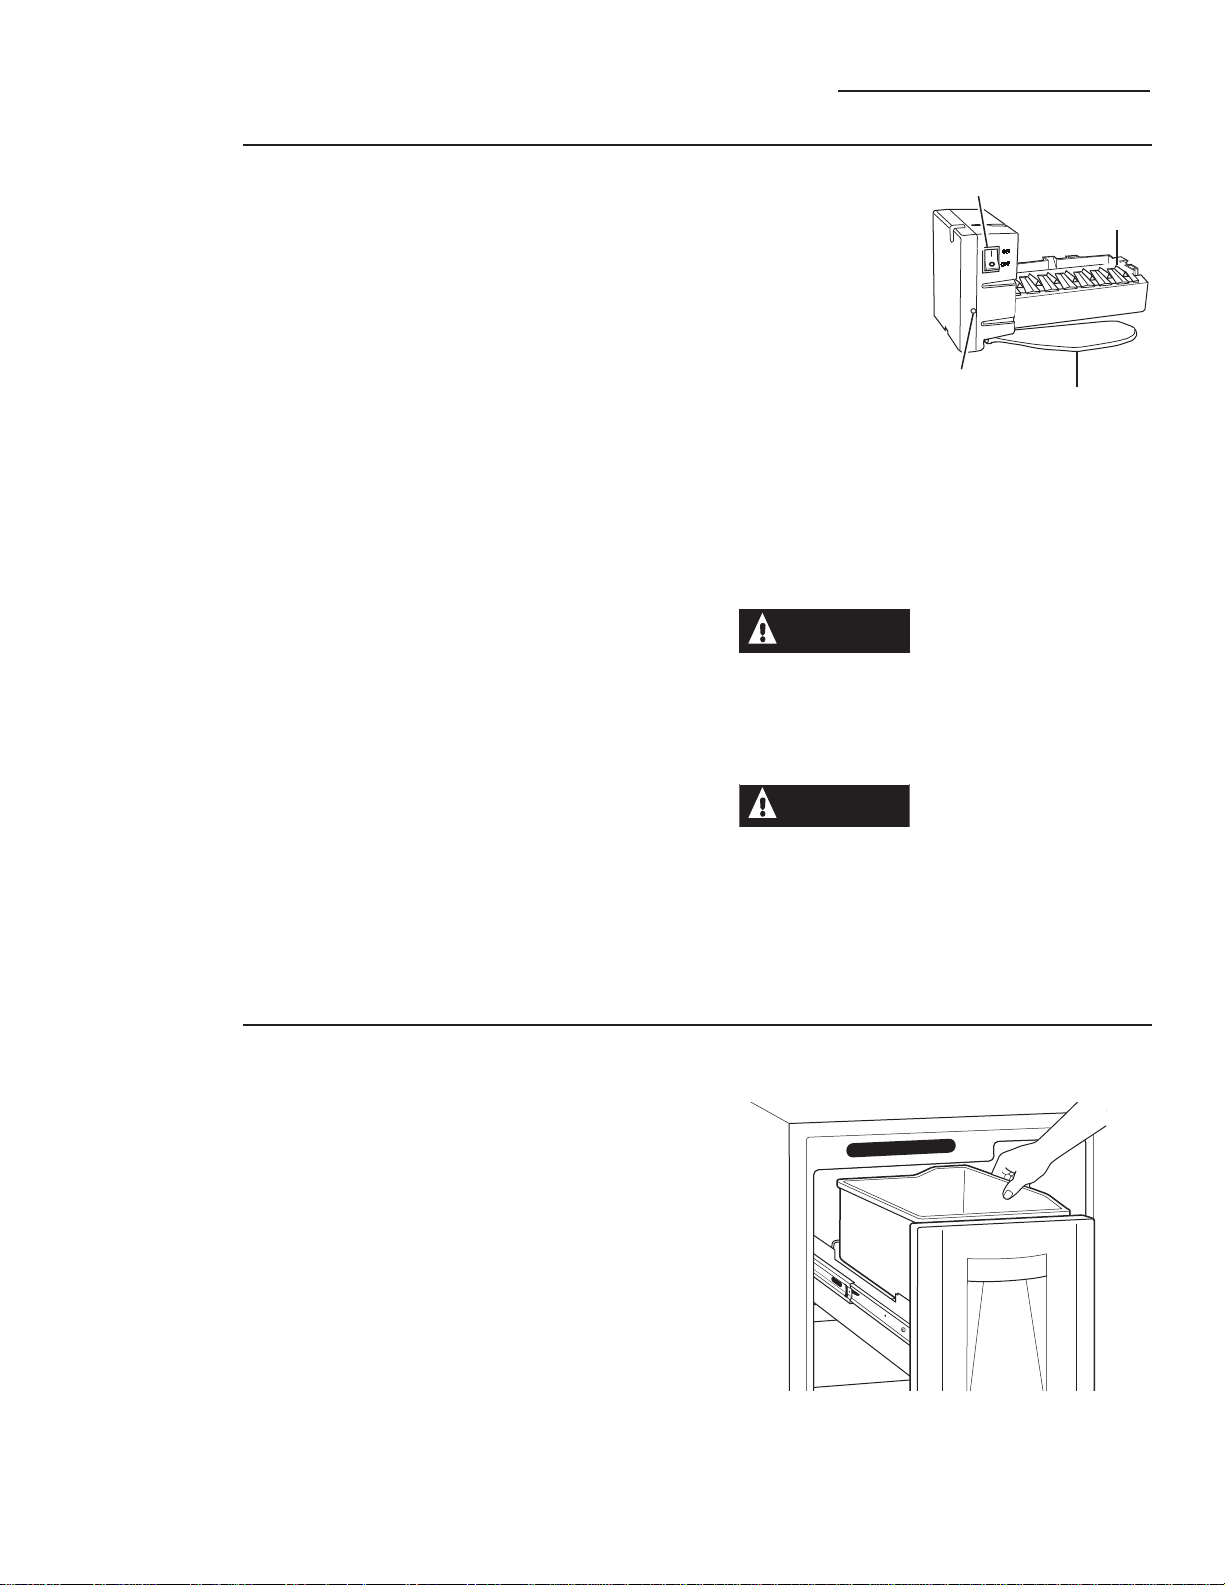
Icemaker
Feeler Arm
Green
Power Light
Power Switch
Ice storage
bin
To remove, pull the icemaker drawer fully
open and remove the transportable ice
storage bin by lifting up and out.
NOTE: Ice can fall behind the ice storage bin.
Prior to replacing the bin, check for any fallen
ice.
If the ice storage bin is removed from the
refrigerator for an extended period of time,
we recommend setting the icemaker power
switch to O (off).
To replace, grasp the side of the right side
of the bin with the higher edge so that the
angled side is against the drawer front.
Lower the bin into place and close the
drawer.
CAUTION: Failure to install properly could
cause potential damage to the icemaker.
The ice storage bin is dishwasher safe, top
rack only.
Loading ...
Loading ...
Loading ...