Register Your New Product Today!
By registering your new Remington
®
product, you will receive these important benefits:
Proof of Ownership Product Protection Product Registration Special Offers
Register online at: RemingtonProducts.com
IMPORTANT SAFETY
INSTRUCTIONS
When using an electrical appliance, basic precautions should always be observed,
including the following. Please read all instructions before using this shaver.
WARNINGS
To reduce the risk of burns, fire, electric shock, or injury to persons:
• When connecting the charging unit to a power source outside of the USA or
Canada, use a plug adapter suitable for the power outlet. This device has a
charging adapter that will work with worldwide 100V-240V power outlets.
• Only use the power adapter provided with this device.
• Do not reach for the appliance if it has fallen into water while plugged into the
power source. Unplug from the power source at the wall immediately.
• Appliance may be rinsed under water or used in the shower, but never use the
charging unit in the shower.
• Detach the appliance and charging unit from the power source before cleaning.
• Except when charging, always unplug this appliance immediately after using.
• When recharging place in a safe position, out of the reach of children and pets.
• Close supervision is necessary when this appliance is used by, on, or near
children or individuals with certain disabilities or special needs.
• Use this appliance only for its intended use as described in this manual.
• Do not use attachments not recommended or provided by the supplier.
• Never operate this appliance if the electrical cord is frayed or the plug is damaged.
• Keep the electrical cord away from heated surfaces.
• Never drop or insert objects into any of the appliances openings.
• This appliance is intended for household use only.
• Do not use outdoors, or operate where aerosol (spray) products are being
used, or where oxygen is being administered.
• Always attach the plug to the appliance, then to the wall outlet. To disconnect,
turn all controls to OFF, then remove plug from outlet.
• Always pull on the plug body to unplug the appliance from the wall socket.
Never pull on the electrical cord.
• Do not plug in or unplug this appliance when your hands are wet.
• Do not use extension cords or a voltage converter with this appliance.
• Do not wrap the power cord around the appliance.
• Always store the appliance and charger in low moisture area.
• Do not expose the appliance to temperatures over 140° F (60° C).
• Detach removable power cords from the appliance during storage.
• Do not use this appliance if the cutting head surfaces are damaged or broken
as facial injury could occur.
• This shaver and trimmer are intended for use on facial hair only. It should not
be used for longer hair on your head or body.
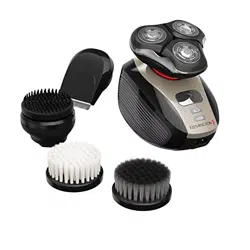
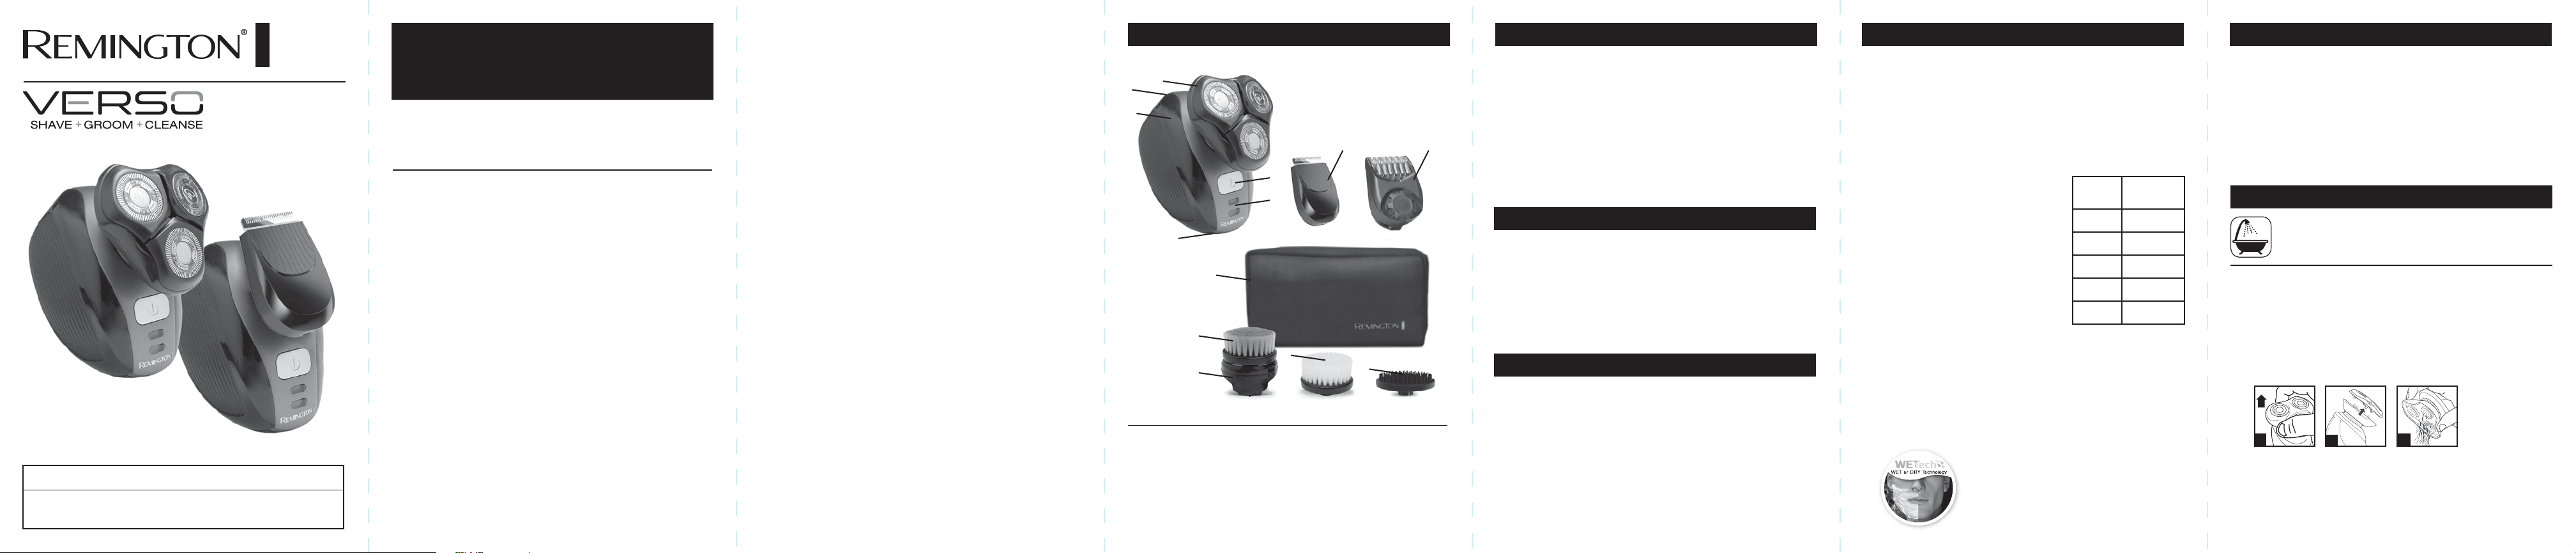
Product Features
KEY FEATURES
1. Rotary shaver head
2. Pop-up detail trimmer
3. Main body
4. Charging pins
5. Power on/off button
6. Battery Indicator display
7. Grooming head
8. Adjustable comb
9. Storage bag
10. Deep cleaning brush
11. Brush mount
12. Daily cleaning brush (XR1410 only)
13. Pre-shave brush (XR1410 only)
14. Charging adapter (not shown)
Charging
Before using, read the important safety instructions in front of the manual.
1. Plug power adaptor into unit.
2. Charge unit for 24 hours before its first use.
3. Use unit until recharge is required.
CAUTION!
• Make sure the unit and your hands are dry when charging.
• Always charge the unit in a cool, dry place.
Use with gel or foam in
the shower for ultimate comfort.
SAVE THESE INSTRUCTIONS
LED lights display the battery charge level
• Low Charge: Top LED light will glow solid red to indicate the shaver needs to be
recharged. There is less than 5 minutes of run time remaining.
• Charging: Bottom LED light will glow solid green to indicate the battery is taking a
charge.
• Full Charge: When fully charged the green LED light will go off.
1. The unit should be turned off when changing attachments.
2. Remove the attachment by lifting upward from the base.
3. After selecting the attachment you want, align the hexagon shapes of the base
and attachment and press to snap the attachment onto the base.
4. For brush heads, first snap the brush mount onto the base. Then snap the
cleansing or pre-shave brush onto the brush mount.
Cleansing
1. Add a drop of facial cleanser to the brush head and dampen under the faucet or shower.
2. Press on/off button to turn on.
3. Divide your face into 4 main sections; forehead, nose and chin, left cheek, right cheek.
4. While applying gentle pressure, move the rotating brush in circular motions over
each section for approximately 30 seconds.
Grooming
1. Use the grooming head without the adjustable
comb for trimming hair close to the skin.
2. Attach the comb onto the groomer head by hooking
the front of the comb over the trimmer blades, then
snapping the comb down onto the groomer.
3. Adjust the comb setting to desired length by
rotating the wheel clockwise to increase length
and counterclockwise to reduce length.
4. Press on/off button to turn the groomer on.
5. Place the groomer head against the skin and slide
against the growth direction of hair.
Pre-Shave
Use the silicone pre-shave massage brush to exfoliate skin and lift hair for an extra
close shave.
1. Dampen the silicone pre-shave massage brush.
2. Press on/off button to turn on.
3. While applying gentle pressure, move the rotating brush in circular motions over
each section of face.
Shaving
Note: If shaving with gel or foam, first wet face and then apply to applicable area.
1. Press on/off button to turn the shaver on.
2. Hold the shaver at a right angle to the skin so that all three heads are touching
the skin with equal pressure.
3. Stretch the skin with free hand so hairs stand upright.
4. While applying light pressure, use short, circular strokes to shave the face
5. Rinse shaver under warm water to clean away excess gel or debris.
LED Battery Indicators
Changing the Attachments
Instructions for Use Instructions for Use
Cleaning and Care
1
9
10
11
13
12
3
4
2
5
6
7 8
Use and Care Guide
XR1400
XR1410
This is a wet/dry appliance.
The appliance may be cleaned under warm water.
NOTE: When cleaning your shaver, make sure the shaver is turned off
and disconnected from the power cord.
CAUTION!
• To clean the external surfaces of the shaver, use a damp cloth. Do not use strong
detergents or other chemicals.
• To dry, wipe the surface of the shaver with a dry towel. Do not use a hair dryer or
heater to dry the shaver.
A
C
B
Daily:
1. Pull rotary head face of shaver off of lower hair pocket. (Diagram B)
2. Tap out excess hair shavings. (Diagram C)
3. Rinse the head of the shaver in running water.
4. Close head assembly.
Comb
Position
~Cut
Length
1
/" (2mm)
2
/" (3mm)
3
/" (4mm)
4
/" (5mm)
5
/" (6mm)

When your rechargeable shaver reaches the end of its useful life, the LiFePO
4
batteries must be removed from the shaver and be recycled or disposed of prop-
erly in accordance with your state and local requirements. If this is not required
by law, you may elect to dispose of the shaver with the batteries.
CAUTION! Do not put in fire or mutilate your batteries when disposing as they
may burst and release toxic materials. Do not short circuit as it may cause burns.
Dispose of properly in accordance with your local and state requirements.
To Remove the Rechargeable Battery:
1. Unplug the shaver
2. Run shaver until the motor stops
3. Remove the head from the shaver. (Pull head up and off.)
4. Remove the screw that is exposed when the head is removed.
5. Using a small screwdriver, pry the front cover from the body.
6. Using a small screwdriver, pry both side covers from the body.
7. Remove four screws located on the front of shaver along the outside edge.
8. Using a small screw driver, pry up the newly unsecured front inner housing.
9. Remove 3 screws that were newly exposed on front.
10. Using a small screw driver, pry up the newly unsecured inner back housing to
expose the battery.
11. Pry battery free from circuit board.
12. Dispose of battery properly.
Product Disposal
Questions or comments: Call 800-736-4648 in the US or 800-268-0425 in
Canada. Or visit RemingtonProducts.com
Dist. by: Spectrum Brands, Inc., Middleton, WI 53562
Dist. by: Spectrum Brands Canada, Inc.,
131 Saramia Crescent, Vaughan, ON L4K 4P7
® Registered Trademark and TM Trademark
of Spectrum Brands, Inc.
© 2016 Spectrum Brands, Inc. 12/15 14048-00
Made in China
T22-0003991-A
By registering your new Remington
®
product you will receive these important benefits:
• Proof of ownership
• Product protection
• Product registration
• Special offers
Register online at: RemingtonProducts.com
Product Registration
Replacement Parts
Rotary Shaving Heads
To keep your shaver working at peak performance, it is recommended that you
replace the cutting head after every 12-18 months of use. Indication that your
shaver may need to have the cutting head replaced would be if you notice an
increase in irritation of your skin after you shave or you feel hair pulling due to dull
cutting blades.
The replacement cutting head for your shaver is: SPR-XR
Groomer attachment with adjustable length settings:
SPR-XT
Replacement Brushes
It is recommended that you replace your brush heads every 3 months.
SPR-XFB - Pre-Shave Brush with Brush Mount
SPR-XFM - Pre-Shave Brush
SPR-XFN - Deep Cleaning Brush
SPR-XFD - Daily Cleaning Brush
How to Order Parts and Accessories
Two easy ways to order spare parts and accessories are available.
• Order by Phone: U.S. Residents: 1-800-392-6544
• Order Online: RemingtonProducts.com
Limited Two-Year Warranty
Spectrum Brands, Inc. warrants this product against any defects that are due to faulty
material or workmanship for a two-year period from the original date of consumer
purchase. This warranty does not include damage to the product resulting from
accident or misuse. If the product should become defective within the warranty
period, we will replace it free of charge. Return your product and sales receipt with
your name, address and day time phone number to: Remington Returns Center,
507 Stokely Dr., P.O. Box 1, Deforest, WI 53532
. For more information call
800-736-4648 in the US or 800-268-0425 in Canada.
Warranty excludes:
• Heads and cutters
KEEP ORIGINAL SALES RECEIPT AS PROOF OF PURCHASE FOR WARRANTY
PURPOSES.
This warranty does not cover products damaged by the following:
• Accident, misuse, abuse or alteration of the product
• Servicing by unauthorized persons
• Use with unauthorized accessories
• Connecting it to incorrect current and voltage
• Wrapping cord around appliance causing premature wear & breakage
• Any other conditions beyond our control
SPECTRUM BRANDS, INC. SHALL NOT BE RESPONSIBLE FOR ANY INCIDENTAL,
SPECIAL OR CONSEQUENTIAL DAMAGES RESULTING FROM THE USE OF THIS
PRODUCT. ALL IMPLIED WARRANTIES, INCLUDING BUT NOT LIMITED TO IM PLIED
WARRANTIES OF FITNESS AND MERCHANTABILITY, ARE LIMITED IN DURATION TO
TWO YEARS FROM DATE OF ORIGINAL PURCHASE.
This warranty gives you specific legal rights and you may also have other rights
which vary from state to state or province to province. Some states do not allow
the exclusion or limitation of incidental, special or consequential damages.
Warranty Performance Guarantee
Spectrum Brands, Inc.
Money-back Offer
If within 30 days after you have purchased your Remington® branded product,
you are not satisfied and would like a refund, return it with the sales slip indicating
purchase price and date of purchase to the retailer from whom it was purchased.
Spectrum Brands, Inc. will reimburse all retailers who accept the product within 30
days from the date of purchase. If you have any questions concerning the money-
back guarantee, please call 800-736-4648 in the US or 800-268-0425 in Canada.
Remington Guarantees Satisfaction After 30 Days!
Remington Men’s Shave and Groom 60-Day Money Back Guarantee*
If within 60 days after purchasing any Remington
®
branded Men’s Shave and
Groom product, you are not completely satisfied and would like a refund, return
it with the original dated sales receipt directly to Remington and receive a full
refund.** For questions concerning the money-back guarantee, please call
800-736-4648 in the US or 800-268-0425 in Canada.
*Applies to US and Canadian customers’ returns only.
**Terms and conditions apply.
Terms and Conditions
1. Refund will be in the form of a check issued in US Dollars and will be provided
only if all Terms and Conditions are met.
2. The following items must be returned to Remington and postmarked no later
than 60 days after purchase of the Remington
®
branded Men’s Shave and
Groom product:
a. The Remington
®
product;
b. The original sales receipt indicating price and date purchased; and
c. The completed 60-day money back guarantee form located at
RemingtonProducts.com/60day.
3. In addition, Remington, in its discretion, must determine that the returned
product was used in accordance with the instruction booklet (included with the
product at the time of purchase).
4. Returns should be mailed prepaid (no collect returns accepted) to:
Remington 60-Day MBG
507 Stokely Drive, Box 1
DeForest, WI 53532
5. Refund does not include postage costs for the return of the product, but will
include applicable taxes paid by customer, if any.
6. No responsibility will be accepted for late, lost, stolen, misdirected or damaged
product.
7. Please allow 4-6 weeks to receive your refund by check.
Contains a Listed Adaptor
Weekly:
1. Perform the daily cleaning steps 1 and 2.
2. Remove the cover from the hair pocket assembly. (Diagram D)
3. Release the inner cutter lock by sliding out of support. (Diagram E)
4. Remove the inner cutter carrier away from the cutters. (Diagram E)
5. Remove the cutters. (Diagram F)
6. Thoroughly rinse away any debris from inner and outer cutters. (Diagram G)
7. Replace the inner cutters by matching the color of the inner cutters to the
corresponding outer cutter hub. (Diagram H)
8. Place inner cutter lock back into position by sliding it back into the support until it
snaps into place. (Diagram I)
9. Lubricate each cutter with household oil.
10. Snap head assembly back onto neck/hair pocket.
LUBRICATING TEETH
• Lubricate the teeth of the Pop-up trimmer and the Grooming head every six
months with a drop of sewing machine oil.
CLEANING GROOMING HEAD
• The easiest and most hygienic way to clean the grooming head is by rinsing the
head after use with warm water. A cleaning brush can also be used to remove
cut hair from the blades.
Cleaning and Care
D
E
F
G
H
I