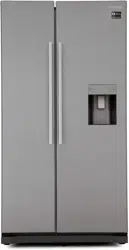
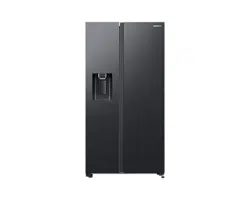
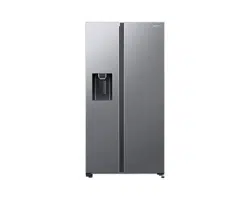
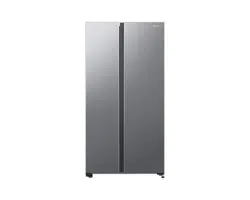
Congratulations on the purchase of your Samsung Side-By-Side Refrigerator. We hope you will enjoy the many state-of-the-art features and efficiencies that this new appliance has to offer.
Selecting the best location for the refrigerator
Solid, level surface without carpeting or flooring that may obstruct ventilation
Away from direct sunlight
Adequate room for opening and closing the door
Away from a heat source
Room for maintenance and servicing
Temperature range: between 5 °C and 43 °C
Effective temperature range
The refrigerator is designed to operate normally in the temperature range specified by its class rating.
NOTE
The cooling performance and power consumption of the refrigerator may be affected by the ambient temperature, the door-opening frequency, and the location of the refrigerator. We recommend adjusting the temperature settings as appropriate.
Clearance
Allow sufficient space to install the refrigerator on a flat surface.
Overall space required in use. Refer to drawing and dimension as below.
NOTE
Allow clearance to the right, left, back and top when installing. This will help reduce power consumption and keep your energy bills lower.
Do not install the refrigerator where the temperature will go below 50°F (10°C).
Make sure you disconnect the water supply line BEFORE removing the freezer door.
Removing the refrigerator doors
If your entrance won’t allow the refrigerator to pass easily through it, you can remove the doors.
The actual image of your refrigerator may differ, depending on the model and the country.
1. Removing the Front Leg Cover
First, open both the freezer and refrigerator doors, and then take off the front leg cover by turning the three screws counter-clockwise.
Separating the Water Supply Line from the Refrigerator
1. Remove the water line by pressing the coupler 1 and pulling the water line 2 away
NOTE
Do not cut the water line. Gently separate it from the coupler.
2. Removing the freezer door
A few things to mention first.
Make sure that you lift the door straight up so the hinges are not bent or broken.
Be careful not to pinch the water tubing and wire harness on the door.
Place doors on a protected surface to prevent scratching or damage.
1.With the Freezer door closed, remove the upper hinge cover 1 using a screwdriver, and then disconnect the wires by gently pulling them apart 2 .
2.Remove hinge screws 3 and the ground screw 4 by turning counterclockwise, and take off the upper hinge 5 . Be careful that the door may fall on you as you are removing it
3.Next, remove the door from the lower hinge 6 by carefully lifting the door straight up 7 .
CAUTION
Be careful not to pinch the water tubing and wire harness on the door.
Removing the Fridge Door
1. With the door closed, remove the upper hinge cover 1 using a screwdriver.
2.Remove hinge screws 2 and the ground screw 3 by turning counterclockwise, and take off the upper hinge 4 . Be careful that the door may fall on you as you are removing it.
3.Remove the door from the lower hinge 5 by lifting the door straight up 6 .
Reattaching the refrigerator doors
Once you have safely placed your refrigerator where you plan for it to stay, it is time to put the doors back on.
Reattaching the Freezer Door
1.Insert the upper hinge shaft 3 into the hole on the corner of the freezer door 4 . Make sure the hinge is level between the upper hinge hole 5 and the hole of the cabinet 6 and reattach the hinge screws 7 and ground screw 8 by turning in a clockwise direction.
2.Reconnect the wires.
3 Place the front part of the upper hinge cover 9 on the front of the upper hinge 10 and reattach with the screw.
Leveling the refrigerator
Now that the doors are back on the refrigerator, you will want to make sure the refrigerator is level so you can then make final adjustments. If the refrigerator is not level, it will not be possible to get the doors perfectly even.
When the Freezer door is lower than the fridge
Insert a flat-blade screwdriver into a notch on the Leg, turn it clockwise or counter clockwise to level the freezer.
When the Freezer door is higher than the fridge
Insert a flat-blade screwdriver into a notch on the Leg, turn it clockwise or counter clockwise to level the fridge.
NOTE
Refer to the next section for the best way to make very minor adjustments to the doors.
The legs of product are unconnected when it is out of factory. Make sure to adjust the legs to touch the floor, and make the product level before using.
For safety reasons, adjust the front side a little higher than the rear side.
Making minor adjustments to the doors
Remember, a leveling refrigerator is necessary for getting the doors perfectly even. If you need help, review the previous section on leveling the refrigerator.
In the case of the process to correct the imbalance is the same. Open the doors and adjust them, one at a time, as follows:
1.Unscrew the nut 1 from the lower hinge until it reaches the upper end of the bolt 2
2.Adjust the height difference between the doors by turning the bolt 2 clockwise or counter clockwise
3.After adjusting the doors, turn the nut 1 clockwise until it reaches the lower end of the bolt, then tighten the bolt again with the wrench 3 to fix the nut in place 1 .
Checking the water dispenser line (optional)
A water dispenser is just one of the helpful features on your new Samsung refrigerator. To help promote better health, the Samsung water filter removes unwanted particles from your water. However, it does not sterilize or destroy microorganisms. You will need to purchase a water purifying system to do that.
In order for the icemaker to operate properly, water pressure of 138 ~862 Kpa is required. Under normal conditions, a 170 cc paper cup can be filled in 10 seconds.
If the refrigerator is installed in an area with low water pressure (below 138 Kpa), you can install a booster pump to compensate for the low pressure.
Make sure the water storage tank inside the refrigerator is properly filled. To do this, press the water dispenser lever until the water runs from the water outlet.
Operations
Setting up the refrigerator
Now that you have your new refrigerator installed and in place, you are ready to set up and enjoy the full features and functions of the appliance.
By completing the following steps, your refrigerator should be fully operational. If not, first check the power supply and electricity source or try the troubleshooting section at the back of this user guide. If you have any further questions, contact your Samsung Electronics service center.
Place the refrigerator in an appropriate location with reasonable clearance between the wall and the refrigerator. Refer to installation instructions in this manual.
Once the refrigerator is plugged in, make sure the interior light comes on when you open the doors.
Set the temperature control to the coldest temperature and wait for an hour. The freezer should get slightly chilled and the motor should run smoothly.
After powering the refrigerator, it will take a few hours to reach the appropriate temperature.Once the refrigerator temperature is sufficiently cool, you can store food and drink in the refrigerator.
USE ICE TRAY(OPTIONAL)
When the freeze temperature get zero degre below, you can use Ice Box to make ice.
1. Pull out the ice tray.
2. Pour cool water into the tray until it reaches the water level indicator on the tray.
3. Place it inside ice tray.
4. Turn ice tray button and the ice automatically full into the below ice compartment after release. Pull out ice storage compartment for ice.
1.Pull out the ice tray
2.Pour water into the tray until it reaches the water level indicator on the tray.
3.Place it under the freezer shelf or on the freezer shelf.
4.To separate individual ice cubes, pull out the ice tray and hold the ice tray by its ends, then twist it gently.
Using the control panel (optional)
1.POWER FREEZE BUTTON
Speeds up the time needed to freeze products in the freezer. This can be helpful if you need to quickly freeze items that spoil easily or if the temperature in the freezer has warmed dramatically (For example, if the door was left open).
2.FREEZER BUTTON
Press the Freezer button to set the freezer to your desired temperature,You can set the temperature between -14°C (8°F) and -25ºC (-14°F).
3.ICE TYPE BUTTON
Use this button to choose Cubed, Crushed or to turn the Ice feature off.
4.FILTER CHANGE BUTTON
When you change the filter, press this button for 3 seconds to reset the filter schedule.
5.VACATION BUTTON
If you are going on vacation or business trip or you do not need to use the refrigerator, press the Vacation button. When you select vacation button for fridge compartment off, display LED of Vacation will be on.
6.CHILD LOCK FUNCTION
By pressing the Vacation button and the Fridge button simultaneously for 3 seconds, all buttons will be locked. The Water dispenser lever and the Ice lever will not work either. To cancel this function, Press these two buttons for 3 seconds again.
7.FRIDGE BUTTON
Press the Fridge button to set the fridge to your desired temperature. You can set temperature between 1°C and 7°C (34°F and 45°F).
“88” segment on Freezer part indicates the current Freezer temperature.
“88” segment on Fridge part indicates the current Fridge temperature.
Power Freeze
This icon will light up when you activate the “Power Freeze” feature.
When you don`t need requirement, just press the button again to cancel the “Power Freeze” mode.
Child Lock
This icon will light up when you activate the Child Lock function by pressing the Vacation button or the Power Cool button and the Fridge button simultaneously for 3 seconds. Press these two buttons for 3 seconds again to reactivate.
Filter Indicator (Optional)
When the filter indicator light is on, it is time to change the filter. Typically this happens about every 6 months.After removing the old water filter and installing a new one, reset the indicator status light by pressing the Ice Type button for about 3 seconds.The indicator will light again in about 6 months to let you know it is time to change your water filter.When you do not use the water filter, press the Ice Type button for more than 5 seconds, the Filter indicator lamp and the Filter Change letters will be off.
Cubed Ice, Crushed Ice and turnning the Ice maker off (Optional)
Enjoy cubed or crushed ice by selecting your preference from the digital control panel. If you don’t need ice, turn the feature off to save on water and energy consumption.The Ice type light indicates the type of ice(or no ice) that is currently chosen.
Controlling the temperature
Controlling the Freezer temperature
The freezer temperature can be set between -14°C (8°F) and -25ºC (-14°F) to suit your particular needs. Press the Freezer button repeatedly until the desired temperature is shown in the temperature display. Keep in mind that foods like ice cream may melt at -16ºC (4°F).
The temperature display will move sequentially from -14°C (8°F) and -25ºC (-14°F). When the display reaches -14ºC (8°F), it will begin again at -25ºC (-14°F).
Five seconds after the new temperature is set the display will again show the actual current freezer temperature. However, this number will change as the Freezer adjusts to the new temperature.
The temperature in two star sections are slightly higher than other freezer compartment.
Controlling the Fridge temperature
The refrigerator temperature can be set between 7ºC (45°F) and 1ºC (34°F) to suit your particular needs. Press the Fridge button repeatedly until the desired temperature is shown in the temperature display.
The temperature control process for the Fridge works just like the Freezer process.Press the Fridge button to set your desired temperature. After a few seconds, the Fridge will begin tracking towards the newly set temperature. This will be reflected in the digital display
CAUTION
The temperature of the freezer or the refrigerator may rise from opening the doors too frequently, or if a large amount of warm or hot food is placed in either side.
This may cause the digital display to blink. Once the freezer and refrigerator return to their normal set temperatures the blinking will stop.
If the blinking continues, you may need to “reset” the refrigerator. Try unplugging the appliance, wait about 10 minutes and then plug back in.
Using the ice and cold water dispenser (freezer)
Press the Ice Type button to select the type of ice you want
NOTE
Ice is made in cubes. When you select “Crushed”, the icemaker grinds the ice cubes into crushed ice.
Dispensing ice
Place your glass underneath the ice outlet and push gently against the ice dispenser lever with your glass. Make sure the glass is in line with the dispenser to prevent the ice from bouncing out.
Using the Water Dispenser
Place a glass underneath the water outlet and push gently against the water dispenser lever with your glass. Make sure the glass is in line with the dispenser to prevent the water from splashing out.
WARNING
Do not put your fingers, hands or any other unsuitable objects in the chute or ice-maker bucket.
It may result in personal injury or material damage.
Never put finger or any other objects in the dispenser opening.
It may cause injury.
Use only the ice maker provided with the refrigerator.
The water supply to this refrigerator must only be installed/connected by a suitably qualified person and connect to a potable water supply only.
In order to operate the ice maker properly, water pressure of 138 ~ 862 Kpa is required.
Using the cold water dispenser (fridge)
Place a glass underneath the water outlet and push gently against the water dispenser lever with your glass. Make sure the glass is in line with the dispenser to prevent the water from splashing out.
Shelves and bins (freezer)
Storing food
Storing Food in the Freezer
The Samsung Side-By-Side Refrigerator has been designed to provide you with maximum spacesaving features and functions. Here are some of the customized compartments we have created to keep your food fresher, longer. Remember, in order to prevent odor penetration to the ice, stored food should be wrapped securely and as airtight as possible.
NOTE
To get more space, you can remove freezer drawer(s) except bottom freezer drawer and ice trays,since it does not affect thermal and mechanical characteristics. A declared storage volume of frozen food storage compartment is calculated with these components removed.
Storing Food in the Freezer
1.ICE CHUTE
Do not put your fingers, hands or any other objects in the ice chute or the ice maker bucket. This may result in personal injury or material damage.
2.SHELVES
Can be used to store all types of frozen food.
3.DOOR BINS
Can be used for small packages of frozen food.
4.DRAWERS
Best used to store meats or dry foods.Stored food should be wrapped securely using foil or other suitable wrapping materials or containers.
Storing Food in the Fridge
5.SHELVES
Designed to be crack-resistant.They can be used to store all types of food and drinks.Circular marks on the glass surface are a normal phenomenon and can usually be wiped clean with a damp cloth.
6 WINE RACK (OPTIONAl)
A place in which the wine is placed.
7.TRAY UTIlITY
Best place to keep eggs.Place the TRAY UTILITY on the shelf for easy access.
8.COOlSELECT DUO(OPTIONAl)
Helps to preserve the taste, and prolong the freshness of your food. Use it to store meat,vegetable, poultry, fish or any other foods that are consumed on a regular basis.
9.FRUIT & VEGETABLE DRAWER
Used to preserve the freshness of your stored vegetables and fruits. It has been specifically designed to control the level of humidity within the drawer.
10.DAIRY BIN
Can be used to store smaller dairy items like butter or margarine, yogurt or cream-cheese bricks.
11.DOOR BINS
Designed to handle large, bulky items such as gallons of milk or other large bottles and containers.
12.BEVERAGE STATION (OPTIONAl)
Canbe used to store the frequently used items,such as canned beverages and snacks and allows access to these items without opening the regrigerator door.
Using the coolselect duo (optional)
The CoolSelect Duo is designed to make your busy life just a little bit easier.
Meat
When MEAT is selected, the temperature of the CoolSelect Duo is suitable for storing meat or ham by entering chill of freezer to it. This feature also helps keep meat or ham fresh for longer.c
Vegetable
When VEGETABLE is selected, the temperature of CoolSelect Duo is suitable for storing vegetable or fruit by closing chill of freezer to it. This feature also helps keep vegetable or fruit.
Removing the freezer accessories
Cleaning and rearranging the interior of the freezer is a snap.
1.Remove the Glass Shelf by pulling the shelf out as far as it will go. Then, gently lift it up and remove it.
2.Remove the Door Bin by holding the door bin with both hands and then gently lift it up.
3.Remove the Plastic Drawer by pulling it out and slightly lifting it up.
4.Remove the Icemaker Bucket by lifting up and pulling it out.
5.Remove the Front Leg Cover by opening both the freezer and refrigerator doors, and removing the three screws. Once the screws are free, detach the cover. To reattach the front leg cover, place it back in its original position and tighten the three screws.
Removing the freezer accessories
1.Remove the Glass Shelf by pulling the shelf out as far as it will go. Then, gently lift it up and gently remove it.
CAUTION
In case it does not have hooks itself in the back side for not being tilted,a shelf should be placed deeply in a proper position where there are blocks for shelves as shown. if not, the shelf can fall out of a refrigerator.
2.Remove the Vegetable & Fruit Drawer by pressing on the indentations found on the inside left and right sides of the Veggie Box/ Dry Box cover and remove by pulling forward. Holding the drawer with one hand, lift it up a little bit while pulling it forward and take it out of the refrigerator.
3.Remove the Gallon Door Bin by holding the bin with both hands and gently lifting it up.
4.Push the Case Fixer handle, and lift the Water Tank up, then take it out.
Cleaning the refrigerator
Caring for your Samsung Side-By-Side Refrigerator prolongs the life of your appliance and helps keep it odor and germ-free.
Cleaning the Interior
Clean the inside walls and accessories with a mild detergent and then wipe dry with a soft cloth. You can remove the drawers and shelves for a more thorough cleaning. Just make sure to dry them before putting them back into place.
Cleaning the Exterior
Wipe the digital panel and display panel with a clean, soft cloth.Spray water onto the cleaning cloth instead of spraying directly on the surface of the refrigerator. This helps ensure an even distribution of moisture to the surface. The doors, handles and cabinet surfaces should be cleaned with a mild detergent and then wiped dry with a soft cloth. To keep your appliance looking its best, the exterior should be polished once or twice a year.
Cleaning the Home Bar
Use a damp cloth to clean the ice and water dispenser.Then wipe dry with a clean, soft cloth.
Changing the interior lights
WARNING
Do not replace LED lamp privately and please contact the specialized repair staff if necessary.
And make it sure that the new LED lamp is the same as the old one.Do not break the lamp cover .
Using the doors
The refrigerator doors are equipped with a door opening and closing feature that ensures that the doors close all the way and are securely sealed.
After opening beyond a certain point, the door will “catch” and remain open. When the door is ajar ahead of the catch that allows it to stay open, it will close automatically
Troubleshooting
Symptom
Action
The refrigerator does not work at all or it does not chill sufficiently.
•Check that the power plug is properly connected.
•Is the temperature control on the display panel set to the correct temperature? Try setting it to a lower temperature.
•Is the refrigerator in direct sunlight or located too near a heat source?
•Is the back of the refrigerator too close to the wall and therefore keeping air from circulating?
The food in the fridge is
frozen.
•Is the temperature control on the display panel set to the correct temperature? Try setting it to a warmer temperature.
•Is the temperature in the room very low?
•Did you store the food with a high water content in the coldest part of the fridge? Try moving those items into the body of the fridge instead of keeping them in the CoolSelect Duo™ drawer.
You hear unusual noises
or sounds.
•Check that the refrigerator is level and stable.
•Is the back of the refrigerator too close to the wall and therefore keeping air from circulating?
•Was anything dropped behind or under the refrigerator?
•A “ticking” sound is heard from inside the refrigerator. This is normal and occurs because various accessories are contracting or expanding in relation to the temperature of the refrigerator interior.
The front corners and sides of the appliance are hot and condensation is occurring.
•Some heat is normal as anti-condensators are installed in the frontcorners of the refrigerator to prevent condensation
•Is the refrigerator door ajar? Condensation can occur when you leave the door open for a long time.
Ice is not dispensing.
•Did you wait for 12 hours after installation of the water supply line before making ice?
•Is the water line connected and the shut-off valve open?
•Did you manually stop the ice making function? Make sure Ice Type is set to Cubed or Crushed.
•Is there any ice blocked within the ice storage unit?
•Is the freezer temperature too warm? Try setting the freezer temperature lower.
You can hear water bubbling in the refrigerator
•This is normal. The bubbling comes from the refrigerant coolant liquid circulating through the refrigerator.
There is a bad smell in
the refrigerator.
•Has a food item spoiled?
•Make sure that strong smelling food (for example, fish) is
wrapped so that it is airtight.
•Clean out your freezer periodically and throw away any spoiled or suspect food.
Frost forms on the walls
of the freezer.
•Is the air vent blocked? Remove any obstructions so air can circulate freely.
•Allow sufficient space between the foods stored for efficient
air circulation.
•Is the freezer door closed properly?
Water dispenser is not
functioning.
•Is the water line connected and the shut-off valve open?
•Has the water supply line tubing been crushed or kinked? Make sure the tubing is free and clear of any obstruction.
•Is the water tank frozen because the refrigerator temperature is too low? Try selecting a warmer setting on the main display panel.
The alarm does not sound even though the door is open?
•The door alarm only sounds when the refrigerator door is ajar at an angle of more than 15 for more than 2 minutes. Initially,the alarm soungs with 10 consecutive rings,then rings 10 consecutive times every minute.
The user manual is designed to give you all the inside tips, instructions, and general information you need to get the best performance out of your device. If you’re unable to find your user manual, follow our step-by-step instructions below. Open the Samsung Support website Enter your model number into the Product Support search bar Click on your product in the dropdown. This will open the device page Scroll down the page until you get to Manuals and Downloads Click Dowload
#2 What to do if your ice maker is producing 50-90 cubes a day
If your ice maker is not producing enough ice, please try the following: Lower the freezer temperature. The freezer temperature must be 0°C for the ice maker to work properly. Make sure that the water valve on the refrigerator water supply line is completely open. You can find the water valve at the point that your refrigerator water supply line taps into your house water line. If you have a water filter in your refrigerator, it may help to change the filter cartridge. Please consult your user manual for more information. Make sure that your freezer is not overfilled. This can reduce ice production.
#3 How to make your ice maker produce more than 120 cubes a day
An ice maker typically makes 1 tray of ice every 90 minutes. To shorten the amount of time the freezer takes to produce a tray of ice, lower the freezer temperature. If your refrigerator has a Power Freeze function, press the Power Freeze button to speed up the ice-making process. In Power Freeze mode both the compressor and the freezer fan run for 10 hours continuously. The ice-making interval will be reduced from 90 minutes to 55 minutes. If the ice bucket fills in fewer than 10 hours, then Power Freeze will stop automatically.
If there's a lot of ice in your freezer, you should defrost it and remove any build-up of frost and ice. Remove all items from your freezer and place them in a refrigerator or cool environment Unplug your freezer Lay out some towels underneath the freezer to catch any water and have some more handy to mop any water inside the freezer Carefully, fill a clean spray bottle with boiling water Spray the frost with the hot water to melt it Mop up the water with a towel and make sure the freezer is completely dry Plug your freezer back in and restock it