Loading ...
Loading ...
Loading ...
12
Crisper and Crisper Cover
(on some models)
To remove and replace the crisper(s):
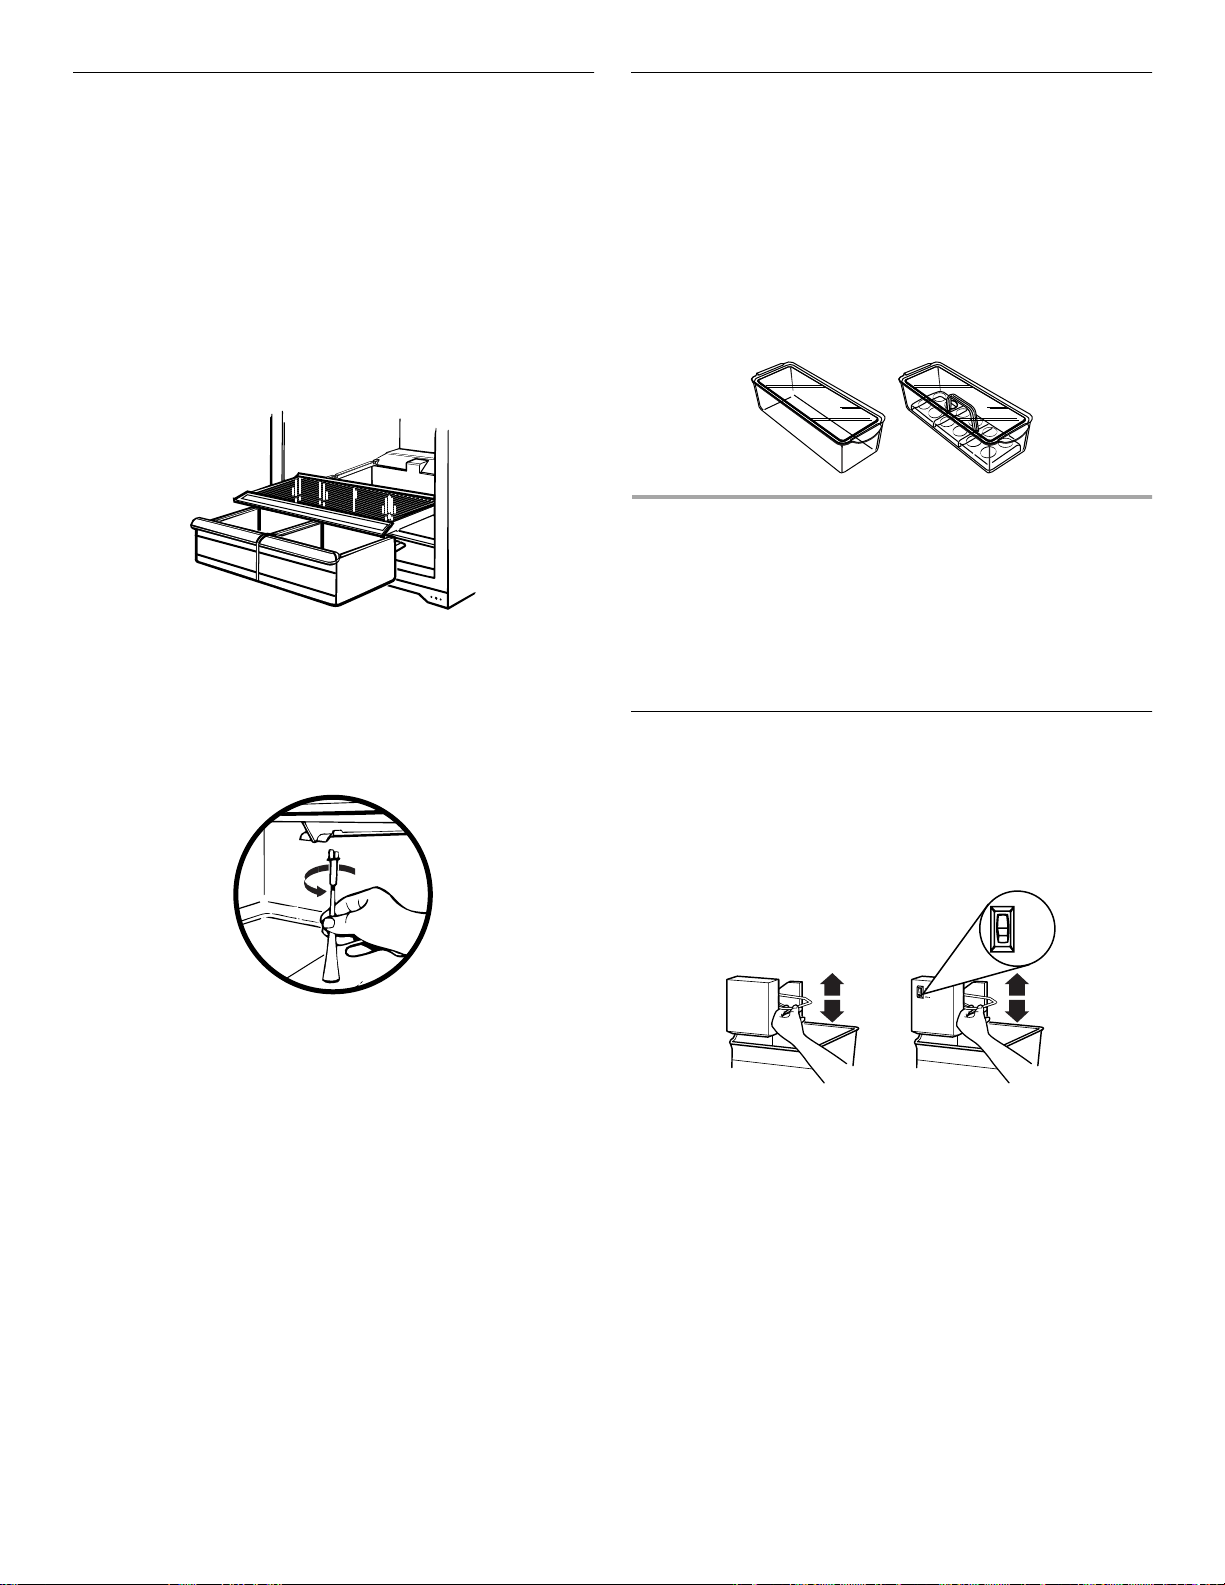
1. Slide crisper(s) straight out to the stop. Lift the front and slide
the crisper(s) out the rest of the way.
2. Replace the crisper(s) by sliding the crisper(s) in fully past the
stop.
Style 1
To remove and replace the plastic cover:
1. Remove the crisper(s).
2. Lift the front of the cover to remove the cover support. Then
lift the cover up and slide it out.
3. Replace the cover by fitting the cover tabs into lowest cabinet
slots and pushing them in. Lower the front retainers into
place.
4. Insert cover support (with the long tab toward the front) into
the groove on the underside of the cover.
NOTE: If the support needs adjustment, turn base clockwise
to raise or counter-clockwise to lower.
Style 2
To remove and replace the glass cover:
1. Pull the glass straight out.
2. Replace the glass by pushing it straight in.
Fruit and vegetable storage guide
Fruits: Wash, let dry and store in refrigerator in plastic bag or
crisper. Do not wash or hull berries until they are ready to use.
Sort and keep berries in original container in crisper, or store in a
loosely closed paper bag on a refrigerator shelf.
Vegetables with skins: Place in plastic bags or plastic container
and store in crisper.
Leafy vegetables: Wash in cold water, drain and trim or tear off
bruised and discolored areas. Place in plastic bag or plastic
container and store in crisper.
Utility or Egg Bin
(on some models -Accessory)
Depending on your model, you may have a one piece utility bin or
a three piece egg bin. To use the three piece egg bin, remove the
cover and place the eggs in the egg tray. Replace the cover and
store on an interior shelf. If you prefer, you can remove the egg
tray and place the entire carton of eggs in the bin. Replace the
cover.
NOTE: Eggs should be stored in a covered container. If your
model does not have an egg bin or covered utility bin, store
eggs in their original container on an interior shelf.
FREEZER FEATURES
Your model may have some or all of these features. Features that
can be purchased separately as product accessories are labeled
with the word “Accessory.” Not all accessories will fit all models.
If you are interested in purchasing one of the accessories, please
call the toll-free number on the cover or in the "Assistance or
Service" section.
Ice Maker
(on some models - Accessory)
There are two styles of ice makers:
■ Normal (Style 1 - on left)
■ Maximum Ice (Style 2 - on right)
To turn the ice maker on:
The on/off switch for the ice maker is a wire shut-off arm located
on the side of the ice maker. To turn the ice maker on, simply
lower the wire shut-off arm.
NOTE: The ice maker will not make ice until the freezer is cold
enough. Allow 24 hours to produce the first batch of ice. Discard
the first three batches of ice produced.
To turn the ice maker off:
■ Automatic turn off: As ice is made, the ice cubes will fill the
ice storage bin, and the ice cubes will raise the wire shut-off
arm to the OFF (arm up) position.
■ Manual turn off: Lift the wire shut-off arm to the OFF (arm up)
position and listen for the click to make sure the ice maker
will not continue to operate.
MAX
NORMAL
Loading ...
Loading ...
Loading ...