Loading ...
Loading ...
Loading ...
49-1000352 Rev. 4 11
INSTALLATION INSTRUCTIONS
Installation Instructions
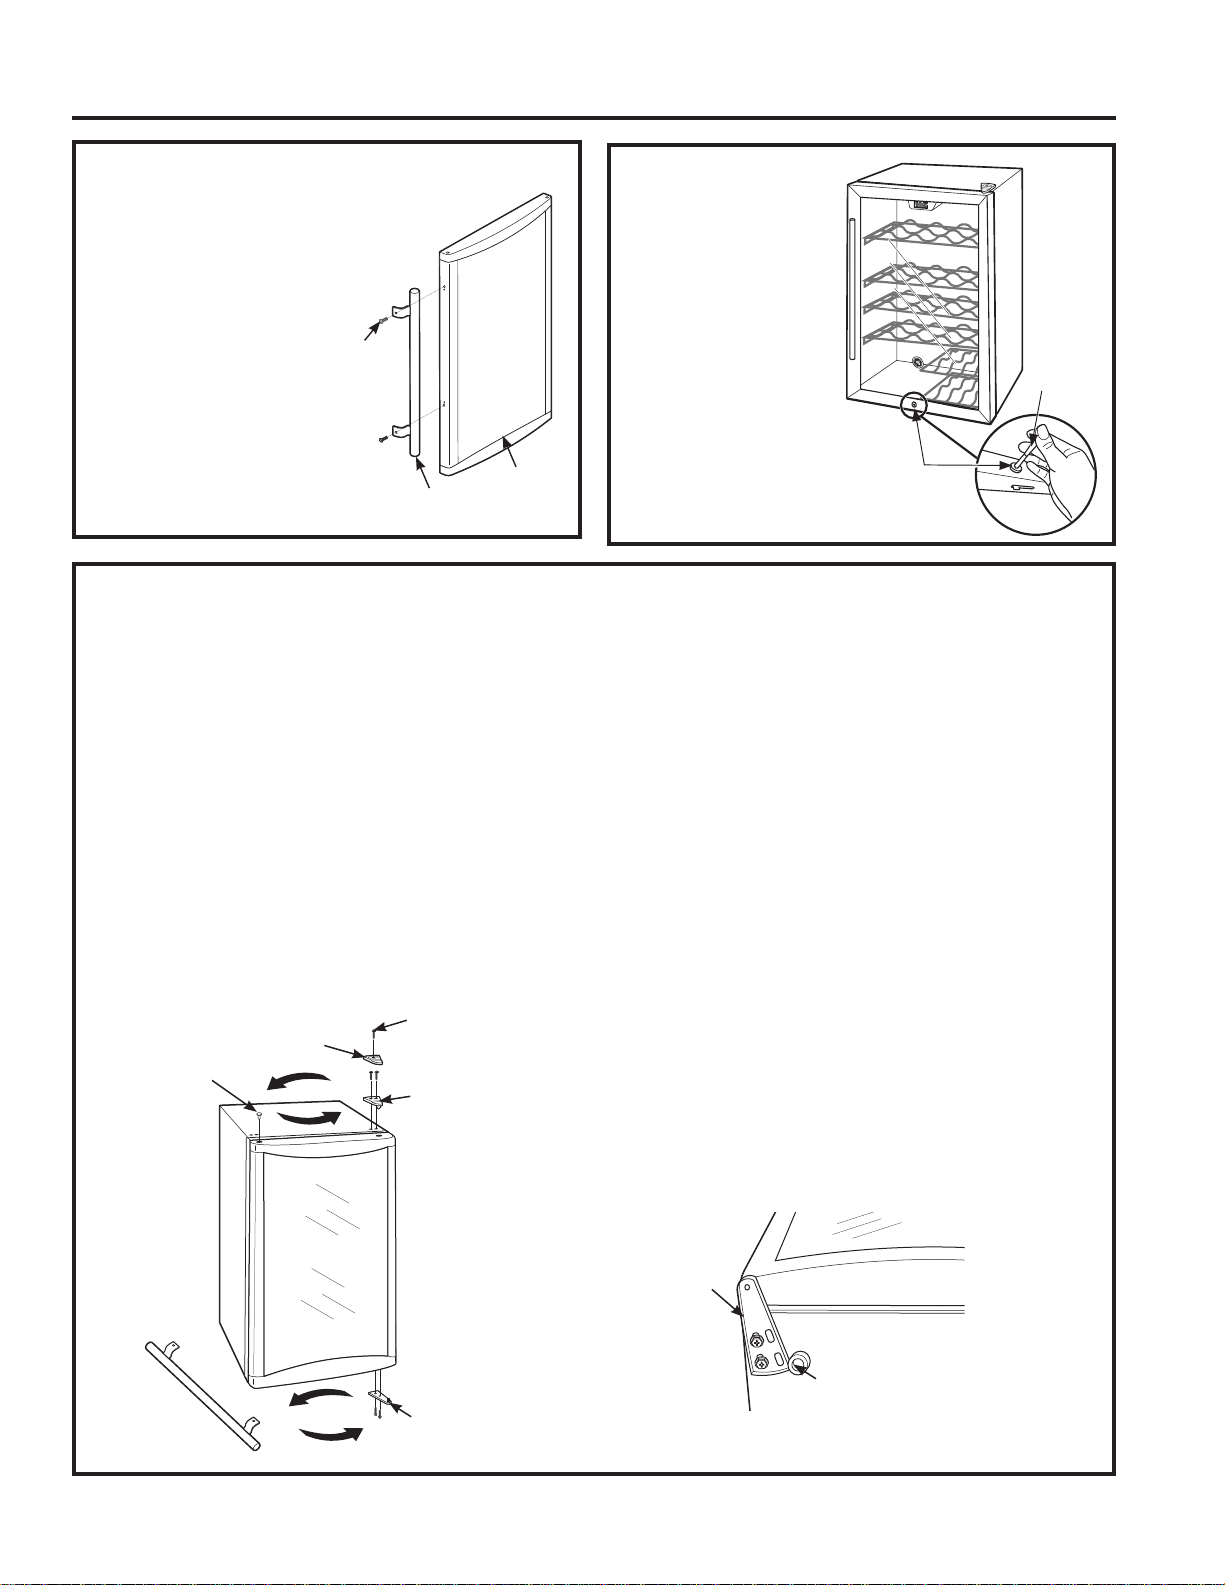
DOOR HANDLE - GVS04BD model only
The door handle and screws
are shipped in a hardware
bag attached to one of the
shelves inside the cabinet.
Locate the door handle and
two screws. Secure the door
handle to the side of the
door as shown.
REVERSING THE DOOR - GVS04BD model only
8QSOXJWKHEHYHUDJHDQGZLQHFHQWHU
2. Tape the door shut with masking tape to secure
alignment.
3. Remove the top hinge cover by removing the screw.
4. Remove the 2 screws securing the top hinge to the
frame.
5. Lean the beverage center backward to access the
bottom hinge.
6. Remove the 2 screws securing the bottom hinge
assembly to the frame.
NOTE: If you lay the unit on its back, be sure
to let it stand upright for at least 2 hours before
FRQQHFWLQJWRWKHSRZHUVRXUFHWKLVZLOOUHGXFHWKH
possibility of a malfunction in the cooling system.
5HPRYHWKH3OXJ%XWWRQIURPWKHWRSOHIWVLGHRIWKH
door.
8. Install the Plug Button into the hinge hole on the
right side. Press firmly to secure.
9. If the handle has been installed, remove it and
LQVWDOOLWRQWKHRSSRVLWHVLGH5HIHUWR'RRU+DQGOH
section for instructions.
10. Hold the door securely in place and install the
bottom hinge on the opposite side.
11. Install the top hinge and cover on the opposite
side. Make sure the door is aligned with the cabinet
before tightening the screws.
12. Remove the tape. Open and close the door to check
alignment with the cabinet. If necessary, loosen the
screws on the bottom hinge, realign the door, and
retighten the screws.
13. Plug in the beverage and wine center.
NOTE: If you had to lay the unit on its back, be
sure to let it stand upright for at least 2 hours before
FRQQHFWLQJLWWRWKHSRZHUVRXUFHWKLVZLOOUHGXFH
the possibility of a malfunction in the cooling system.
14. Set the temperature controls to the desired setting.
DOOR LOCK
- on some models
To secure the door lock,
push the key in and
rotate 90° clockwise.
To unlock, push the
key in and rotate 90°
counter-clockwise.
Screw
'RRU
Handle
.H\
Lock
Hinge
cover
Top
Hinge
Bottom
Hinge
Plug
Button
Screw
Bottom
Hinge
Leveling Leg
Loading ...
Loading ...
Loading ...