Loading ...
Loading ...
Loading ...
9
Operation (continued)
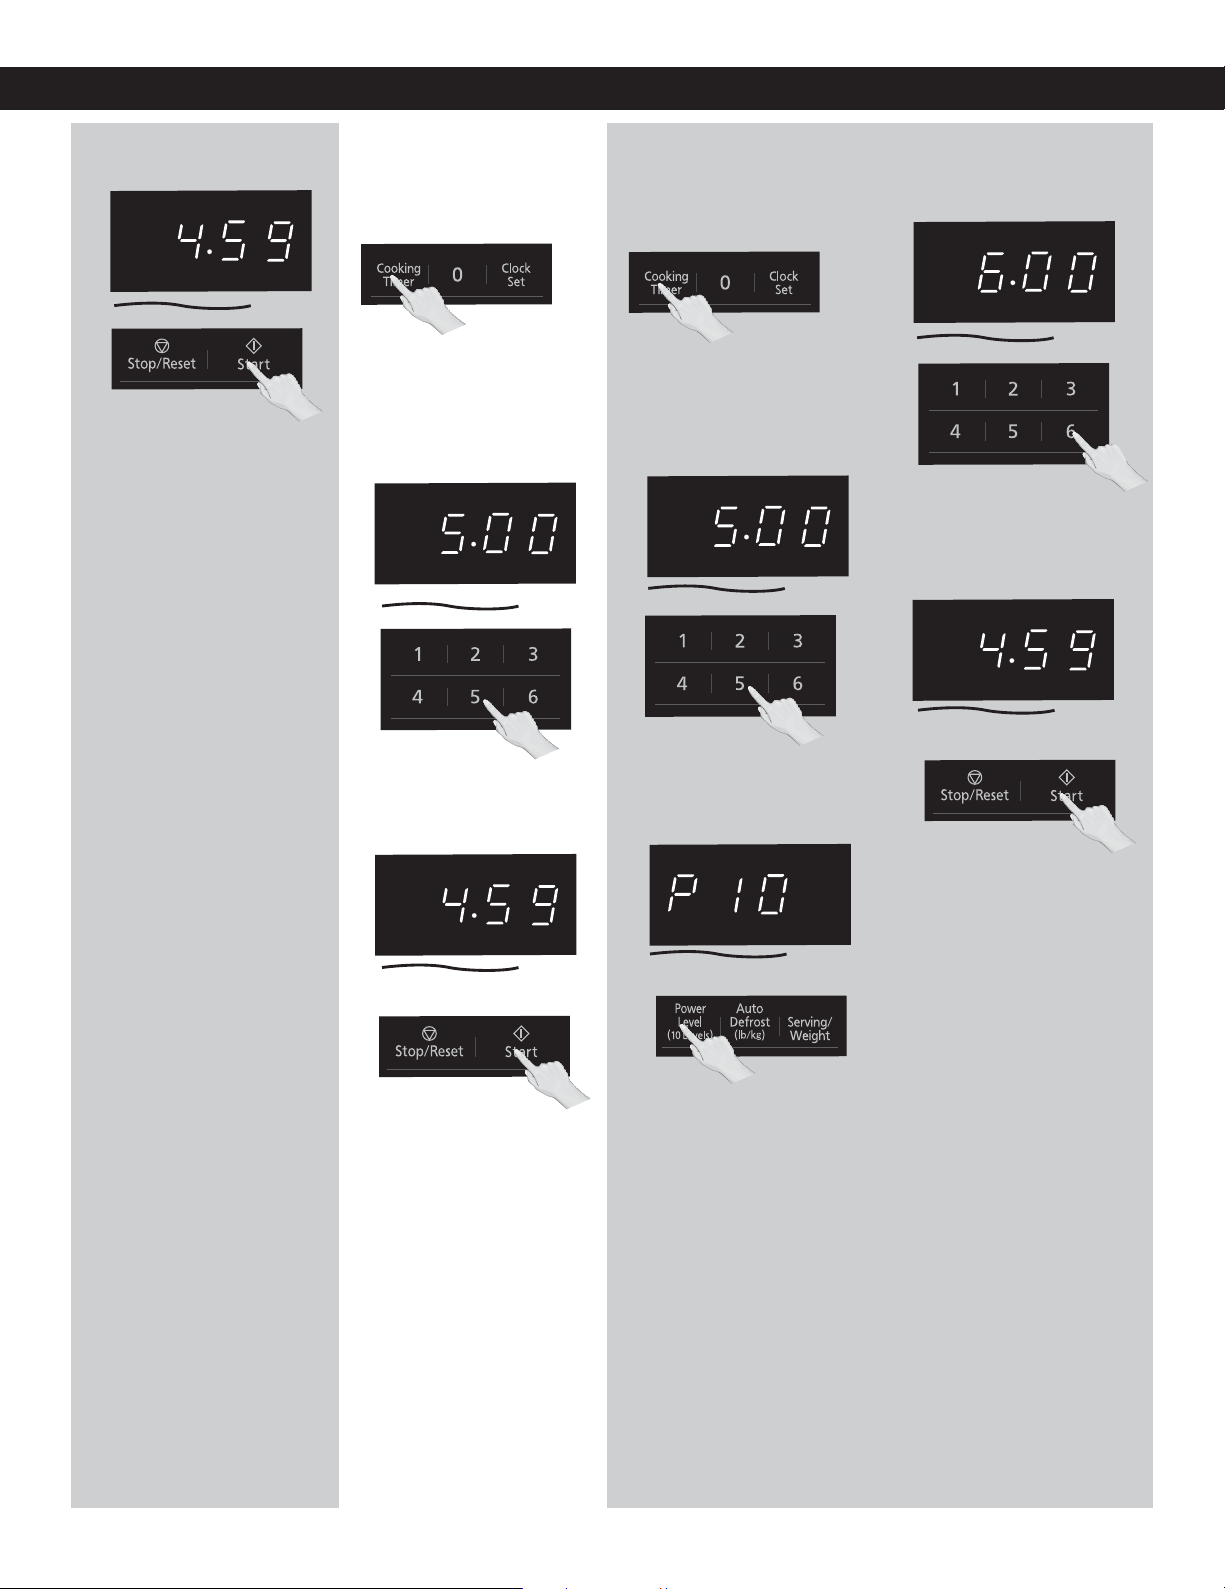
Setting a Standing
Time
Set desired amount of stand
time using Number pads (up
to 99 minutes, 99 seconds).
2
Some recipes call for a standing
time after cooking. To do this,
repeat steps 1 and 2 in the
Cooking section on previous
page. Then press Cooking Timer
.
1
Setting a Delayed
Start
The start time can be delayed
to start cooking at a later time.
To do this, first press
.
Enter the desired delay time
(up to 99 minutes, 99 seconds)
using the Number pads.
2
1
Press Start; the delay time will
count down, then cooking will
begin. At the end of cooking,
five beeps will sound.
NOTES:
1. When each stage finishes,
the oven will beep twice. At
the end of the program, the
oven will beep five times.
2. If the oven door is opened
during Stand Time, Kitchen
Timer or Delay Time, the
time on the display will
continue to count down.
3. Stand Time and Delay start
cannot be programmed
before any automatic
function. This is to prevent
the starting temperature of
food from rising.
5
Cooking (continued)
Press Start; the cooking will
start and the time will count
down in the display. At the
end of cooking, five beeps will
sound.
NOTES:
1. For reheating, use P10 (HIGH)
for liquids, P7 (MED-HIGH) for
most foods, and P6 (MEDIUM)
for dense foods.
2. For defrosting, use P3
(MED-LOW).
DO NOT OVERCOOK: This
oven requires less time to cook
than older units. Overcooking
will cause food to dry out and
may cause a fire. A microwave
oven’s cooking power tells
you the amount of microwave
power available for cooking.
Stage Cooking:
For more than one stage of
cooking, repeat steps 1 and
2 for each stage of cooking
before pressing Start. The
maximum number of stages
for cooking is three. When
operating, two beeps will
sound between each stage.
Five beeps will sound at the
end of the entire sequence.
Press Start. The timer will start
and then beep twice at the end
of cooking time (the beginning
of standing time). Five beeps
will sound when standing time
is done.
3
Press Power Level until the
desired power level appears
in the display. P10 is the
highest and P1 is the lowest.
3
Set Cooking Time using the
Number pads (see previous
page for maximum times).
4
3
Cooking Timer
Note: After running the oven
at P10 power continuously
for 30 min, if the cook
process is not complete, the
oven will automatically adjust
to P8 power to protect the
microwave and complete the
cook cycle.
If you want to cook again at
P10 power, you will need to
wait 15 min before restarting.
Loading ...
Loading ...
Loading ...