Blu-ray Disc™ Player / HDD Recorder Operating Instructions
GETTING STARTED
Unit care
HDD/USB HDD handling care
The HDD is a high precision recording instrument and is easily susceptible to damage. Therefore, be careful of the following points while the unit is turned on, especially during operation, otherwise the HDD and the recorded content may be damaged:
Do not subject the unit to any vibration and shock.
Do not remove the AC mains lead from the household mains socket.
The HDD is a temporary storage device This unit cannot save (backup) the HDD titles to media. You have to be very careful when handling the unit and editing the title.
If the HDD or USB HDD is damaged, the recorded content cannot be recovered.
Setup precautions
Do not place on anything that generates heat like a Set Top Box, etc.
Place in an area where condensation does not occur. Conditions where condensation may occur
When there is an extreme change in temperature.
In the above situation, without turning the unit on, let the unit adjust to the room temperature and wait 2–3 hours until condensation is gone.
The unit may breakdown if cigarette smoke or bug spray/vapour, etc. gets inside the unit.
When moving the unit
Before moving the unit, ensure the disc tray is empty.
Switch the unit to standby mode. (Wait until “BYE” disappears from the display.)
Remove the AC mains lead from the household mains socket.
Move only after the unit has come to a complete stop (approx. 3 minutes) in order to avoid subjecting to vibration and shock. (Even after the unit is switched to standby mode, the HDD continues operating for a short time.)
Cleaning
Wipe with a soft, dry cloth.
Never use alcohol, paint thinner or benzine to clean this unit.
Before using chemically treated cloth, carefully read the instructions that came with the cloth.
Use the lens cleaner (not supplied) to clean the unit’s lens.
When requesting this unit for repair
The registration of the USB HDD may be cancelled in the process of repairing this unit. You can use the USB HDD again by re-registering, but all recorded content already on the USB HDD will be lost. In such cases, the recorded content (data) cannot be recovered.
To dispose or transfer this unit
This unit may contain private information. Before disposing of or transferring this unit, perform the following to delete the data, including personal or secret information:
Format HDD (> 64)
Perform “Shipping Condition”
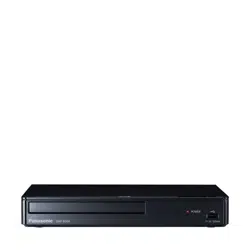
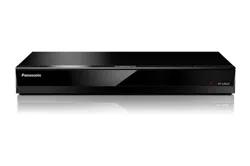
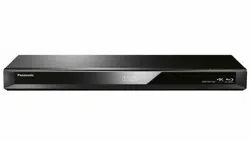
Main unit
Disc tray
Display
Remote control signal sensor
Angle: Approx. 20° up and down, 30° left and right
Distance: Within approx. 7 m in front of the unit
SD card slot
When removing the SD card, press on the centre of the card and pull it straight out.
Open/close disc tray
Standby/on switch ()
Press to switch the unit from on to standby mode or vice versa. In standby mode, the unit is still consuming a small amount of power.
USB port ( DC 5 V 500 mA)
Inserting or removing media
Disc
SD Card/USB device
While writing to/reading from the media, do not switch the unit to standby mode or remove the media. Such action may result in loss of the media contents.
When inserting the media, ensure that it is facing the right way up.
The USB port on the front side does not support USB HDDs. Connect a USB HDD to the USB port on the rear side.
Display
Drive (HDD, BD or SD) indicator
Main display section indicator
Messages and other information are displayed.
Timer recording indicator
This indicator lights up when the timer recording standby or Keyword Recording standby is activated.
Copying indicator
SD card slot indicator
USB port indicator
Playback indicator
Remote control signal indicator
Disc indicator
Recording indicator
REC” lights up while recording is inprogress.
“1” flashes when the first timer recording standby is activated or recording is paused, and lights up while recording is in progress. In the same way as “1”, “2” lights up or flashes for the second recording.)
Rear
AC IN terminal ()
Ventilation hole
RF IN/OUT terminal
HDMI terminal
USB port ( DC 5 V 500 mA)
Connect a USB HDD to this USB port.
LAN port
COAXIAL terminal
Class II equipment (The construction of the product is double-insulated.)
Remote Control
Transmit the remote control signal
Point it at remote control signal sensor on this unit.
Switch the unit from on to standby mode or vice versa
Select channels and title numbers, etc./Enter numbers or characters
Switch to the previously watched channel
Manual skip
-10s: Skip approx. 10 seconds backward
+60s: Skip approx. 1 minute forward
Basic operations for recording and play, REWIND LIVE TV/PAUSE LIVE TV
Show Information
Selection/OK, Frame-by-frame
Show Video Menu, Top Menu, Pop-up Menu
Show OPTION menu
Colour buttons (red, green, yellow, blue) Use in accordance with instruction on the screen.)
Select audio
To delete unwanted recorded titles, timer programmes, video, photo or music
TV operation buttons
Start recording
Channel select/Change pages in the Video Menu screen etc.
Select drive (HDD, Disc, SD or USB)
Show the Timer recording screen
Show NETFLIX screen
Show the Network Service screen
Exit the menu screen
Show the TV Guide screen
Show the FUNCTION MENU screen
Return to previous screen
Show subtitles
Show Teletext
Connection
Before connection, turn off all equipment and read the appropriate operating instructions.
Use the High Speed HDMI cables. Non-HDMI-compliant cables cannot be utilized. It is recommended that you use Panasonic’s HDMI cable.
When outputting 1080p or 24p (4K) signal, please use HDMI cables 5.0 meters or less. When the unit is not to be used for a long time.
To save power, unplug it from the household mains socket. This unit consumes a small amount of power, even when the unit is in standby mode.
Basic connections
Keep the RF coaxial cables as far away as possible from other cables.
Amplifier/receiver connections
HDMI terminal
You will not be able to view 3D programmes or 4K images with this connection if your amplifier/receiver is not 3D or 4K compatible.
When using a TV or an amplifier/receiver that does not display “ARC” on the HDMI terminal, it is necessary to connect the TV and the amplifier/receiver with a digital audio cable to enjoy the TV audio on the amplifier/receiver.
DIGITAL AUDIO OUT terminal
When you do not want the audio to be output from the TV, set “HDMI Audio Output” to “Off"
Network connection
When this unit is connected to the network, you can enjoy network functions (DLNA function, Network Service, TV Anytime, etc.).
For details about connection method, refer to the instructions supplied with the connected equipment.
After you make the LAN cable/Wireless LAN connection, the network setting is needed.
LAN cable connection
Use category 5 or above straight LAN cables (STP) when connecting to peripheral devices.
RECORDING
Recording TV Programmes
The titles can only be recorded to built-in HDD and cannot be copied from built-in HDD to the media other than USB HDD.
This unit can record two programmes being broadcasted at the same time. Preparation If you want to change the recording mode (> right)
Select the channel to record.
Press [REC ]. Recording will start.
Select “Automatic Stop”, then press [OK].
One touch recording (OTR) Recording stops automatically when the programme ends.
e.g., [For_Australia]
If a timer recording reaches its start time when all tuners are being used for recording, the recording (OTR) of one of the programmes terminates.
Teletext will not be recorded.
Following contents or media cannot be played back while recording.
video file
photo
USB HDD and USB memory
Copying cannot be performed while recording.
When “Automatic Standby after OTR” is set to “On”, this unit is turned to standby mode if this unit is not operated for approximately 5 minutes after completing Automatic Stop” or “Recording Time”.
To set the recording time
1. Select “Recording Time” or “Continuous recording” in step 3 (⇒ left). Recording Time: You can set the length of recording time from 30 minutes to 4 hours.
You can select the recording time with [].
2. Press [OK].
Operation during Recording
To check the recording programm
Press [STATUS ]
e.g., While recording two programmes simultaneously
To stop recording
Press [].
When recording one programme: If the following screen appears
Select “Yes”, then press [OK].
When recording two programmes: Following screen appears
Select the programme, then press [OK].
Select “Yes”, then press [OK].
To pause recording:
After displaying the recording programme, press
• Press again to restart recording (A title is not split into separate titles.)
Note: Timer recording programme cannot be paused.
Simultaneous rec and play
You can play the recording title from the beginning or the titles previously recorded to the HDD.
1. Press [VIDEO MENU].
2. Select the title, then press [OK].
Timer recording
To edit the timer recording on the TV Guide screen
Select the programme to edit, then press the red button.
Select “Timer Rec Edit”, then press [OK].
Go to step 3, “Manually programming timer recording”.
To cancel a timer recording on the TV Guide screen
Select the programme to cancel, then press the red button.
Select “Timer Rec Cancel”, then press [OK]. ” disappears.)
If “Overlapped Timer Recording” screen appears
You can eliminate the overlapping or may change with repeat event for the duplicated programme.
Select “Change”, then press [OK].
Follow the on-screen instructions.
The overlapped programmes are displayed with if their repeat programmes (the same programmes broadcast at different times) are available for timer recording.
When connecting registered USB HDD, “USB HDD” tab and registration number appears. Select “USB HDD” tab.
Screen icons
Tab
You can quickly find the recorded titles by selecting the tab.
To select the tab: Press
To change the displayed programme type tab
Select the programme type, then press the green button.
Select the item, then press [OK].
Showing grouped title
Press [OPTION].
Select “Grouped Titles” or “All Titles”, then press [OK].
Grouped Titles:
Two or more titles recorded in the daily/weekly/series timer recording mode are bundled and displayed as one item.
Two or more Keyword recording titles recorded from the same Keyword.
Playing back grouped titles
1. On the Grouped Titles screen: Select the item marked with
2. When playing all titles: Press
When playing the individual title: Press [OK] and select the title, then press [OK].
Playback from Chapter View
Select the title, then press [OPTION].
Select “Chapter View”, then press [OK].
3. Select the chapter, then press [OK].
Playing Keyword Recording titles
1. Select “Keyword Record” tab
2. Select the Keyword, then Press [OK].
3. Select the title, then press [OK].
To protect Keyword Recording titles
Select the title, then press the red button in step 3.
Select “Set up Protection”, then press [OK].
To delete Keyword Recording titles
You can delete keywords and all titles found with the keywords.
Press [DELETE] in step 2.
Select “Delete”, then press [OK].
Playing titles on the media
Insert the media
When the Video Menu screen or menu screen etc., appears: Select the item or title, then press [OK]. Repeat this step if necessary.
To play back the playlist created on other equipment
Press [FUNCTION MENU].
Select “Disc” in “Media”, then press [OK].
Select “Playlists”, then press [OK].
Select the playlist, then press [OK].
Menu screen
Selecting screen for each operation is displayed when the media is inserted, and you can access the operation screen easily. e.g., [USB]
• Display items differ depending on what is recorded in each media.
If the menu screen is not displayed, display it by performing the following operation.
While stopped Press [FUNCTION MENU].
Select “Media”, then press [OK].
Select the media, then press [OK].
Video list screen
e.g.,
Video Menu screen
e.g.,
Showing Information Select the title, then press [STATUS ].
Video Menu ( AVCHD ) screen
[SD] e.g.,
Showing Information
Select the title, then press [OPTION].
Select “Information”, then press [OK].
Notes for BD-Live discs
[BD-V] BD-Live allows you to enjoy more functions such as subtitles, exclusive images and online games.
1. Perform network connection and settings.
2. Insert a disc.
For the playback method, refer to the instructions for the disc.
Delete BD-Video data
If you no longer need BD-Live data recorded on the built-in HDD, you can delete data with the following operation.
Press [FUNCTION MENU].
Select “BD-Video Data Management” in “Setup”, then press [OK].
Select “Delete BD-Video data”, then press [OK].
Select “Yes”, then press [OK].
Select “Start”, then press [OK].
Press [OK].
Note
• You can restrict Internet access when BD-Live functions are used
• When “Pure Sound mode” is set to “On”, this unit cannot use BD-Live functions.
Operation during play
NOTE • Discs continue to rotate while menus are displayed. Press when you have finished playback to protect the unit’s motor, your TV screen, etc.
General operations
Status messages Press [STATUS ] twice.
Stop
Press .
Resume play function
Press [] to restart from the stopped position.
NOTE Discs: Only previous stopped position is memorised. The position may be cleared if the tray is opened or the unit is switched to standby mode.
Quick View Press and hold .
• Press again to return to normal speed.
NOTE
• MKV, MP4 and MPEG2: Quick View is not effective.
• Quick View is not effective when playing back the disc.
3D video playback Preparation
Connect 3D compatible TV to this unit.
• Perform the necessary preparations for the TV. Play back following the instructions displayed on the screen.
Preparatory 3D settings
3D BD-Video Playback
It is also possible to play back 3D discs in 2D conventional video).
3D Type
If 3D video cannot be played back in 3D, you may be able to play it in 3D by changing the setting.
3D AVCHD Output
If 2D AVCHD video is recognised as 3D video and cannot be played back correctly, you may be able to play it by changing the setting.
3D Playback Message
Hide the 3D viewing warning screen.
3D settings during playback
1 Press [OPTION]. 2 Select “Playback Settings” in “Playback Menu”, then press [OK]. 3 Select “3D Settings”, then press [OK]. 4 Select the item, then press [OK]. Signal Format - Original: Keep original picture format. - Side by side:3D picture format comprising of left and right screens. - 2D to 3D: Converts 2D pictures to 3D effect while playing. 3D Picture Mode - Normal: - Soft: This function cannot be enabled when “Signal Format” is set to “2D to 3D”. - Manual: 3D effects set manually
Manual Settings
Distance Set the amount of depth perception.
Screen Type Selects how the screen appears during 3D playback (flat or round).
Frame Width Set the amount of feathering at the edge of screen. Frame Colour
Set the colour of feathering at the edge of screen.
Graphic Display Level Adjust the 3D position for the playback menu or message screen etc.
Playback menu
1 Display the Playback menu
1 Press [OPTION].
2 Select “Playback Settings” in “Playback Menu” or select “Playback Settings”, then press [OK].
2 Select the menu, then press [OK].
3 Select the item, then press [OK].
4 Change the setting.
EDITING VIDEO
Once deleted, divided or partially deleted, content cannot be restored to its original state. Make certain before proceeding.
Deleting recorded titles
1 On the Video Menu screen: Select the title.
2 Press [DELETE].
3 Select “Delete”, then press [OK].
Deleting during play
1 Press [DELETE] while playing.
2 Select “Delete”, then press [OK].
Editing recorded titles
1 On the Video Menu screen: Select the title.
2 Press [OPTION].
3 Select the item, then press [OK].
Partial deleting
1 Select “Partial Delete” in “Edit”, then press [OK]. 2 Press [OK] at the start point and end point to delete. • You can find the desired point by using play, search, etc. (> 36) 3 Select “Continue”, then press [OK]. • Select “Next”, then press [OK] to delete other sections. Up to 20 sections can be set. (> go to step 2) 4 Select “Delete”, then press [OK]. 5 Press [RETURN ].
Dividing title
1 Select “Divide Title” in “Edit”, then press [OK]. 2 Press [OK] at the point to divide the title. • You can find the desired point by using play, search, etc. (> 36) 3 Select “Continue”, then press [OK]. 4 Select “Divide”, then press [OK].
File Conversion
File Conversion is a function to convert the recording mode of the title in DR mode and AVCHD contents. The size of the converted title will be small regularly. It will take about the same time as the recorded duration.
1 Select “File Conversion” in “Edit”, then press [OK].
2 Set the conversion options, then press [OK].
3 Select the item, then press [OK].
Convert & Delete: The original title will be deleted to save HDD capacity after conversion.
Convert Only: The original title remains after conversion. To cancel a “Now” conversion Press and hold [RETURN ] for more than 3 seconds. Deleting video files on the HDD
1 On the video list screen: Select the file or folder.
2 Press [DELETE].
3 Select “Yes”, then press [OK].
COPYING VIDEO
Copying titles
1 Connect the USB HDD.
2 Press [FUNCTION MENU]. 3 Select “Recorded Programmes” in “Contents on HDD”, then press [OK]. 4 Select the title. • Multiple selection Select the title, then press the yellow button. A check mark is displayed. Repeat this step. • Press the yellow button again to cancel. 5 Press the blue button. 6 Select “Yes”, then press [OK]. • If you select “No”, you can change the selection. (=> right, To change the selection) 7 Set other settings, then press [OK]. (=> right, “Setting the copying options”) 8 Select “Yes”, then press [OK].
NETWORK
Enjoying Network Service
Network Service allows you to access some specific websites supported by Panasonic, and enjoy Internet contents such as photos, videos, etc. from Network Service home screen.
Preparation • Perform network connection and settings. 1 Press [INTERNET]. • The message is displayed. Please read it carefully and then press [OK]. • NETFLIX can be accessed directly by pressing [NETFLIX] button. 2 Select the item, then press [OK]. • Operable buttons: , [OK], [RETURN ], colour buttons and number buttons. TV Anytime
Operations such as the ones below can be performed from anywhere with a smartphone or tablet installed with Media Center App.
- Setting a recording
- Watching TV with this unit’s tuner
- Playing back titles recorded on this unit (Use the Media Center App to complete user registration to use these functions.)
This unit will always be connected to the Internet when this function is activated.
Please note that a regular maintenance or unexpected trouble may interrupt the service, and that the service content may be changed or revoked and operation menu screens may be changed with or without a prior notice.
We recommend that you use a high-speed connection, such as LTE or Wi-Fi.
TV Anytime services may be discontinued temporarily or permanently without notice.
Smart Home Networking (DLNA)
Smart Home Networking (DLNA) allows you to watch the contents and broadcasts on Server equipment connected on the same network from Client equipment.
This unit can be used both as Server and Client. Additionally, if used as Client, this unit can also be used as Media Renderer, which can be controlled by a Smartphone, etc.
Using this unit as Server
You can watch broadcasts received by this unit (Multiroom TV Streaming), videos and photos saved on HDD of this unit on DLNA (Client) compatible equipment.
For details regarding the connection and operation of equipment connected via a network, refer to their respective operating instructions.
DLNA function compatible software should be installed.
Preparation
1 Operate the playback equipment (Client) to display the list of contents on this unit.
2 Select the item, then press [OK].
The DLNA compatible device that is to be connected to the unit should be connected to the same hub or broadband router as the unit. The titles with access restriction (e.g., copy restriction) signals sent from broadcasters are not available for this function.
You cannot play back music from the playback equipment Client).
If video frames are dropped, change the following settings.
Conversion Setting for DLNA
Resolution Setting for DLNA
Files not on the HDD cannot be played back.
Playing back 3D video recorded on this unit may not work properly.
D photos copied to this unit cannot be played back in 3D.
Using this unit as Client You can share videos, photos and music stored in the DLNA Certified media server.
1 Press [FUNCTION MENU].
2 Select “DLNA Client” in “Home Network”, then press [OK].
A list of equipment connected via the network is displayed.
This list can be updated by pressing the red button.
3 Select the equipment, then press [OK].
4 Select the item, then press [OK].
Menu structure will be different depending on the equipment. Select the contents by repeating the operation.
Convenient functions can be used by pressing OPTION] depending on the contents.
Control Panel: Control Panel is displayed once the playback starts.
Press [OK] if the Control Panel is not displayed. (It may not be displayed depending on the conditions of use.)
While playing video or photo) Press RETURN ] to hide the Control Panel.
Using this unit as Media Renderer
This unit will work as Media Renderer, which allows you to play back the contents on DLNA Server by operating a Digital Media Controller (a smartphone, etc.).
1 Press [FUNCTION MENU].
2 Select “Media Renderer” in “Home Network”, then press [OK].
3 Operate the Digital Media Controller compatible equipment.
Using Smart Home Networking (DLNA) with Wi-Fi Direct®
Wi-Fi Direct is a standard that enables wireless LAN devices to communicate each other directly without a wireless broadband router. This unit can be connected wirelessly and directly to other DLNA compatible equipment on a temporary basis, regardless of the network connection and settings of this unit.
CONVENIENT FUNCTIONS
VIERA Link functions
Automatic input switching/ Power on link
When the following operations are performed, the input channel of the TV will be automatically switched and the screen of this unit will be displayed. Additionally when the TV is off, the TV will automatically turn on.
- When play starts on this unit
- When an action that uses Video Menu etc, is performed
Power off link
When you set the TV to standby mode, this unit is also automatically set to standby mode.
• Power off link function does not work when manual recording, copying etc.
Playing music continuously even after turning off power to the TV
The following operations make it possible to keep he power of the unit on and to play music continuously. When the unit is directly connected to an amplifier/receiver. 1 While playing music Press [OPTION]. 2 Select “TV Power Off”, then press [OK]. • Sound may be discontinued for several seconds when the power to the TV is turned off.
Easy control only with Panasonic TV’s remote control
You can operate this unit using the TV remote control. Refer to the operating instructions of the TV about the buttons that you can use. VIERA Link, based on the control functions provided by HDMI which is an industry standard known as HDMI CEC Consumer Electronics Control), is a unique function that we have developed and added. As such, its operation with other manufacturers’ equipment that supports HDMI CEC cannot be guaranteed.
These functions may not work normally depending on the equipment condition.
Use the remote control supplied with this unit if you cannot operate this unit using buttons on the TV remote control. Software (Firmware) Update
You cannot operate the unit until the update is complete. Don’t remove the AC mains lead during the update. Removing the AC mains lead while the update is in progress may damage the unit.
• From broadcasts ([For_New_Zealand])
Software of this unit will be updated from broadcasts if update information is detected.
• From Internet
Network connection and setting are required.
If a software (firmware) update is available, a notification is displayed.
• It is displayed on the Channel Information when the Software (Firmware) can be updated immediately.
To execute, press the red button while the Channel Information is displayed, and follow the instructions on the screen.
Update of the software (firmware) will start when the unit is turned to standby mode.
4K Networking
You can save 4K videos/photos recorded with digital cameras and other 4K-compatible devices to the HDD of this unit and play them back.
Compatible 4K content
MP4/MOV (4K/24p, 25p and 30p) bit rate up to 100 Mbps resolution up to 3840k2160 25p/30p, k2160 24p
JPEG, MPO resolution 3840k2160
Photos with a resolution greater than k2160 are played back in 3840k2160.
Preparation
Connect a 4K-compatible TV to this unit.
TROUBLESHOOTING
Before requesting service, make the following checks. If the problem still persists, consult your dealer for instructions. Updating to the latest software (firmware) may solve the problem.
The followings do not indicate a problem with this unit:
Regular disc rotating sounds or HDD rotating sounds.
Poor reception due to atmospheric conditions.
When you switch the unit on or to standby mode, there may be an unexpected sound.
General operation
The unit does not work.
Check the connections.
One of the unit’s safety devices may have been activated.
Reset the unit as follows:
1. Press [] on the main unit to switch the unit to standby.
If the unit does not switch to standby, press on the main unit for about 3 seconds.
The unit is forcibly switched to standby.
Alternatively, disconnect the AC mains lead, wait one minute, then reconnect it.
2. Press [] on the main unit to switch it on. If the unit still cannot be operated, consult the dealer.
Cannot eject a disc.
1. Press and hold [] on the main unit for at least 3 seconds when it is turned off.
2. Press and hold [OK], the yellow button and the blue button at the same time for more than seconds.
"00 RET” is displayed on the front panel display.
3. Repeatedly press [] (right) until “06 FTO” is displayed on the front panel display.
4. Press [OK].
The remote control does not work.
The remote control and main unit are using different codes. Change the code on the remote control. “Remote Control ” appears on the right side of the screen. (“” stands for a number.)
Front panel display
Press and hold [OK] and the indicated number button at the same time for more than 5 seconds.
Startup is slow.
Startup takes time in the following situations:
A disc is inserted.
The clock is not set.
Immediately after a power failure or the AC mains lead is connected.
When a BD-J application is executing.
When the “Quick Start” is not activated.
Displays
“0:00” is flashing on the front panel display.
Set the clock.
The clock does not display on the unit when switched to standby.
The clock does not display when “Quick Start” is not activated.
TV screen and video
Screen size is wrong.
Check the “TV Aspect” or “Aspect for 4:3 Video”.
Adjust the aspect ratio setting on TV.
Adjust the aspect ratio setting on this unit.
Check “Aspect for Recording” before recording or file conversion.
The black screen appears on the TV.
This phenomenon may occur, depending on the TV setting, when “Quick Start” is activated. Depending on the TV, this phenomenon may be prevented by reconnecting to a different HDMI input terminal.
TV reception is not displayed.
Broadcast signals are not output from this unit’s RF OUT terminal. Select “On” in “RF OUT Aerial Signal )”.
The screen changes automatically.
If “Screen Saver” set to “On”, the screen saver function will be activated when there is no operation for 5 minutes or more.
There is a lot of image lag when playing video.
Set to “0” all items in the “Noise Reduction”.
Set “Audio Delay”.
The images do not appear on the TV. The picture is distorted during play, or video is not played correctly.
Check the connections.
Check the settings of the connected TV, etc.
An incorrect resolution is selected in “HDMI Video Format”. Reset the setting as follows:
1. While the unit is on, press and hold [OK], the yellow button and the blue button at the same time for more than 5 seconds.
"00 RET” is displayed on the front panel display.
2. Repeatedly press [] (right) until “04 PRG” is displayed on the front panel display.
3. Press and hold [OK] for at least 3 seconds. Set the item again.
When Dolby Digital Plus, Dolby TrueHD, and DTS-HD® audio are not output properly, select “Yes” in “Default Settings” and make proper settings.
The unit’s TV System is different from that of the disc. Change the TV System. TV System)
The picture may be distorted or a black screen may appear between scenes recorded with different aspect ratios.
Set “Deep Colour Output” or “Contents Type Flag” to “Off”.
The country setting is not set correctly. Perform Shipping Condition” first, and then set the country you live in again.
3D video is not output correctly.
3D video may be output correctly by changing the following settings:
3D Type” of “3D Settings” (> 66)
Signal Format” (> 38, 3D settings during playback)
Check the settings of the connected TV.
When a non-3D compatible amplifier/receiver is connected between this unit and a TV, 3D video is not output. (> 10)
When “HDMI Audio Output” is set to “Off”, 3D video may not be output correctly.
Sound
No sound. Distorted sound.
Check the connections.
Check the settings of the connected TV, etc.
Press [AUDIO] to select the audio.
To output audio from a device connected with an HDMI cable, set “HDMI Audio Output” to “On”.
Cannot change audio channel.
You cannot change the audio channel if “Digital Audio Output” is set to “Bitstream”.
Recording, timer recording and copying
Cannot record. Cannot copy.
Some broadcasts are copyright protected.
You cannot record to the disc.
Timer recording does not work properly.
When is displayed on the screen.
Auto Renewal Recording does not work properly.
The programme will not be overwritten in the following cases:
the programme is protected
any programme is being played back or copied
a screen such as Video Menu is displayed
Instead, the programme will be saved as a separate programme and that will be overwritten.
A part or whole of a recorded title has been lost.
If there is a power failure or the AC mains lead is disconnected from the household mains socket while recording or editing, the title may be lost or the HDD may become unusable. We cannot offer any guarantee regarding lost programmes.
Keyword Recording does not work properly.
The unit may not record a Keyword Recording programme when part of its broadcast time overlaps with that of another timer-recording programme. When this occurs, the Keyword Recording does not start even after the timer-recording has finished.
The unit cannot run a search correctly if Search Conditions are not appropriate. Revise the Search Conditions.
Play
Cannot play back.
The disc is dirty.
The disc is scratched or marked.
The disc may not be able to play back if it was not finalised or a Top Menu was not created on the equipment used for recording.
Refer to “Screen icons”
Audio and video momentarily pause.
• DVD-R DL and +R DL discs have two writable layers on one side. Video and audio may momentarily cut out when the unit is switching layers.
You have forgotten your rating PIN.
1. The rating level returns to the factory preset.
While the unit is on, press and hold [OK], the yellow button and the blue button at the same time for more than 5 seconds.
RET” is displayed on the front panel display.
2. Repeatedly press [1] (right) until “03 VL” is displayed on the front panel display.
3. Press [OK].
INIT” is displayed on the front panel display.
Image for the Quick View is not smooth.
Image may not be played back smoothly in case of high definition titles.
Edit
Cannot edit.
You may not be able to edit on the HDD if there is no available space. Delete any unwanted titles to create empty space.
Photo
The contents of the SD card cannot be read.
Remove the card from the slot and then insert again. If this does not solve the problem, switch the unit to standby mode and turn it on again.
Photos do not play back normally.
The images that were edited on the PC, such as Progressive JPEG, etc., may not play back.
USB
This unit does not recognize the USB device correctly.
If inserted during playback the USB device may not be recognized by this unit. Disconnect and reconnect the USB device. If it still does not recognize the connection, switch the unit to standby mode and turn it on again.
USB devices connected using a USB extension cable other than a dedicated one or a USB hub may not be recognized by this unit.
TV Guide
The TV Guide information is not displayed properly.
Set the clock correctly.
There was a programme change, or TV Guide information from a broadcast station was possibly not correctly transmitted.
If signal quality is bad, the TV Guide system may not be able to receive any data.
It may take time until the TV Guide screen is displayed correctly. Wait for about a day
Broadcast
Picture regularly breaks up on some channels.
Adjust the reception with “Manual Tuning”
Network
You cannot access this unit from DLNA compatible equipment on the network.
Check the network connection and the network settings.
It may not be possible to connect depending on the types of the equipment or the status of the equipment.
When using this unit as a server, video frames are dropped.
Change the following settings:
Conversion Setting for DLNA
Resolution Setting for DLNA
You cannot play contents properly from DLNA compatible equipment on the network.
There may be some video that cannot be played back on DLNA compatible equipment depending on the equipment.
Following titles may not be played back:
A title with access restriction
A title with incompatible format
Playback via DLNA compatible equipment may not be performed when this unit is in the following conditions:
While playing back a BD-Video
While simultaneously copying and recording
While displaying the Basic Settings menu
While executing functions using a network, such as Network Service
When using Wireless LAN connection, video from the DLNA Certified media server is not played back or video frames are dropped during playback.
Use 802.11n (2.4 GHz or 5 GHz) Wireless router.
Simultaneous use with a microwave, cordless telephone etc. at 2.4 GHz may result in connection interruptions or other problems.
On the “Wireless Settings” screen, the continuous lighting of at least four “Reception” indicators is the target for a stable connection. If three or fewer indicators are lit or the connection is being interrupted, change the position or angle of your Wireless router. If there is no improvement, connect to a wired network and perform the “Easy Network Setting”, again.
Reset
To return all the settings to the factory preset
Perform “Shipping Condition” or “Default Settings
Messages on the front panel display
The following messages or service numbers appear on the front panel display when something unusual is detected.
CONV
Selected titles in the USB HDD are being converted.
Do not disconnect the USB HDD from this unit.
GUIDE
TV Guide data is being downloaded.
NoREAD
The disc is dirty. The unit cannot read the disc.
The lens cleaner has finished cleaning.
Press [ OPEN/CLOSE] on the main unit to eject the disc.
PLEASE WAIT
Displayed when the unit is started and is switched to standby mode.
There was a power failure or the AC plug was disconnected while the unit was on. The unit is carrying out its recovery process. Wait until the message disappears.
PROG FULL
There are already 32 timer programmes. Delete unnecessary timer programmes.
REMOVE
The USB device is drawing too much power. Remove the USB device.
SET
The remote control and main unit are using different codes. Change the code on the remote control.
START
Update of the software (firmware) is started. You cannot operate the unit until the update is complete.
SW-DL
Software (firmware) is downloading.
Download will stop when the unit is turned on, or the timer recording starts.
When “FINISH” is displayed, update of the software firmware) has completed.
UNSUPPORT
The media is not supported.
UPD /
(“” stands for a number.)
The software (firmware) is being updated. You cannot operate the unit until the update is complete.
U50
An error has occurerd in the antenna’s power supply. Check to see if the antenna’s cable core and braided wire shield are in contact with each other.
U59
The unit is hot. The unit switches to standby for safety reasons. Wait for about 30 minutes until the message disappears.
Install or place this unit with good ventilation.
U61
When a disc is not inserted) A malfunction has occurred. The unit is trying to restore to the normal operation. Once the message disappears you can use the unit again. If it remains displayed, consult the dealer.
U76
HDMI cannot be output because it is connected to a model that does not support copyright protection.
U77
Due to the current disc not having authorised copyright information, video output is not performed.
U88
When a disc is inserted) There was something unusual detected with the disc or the unit. The unit is trying to restore to the normal operation. Once the message disappears you can use the unit again. If it remains displayed, consult the dealer.
U99
The unit fails to operate properly. Press [Í/I] on the main unit to switch the unit to standby mode. Now press [Í/I] on the main unit again to turn the unit on.

 )
) DC 5 V 500 mA)


 )
)

 Keep the RF coaxial cables as far away as possible from other cables.


 ]. Recording will start.
 ].
].
 ].
].


 ” disappears.)

 if their repeat programmes (the same programmes broadcast at different times) are available for timer recording.


 ].
].

 when you have finished playback to protect the unit’s motor, your TV screen, etc.
 ] to restart from the stopped position.


 is displayed. Repeat this
 , [OK], [RETURN ], colour buttons and number buttons.


 ] on the main unit to switch the unit to standby.
 ] (right) until “06 FTO” is displayed on the front panel display.
 ] (right) until “04 PRG” is displayed on the front panel display.
 is displayed on the screen.
 OPEN/CLOSE] on the main unit to eject the disc.