Loading ...
Loading ...
Loading ...
5INSTALLATION
Clean the refrigerator thoroughly according to
instructions and wipe away any dust that has
accumulated during shipping.
Check that the floor is level. If it is not, adjust the
stabilising foot so that the refrigerator is level and stable.
We recommend that the refrigerator be turned on and
left to run for two to three hours before placing any food
inside it. This will allow you to check that it is operating
properly and there is adequate cool air in the freezer.
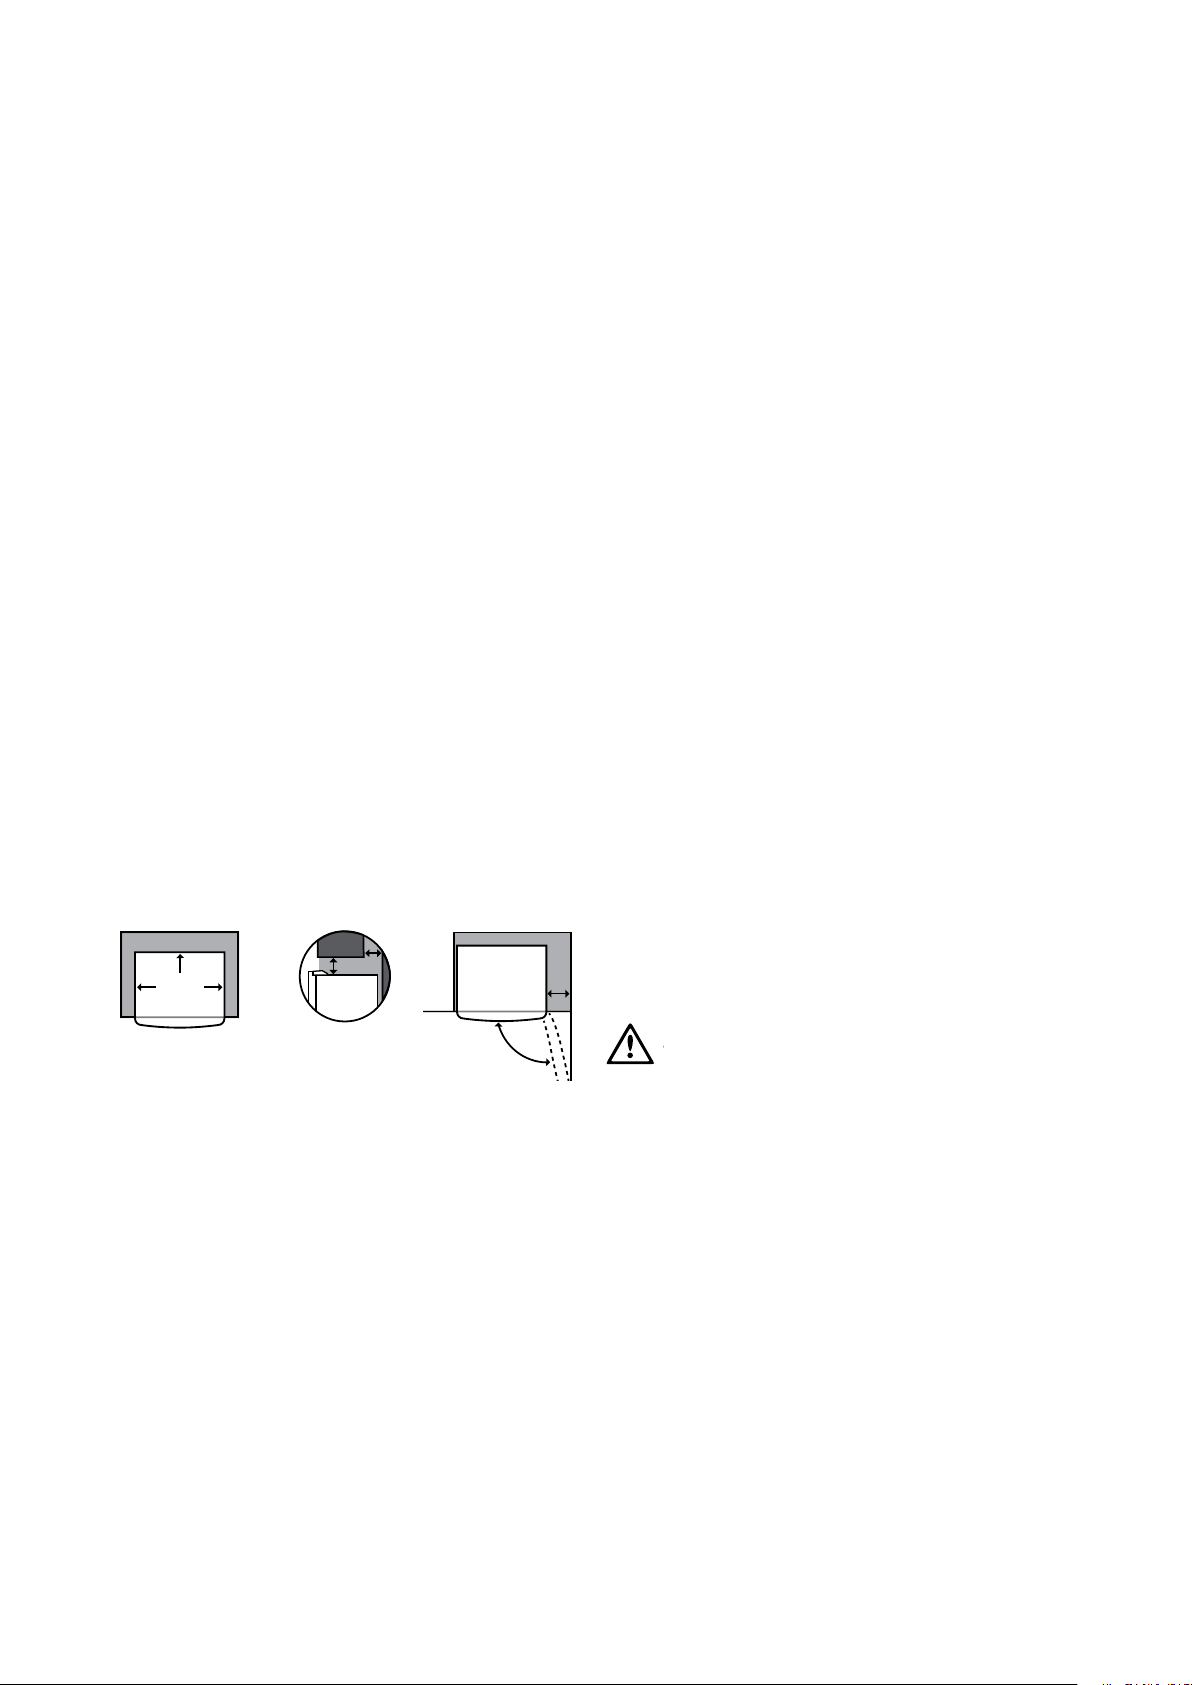
Installation clearances
• Allow a minimum of 30mm clearance on both sides
of the refrigerator.
• Allow a minimum of 50mm clearance at the back of
the refrigerator.
• Allow a minimum of 50mm (X) clearance above
the refrigerator.
• If you do not have above cupboard with a rear gap of
minimum 100mm (Y), recommended clearance at the
top of the refrigerator is 90mm (X).
• When positioned in a corner, the clearance must be
at least 300mm on the hinge side to allow the door
to open smoothly so that bins and shelves can be
removed easily. For easy removal of Crisper it is
recommended to remove bottle door bin first if
minimum clearance in the corner on hinge side is less
than 350mm.
X
350mm
50mm
Recommended
airspace
CABINET
DOOR
30mm
30mm
Y
NOTE: Refrigerator doors on all models are designed to sit
proud of cabinetry (not flush). In installations where both
sides and the rear of the refrigerator are not enclosed by
cabinetry e.g. the refrigerator is placed against a wall, the
clearance between the rear of the refrigerator and the wall
should not be greater than 75mm.
Initial start up
When in operation, the outside of the refrigerator will feel
warm, particularly at start up. This is normal.
Avoid placing food against air outlets as this will impede
air circulation.
A light frosting will occasionally occur on the cold interior
of the freezer if the door is opened frequently. This is
normal and the frost will disappear after a few days in
most climates.
INSTALLATION
Make sure that the freezer and fresh food doors are
fully closed after you have loaded or removed food
from these compartments. If the doors are left partly
opened, a heavy frost will coat the inside of the freezer.
If this occurs, remove the frost. Ensure that all doors are
properly closed to prevent frost from reappearing.
Your refrigerator uses energy efficient components that
may produce different noises from your old refrigerator.
Occasionally, a gurgling sound of refrigerant flowing or
sound of parts expanding or contracting can be heard.
These noises are quite normal.
Cleaning
Exterior
Clean the refrigerator with only lukewarm soapy water
and a soft cloth. Rinse with clean water and then wipe
the surface with a soft clean cloth to remove any soap
residue.
Interior
Clean the refrigerator interior regularly. Turn power off.
Wipe the interior with a soft cloth and lukewarm soapy
water. Thoroughly dry all surfaces and removable parts.
Avoid getting water on the refrigerator controls. If you
have taken out any removable parts, replace them and
switch on the power before re-stocking the refrigerator.
Wipe away thoroughly any food spills.
Keep door seals clean
Ensure that the door seals are always clean. Sticky food
and drinks can cause seals to adhere to the cabinet and
may cause the seal to tear when opening the door.
Wash seals with lukewarm soapy water. Rinse thoroughly
and dry.
WARNING
CAUTION
Never use hot water, solvents, commercial kitchen
cleaners, aerosol cleaners, metal polishers, caustic or
abrasive cleaners or scourers to clean the appliance
as they will damage it. Many commercially available
cleaning products and detergents contain solvents that
will damage your refrigerator. When cleaning, use only a
soft cloth and lukewarm soapy water.
Loading ...
Loading ...
Loading ...