Loading ...
Loading ...
Loading ...
GB
9
Start-up and use
The control panel described in this manual is only a
representative example: it may not exactly match the
panelon your appliance.
When using the touch control pannel panel:
Do not use gloves
Use a clean finger
Touch the glass smoothly
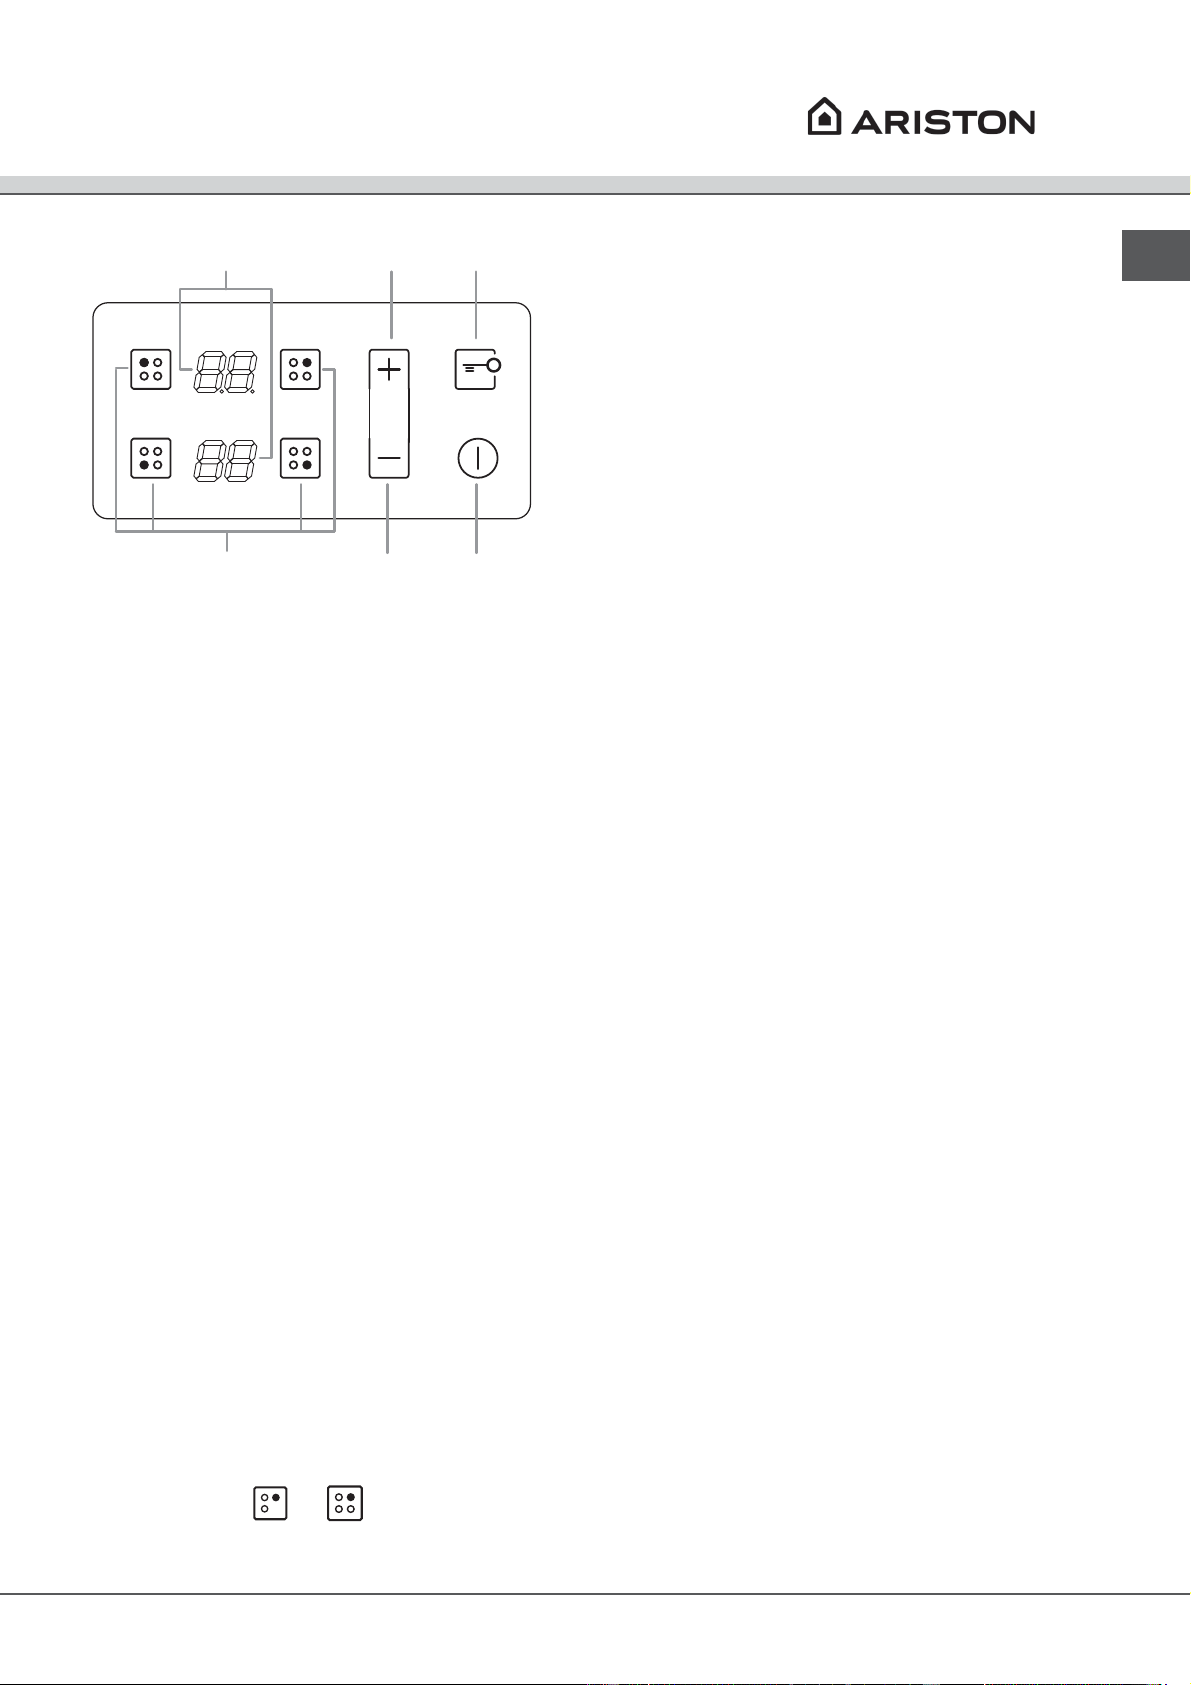
1 INCREASE POWER/ TIME button - controls the
power and time
2 REDUCE POWER/ TIME button controls the
power and time.
3 COOKING ZONE SELECTOR button is used to
select the desired cooking zone
4 ON/OFF button switches the appliance on and
off.
5 CONTROL PANEL LOCK button prevents
accidental changes to the hob settings and shows the
control panel has been locked.
6 HEATER DISPLAY -shows the cooking zone se-
lected, power level, preset time of cooking, booster
funcition activated.
! For detailed information on the control panel functions
refer to “Start-up and use” section.
! This product complies with the requirements of the
latest European Directive on the limitation of power
consumption of the standby mode.
If no operations are carried out for a period of 2
minutes, after the residual heat indicator lights turn
off and the fan stops (if present), the appliance
automatically switches to the .off mode..
The appliance resumes the operating mode once the
ON/OFF button is pressed.
! Depending on the number of heaters/cooking zones
on the hob the COOKING ZONE SELECTOR BUTTONS
may vary between and
1
234
56
Description of the appliance
Control panel
Start-up and use
Before connecting the appliance to the power supply,
make sure that:
• The appliance is earthed and the plug is com-
pliant with the law.
• The socket can withstand the maximum power
of the appliance, which is indicated on the data plate
located on the appliance itself.
• The voltage falls within the range of values indi-
cated on the data plate.
• The socket is compatible with the plug of the
appliance. If the socket is incompatible with the plug,
ask an authorised technician to replace it. Do not use
extension cords or multiple sockets.
! Once the appliance has been installed, the power
supply cable and the electrical socket must be easily
accessible.
! The cable must not be bent or compressed.
! The cable must be checked regularly and replaced by
authorised technicians only.
! The manufacturer declines any liability should these
safety measures not be observed.
! Do not remove or replace the power supply cable for
any reason. Its removal or replacement will void the war-
ranty and the CE marking. INDESIT does not assume lia-
bility for accidents or damage arising from replacement/
removal of the original power supply cable. Replacement
can only be accepted when carried out by personnel
authorised by INDESIT and using an original spare part.
! The glue applied on the gaskets leaves traces of
grease on the glass. Before using the appliance, we
recommend you remove these with a special non-abra-
sive cleaning product. During the first few hours of use
there may be a smell of rubber which will disappear very
quickly.
! A few seconds after the hob is connected to the elec-
tricity supply, a buzzer will sound. The hob may now be
switched on.
Types of noise during normal hob operation:
• Buzz: due to the vibration of the metallic parts
that make up the induction element and the pot; it is ge-
nerated by the electromagnetic field required for heating
and increases as the power of the induction element
increases.
• Soft whistle: heard when the pot placed on the
heating zone is empty; the noise disappears once food
or water is placed into the pot.
• Crackle: produced by the vibration of materials
on the bottom of the pot due to the flow of parasitic
currents caused by electromagnetic fields (induction);
can be more or less intense depending on the material
making up the bottom of the pot, and decreases as the
pot dimensions increase.
Loading ...
Loading ...
Loading ...