Loading ...
Loading ...
Loading ...
7Installation
Or:
If there are certain items you do not wish to
install, check the boxes before these items.
Select at least ‘WebCam Driver
SPC2050NC’ and ‘Philips CamSuite’.
Click the ‘Next’ button.
•The following software license agreement
appears.
Click on ‘Yes’ to continue the installation.
• The following screen appears.
Click ‘Next’ to continue.
• The ‘Reboot’ screen appears.
Select ‘Yes’, then click ‘Finish’ to restart your
PC / laptop.
• After installation, the ‘Philips CamSuite’ shortcut
‘ ’ will be visible in the Windows taskbar
(bottom right of your screen).
• In the ‘Philips CamSuite’ you can adjust the
WebCam settings. For this, refer to
6 ‘WebCam settings’.
You can now connect your WebCam.
9
8
7
6
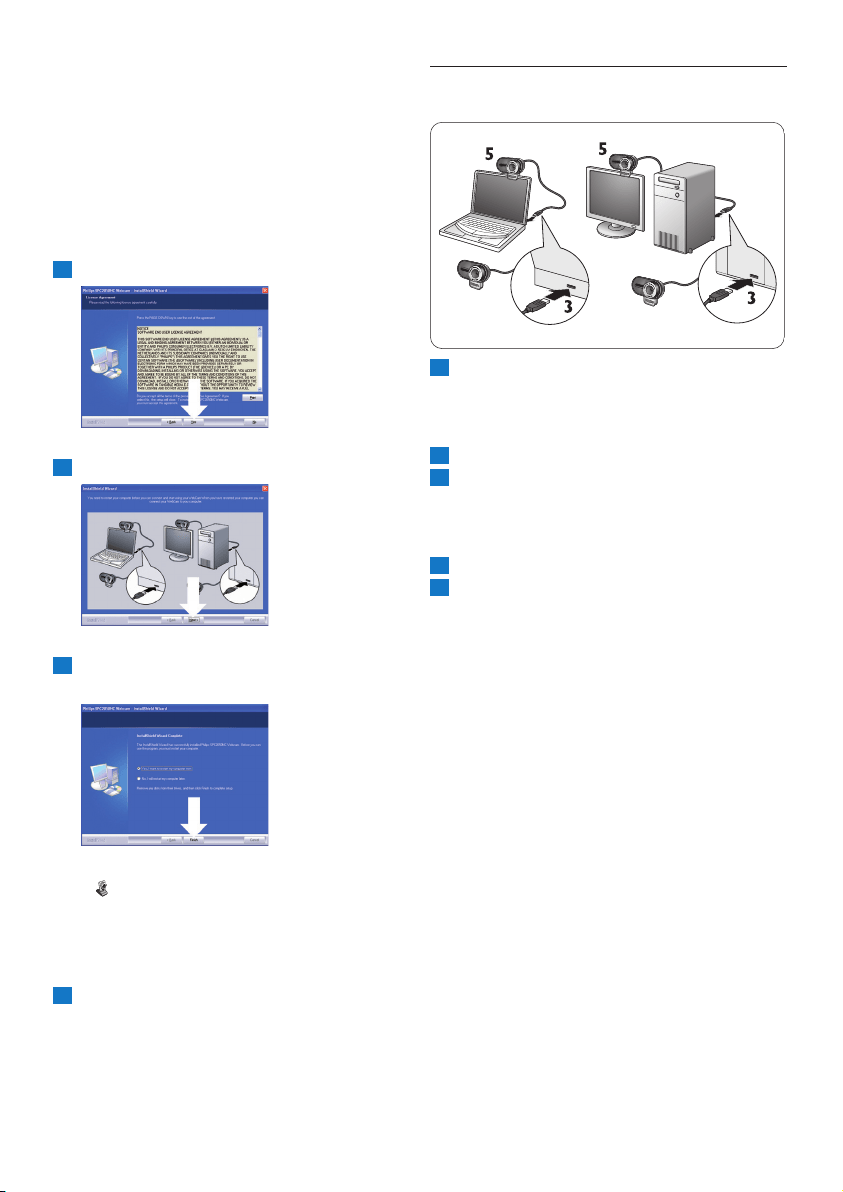
5.2 Connecting the WebCam to your
PC / laptop
Be sure to run the installation CD first,
before connecting the WebCam to the
PC / laptop. For this, refer to 5.1 ‘Installing
the WebCam software’.
Turn on the PC / laptop.
Connect the USB connector of the USB
cable to the USB port of the PC / laptop.
• The WebCam will now derive its power
from the PC / laptop.
Aim the webcam as required.
Use the clamp to attach the WebCam to
your flat PC monitor or laptop screen.
5
4
3
2
1
Loading ...
Loading ...
Loading ...