Loading ...
Loading ...
Loading ...
6 7
1-800-798-7398
sharkclean.com
English
English
Getting Started
When assembling your Steam Mop there may be a little water in or around the water tank.
This is because we test all our Steam Mops before you buy them, so you get a quality Shark
®
Genius
™
Steam Pocket
®
Mop System.
a Steam Mop Handle
b Quick-Release Cord Holder
c Cord Management Clip
d Filling Flask
e Pad Release Button
f Steam Mop Body
g Water Tank Lid
h Steam Control Button
i Water Tank
j Secondary Release Buttons
k Steam Blaster
™
Nozzle
l Genius
™
Mop Head
m Dirt Grip
™
Pad
n Mop Head Release Button
Assembling Your Steam Pocket
®
Mop
WARNING: ALWAYS make sure the Steam
Mop is UNPLUGGED when not in use. NEVER
fill the Steam Mop or attach the mop head
when the Steam Mop is plugged into an
electrical outlet. Unplug from the electrical
outlet and allow to cool before you fill
the mop, or attach or remove the head.
To prolong the life of your Steam Mop, we
recommend using distilled water. Make sure
you add only water to the tank. Chemicals or
cleaning solutions (including vinegar) may
damage the Steam Mop and could be unsafe
for you and your family.
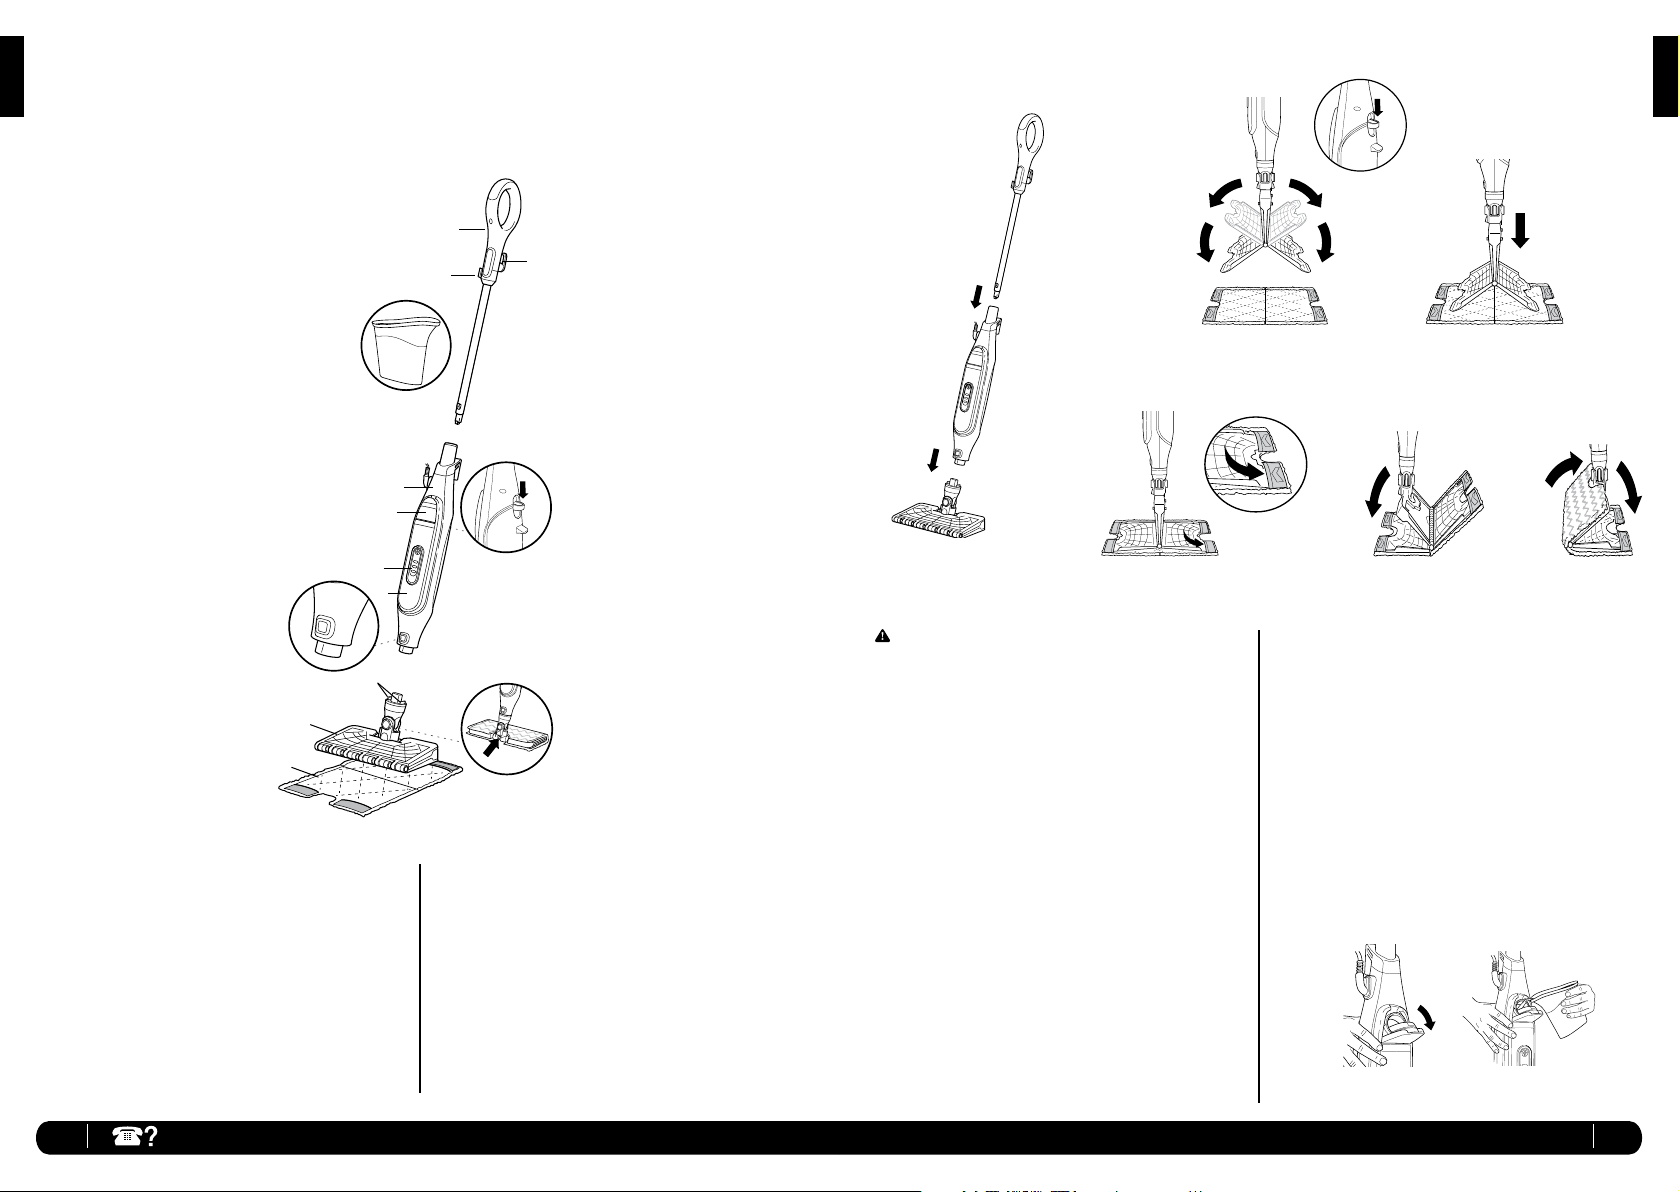
STEAM MOP ASSEMBLY
1 Insert the mop handle into the Steam Mop
body. Push the mop handle in until it clicks
into place. (fig. 1)
2 Slide the Genius
™
Mop Head into the Steam
Mop body. Push until it clicks securely into
place. (fig. 1) To detach the Genius Mop
Head, press the release button and slide o.
3 To attach the Dirt Grip
™
pad, spread the
pad on the floor with the pocket side up.
Center the Genius Mop Head above the
pad, then press the pad release button on
the back of the Steam Mop body (fig. 2a).
Both sides of the mop head will drop open
(fig. 2b). Slip the mop head’s four corner
tabs into the four corner pockets of the
pad (fig. 3 and fig. 4). Gently press one
side of the mop head to the floor until that
side clicks into place (fig. 5). Repeat on
the other side (fig. 6).
4 Pull down on the water tank lid to open
(fig. 7).
5 Use the filling flask to pour water into the
tank (fig. 8). Water can be poured into
the tank directly. DO NOT overfill past the
water line on the fill flask. Press the water
tank lid firmly to close it.
fig. 1
fig. 7
fig. 8
a
c
d
e
f
g
h
i
l
n
j
k
b
fig. 3fig. 2b
fig. 2a
fig. 5 fig. 6
fig. 4
Loading ...
Loading ...
Loading ...