Owner Manual Drip Coffee Maker
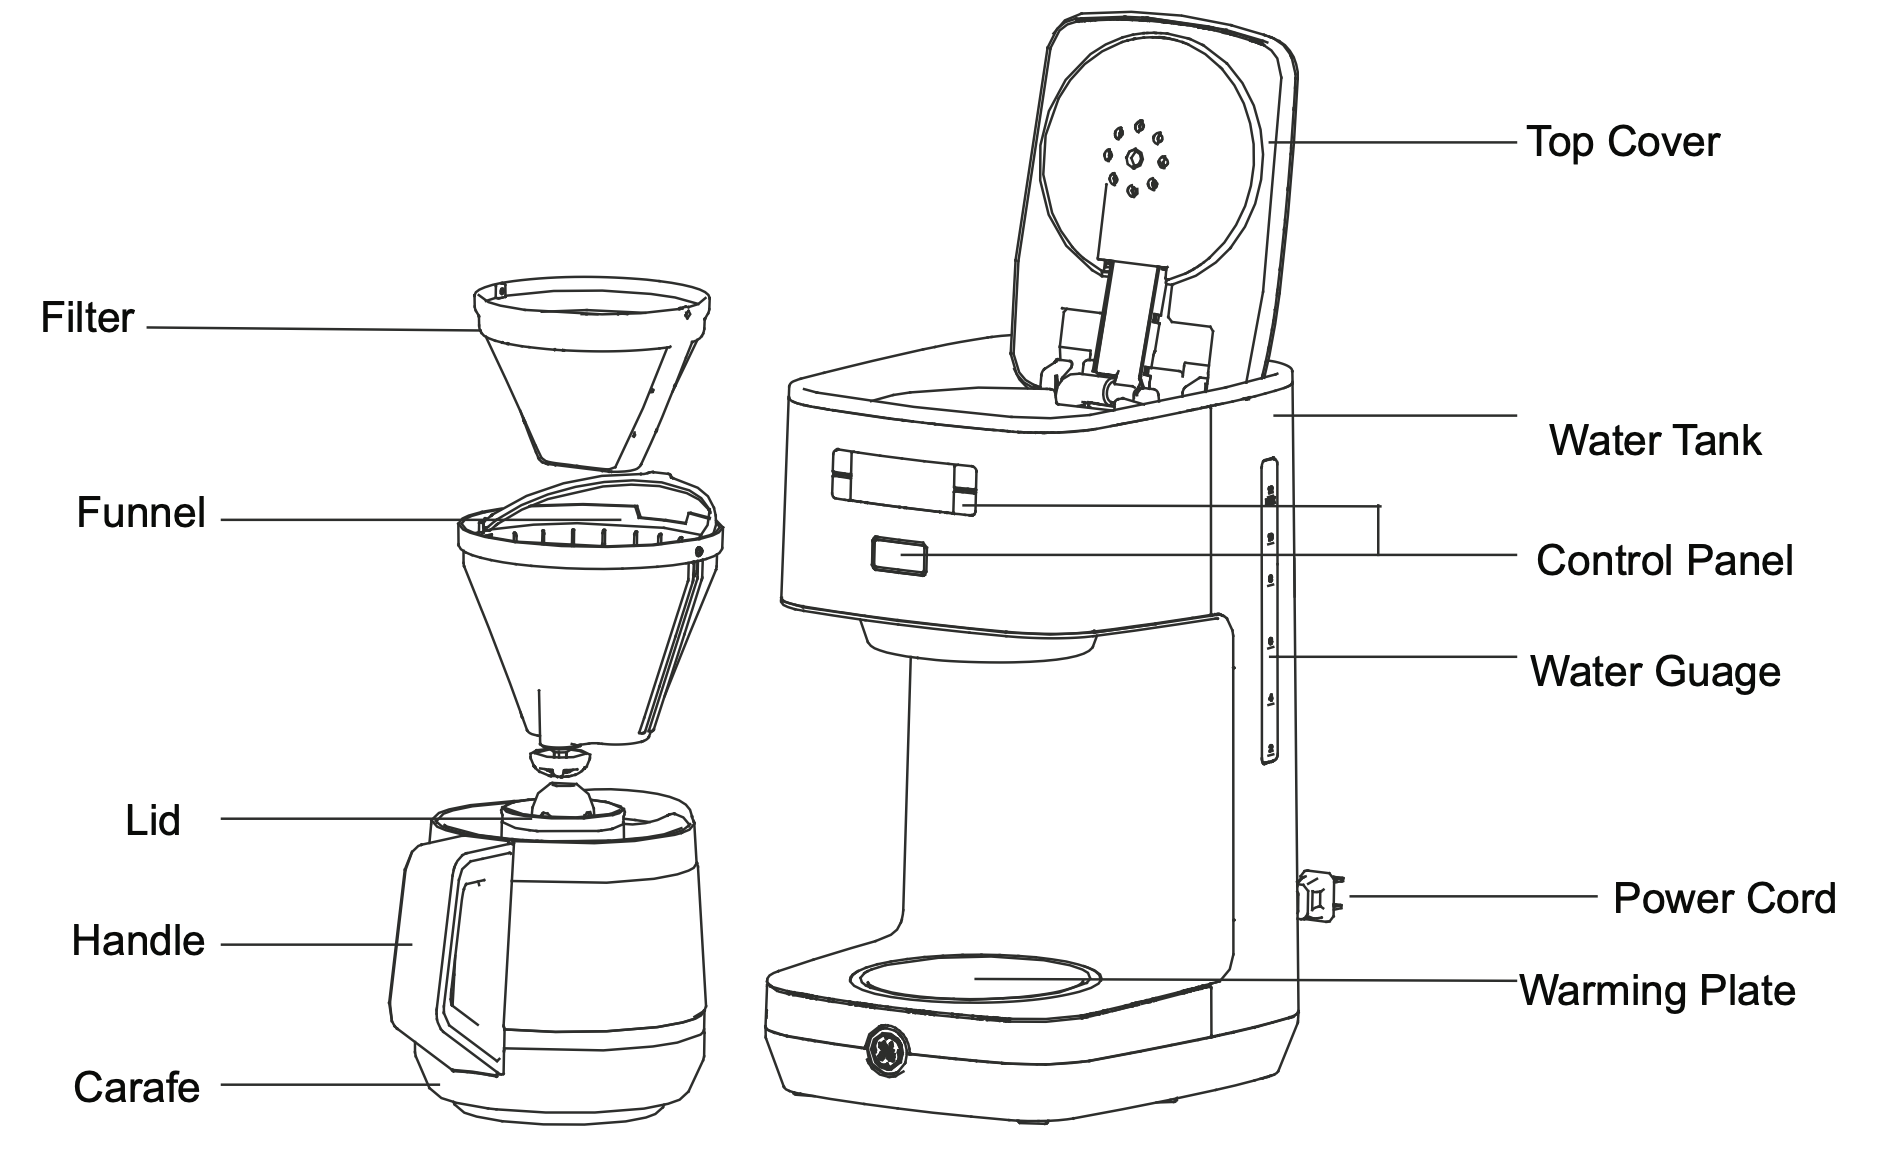
Parts Included
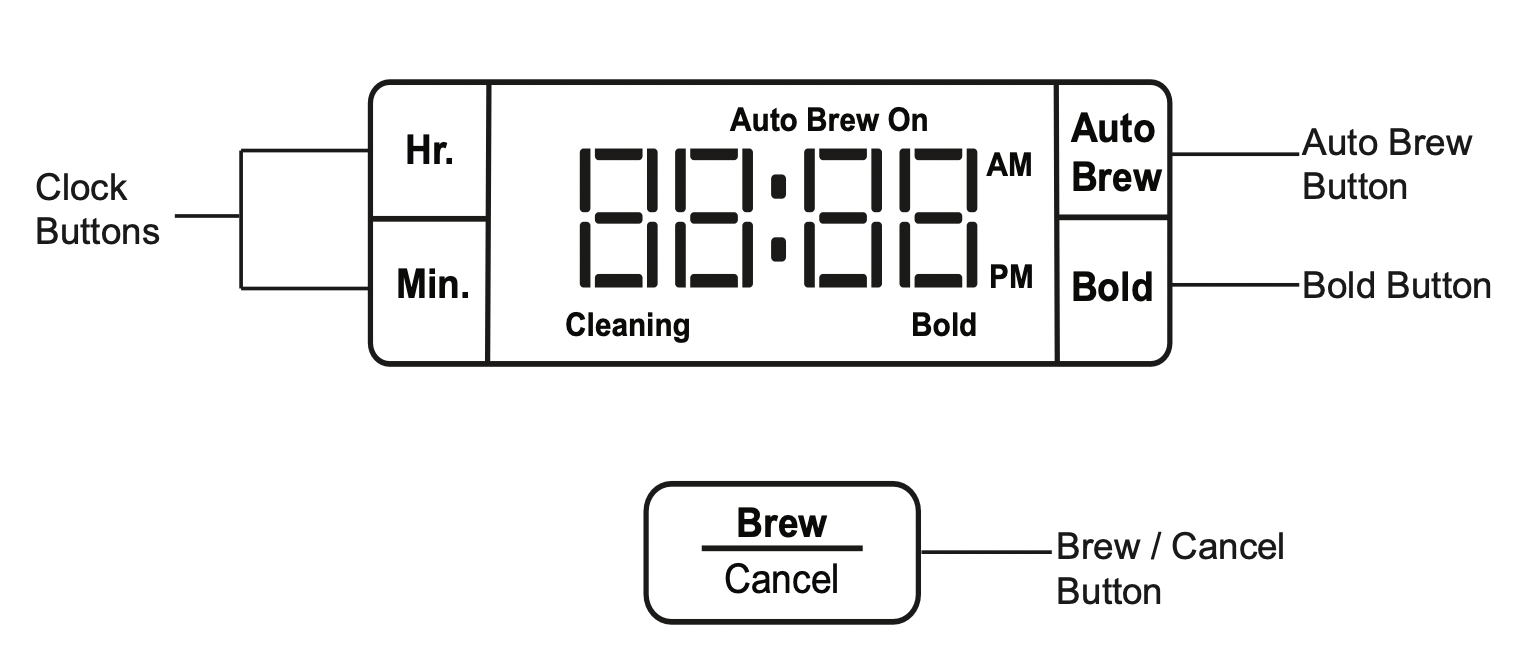
Controls
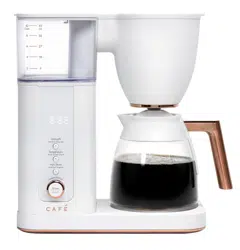
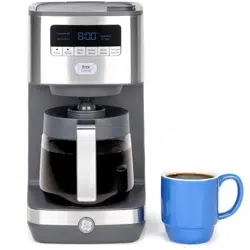
Using the Glass Carafe Drip Coffee Maker
Before Use
- For the first time use, remove packing material and clean the main unit/accessories.
- Clean the main unit/accessories when you have not used for a longtime.
How to Use
- Lift to open the Coffee Maker lid. Fill carafe with cold tap water and pour into water reservoir at the back of the unit.The stepped water level indicator can be easily viewed inside unit.
IMPORTANT: Before brewing, always check to make sure water level is past the MIN line and add water if needed. Never exceed the MAX fill line.
NOTE: The amount of brewed coffee will always be less than the amount of water placed into the water reservoir; as much as 10% is absorbed by coffee grounds and filter.
- Place empty carafe on the warming plate.
- Place the permanent filter in the removable filter holder. Measure 2 level tablespoons of drip or regular grind coffee for each cup of coffee desired. For stronger or milder coffee, adjust amount of coffee to suit your taste.
- Drop the filter holder down into the housing. Close the lid.
- Plug Coffee Maker into a 120V AC electrical wall outlet.
- Connect the appliance with the power source of 120V 60Hz, then open the top lid and fill the water tank with maximum amount of room-temperature water (20-25°C), and then close the top lid.
Connect the appliance with the power source of 120V 60Hz, then open the top lid and fill the water tank with maximum amount of room-temperature water (20-25°C), and then close the top lid.
After power on, press "BREW/CANCEL" key once, the indicator illuminates in white, the relay functions, at that time, the heating element starts to work, which indicates the appliance starts to brew coffee. The Brew icon will appear on the LCD display.
Press "BREW/CANCEL" once, the relay disconnects, the white indicator turns off, which means the appliance stops brewing coffee.
After boiling away the water in the water tank, the thermostat functions and the appliance enters into the keep-warm mode, after keeping warm for 2 hours, the indicator turns off, and the appliance enters into the standby mode.
Connect the appliance with the power source of 120V 60Hz, the LCD display shows 12:00 AM (":" does not blink). The appliance enters into the clock-setting mode. Press “HR" and “MIN" keys to set the current time. If there is not any operation within 15 seconds, the current time shown in the LCD display will be confirmed and the appliance will enter into the standby mode.
Set the clock
A. Shortly press "HR" key once, one hour can be changed.Hold and press "HR" key, the “hour" can be increased continuously.
B. Shortly press “MIN" key once, one minute can be changed.Hold and press “MIN" key, the "minute" can be increased continuously.
C. After setting the time, press "BREW/CANCEL", "Auto Brew" or “Bold" to confirm the set current time, alternatively, do not operate the appliance for 15 seconds and then the set current time is confirmed.
When the appliance is under the standby mode, hold and press "HR" or "MIN" key for more than 3 seconds to enter into the clock setting mode.
Function selection:
A. Regular coffee: Press the "Brew/Cancel" key once, the “Regular coffee" is selected, and the white indicator turns on, the appliance starts to brew coffee. After boiling away the water in the water tank, the thermostat functions and the appliance enters into the keep-warm mode and the white indicator off. After keeping warm for 2 hours, the appliance turns off automatically.
B. Bold coffee: Press "Bold" key, the LCD display shows "Bold" and the "Bold coffee" mode is selected. Press the "Brew/Cancel" key once, the white indicator turns on, the appliance starts to brew strong coffee. After boiling away the water in the water tank, the thermostat functions and the appliance enters into the keep-warm mode. The bold function can only select in the standby mode or the Auto-Brew mode.
C. Press and hold the "Brew/Cancel" button for 3 seconds to enter "Clean" mode at any time. 80 cycles is not required to enter the clean mode. Once clean mode is activated, the heater will turn on. "Clean" function: When the appliance has worked for 80 cycles cumulatively, the LCD display shows "Cleaning" to remind the user that the appliance needs to be cleaned. Hold and press the "BREW/CANCEL" key for more than 3 seconds in any status, the white indicator turns on, and the cleaning program is started, the heating elements works until the water in the water tank is boiled away. Then the appliance will enter into the standby mode. The "Cleaning" shown in the LCD display can only be canceled after the de-scaling is finished.
D. Under the keep-warm condition, press "BREW/CANCEL" key to cancel the keep-warm function, at that time, the LCD display shows the current time and the appliance enters into the standby mode.
"Auto Brew" function
A. Press "Auto Brew" key, the LCD display shows "Auto Brew on" and "AM 1:00",then set the auto-brew time by following the operation of setting the clock. After finish setting, press "Auto Brew "key, the display shows "Auto Brew on", and the auto-brew time stops blinking, then the appliance enters into the auto-brew mode, after 5 seconds, the appliance goes back to the main interface, at that time, the LCD display shows "Auto Brew on" and current time, which means the auto-brew function is confirmed. The LCD display will turn off 1 minute after the coffee maker enters the warming state.
B. Press "Bold" key, the LCD display shows "Auto Brew on", "Bold" and the current time, which means the "Auto Brew" function for "Bold coffee" mode is confirmed.
C. When the auto-brew time is reached, the white indicator of "BREW/CANCEL" key lights up, and the coffee-brewing function is activated.
D. Can press "Auto Brew" key to cancel the auto-brew function when the appliance works under the auto-brew mode. After the auto-brew function is confirmed, press "BREW/CANCEL" key, the appliance will start to brew coffee and the current auto-brew function is canceled.
7. Press the START button.The Coffee Maker will begin the brew cycle.
NOTE: To interrupt the brewing process at any time, press the BREW button; then remove plug from wall outlet.
8. Turn off the unit: press and hold START button, you can stop brewing coffee, it will display keep warm time, which count from 0:00, after 1 min the display will off. The appliance will cut off power automatically and enter sleep mode after two hours.
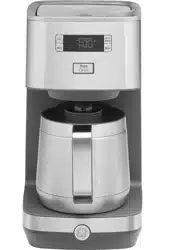
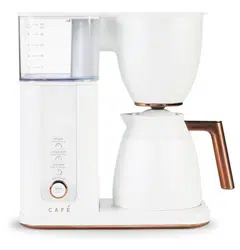
Using the Stainless Carafe Drip Coffee Maker
Before Use
For the first time use, remove packing material and clean the main unit/accessories.
Clean the main unit/accessories when you have not used for a long time.
How to Use
- Lift to open the Coffee Maker lid. Fill carafe with cold tap water and pour into water reservoir at the back of the unit. The stepped water level indicator can be easily viewed inside unit.
IMPORTANT: Before brewing, always check to make sure water level is past the MIN line and add water if needed. Never exceed the MAX fill line.
NOTE: The amount of brewed coffee will always be less than the amount of water placed into the water reservoir; as much as 10% is absorbed by coffee grounds and filter.
- Never place empty carafe on the warming plate.
- Place the permanent filter in the removable filter holder. Measure 2 level tablespoons of drip or regular grind coffee for each cup of coffee desired. For stronger or milder coffee, adjust amount of coffee to suit your taste.
- Drop the filter holder down into the housing. Close the lid.
- Plug Coffee Maker into a 120V AC electrical wall outlet.
- Connect the appliance with the power source of 120V 60Hz, then open the top lid and fill the water tank with maximum amount of room-temperature water (20-25°C),and then close the top lid.
Connect the appliance with the power source of 120V 60Hz, then open the top lid and fill the water tank with maximum amount of room-temperature water (20-25°C), and then close the top lid.
After power on, press "BREW/CANCEL" key once, the indicator illuminates in white, the relay functions, at that time, the heating element starts to work, which indicates the appliance starts to brew coffee. Press "BREW/CANCEL" once, the relay disconnects, the white indicator turns off, which means the appliance stops brewing coffee. After boiling away the water in the water tank. The indicator turns off and the appliance enters into the standby mode.
Connect the appliance with the power source of 120V 60Hz, the LCD display shows 12:00 AM (":" does not blink). The appliance enters into the clock-setting mode. Press "HR" and "MIN" keys to set the current time. If there is not any operation within 15 seconds, the current time shown in the LCD display will be confirmed and the appliance will enter into the standby mode.
Set the clock
A. Shortly press “HR" key once, one hour can be changed. Hold and press “HR” key, the "hour" can be increased continuously.
B. Shortly press "MIN" key once, one minute can be changed. Hold and press "MIN" key, the "minute" can be increased continuously.
C. After setting the time, press "BREW/CANCEL", "Auto Brew" or "Bold" to confirm the set current time, alternatively, do not operate the appliance for 15 seconds and then the set current time is confirmed.
When the appliance is under the standby mode, hold and press "HR" or "MIN" key for more than 3 seconds to enter into the clock setting mode.
Function selection:
A. Regular coffee: Press the "Brew/Cancel" key once, the "Regular coffee" is selected, and the white indicator turns on, the appliance starts to brew coffee. After boiling away the water in the water tank, the white indicator off. Press "Bold" key under the "Regular coffee" mode, the LCD display will show "Bold" and the "Bold coffee" mode is selected.
B. Bold coffee: Press "Bold" key, the LCD display shows “Bold"and the "Bold coffee" mode is selected.Press the "Brew/Cancel" key once, the white indicator turns on, the appliance starts to brew strong coffee.The bold function can only select in the standby mode or the Auto-Brew mode.
C. "Clean" function: When the appliance has worked for 80 cycles cumulatively, the LCD display shows "Cleaning" to remind the user that the appliance needs to be cleaned. Hold and press the "BREW/CANCEL" key for more than 3 seconds in any status, the white indicator turns on, and the cleaning program is started, the heating elements works until the water in the water tank is boiled away, then the appliance will enter into the standby mode. The "Cleaning" shown in the LCD display can only be canceled after the descaling is finished.
"Auto Brew"function
A. Press "Auto Brew" key, the LCD display shows "Auto Brew on" and "AM 1:00", then set the auto-brew time by following the operation of setting the clock. After finish setting, press "Auto Brew" key, the display shows "Auto Brew on", and the auto-brew time stops blinking, then the appliance enters into the auto-brew mode, after 5 seconds, the appliance goes back to the main interface, at that time, the LCD display shows "Auto Brew on" and current time, which means the auto-brew function is confirmed.
B. Press "Bold" key, the LCD display shows "Auto Brew on", "Bold" and the current time, which means the "Auto Brew" function for "Bold coffee" mode is confirmed.
C. When the auto-brew time is reached, the white indicator of "BREW/CANCEL" key lights up, and the coffee-brewing function is activated.
D. Can press "Auto Brew" key to cancel the auto-brew function when the appliance works under the auto-brew mode. After the auto-brew function is confirmed, press "BREW/CANCEL" key, the appliance will start to brew coffee and the current auto-brew function is canceled.
7. Press the START button. The Coffee Maker will begin the brew cycle.
NOTE: To interrupt the brewing process at any time, press theBREW button; then remove plug from wall outlet.
8. Turn off the unit: press and hold START button, you can stop brewing coffee.
Care and Cleaning
Be sure to unplug this appliance before cleaning. To protect against electrical shock, do not immerse cord, plug or unit in water or liquid. After each use, always make sure plug is first removed from wall outlet.
- Clean all detachable parts after each use in hot sudsy water.
- Wipe the exterior surface of unit with a soft, damp cloth to remove stains.
- Water droplets may buildup in the above area of the funnel and drip onto the product base during brewing. To control the dripping, wipe off the area with a clean, dry cloth after each use.
- Replace all parts and keep for next use.
Removing Mineral Deposits
To keep your coffee maker operating efficiently, periodically you should clean away the mineral deposits left by the water according to the water quality in your area and the use frequency, we recommend removing mineral deposits as follows:
- Fill the tank with water and descaler to the max level as indicated on water gauge (the scale of water and descaler is 4:1, the detail refers to the instruction of descaler. Please use “household descaler”, you may also use the citric acid instead of the descaler (the one hundred parts of water and three parts of citric acid).
- Place the serving cup under the brew basket.
- Make ensure funnel are assembled in place.
- Switch on the appliance and allow it to “brew” de-scaling solution.
- After “brew” one-cup solution, switch off the appliance.
- Leave the solution stay for 15 minutes and repeat step 3-5.
- Switch on the appliance and run off the solution until the water tank is completely empty.
- Rinse by operating the appliance with water at least 3 times.
Hints for Great-Tasting Coffee
- A clean coffee maker is essential for making great-tasting coffee. Regularly clean the coffee maker as specified in the “CLEANING AND MAINTENANCE” section. Always use fresh, cold water in the coffee maker.
- Store unused coffee powder in a cool, dry place. After opening a package of coffee powder, reseal it tightly and store it in a refrigerator to maintain its freshness.
- For an optimum coffee taste, buy whole coffee beans and finely grind them just before brewing.
- Do not reuse coffee powder since this will greatly reduce the coffee’ flavor. Reheating coffee is not recommended as coffee is at its peak flavor immediately after brewing.
- Clean the coffee maker when over-extraction causes oiliness. Small oil droplets on the surface of brewed, black coffee are due to the extraction of oil from the coffee powder.
- Oiliness may occur more frequently if heavily roasted coffees are used.
Any other servicing should be performed by an authorized service representative.