Loading ...
Loading ...
Loading ...
11
INTRODUCTION
Before you start
1 Make sure that the anti-tip bracket at the right rear of the cooker has been properly
installed.
2 Make sure that the installer has completed the ‘Final checklist’ in the Installation
instructions.
3 Read this guide, taking special note of the ‘Safety and warnings’ section.
4 Remove all accessories and packaging from the oven and cooktop. Recycle items that
you can. If any adhesive residue is left on surfaces, remove this using dishwashing liquid
on a soft cloth. Do not use any harsh or abrasive cleaners.
5 Make sure you follow the instructions under ‘First use’ before using your cooker
for cooking.
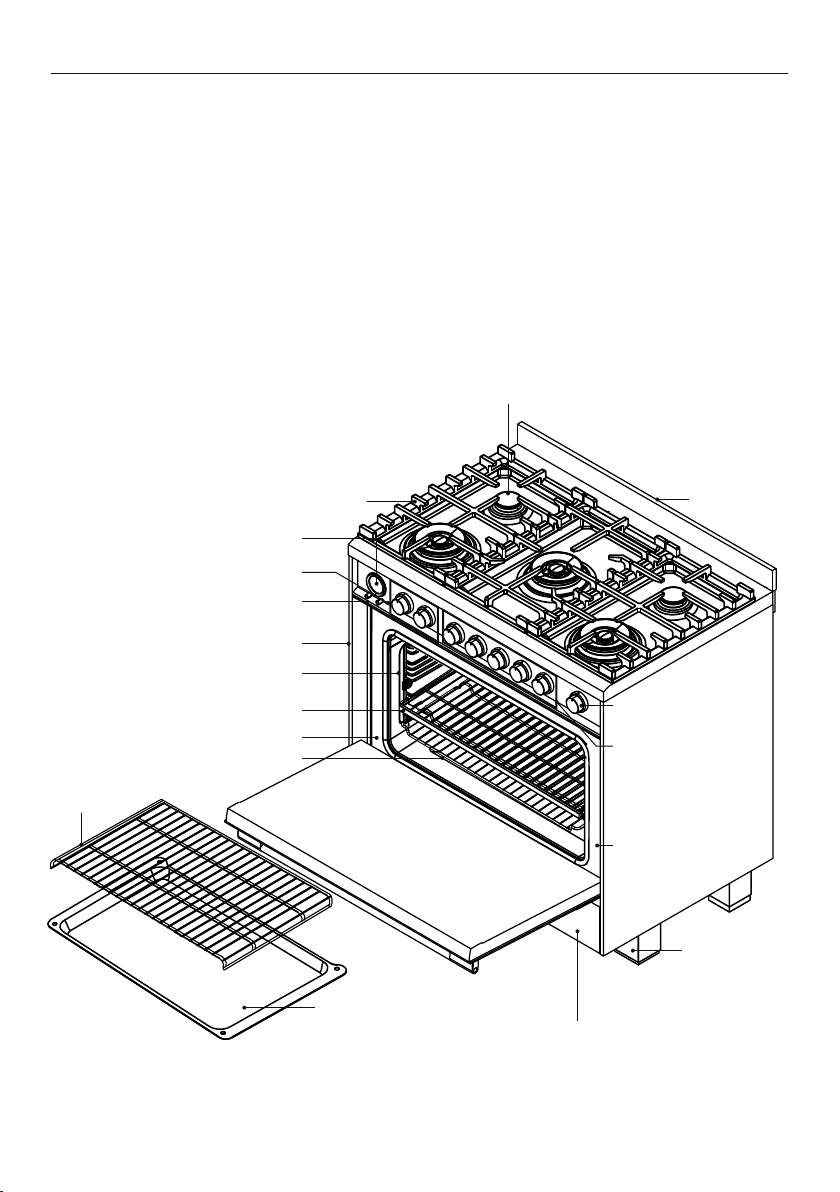
Overview
Features may vary.
Control panel
Oven frame
Oven door gasket
Step down wire shelf
Oven function and
temperature dials
Foot (cover)
Warming drawer
Grill rack
Roasting dish
Full extension sliding shelf
Label with model
and serial numbers
Warming drawer
control
Side racks
Back trim
Burner
Burner grates
Clock display and controls
Cooktop
burner dials
Loading ...
Loading ...
Loading ...