Loading ...
Loading ...
Loading ...
Replacing the Presser Foot
GETTING READY
21
1
Replacing the presser foot
a
Press (Needle position button) once or twice to
raise the needle.
b
Turn off the machine.
c
Raise the presser foot lever.
d
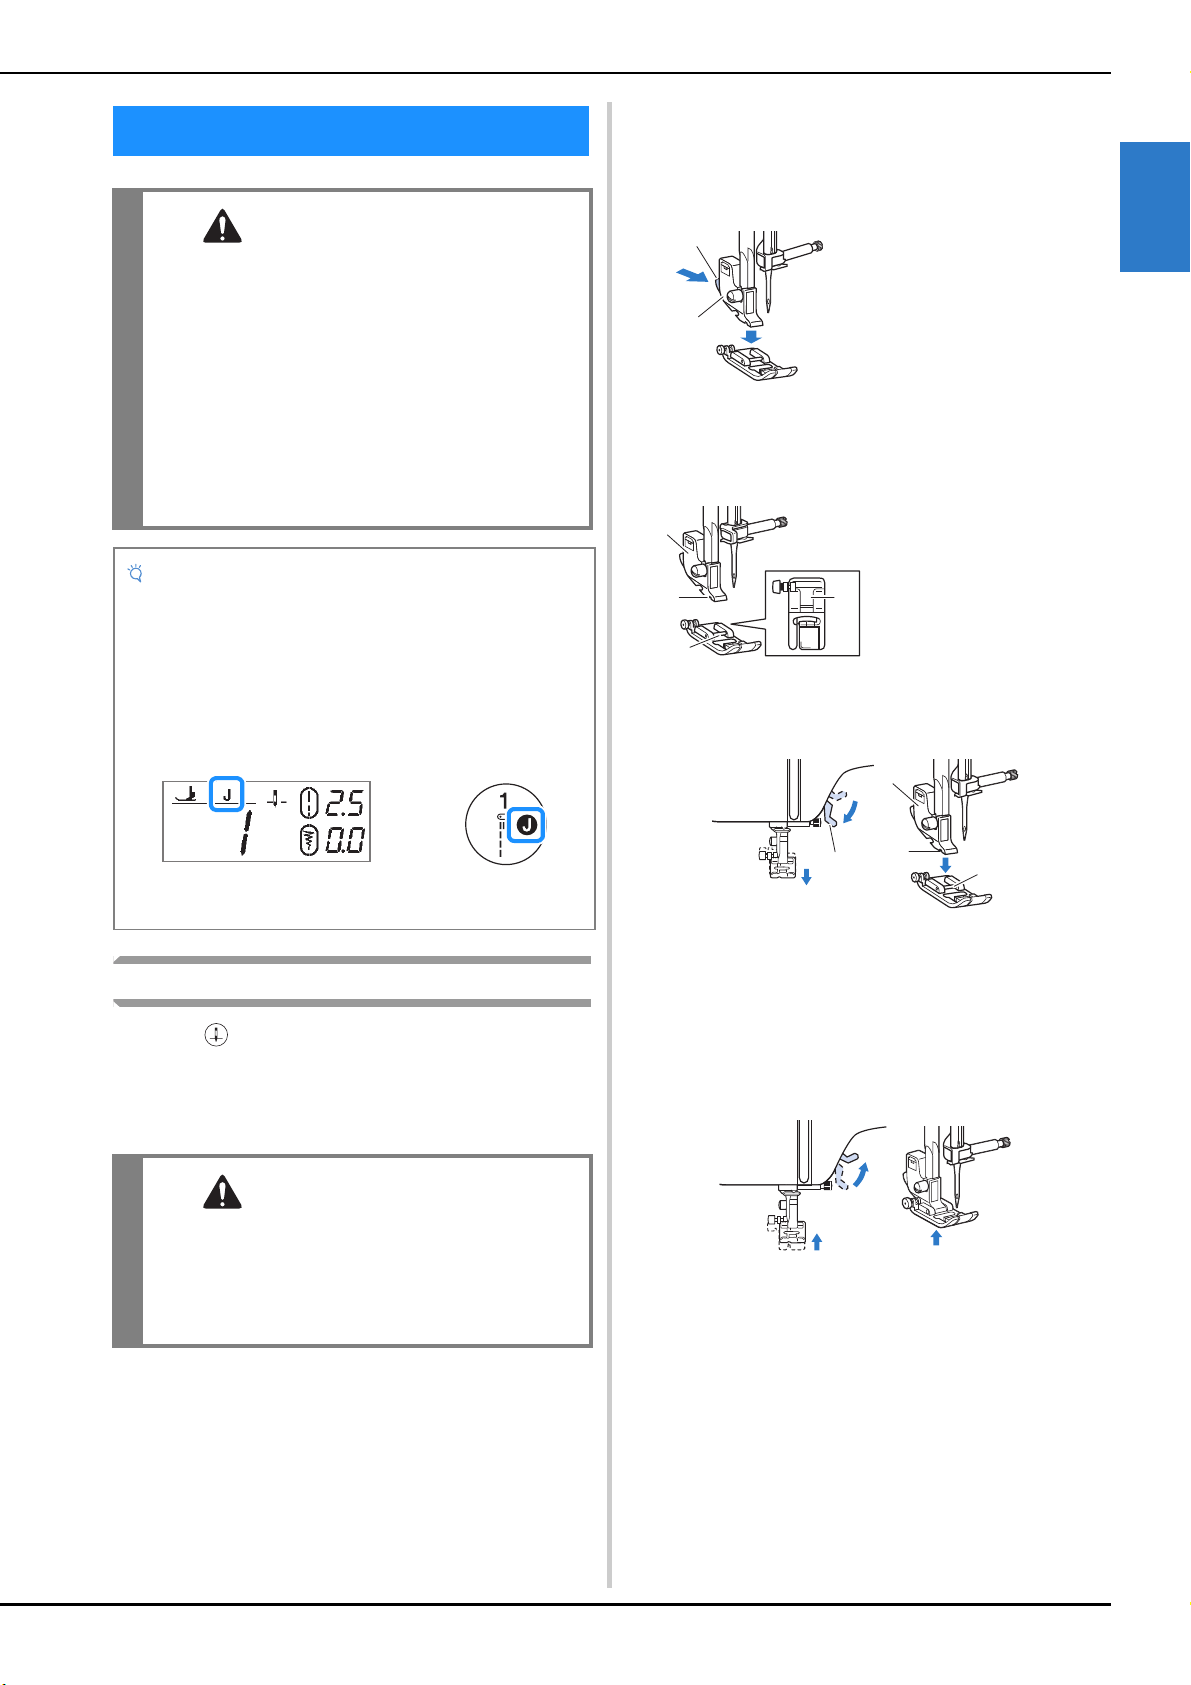
Press the black button at the back of the presser foot
holder in order to remove the presser foot.
e
Place the appropriate presser foot below the presser
foot holder so that the presser foot pin is aligned with
the notch in the presser foot holder.
f
Slowly lower the presser foot lever so that the presser
foot pin snaps into the notch in the presser foot holder.
1 Presser foot lever
2 Presser foot holder
3 Notch in the presser foot holder
4 Presser foot pin
The presser foot is attached.
g
Raise the presser foot lever to check that the presser
foot is securely attached.
h
Turn on the machine.
Replacing the Presser Foot
CAUTION
• Use the appropriate presser foot for the type
of stitch that you wish to sew, otherwise the
needle may hit the presser foot, causing the
needle to bend or break. For details on the
presser foot that should be used with the
selected stitch, refer to “Stitch Chart” on
page 33.
• Only use presser feet designed specifically for
this machine. Use of any other presser foot
may result in injuries or damage to the
machine.
Note
• When a stitch is selected, the symbol for the presser
foot that should be used is shown in the LCD or the
stitch pattern display window. Check that the
appropriate presser foot is attached before starting to
sew. If the wrong presser foot is attached, attach the
appropriate presser foot.
The position where the symbol for the presser foot is
shown differs depending on the model.
* The symbols for certain presser feet, such as zipper foot “I”
and the quilting foot, may not appear in the screen.
CAUTION
• Before replacing the presser foot, be sure to
turn off the machine, otherwise injuries may
occur if the “Start/Stop” button or any other
button is pressed and the machine starts
operating.
/
1 Black button
2 Presser foot holder
1 Presser foot holder
2 Notch in the presser foot
holder
3 Presser foot pin
4 Presser foot type
a
b
J
1
4
2
3
a
b
c
d
Loading ...
Loading ...
Loading ...