Loading ...
Loading ...
Loading ...
15
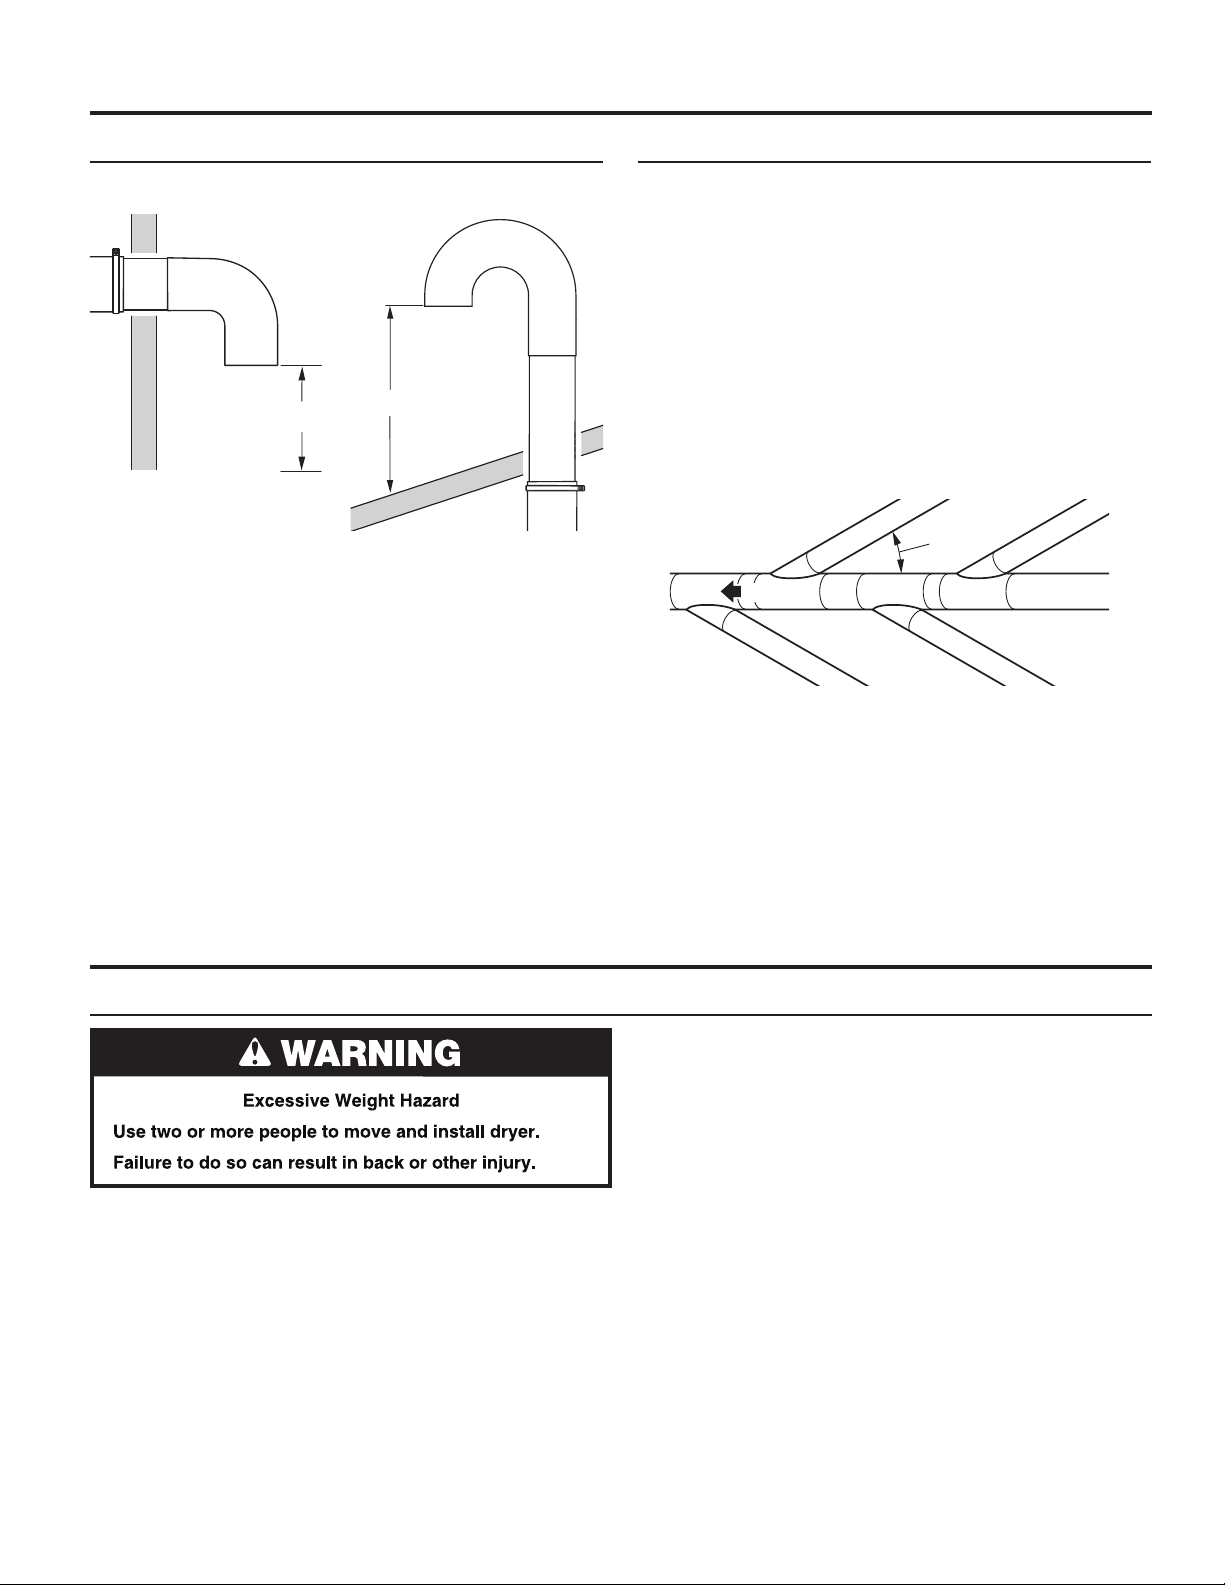
The outside end of main vent should have a sweep elbow directed
downward.
If main vent travels vertically through the roof, rather than through
wall, install a 180° sweep elbow on end of vent at least 2 ft.
(610 mm) above surface of roof.
The opening in wall or roof shall have a diameter 1⁄2" (13 mm)
larger than vent diameter. Vent should be centered in opening.
Do not install screening over end of vent for best performance.
12" min.
(305 mm)*
A main vent can be used for venting a group of dryers. The main
vent should be sized to remove 5663 l/min. (200 CFM) of air per
dryer. Large-capacity lint screens of proper design may be used in
main vent if checked and cleaned frequently. The room where the
dryers are located should have make-up air equal to or greater than
CFM of all the dryers in the room.
Back-draft Damper Kit, Part No. 3391910, is available from your
distributor and should be installed in the vent of each dryer to
keep exhausted air from returning into dryers and to keep exhaust
in balance within main vent. Unobstructed return air openings are
required.
Each vent should enter the main vent at an angle pointing in
the direction of the airflow. Vents entering from the opposite side
should be staggered to reduce the exhausted air from interfering
with the other vents.
The maximum angle of each vent entering the main vent should be
no more than 30°.
Keep air openings free of dry cleaning fluid fumes. Fumes create
acids which, when drawn through the dryer heating units, can
damage dryers and items being dried.
A clean-out cover should be located on the main vent for periodic
cleaning of the vent system.
If an Exhaust Hood Cannot be Used Multiple Dryer Venting
DRYER VENTING REQUIREMENTS
24" min.
(610 mm)
* Minimum clearance above any
accumulation of snow, ice, or
debris such as leaves
1. Remove red cap from gas pipe on back of dryer.
2. Connect gas supply to dryer. Use a pipe thread compound
approved for the type of gas supplied. If flexible metal tubing
is used, be certain there are no kinks.
If necessary for service, open the toe panel. Use a putty knife
to press on the toe panel locks located at the upper corners
of the toe panel. Pull downward on the toe panel to open.
Toe panel is hinged at the bottom.
3. Open the shut-off valve in the gas supply line and make sure
the dryer has its own gas supply opened.
4. Test all connections by brushing on an approved noncorrosive
leak-detection solution. Bubbles will show a leak. Correct any
leaks found.
Make Gas Connection
GAS SUPPLY CONNECTION
30˚ max.
air ow
Air flow
Loading ...
Loading ...
Loading ...