Loading ...
Loading ...
Loading ...
5
Adapting the hob to different types of gas
To adapt the Hob for use with different types of gas, carry out the following instructions:
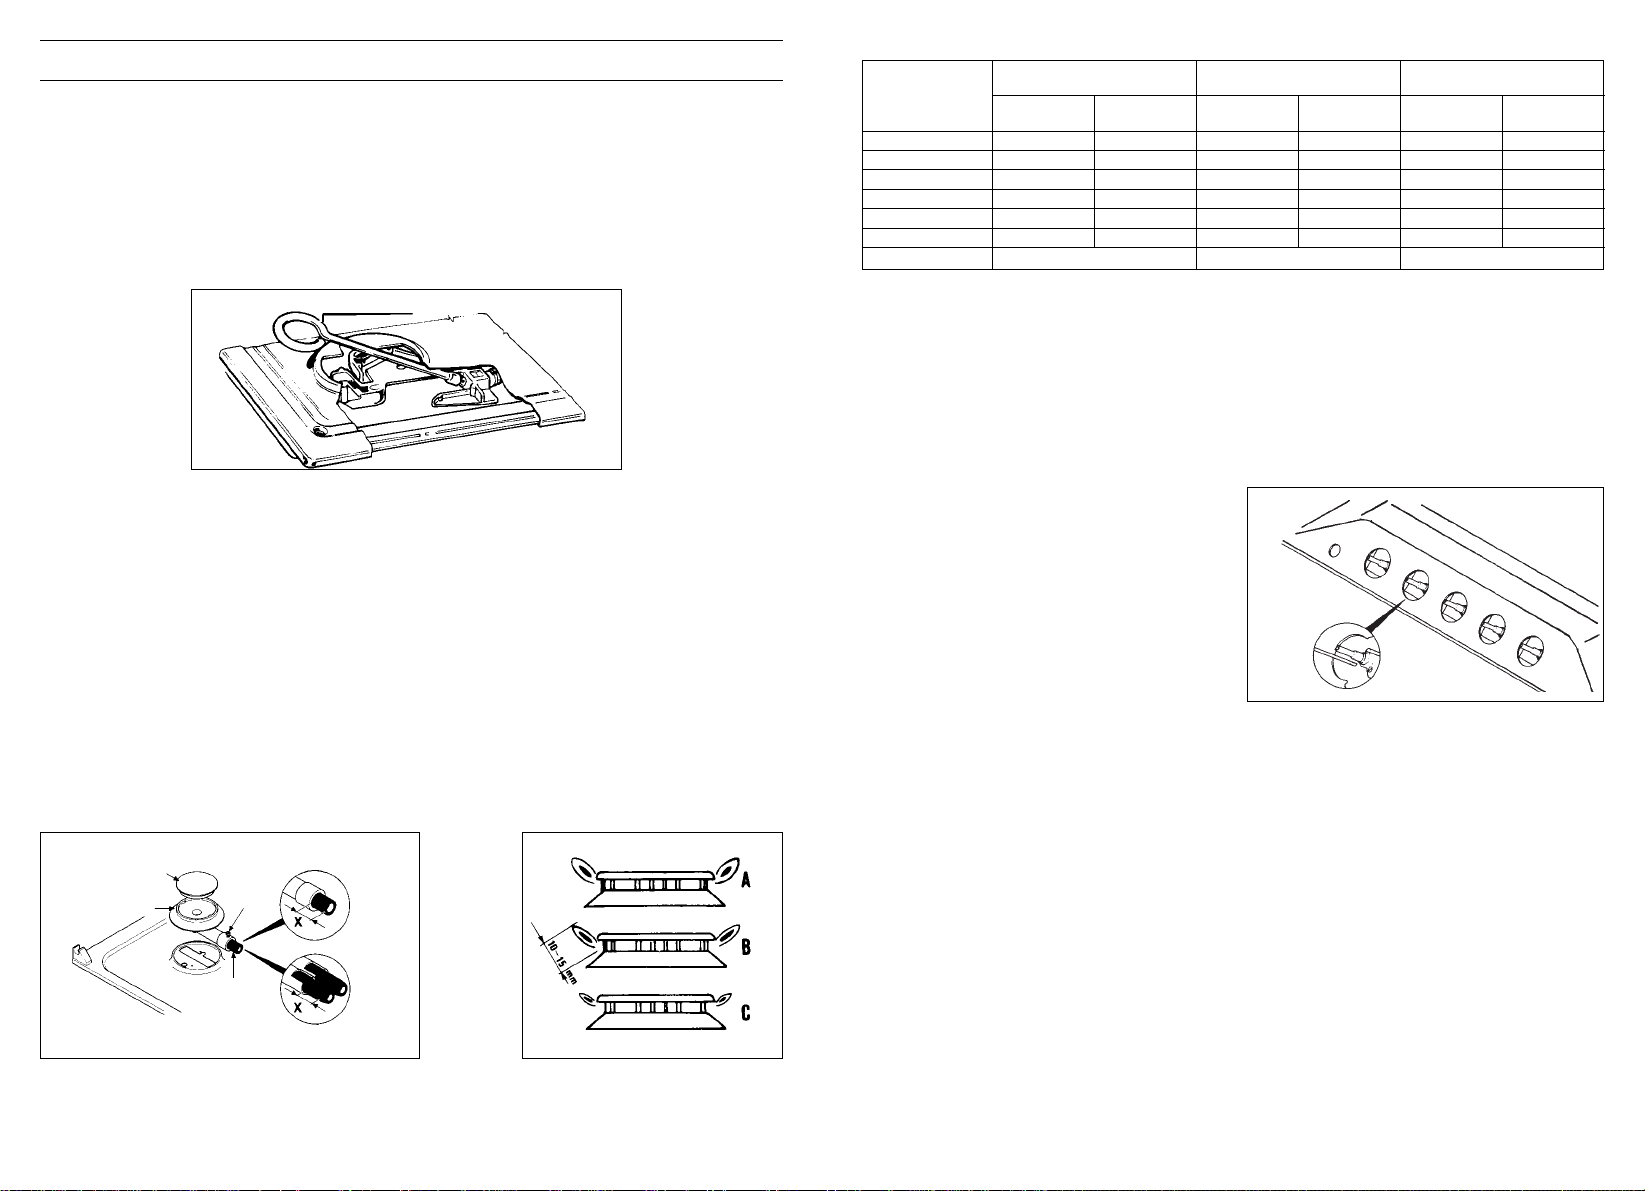
— remove the grids and burners
— insert the hexagonal spanner (supplied) into the burner support (Fig. 5)
— unscrew the injector and replace it with one suitable for the gas to be used (see
Table page 6).
When you have carried out the new gas regulation, replace the old gas rating plate
on your appliance with one (supplied with hob) suitable for the type of gas for which
it has been regulated.
REGULATING THE BURNERS
Flame Combustion
For maximum efficiency from the burners, the correct combustion of the flame is ne-
cessary. A good flame must be well aligned and without yellow tips (Fig. 7/B). If there
is insufficient air, the flame will be uneven with yellow tips (Fig. 7/A). If there is too much
air, the flame will be very short and bright (Fig. 7/C). In these cases the combustion
must be adjusted by re-fitting the carburation tube to the Venturi (where there is insuffi-
cient air) or removing the carburation tube (in the case of too much air). To position
the carburation tube, the fixing screws must be loosened, and retightened when the
satisfactory combustion is obtained.
Fig. 6 Fig. 7
BURNER CAP
BURNER
AIR REGULATION
SCREW
FIXING
SCREW
SMALL
MEDIUM
LARGE
DOUBLE RING
MAXI
FISH
For dimensions «X» see attached table
Hexagonal spanner
Fig. 5
Regulating the minimum flame
After lighting the burners, turn the control knob to the minimum setting and then remo-
ve the knob (this can easily be removed by apply a gentle pressure).
Using a small «Terminal» type screwdriver the regulating screw can be adjusted as in
Fig. 8. Turning the screw clockwise reduces the gas flow, whilst turning it anticlockwise
increases the flow – Use this adjustment to obtain a flame of approximately 3 to 4 mm
in length and then replace the control knob.
If GPL (cylinder) gas is being used, turn the screw clockwise right to the end of the
travel of the by-pass.
Screws
regulating
Gas tap calibrating screws
(flat head slot type)
6
Fig. 8
Maxi
Fish
Double ring
Rapid
Semi rapid
Small
Total NHGC
2x110 11
2x110 11
2x110 11
141 10
110 5,7
92 3,8
40,5
2x65 11
2x65 11
2x65 11
81 8,7
65 5,5
52 3,5
37,4
13 mm 13 mm
15 mm 15 mm
13 mm 15 mm
4 mm 5 mm
2 mm 7 mm
6 mm 6 mm
NG
air regul.
MJ/HInjector size
LPG gas
Reg. 2,75 kPa
Natural gas
Reg. 1,0 kPa
MJ/HInjector size
Burner
LPG
air. regul.
Quota «X» depending
on type of gas
Table of gas consumption
PRESSURE ADJUSTMENT
First turn the gas off to the appliance. Remove the sealing screw from the regulators
test point at the rear of the appliance and fit the hose of the Manometer to it.
Turn the gas on and light the Wok Burner and one Medium Burner at maximum set-
ting. Check the pressure and adjust at the regulator if necessary to the settings in the
table below or on the Data plate.
For Propane Gas adjust at the regulator on the cylinder - Turn regulator adjusting
screw clockwise increases pressure whilst anti-clockwise decreases pressure. Refit
the test point sealing screw when finished.
INSTRUCTIONS FOR USE
Using the gas Burner
To ignite the burners, place a lighted taper close to the burner, press in and turn the
control knob anti-clockwise.
If the burners have not been used for a couple of days, wait for a few seconds before
lighting the burner, this will allow any air present in the pipes to escape.
For appliances equipped with electronic ignition, simply press down and turn the con-
trol knob to the position marked with a star
★
.
Loading ...
Loading ...
Loading ...