Loading ...
Loading ...
Loading ...
12
|
Wolf Customer Care 800.222.7820
6 Apply a thin lm of petroleum jelly to the outermost
underside edge of the cooktop pan. The petroleum jelly
aids in future removal.
7 Insert the cooktop into the opening.
8 Ensure the cooktop is fully seated and centered in the
opening.
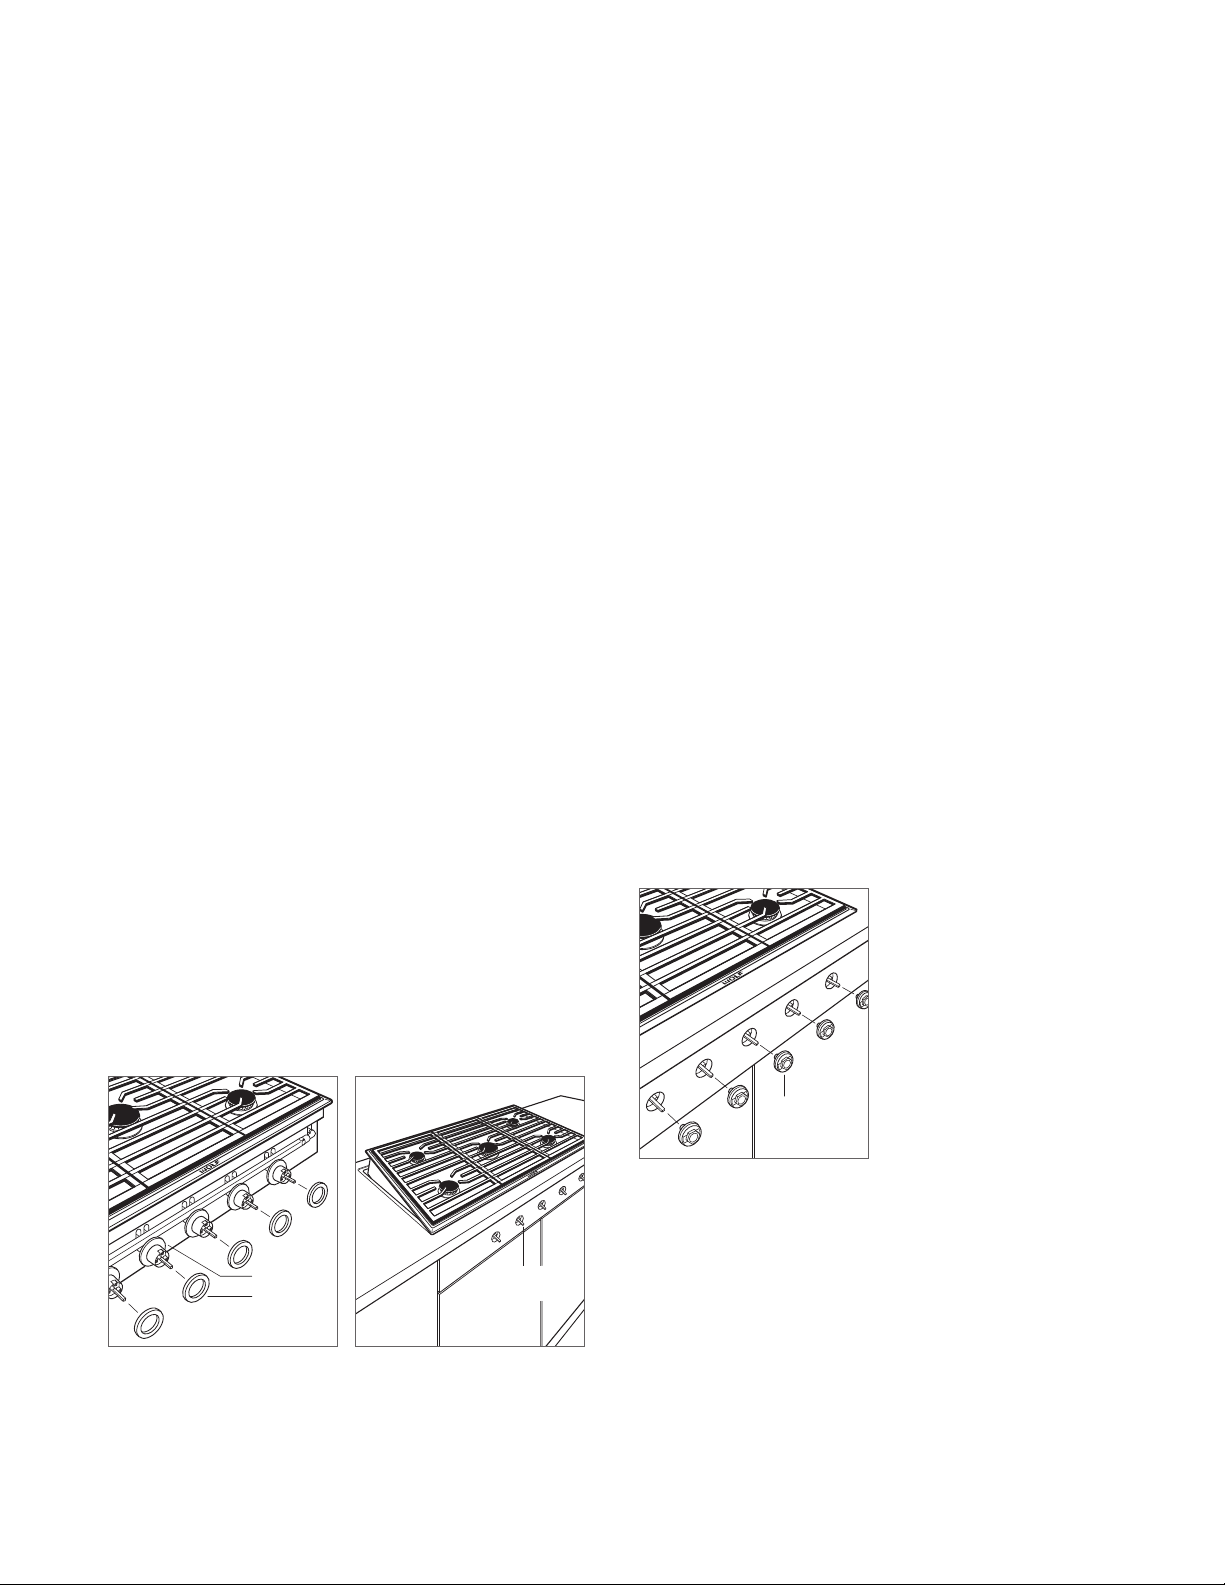
9 Install the bezels to the valve assemblies by rotating
clockwise until hand tight. Do not overtighten. Refer to
the illustration below.
10 Apply the sealant between the cooktop and countertop.
11 Use the squeegee to smooth the seam and remove
excess sealant.
12 Allow the sealant to set for 20 minutes.
13 Use denatured alcohol and paper towels to clean the
seam.
14 Allow 24 hours for the sealant to cure.
15 Use a stainless steel cleaner/polish to remove sealant
from the countertop and cooktop.
Contemporary Cooktop
FLUSH INSTALLATION
The following are provided:
• A required installation kit.
• An optional template to aid in cooktop placement.
• An optional template to aid in valve hole placement.
IMPORTANT NOTE: Prior to installing the cooktop, install the
valve stem spacers on the valve stem retainers to achieve
the appropriate depth. A 1"
(25) thick facade does not
require a spacer. For all facades less than 1"
(25), subtract
the thickness of the facade from 1"
(25) to determine the
required spacer thickness.
1 Once the proper spacing is determined, remove the
paper backing from the spacers and apply to each valve
stem. Refer to the illustration below.
2 Clean all surfaces of dust and debris.
3 Insert the front of the cooktop into the opening. Slightly
angle the cooktop to align each valve stem with the
holes in the façade and lower the back of the cooktop
into position. Refer to the illustration below.
4 Verify there is a gap of at least
1
/16" (2) to the countertop
around the perimeter of the cooktop. The gap allows
for heat expansion. The countertop may be damaged if
there is an insufcient gap.
5 Remove the cooktop.
INSTALLATION
SPACER
RETAINER
ALIGN
VALVE STEMS
Apply spacers prior to
installation
Insert Contemporary cooktop
BEZEL
Install bezels
Loading ...
Loading ...
Loading ...