
Loading ...
Loading ...
Loading ...
C7-100ct: Flush-Mount Installation
1) Remove the vehicle panel and check
the desired mounting location to ensure
that there is adequate clearance behind
the panel for the tweeter’s magnet
structure and mounting hardware.
2) Carefully cut a 1.88-inch (48 mm) diameter hole in
the vehicle panel. This will achieve a snug fit and
allow the tweeter flange to conceal the cut line.
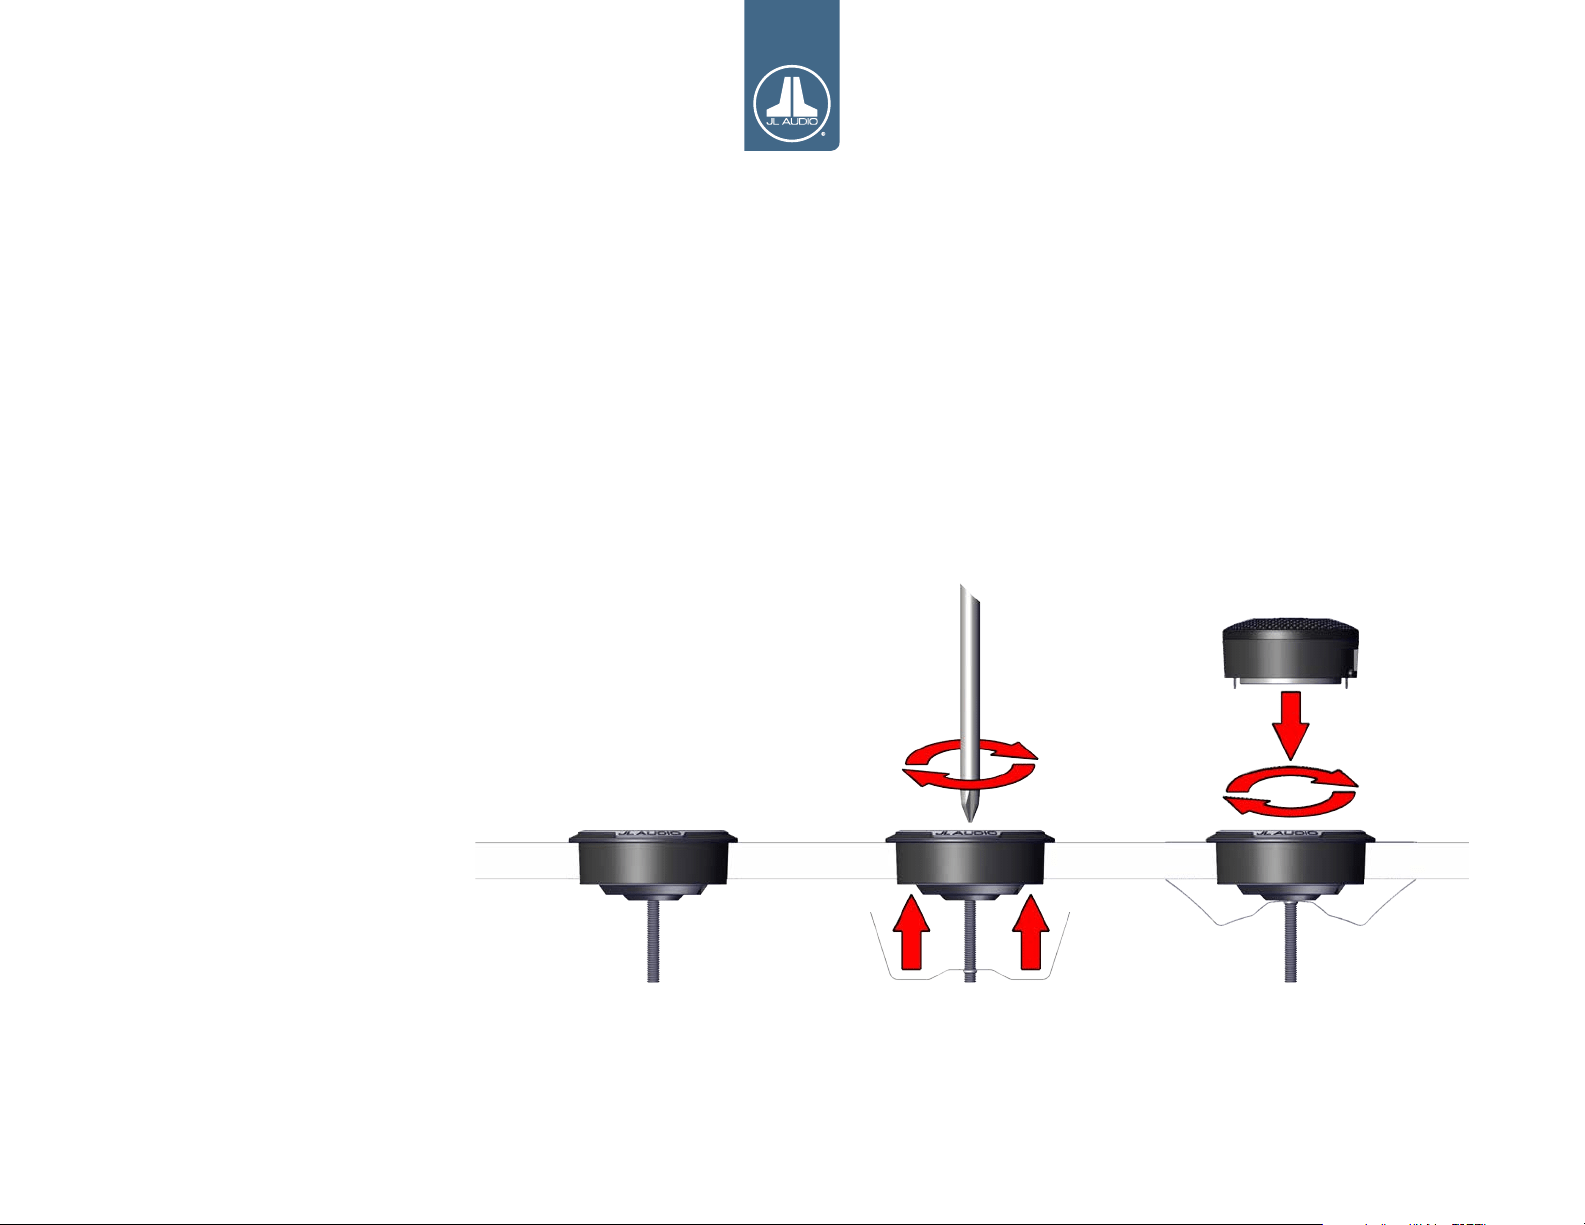
3) Insert the flush-mount fixture from the front of the
panel and place the M4 machine screw through the
center hole of the fixture.
4) From behind the panel, thread the spring clip onto
the M4 machine screw and hand-tighten until the
fixture is secure.
5) Feed a tweeter wire through each semicircular
cutout in the fixture from the front of the panel.
6) To attach the tweeter to the fixture, observe the
indented locking slots on the outer edge of the
tweeter body and align these with the tabs visible
on the inside walls of the fixture. Slide the tweeter
into the fixture and secure by pressing down on
the tweeter and giving it a small clockwise turn.
8) Connect the tweeter’s wires to the wire leads from
the amplifier, observing correct polarity. Install the
protection capacitor as noted on page 5.
9) Re-install the vehicle panel, taking care to
route the new wiring so as not to interfere
with any vehicle mechanisms (window
mechanisms, for example).
Diagram C:
Flush-Mount Fixture Installation
7
Loading ...