Loading ...
Loading ...
Loading ...
5
Use
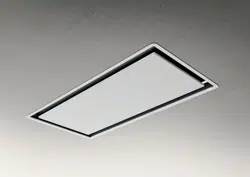
The hood is designed to be used for exhausting version.
In this case the fumes are conveyed outside of the building by
means of a special pipe connected with the connection ring
located on top of the hood.
CAUTION!
The exhausting pipe is not supplied and must be purchased apart.
Diameter of the exhausting pipe must be equal to that of the
connection ring.
CAUTION!
If the hood is supplied with active charcoal filter, then it must be
removed.
Connect the hood and discharge holes on the walls with a
diameter equivalent to the air outlet (connection flange).
Using the tubes and discharge holes on walls with smaller
dimensions will cause a diminution of the suction performance and
a drastic increase in noise.
Any responsibility in the matter is therefore declined.
! Use a duct of the minimum indispensable length.
! Use a duct with as few elbows as possible (maximum elbow
angle: 90°).
! Avoid drastic changes in the duct cross-section.
Installation
Specialised personnel must carry out both the electrical and
the mechanical installation.
Do not cut a joist or stud unless absolutely
necessary. If a joist or stud must be cut, then a
supporting frame must be constructed.
Fittings material is provided to secure the hood
to most types of walls/ceilings.
However, a qualified technician must verify
suitability of the materials in accordance with
the type of wall/ceiling.
Before making cutouts, make sure there is
proper clearance within the ceiling or wall for
exhaust vent.
Hood installation height above cooktop is the
users preference. The lower the hood is above
the cooktop, the more efficient the capturing of
cooking odors, grease and smoke.
CAUTION: FOR GAS RANGES
INSTALLATION: MOUNT THIS HOOD SO
THAT THE BOTTOM EDGE IS AT 39" (99
CM) ABOVE THE COOKING SURFACE.
FOR ELECTRIC RANGES INSTALLATION:
MOUNT THIS HOOD SO THAT THE
BOTTOM EDGE IS NOT LESS THAN 30"
(76,2 CM) ABOVE THE COOKING
SURFACE.
HOUSEHOLD USE. PLEASE, READ
INSTALLATION MANUAL FOR SPECIFIC
APPLICATION.
Check your ceiling height and the hood
height maximum before you select your
hood.
Consult last pages of this manual for installation instruction
and electrical connection steps.
Installation of gypsum board panels
(For certain models only)
Fig. 22
CAUTION: Installation must be performed exclusively by
qualified installers.
FOR THE INSTALLER: responsibility for installation of the hood,
including verification of the conformity of the assembly kit
eventually supplied with the product, rests exclusively with the
installer.
Below is a non-exhaustive list of instructions, useful to the installer
(who should use a professional gypsum board installer) to install
the gypsum board:
− Use fireproof gypsum board panels (type X fire rated
gypsum board complying with ASTM E84), suitable
for the operating conditions in terms of temperature
(at least 80°C) and humidity (at least 93%) reached
during application;
− the total weight of the gypsum board should not
exceed 4kg;
− fix the gypsum board to the hood using the fixing
points already inserted in the extractor panel;
− to fix the gypsum board, use suitable mechanical
components (not included in the assembly kit).
Elica denies all liability for damage to persons or property resulting
from incorrect installation of the gypsum board and/or product.
Loading ...
Loading ...
Loading ...