Loading ...
Loading ...
Loading ...
38 Servicing Your Honda
Fuel Tank (CRF450R)
8. Check for interference between the frame and
tank, and adjust the cushion rubbers (14) on the
both sides of the frame if necessary.
NOTICE
Do not ride your CRF in state which the cushion
rubbers have been removed.
It may cause the fuel tank cracking.
Installation
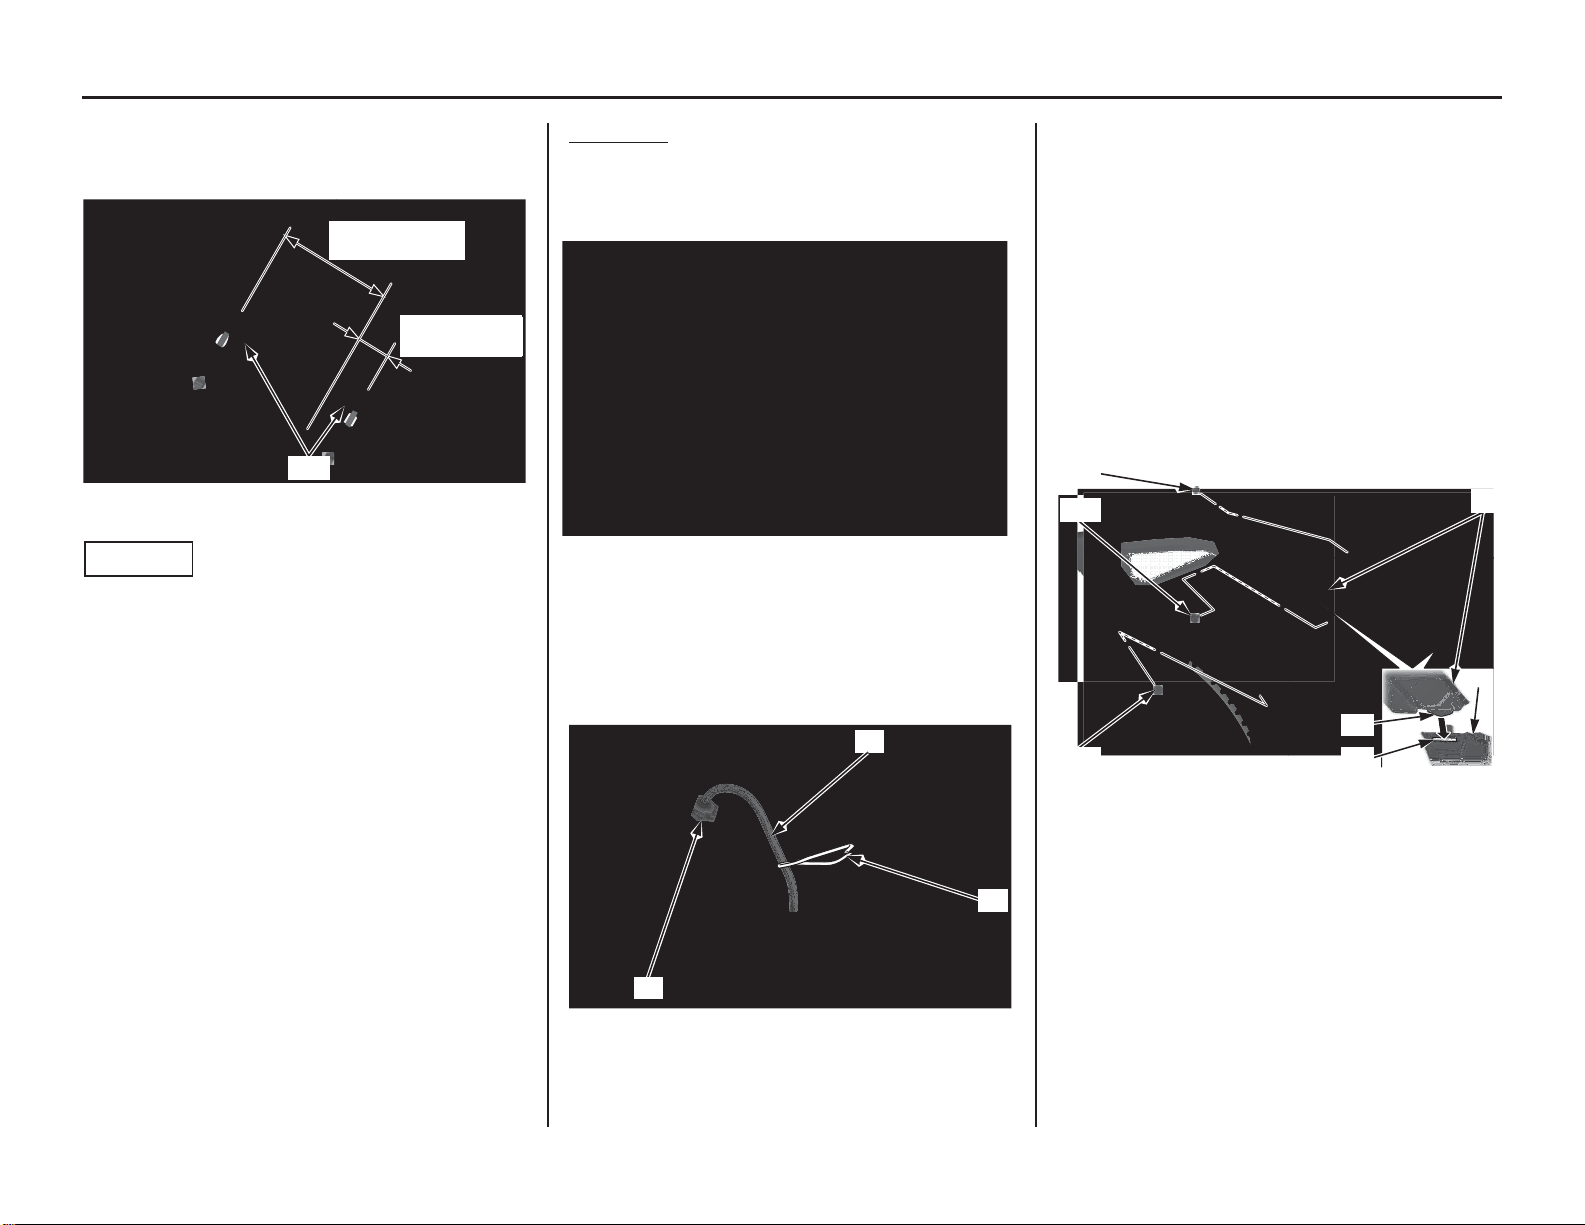
1. Install the fuel tank (1) on the frame.
2. Install and tighten the washers (2) and fuel tank
bolts (3) to the specified torque:
7 lbf·ft (10 N·m, 1.0 kgf·m)
3. Put the breather tube (4) in the steering stem
nut (5).
4. Remove the hose clamp (6) from the breather
tube.
5. Slide the shroud (7) toward the down so that
the shroud tab (8) and the slot (9) on the air
cleaner housing cover (10) is aligned.
6. Install the shroud C bolt (11), B bolt (12) and
shroud A bolt (13).
Tighten the shroud A and B bolts to the
specified torque:
7 lbf·ft (10 N·m, 1.0 kgf·m)
Tighten the shroud C bolt to the specified
torque:
3.8 lbf·ft (5.2 N·m, 0.5 kgf·m)
The right and left shrouds can be installed in
the same manner.
7. Install the seat (page 34).
(14) cushion rubbers
3.35 ± 0.10 in
(85.0 ± 2.5 mm)
(14)
1.10 ± 0.10 in
(28.0 ± 2.5 mm)
(1) fuel tank
(2) washers
(3) fuel tank bolts
(4) breather tube (6) hose clamp
(5) steering stem nut
(4)
(6)
(5)
(7) shroud (11) shroud C bolt
(8) tab (12) shroud B bolt
(9) slot (13) shroud A bolt
(10) air cleaner housing cover
(7)
(11)
(12)
(13)
(9)
(8)
(10)
Loading ...
Loading ...
Loading ...